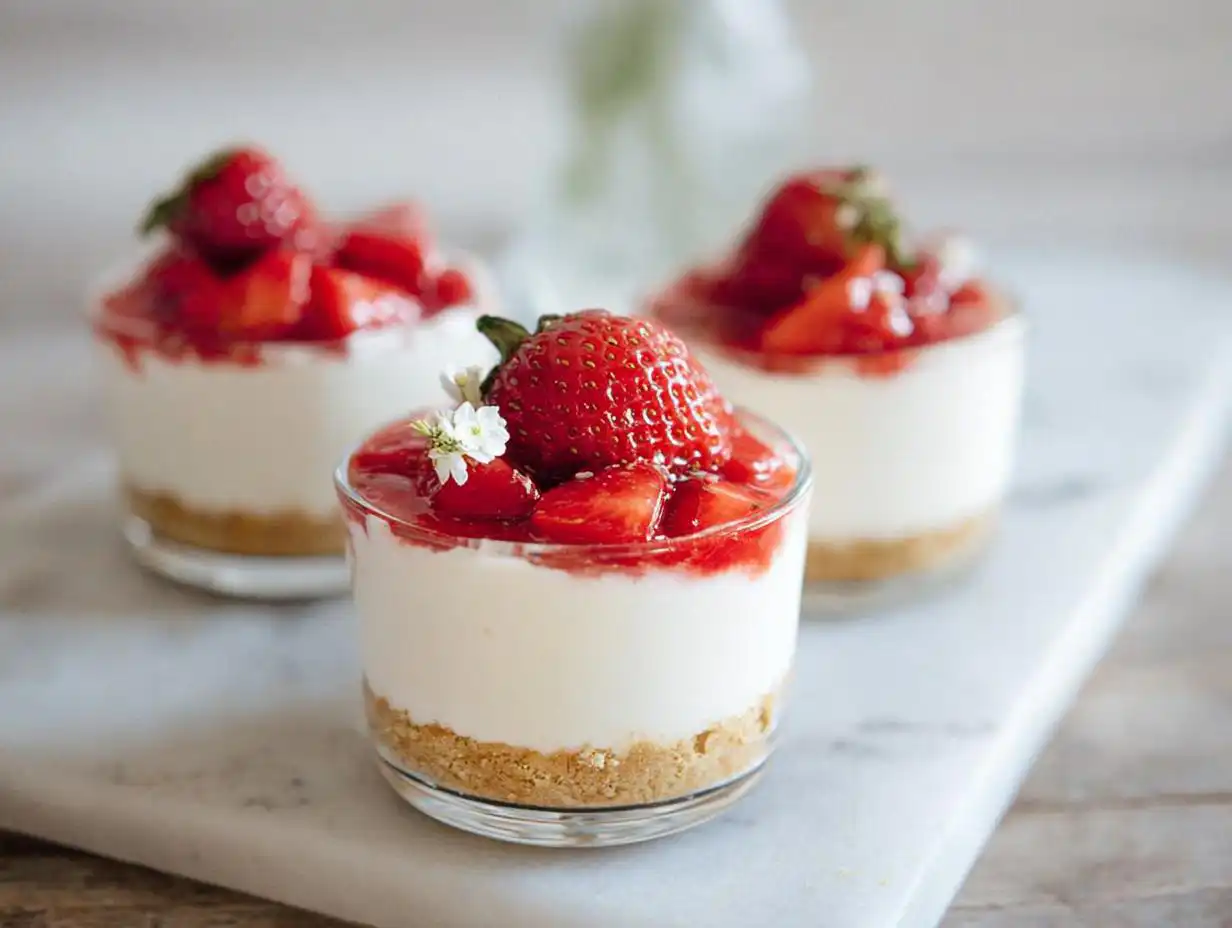
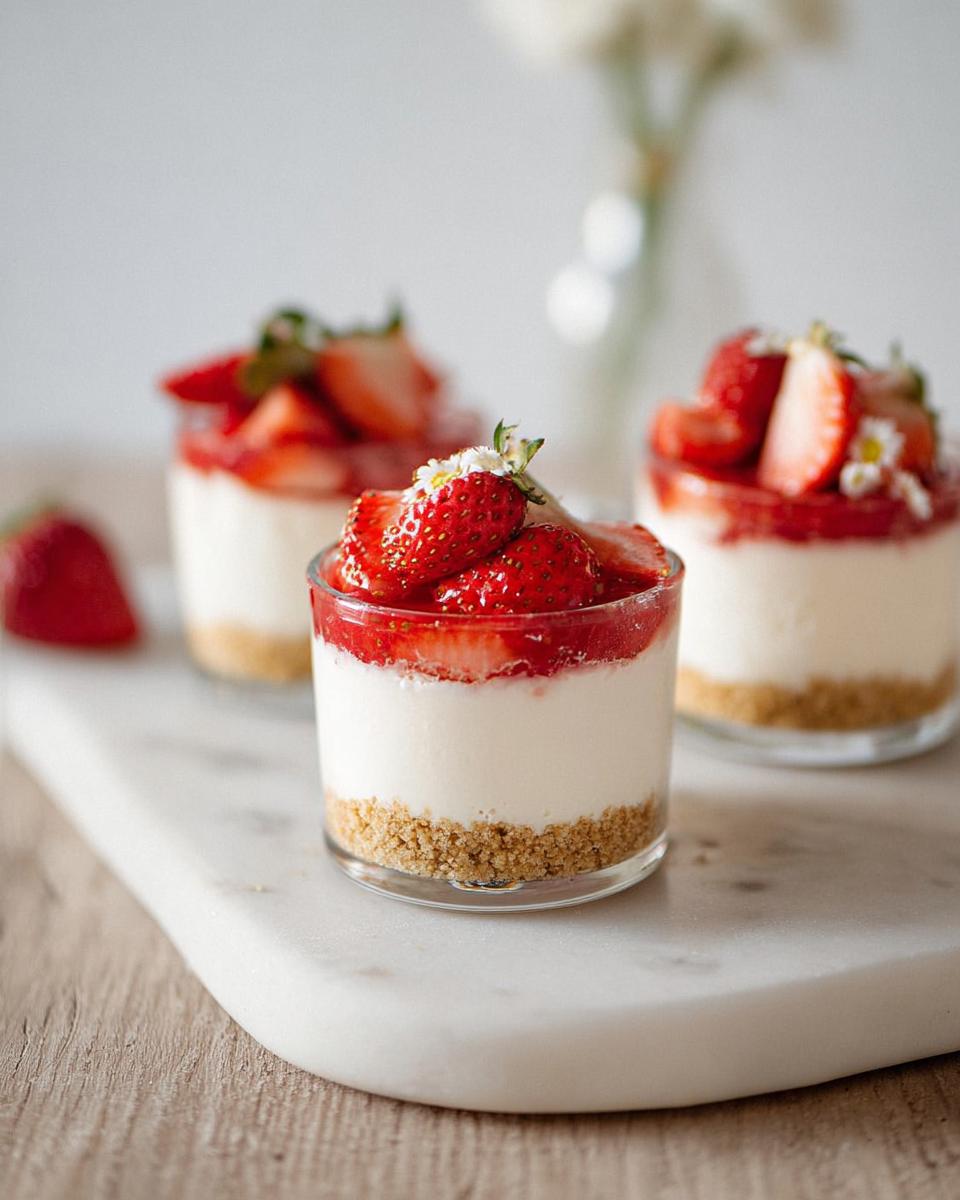
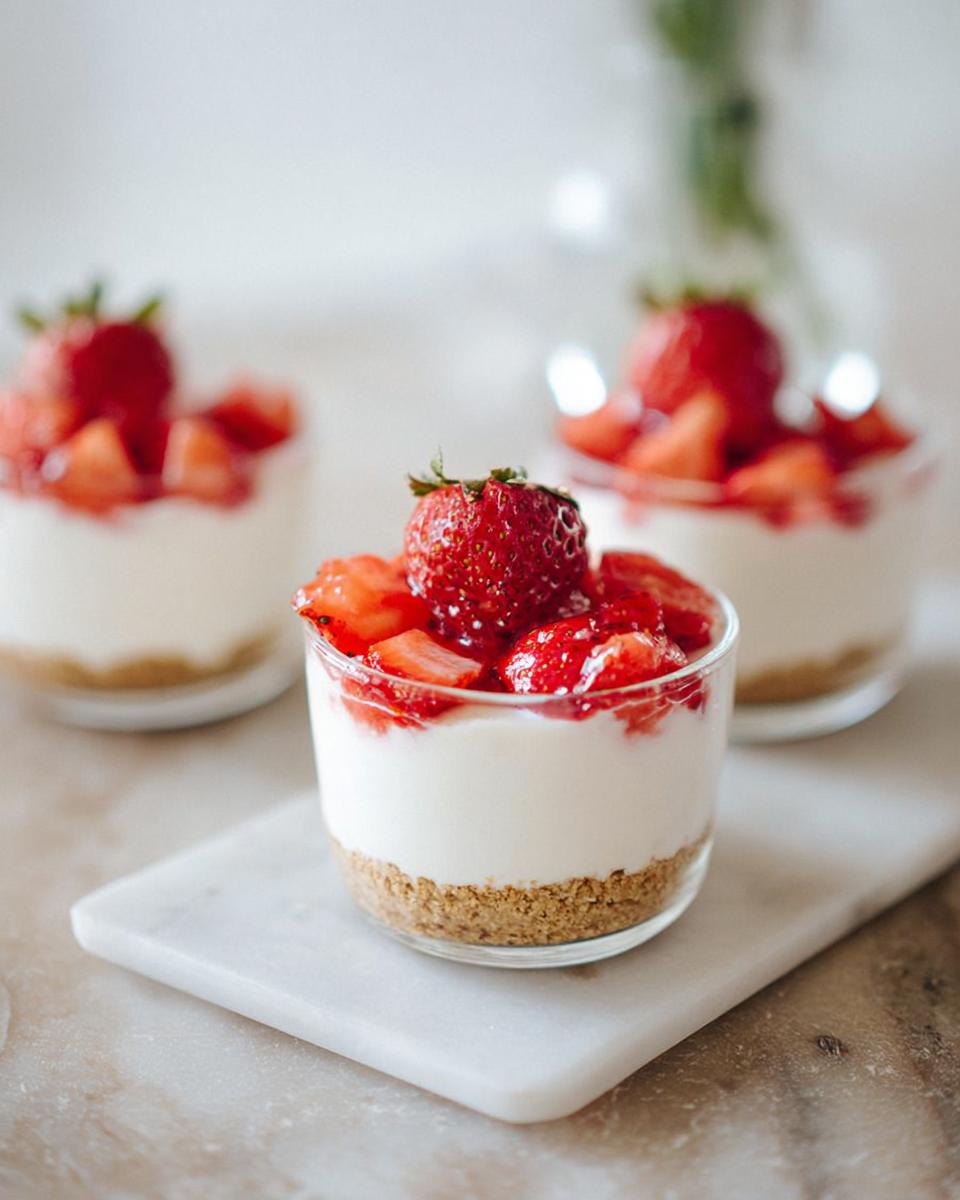
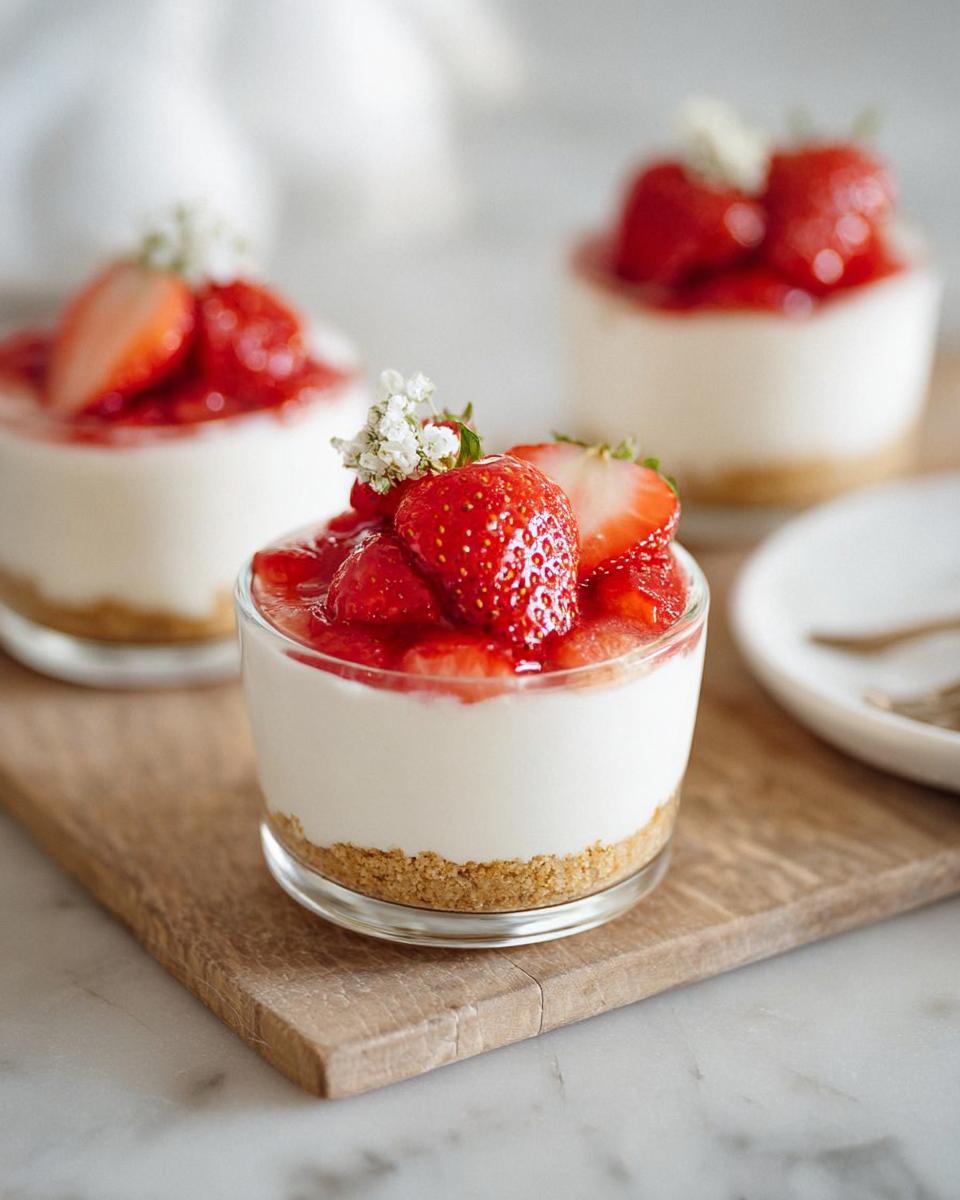
Sometimes you just need a dessert that looks like it took hours of careful work, but secretly, it’s a total breeze. Forget pulling out the springform—we are going straight for the cute little glass cups! These Strawberry Cheesecake Cups are my go-to when I need something truly elegant for guests without turning on the oven.
Trust me when I say that layering the bright strawberries right over that creamy base is where the magic happens. That perfect little balance of sweet and tart from the fresh strawberries and rich filling makes these addictive. I developed this technique years ago, obsessed with getting the perfect flavor profile, and I’m so happy to share it with you now.
If you’re looking for an easy but stunning strawberry dessert, you’ve found it! My role here at Recipes by Betty keeps me busy, but these little cups are always worth the fifteen minutes of prep time.
Why You Will Love These Strawberry Cheesecake Cups
Honestly, why complicate things when you can have perfection this easy? These cups hit every single marker for a successful, crowd-pleasing dessert. I always find myself reaching for this recipe when I need something fast but impressive.
- They are completely no bake! Seriously, no oven required, saving you time and keeping your kitchen cool.
- Prep time is a shockingly quick 15 minutes. You mix, layer, and chill!
- They look instantly elegant. Serving them in clear cups shows off that gorgeous contrast between the crust and the filling.
- The flavor is just sublime—that tangy brightness from the strawberries cuts through the rich, sweet cream cheese filling perfectly.
- You can easily make these ahead of time, which is a lifesaver when hosting parties. Just pop them in the fridge!
- These are so versatile! You can easily tweak the fruit topping to match any season or occasion. Talk about flexible no bake treats!
Gathering Ingredients for Strawberry Cheesecake Cups
You won’t believe how few things you actually need for these! Since these are an assembly job, all the pieces are straightforward and shelf-stable—well, except for the fresh berries, which are the star, of course. Getting your ingredients laid out first (called *mise en place*, though I just call it ‘getting set up’) makes the 15-minute prep fly by. Having everything measured and ready is essential when you’re working quickly to build the best strawberry dessert.
We break the shopping list down into three easy groups:
For the Crust
- 1 cup crushed graham crackers. Use the fine crumbs you get right at the bottom of the box—that’s flavor!
- 3 tbsp melted butter. Make sure it’s fully melted, we need it liquid!
For the Filling
- 1 cup cream cheese. I always let mine sit out for about 30 minutes before starting so it gets beautifully soft. Big difference in mixing!
- 1/2 cup powdered sugar. And yes, you must use powdered, not granulated; we want that silky texture.
- 1 cup whipped cream. You can use stabilized topping or freshly whipped heavy cream, whatever floats your boat.
For Topping
- 1 cup strawberries chopped. Make sure these are nice and ripe—don’t skimp on the quality here!
Equipment Needed for Perfect Strawberry Cheesecake Cups
We’re keeping the equipment list super short here because that’s the beauty of a no-bake assembly dessert! You don’t need fancy gadgets, but a couple of tools really make the process smooth. If your kitchen is anything like mine, you probably have all of this tucked away already.
The mixer is my best friend for getting that filling impossibly smooth. You’ll need a few basics, but here’s my biggest serving secret for these treats, which you can read more about in my guide to mini desserts in a cup.
- Mixing bowls: You’ll need at least two—one for the crust crumbs and one for that fluffy filling.
- Electric mixer: Handheld or stand mixer works fine. This is essential for creaming the cream cheese and sugar so it’s perfectly lump-free!
- Serving cups: Grab about four small, individual cups.
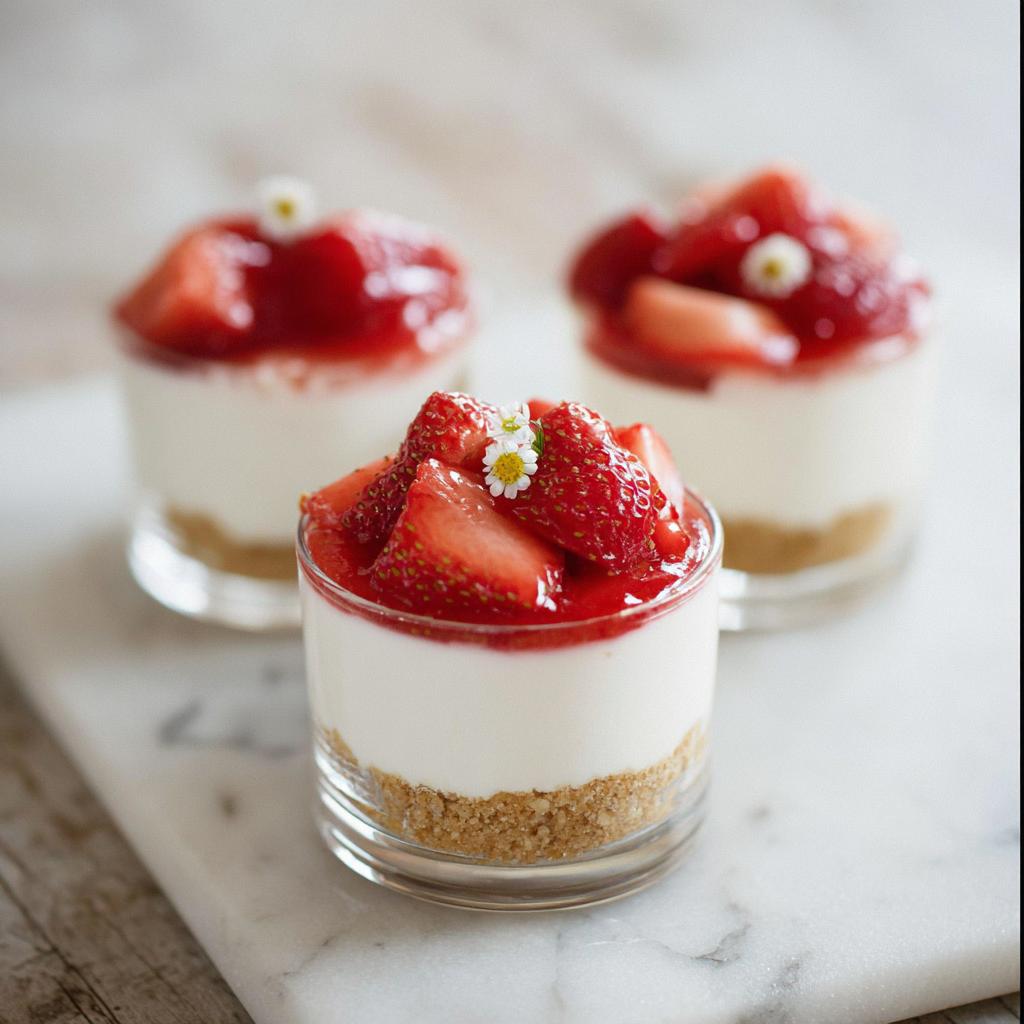
My huge tip, and this is important for presentation? Use clear glass cups! Seriously, don’t hide that gorgeous work you just did. When you can see the clean line between the buttery crust, the pale, creamy filling, and those bright red strawberries on top, it looks like you spent all afternoon fussing over layers. It really elevates the whole experience!
Step-by-Step Instructions for No Bake Strawberry Cheesecake Cups
This is where the action happens! Since we aren’t using the oven, we really need to focus on getting these layers just right so they hold their shape until that first perfect spoonful. It moves fast, so grab your mixer and keep your chopped strawberries close by. Following these steps ensures you get sturdy, beautiful no bake cheesecake cups every single time.
Preparing the Graham Cracker Crust for Strawberry Cheesecake Cups
First up, let’s build the base. In a small bowl, toss your crushed graham crackers with the 3 tablespoons of melted butter. Use a fork to mix it really well until all that cracker dust looks damp and evenly coated. Don’t add too much butter, or it gets soggy!
Now, divide that buttery mixture evenly among your four serving cups. Use the back of a clean spoon or a small measuring cup to press that crust down firmly. You really want to pack it in tight. A good, dense crust is the secret to keeping this whole thing together!
Making the Creamy Filling for Strawberry Cheesecake Cups
Time for the rich part! Grab your mixing bowl—make sure it’s clean—and beat that softened cream cheese with the powdered sugar until it is completely smooth. You don’t want any little fatty lumps hiding in there; you’re aiming for creamy silk.
Once it’s smooth, add your cup of whipped cream. And here’s the gentle part: you must *fold* it in, not beat it! Use a spatula and gently scoop from the bottom up until everything is just combined. This keeps all the lovely air we whipped into the cream—we want light, lofty filling, not deflated goo.
Assembling and Chilling Your Strawberry Cheesecake Cups
Layer time! Spoon that fluffy filling right over your prepared crusts, smoothing the top lightly. Then, spoon your chopped strawberries evenly over the top of each cup. They look so pretty piled up like that!
Now for the hard part: patience! These are no bake cheesecake cups, so they need a proper chill to firm up beautifully. Cover your cups loosely with plastic wrap or a small piece of foil and pop them into the refrigerator for at least 2 hours. That 120 minutes of chilling time is what solidifies this dessert so it holds its shape when you dig in!
Tips for Success Making Strawberry Cheesecake Cups
Even though this recipe is delightfully simple, a few small tricks I picked up over the years make the difference between a good cup and an absolutely *great* cup. Seriously, don’t skip these little details—they build that next level of reliability into the final product!
First, I cannot stress this enough: your cream cheese has to be truly room temperature for the filling. If it’s cold, you’ll end up wrestling tiny hard lumps into your mixture, no matter how long you beat it. Pull it out an hour before you plan to mix, and it will blend like honey. This makes the entire filling stage take half the time, I promise!
Secondly, if you are making these ahead—say, the day before a big party—you need to manage your strawberries carefully to avoid sogginess. If you’ve got time, take your chopped strawberries and toss them with just a teaspoon of sugar and let them sit for about 15 minutes. They’ll release some juice you can drain off! Then, only add the slightly drier berries on top of the chilled cups just before serving. This keeps that crust nice and crisp.
Finally, don’t over-fold in the whipped cream! That’s where all the air lives. You want to see some faint streaks here and there when you stop folding, because those streaks will gently bake out (not literally, since it’s no-bake, but they’ll disappear during the final chill) leaving you with a lighter, more mousse-like texture instead of something heavy.
For more general baking wisdom that applies everywhere—from scones to these cute cups—you can check out my best general advice right here: expert baking tips!
Serving Suggestions for Strawberry Cheesecake Cups
These little treats are so pretty on their own, but a little extra touch never hurt anybody, right? Since they come together so fast, you have plenty of time to think about presentation! The key here is keeping everything cool because they are happiest right out of the fridge.
I love serving these when I’m doing a big dessert spread, maybe alongside a lighter, fruitier option. If you’re obsessed with homemade strawberries, you should check out my recipe for fresh strawberry mousse—it uses similar fruit flavors but in a totally different texture!
Here are a couple of ways I like to dress these up right before setting them out:
- A Zestful Pop: If you have a lemon or lime handy, grating just a little bit of fresh zest right over the strawberries when you layer them on top adds an amazing, unexpected brightness. It really wakes up the strawberry flavor!
- Garnish Goals: Instead of just chopped berries, try topping each cup with one perfect, whole strawberry standing upright in the center. It sounds simple, but visually, it makes a huge difference! Sometimes I’ll add a tiny, tiny mint leaf right next to it for color contrast.
- A Drizzle Detail: If you feel like going slightly extra (and we always should!), a very light drizzle of melted white chocolate across the top looks sophisticated, especially if you managed to keep those layers super clean. Don’t overdo it, though; these cups shine because they aren’t heavy!
Always remember to keep them chilled on a platter until the very last second before serving. Seeing that beautifully set filling makes everyone excited to dig in!
Storage and Reheating for Strawberry Cheesecake Cups
Because these are such easy make-ahead treats, storage is a super simple part of the process—mostly! The great thing about individual cups is that they seal up really well, which keeps the crust from getting that funny fridge smell and keeps the filling wonderfully fresh.
The most important thing to remember is that these must stay cold. Since cream cheese and whipped cream are involved, we’re keeping them tucked away in the refrigerator, not on the counter. They are 100% not a dessert you want to leave out while you’re mingling!
For best results, I always recommend assembling these the day you plan to serve them, but they hold up beautifully for about two to three days in the fridge. Any longer than that, and while they’ll still be safe, the moisture from the strawberries might start making your beautiful graham cracker crust a little too soft. We want crumbly excitement, not soggy sadness!
Now, about reheating—ha! Don’t even think about it. These are strictly chilled desserts. Any attempt to warm these up would just melt that gorgeous filling into a sweet puddle. If you ever have leftovers, just pull them straight from the fridge and eat them chilled. That’s how they were designed to be enjoyed!
For long-term storage ideas that don’t involve cheesecake, I always keep an eye on this general desserts category section for other easy recipes. But for these cups, cold is king!
Frequently Asked Questions About Strawberry Cheesecake Cups
I get so many questions once people start making these, which just proves how popular they are! It’s totally normal to want to tweak things or worry that your crust won’t hold up, especially when dealing with something like these beautiful strawberry cheesecake cups. Here are the top things people ask me!
Can I use a different cookie for the crust in these no bake cheesecake cups?
Absolutely! While graham crackers give you that classic cheesecake flavor profile which I love in these no bake cheesecake cups, you have total freedom here. If you don’t have crackers, vanilla wafers are a dream substitute—they crush up so easily and give a slightly sweeter base. Shortbread cookies work too, but keep in mind they are usually richer in butter, so you might need to cut back the added butter just a tiny bit to keep the mixture from getting greasy!
How do I make the strawberry topping for my Strawberry Cheesecake Cups look professional?
This is all about texture management! If your strawberries are weeping juice and making the cream soggy, you can fix that. I mentioned it briefly before, but giving them a little pre-treatment really helps polish the look. Take your chopped berries and toss them gently with a teaspoon of sugar and maybe just a tiny splash of lemon juice—let them sit for 10 minutes. Then, drain off any liquid that pools at the bottom of the bowl. That slight maceration concentrates the flavor and helps the berries sit beautifully on top of the filling without bleeding color everywhere!
Can I substitute the cream cheese with a vegan alternative?
Oh, that’s a great question for people with dietary restrictions! Yes, you totally can switch this up, but you have to use a quality vegan cream cheese block—not the spreadable tubs, those are too watery. Just make sure you beat the vegan cream cheese and powdered sugar extra well until it’s perfectly smooth before folding in your whipped element. You might need a dollop less of the whipped cream, though, as some vegan substitutes can change the overall structure a bit. Keep them chilled super well!
How long should I really chill these strawberry dessert cups?
I always say a minimum of two hours, but if you can manage it, three hours is even better! That 120 minutes of chilling time is non-negotiable because that’s what sets up the texture. Since there’s no gelatin or actual baking involved, the cold temperature is doing all the hard work of firming up that cream cheese and whipped cream mixture. If you try to serve them too soon, you’ll end up with a runny mess when you try to dig in!
About the Creator of These Strawberry Cheesecake Cups
It feels so good to share recipes that make hosting simple and dessert special. I put so much care into making sure these little cups deliver maximum flavor with minimum fuss. My goal is always to create something that looks like it belongs in a fancy bakery display case!
I love seeing everyone enjoy these sweet, layered treats. Happy baking, friends!
By Clara Bennett, Lead Plate Designer at Recipes by Betty.
Strawberry Cheesecake Cups
Equipment
- Mixing Bowls
- Electric mixer
- Serving Cups
Ingredients
For the Crust
- 1 cup crushed graham crackers
- 3 tbsp melted butter
For the Filling
- 1 cup cream cheese
- 1/2 cup powdered sugar
- 1 cup whipped cream
For Topping
- 1 cup strawberries chopped
Instructions
- Mix the crushed graham crackers and melted butter together.
- Press the cracker mixture into the bottom of your serving cups to form the crust.
- Beat the cream cheese and powdered sugar together until the mixture is smooth.
- Gently fold the whipped cream into the cream cheese mixture.
- Layer the cream cheese filling over the crust in the cups.
- Top the filling with the chopped strawberries.
- Chill the cups for 2 hours before serving.