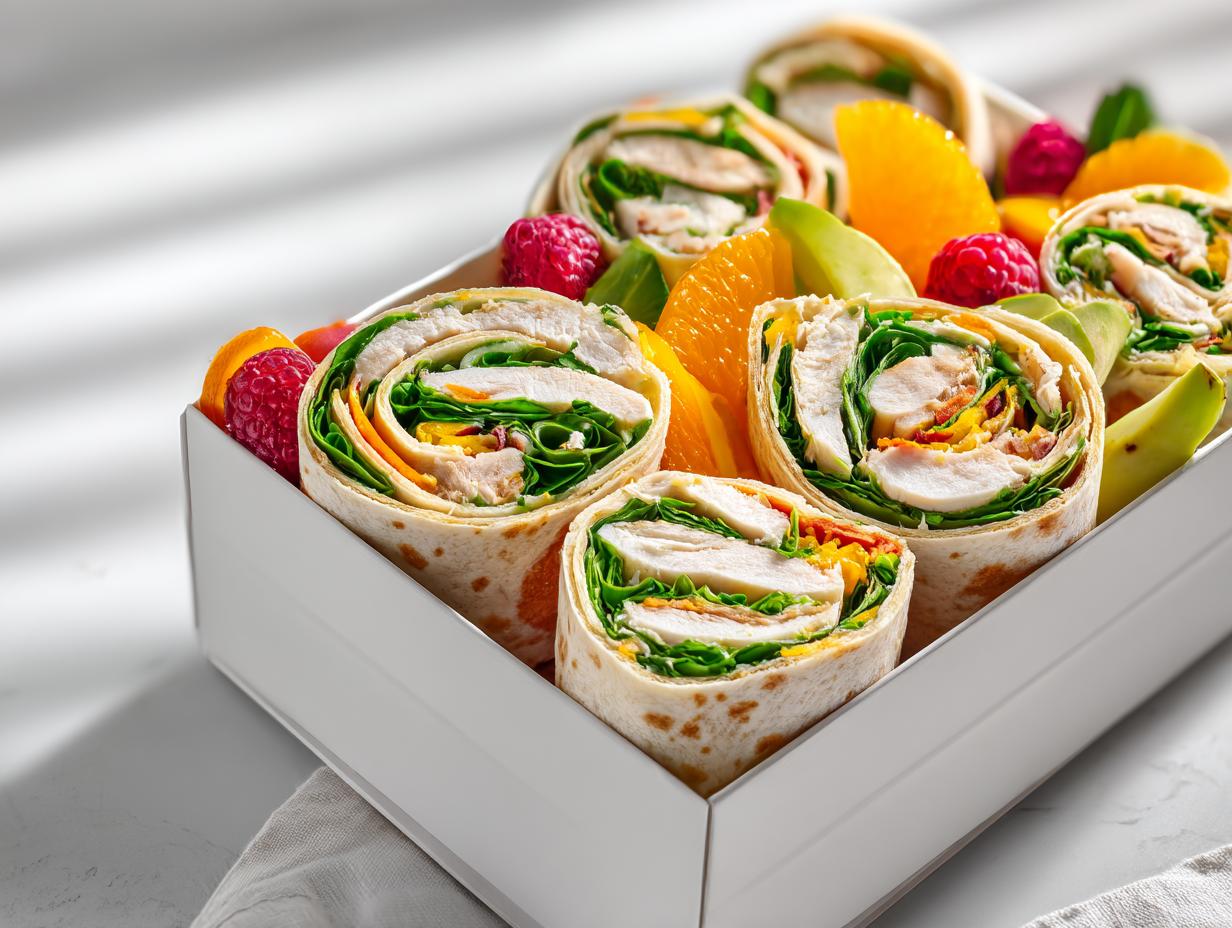
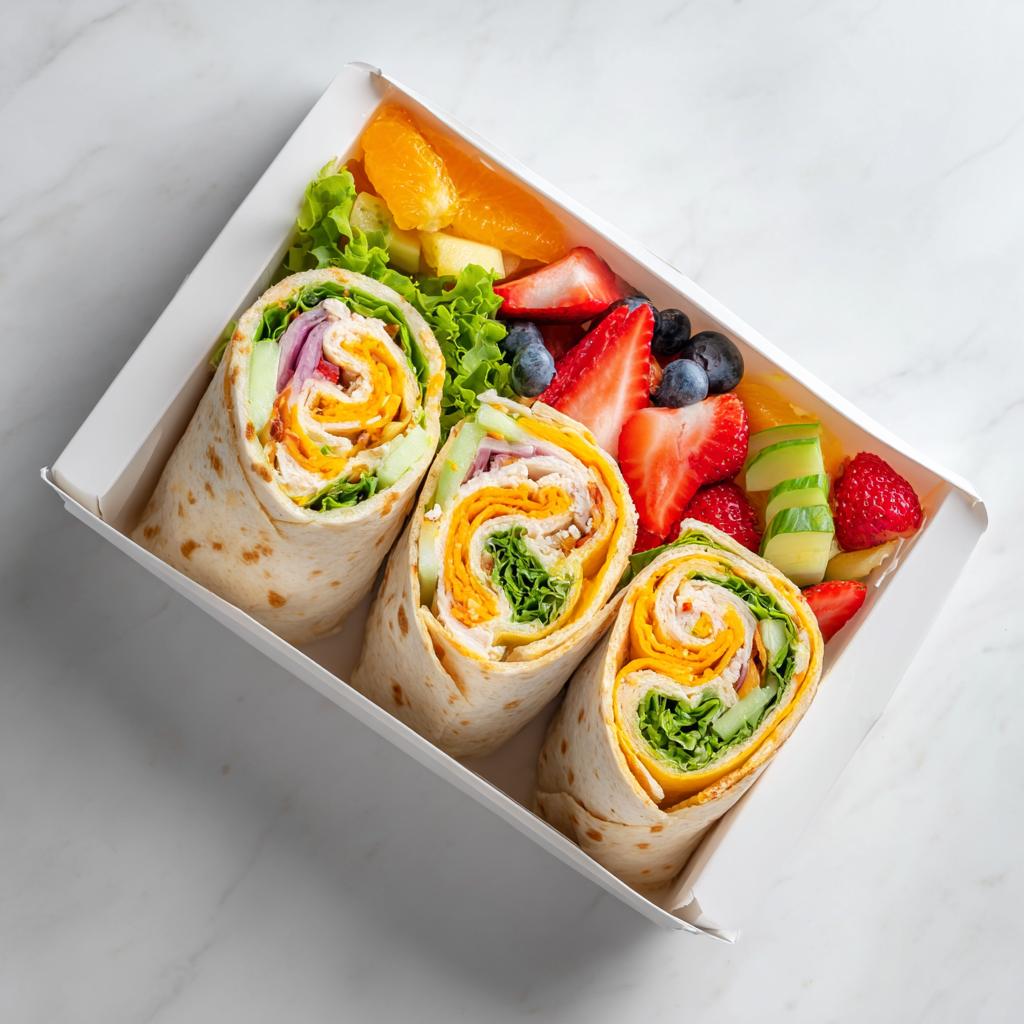
Oh, I absolutely LOVE packing meals for outside! There’s nothing better than eating sunshine, but honestly, soggy sandwiches and messy containers used to ruin the fun. That’s why I spent ages figuring out the best system, and trust me, the Picnic Chicken Wrap Box changed everything for my family. It’s the perfect, organized way to keep everything fresh until you get to your destination. Packing wraps, sliced neatly, into a sectioned container just makes sense, doesn’t it? As Clara Bennett, Lead Plate Designer here at Recipes by Betty, I promise this simple assembly means zero stress when you’re throwing down the blanket later on!
Why This Picnic Chicken Wrap Box Simplifies Outdoor Dining
Honestly, if you’re hauling food to the park or the beach, convenience is king! This recipe isn’t about complicated cooking; it’s about fantastic assembly. The Picnic Chicken Wrap Box means no more rootling around in plastic bags for stray components.
It’s all about keeping things neat while moving. Check out why I love this method for quick outdoor meals:
- Total Portability: Everything stays put, even in a bumpy cooler!
- Zero Sog Factor: Separating the fruit and dip keeps the wraps dry.
- Quick Service: You just hand out the box, and lunch is served.
It really helps keep those midday picnics stress-free. If you want more ideas on using these amazing containers, check out my tips on meal prep snack boxes!
Essential Components for Your Picnic Chicken Wrap Box
When you’re building the ultimate lunch box chicken wrap setup, the ingredients themselves are so simple—which is exactly what we want for a quick picnic day! The secret here is having pre-made wraps ready to go and then selecting fresh, vibrant side items.
We aren’t cooking anything on site, so the quality of what you pack is what you get! Remember, packing food for the outdoors requires items that hold up well outside the fridge for a little while. Keep those fresh choices coming so your meal stays delightful!
For great ideas on pairing these wraps with healthy sides, take a peek at my guide on a healthy snack plate!
Ingredients for the Picnic Chicken Wrap Box
You only need four main components to make this assembly perfect. Don’t overcomplicate it; simplicity is key!
- Chicken wraps, 2, sliced
- Fruit, 1/2 cup
- Veggies, 1/2 cup
- Dip sauce, 1, small container
See? I told you it was easy! Make sure your wraps are tightly rolled before slicing them. That tight roll is what keeps them looking neat when you slice them into bite-sized pieces for the box.
Step-by-Step Assembly of the Picnic Chicken Wrap Box
Okay, now for the fun part—putting it all together! This is where you turn good ingredients into a gorgeous, ready-to-eat picnic meal box. Remember, presentation matters, especially if you want those beautiful outdoor photos!
The key is working strategically so nothing gets smashed or mixes flavors where it shouldn’t. My favorite part is seeing the colors pop once everything is tucked into its compartment. If you’re struggling with inspiration for what veggies to pack, I have a great veggie hummus lunch box idea that might spark some creativity too!
Preparing the Wraps
First things first, we need to get those wraps ready. You should have made your wraps earlier, maybe the night before. Take your two prepared chicken wraps and grab a sharp knife. You need to slice them fairly consistently—about an inch thick is perfect for picking up easily. If they are too thick, they tumble out when you open the box. If they are too crumbly, they dry out faster. Slice them neatly and set them aside for just one second.
Arranging the Picnic Chicken Wrap Box Contents
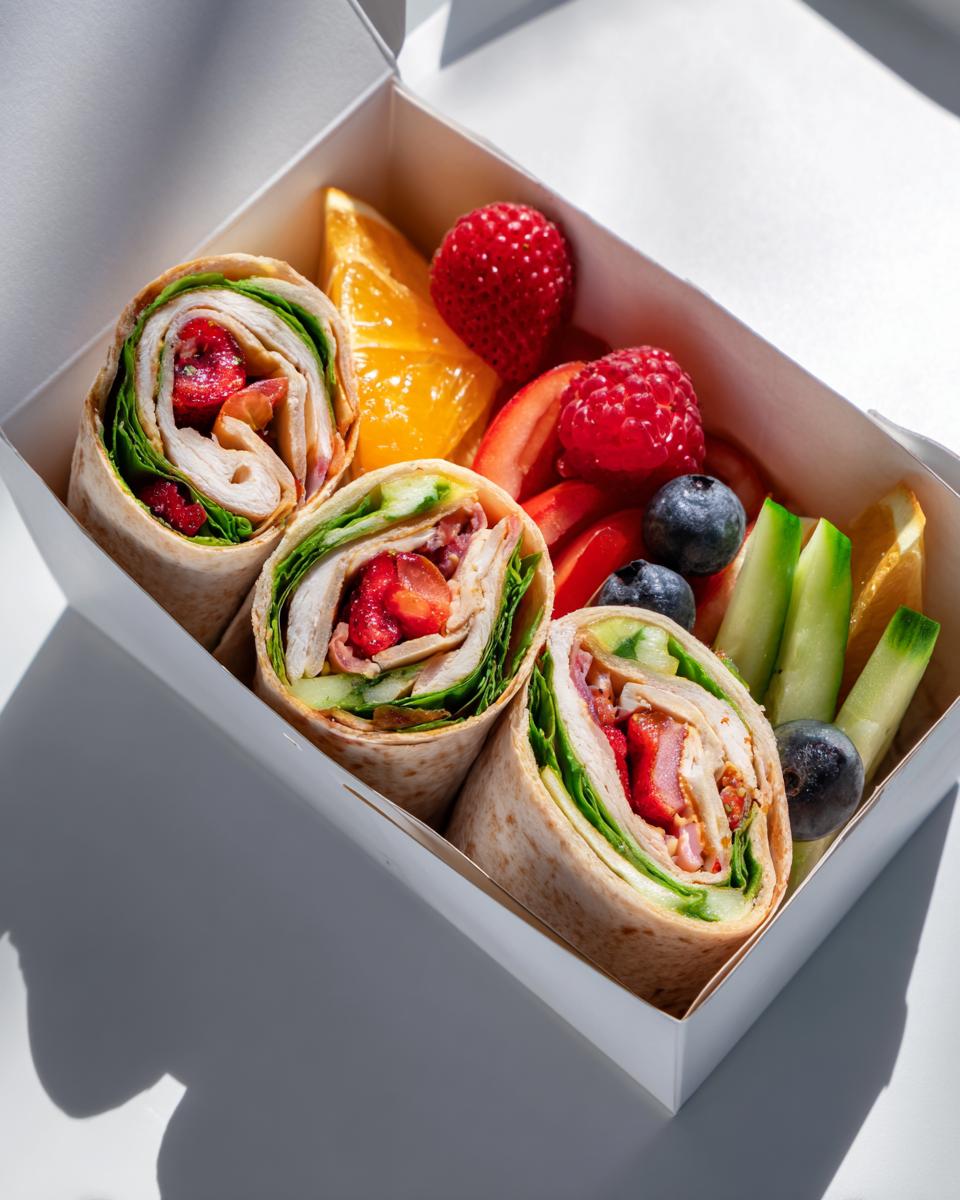
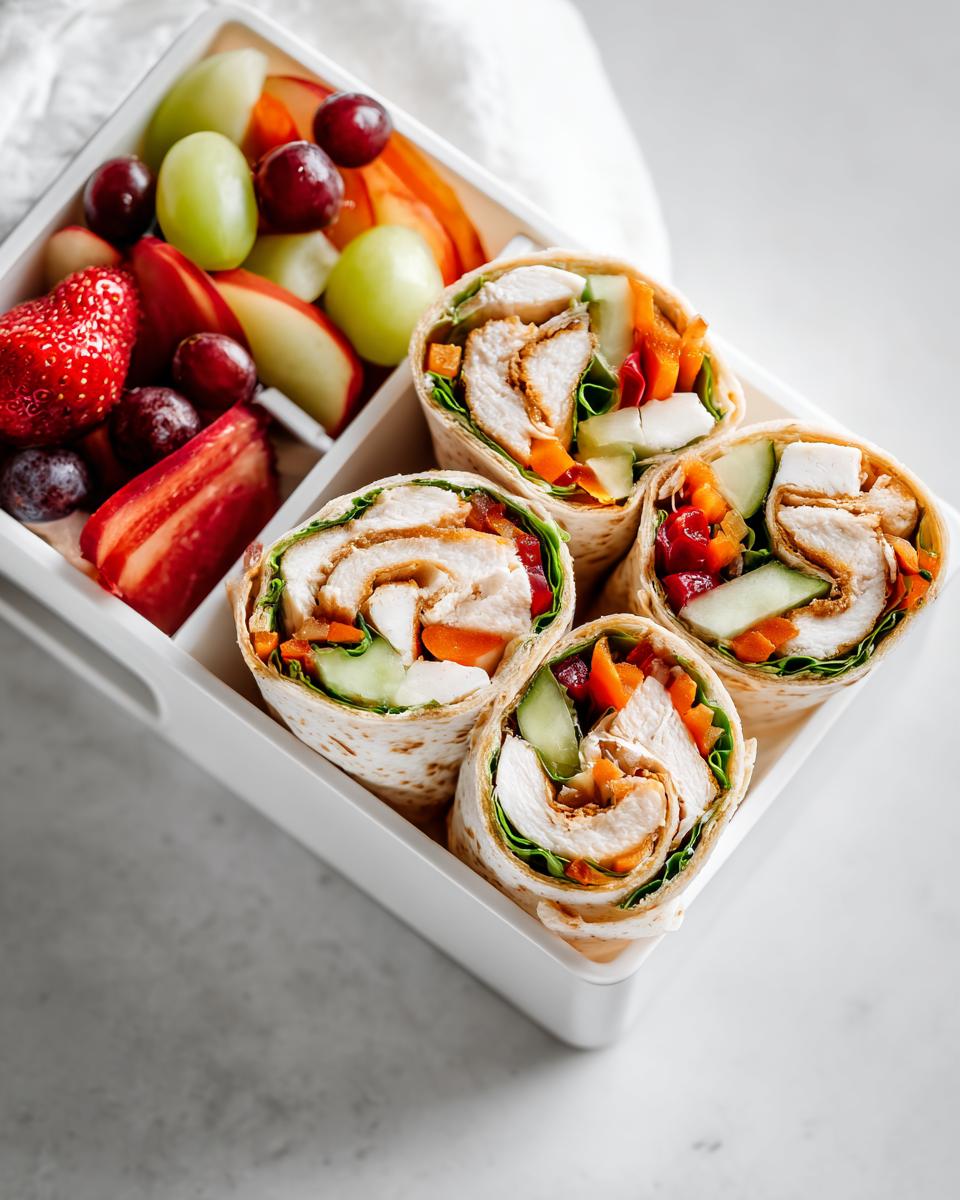
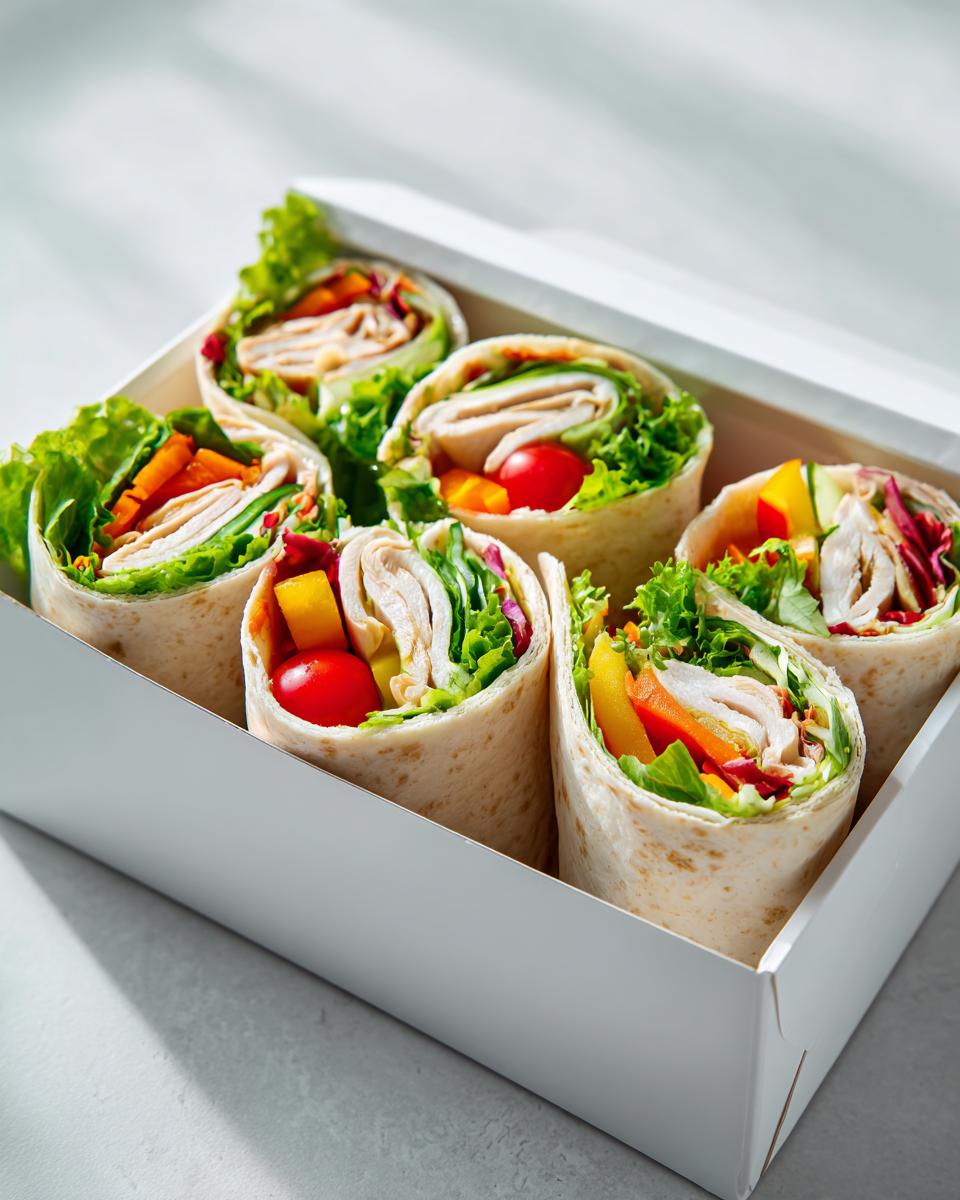
Now, grab that lovely compartment box—the bento style works best! Place your sliced wraps snugly into the largest compartment. Don’t overlap them too aggressively; they need a little space to breathe. Next, fill your fruit and veggie compartments. Try to use drier fruits like grapes or apple slices rather than super juicy things like berries right next to the wraps. Last but not least, tuck that small dip sauce right into its own little section. If the dip leaks, it ruins everything, so make sure the lid is tight on that dipping container!
Expert Tips for the Perfect Picnic Chicken Wrap Box
Listen, handling wraps for outdoor dining can be tricky because moisture is the enemy! If you want your Picnic Chicken Wrap Box to taste just as good at 1 PM as it did when you packed it at 9 AM, you need a few tricks up your sleeve. My number one rule is about keeping the sauce away from the greens.
When you build the original wrap—before you slice it—make sure any creamy ingredients or wet lettuce hits the tortilla first, acting as a barrier. Never put sauce directly onto the bread if you can help it! Also, when you slice the wraps, stand them up vertically in the box instead of stacking them flat. They hold their shape better that way.
If you’re making Chicken Salad wraps, I highly suggest checking out my recipe for Avocado Chicken Salad—it’s much more stable than mayo-based salads for travel!
Ingredient Notes and Substitutions for Your Picnic Chicken Wrap Box
The beauty of this simple setup is how flexible it is! While I swear by the basic formula that makes the ultimate Picnic Chicken Wrap Box, you absolutely can swap things out based on what looks good at the store or what your family loves. If you’re trying to keep things lighter or maybe lower on carbs, we have solutions!
For instance, if you run out of regular tortillas, maybe try large lettuce wraps—though you might need to secure those with a toothpick once sliced! Or perhaps you have a bunch of different veggies available; toss those in! The fruit compartment is a perfect place to use up whatever is ripe and ready.
If you’re worried about the chicken filling in the wraps being too heavy, you can always swap a standard chicken mix for something like a lighter tuna salad or even a vegetarian filling. For more inspiration on lighter meal prep options, see my post on low carb chicken meal prep. It’s all about making this box work for *your* adventure!
Storage and Transport for the Picnic Chicken Wrap Box
Keeping this beautiful assembly fresh is vital! Since we aren’t cooking anything while we are out, the prep stage is everything. Always pack your picnic meal box into a cooler with an ice pack, especially if you added anything saucy inside those wraps. We want everything cool until it’s time to dig in.
Also, make sure you wipe down the lid of your dip container really well before you seal it up. Any little bit of moisture that sneaks out can make the nice crisp veggies go soft fast. If you are making a soup later, I have some great tips for keeping that hot even when traveling, over on my lasagna soup page!
Frequently Asked Questions About the Picnic Chicken Wrap Box
I get so many questions when someone tries this for the first time because people worry about making sure the food lasts until lunchtime! It’s all about quick organization, and I’m happy to clear up any confusion about making the best lunch box chicken wrap experience possible. If you want to see lots of other easy midday meal ideas, browse all my lunch recipes!
Can I make the chicken wraps ahead of time for the picnic chicken wrap box?
Yes, you absolutely should make them ahead of time! I usually roll and slice the wraps the night before. The key is storing the sliced wraps tightly wrapped in plastic wrap inside the fridge so they don’t look dry in the morning. Just don’t slice them more than 8 hours ahead, or they start to look a little sad!
What kind of sauce works best in a lunch box chicken wrap?
You need sauces that are thick and creamy, not watery vinaigrettes! I love using thick hummus, a dollop of cream cheese mixed with herbs, or even a very thick ranch dip. If the sauce is too runny, it migrates into the tortilla and makes the wrap soggy before you even get to your spot. Always pack the dip separately in its own little container, like I mentioned!
What equipment is necessary for this picnic meal box?
The absolute hero piece of equipment here is a compartmentalized box. We call it a bento box, or just a good veggie hummus lunch box setup in my house. You need those separate sections to keep the fruit dry, the veggies crisp, and—most importantly—keep the dip contained! It separates everything so beautifully for that perfect picnic meal box presentation.
Estimated Nutritional Data for One Picnic Chicken Wrap Box Serving
Now, I have to tell you upfront—since the contents going into your wraps can change so much, these numbers are just an estimate based on using a standard whole wheat tortilla, simple grilled chicken breast, and average fruit/veggie portions. Think of this as a *guideline* rather than a hard fact for your personal Picnic Chicken Wrap Box!
When I designed this for quick grab-and-go, I wasn’t worried about counting every calorie, but I know some of you are planning low-carb days or watching your macros. For the most accurate numbers, you’ll want to plug your exact wrap ingredients into a tracker, especially based on what kind of fillings you chose for those wraps!
If you’re looking for ways to tailor fillings to specific diets, check out my notes on how to manage macros with my low carb chicken meal prep guide!
Here’s a general breakdown for what one complete box serving looks like:
- Calories: Approximately 350–450 kcal
- Total Fat: Around 10–15g
- Protein: About 25–30g
- Total Carbohydrates: Roughly 35–45g
Remember, the fruit and veggies add up, but they bring fantastic nutrients, so don’t skimp on those sections!
Share Your Picnic Chicken Wrap Box Creations
I absolutely love seeing what you all come up with when you pack your own meals! Seriously, seeing my ideas travel out into the world and make someone’s picnic easier lights me up more than anything. This Picnic Chicken Wrap Box is designed to be super flexible, and I’m dying to know what fillings you chose for the wraps and which veggies made the cut for your box!
Did you try a spicy chicken spread? Or maybe you went vegetarian? Don’t keep all that creative packing genius to yourself! Please head down to the comments section below and give this recipe a rating if it saved your lunch day. Letting me know how it went helps other families planning outdoor meals trust this method!
And if you snapped a gorgeous picture of your perfectly arranged lunch box chicken wrap setup, tag us on social media! It truly means the world to me to see the practical joy these simple meal ideas bring. If you have feedback, or even suggestions for my next assembly guide, you can always reach out directly through my contact page. Happy picnicking, friends!
Picnic Chicken Wrap Box
Equipment
- Compartment box (Bento box)
Ingredients
- 2 Chicken wraps sliced
- 1/2 cup Fruit
- 1/2 cup Veggies
- 1 Dip sauce small
Instructions
- Prepare the chicken wraps and slice them into pieces.
- Arrange the sliced wraps, fruit, and veggies in the compartment box.
- Place the small dip sauce into a compartment.