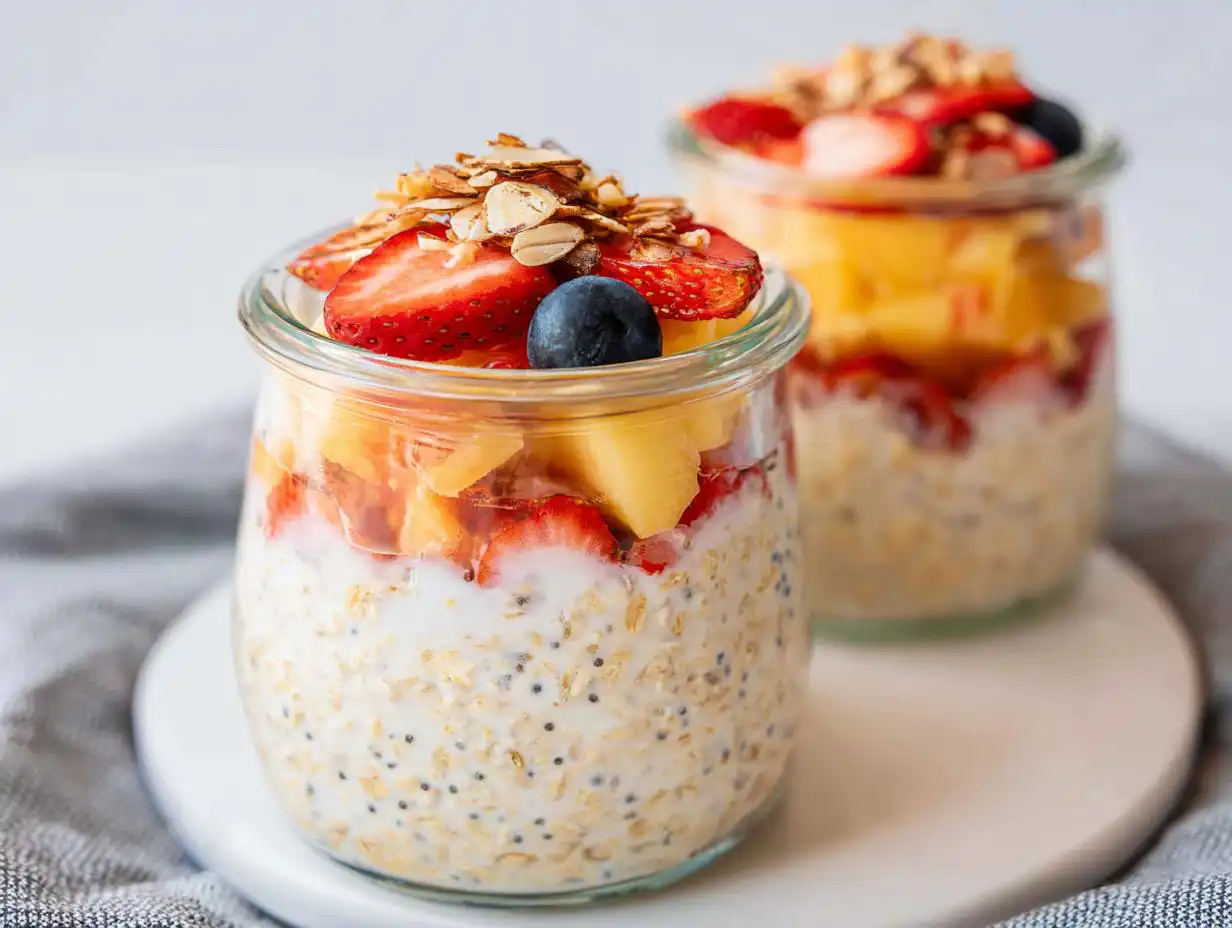
If your breakfast routine has been feeling seriously lackluster lately, you are in the absolute right place! We all know that food tastes better when it looks amazing, right? That’s why I obsessed over making the perfect Overnight Oats Aesthetic Jar. Seriously, these jars look like they took hours, but they’re literally dumped together in five minutes before bed.
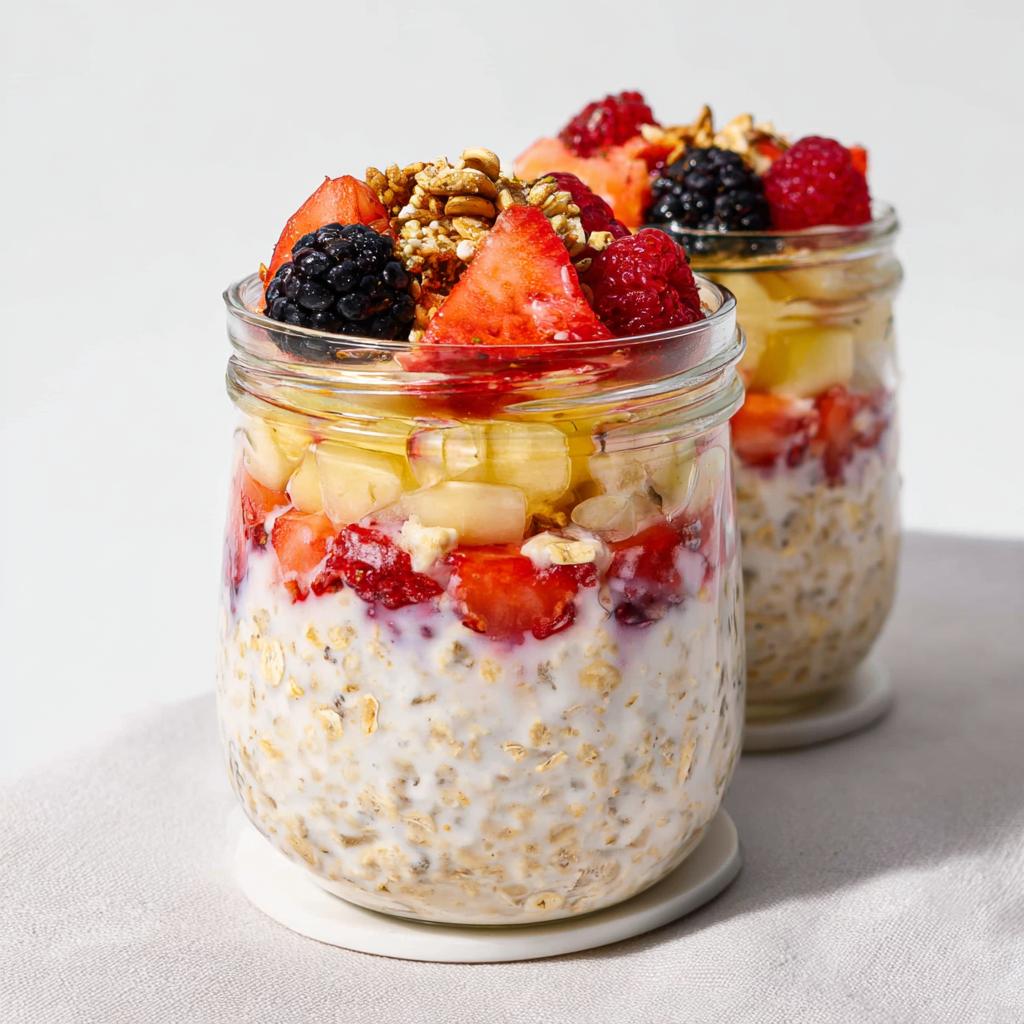
Layering ingredients made the jars both beautiful and practical. When you stack those colors—the creamy base, the vibrant fruit—it just wakes up your whole morning routine. Trust me, you’ll want to take a picture before you even grab a spoon!
Why You Will Love This Overnight Oats Aesthetic Jar
Honestly, what’s not to love? This recipe is designed for my fellow busy bees who still demand high standards for their morning meal. It hits all the trendy marks while keeping things super simple.
- It’s the ultimate grab-and-go meal prep solution for the week.
- The layered look is seriously photogenic—your feed will thank you!
- Total hands-on prep time is under ten minutes, which is a win any day.
- The chilled texture is way creamier than just stirring everything together.
Check out all our other quick breakfast ideas right here: Breakfast Recipes!
Gathering Ingredients for Your Overnight Oats Aesthetic Jar
Okay, ingredient gathering time! For the base, we keep things minimal because we want the final fruit layers to really shine. This is the foundation that turns into that perfectly creamy texture once it chills. I always try to have different fruit options ready ahead of time. You can see what I use in my maple oats, but feel free to experiment!
It’s all about contrast for the layered oats jar look, so don’t be afraid to mix textures, even if you need ideas; check out some suggestions over here for inspiration!
Base Mixture Ingredients for Overnight Oats Aesthetic Jar
This is the must-mix portion you combine the night before. Grab your measuring cups, we need precision here:
- 1/2 cup of oats (I stick to good old rolled oats).
- 1 tablespoon of chia seeds—these are non-negotiable for that thick set!
- 3/4 cup of your favorite milk.
- 1 tablespoon of honey for just a touch of natural sweetness.
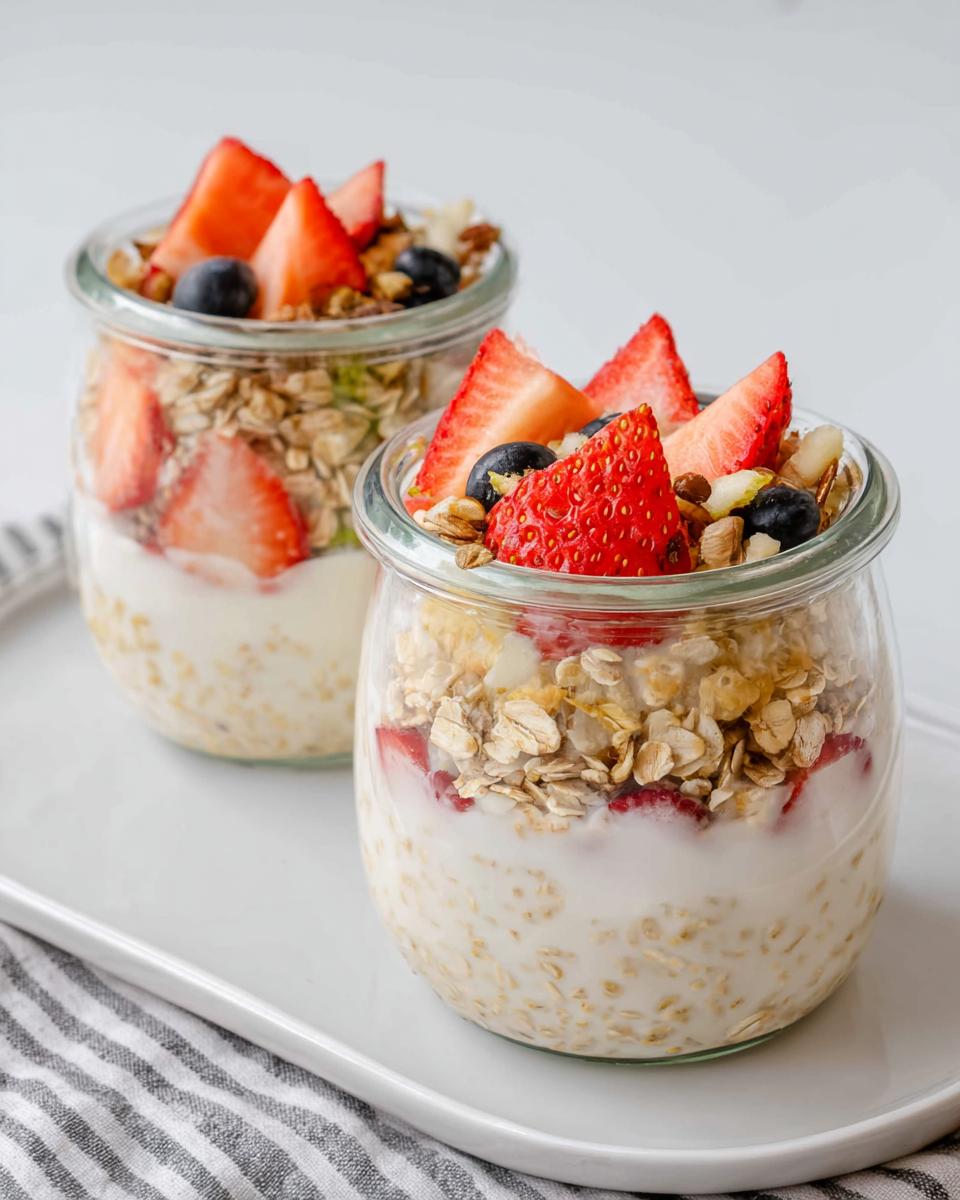
Fruit Layers for the Layered Oats Jar
This is where the magic happens for the visual appeal! You want things that hold their shape well. I love using berries because they’re naturally colorful and don’t get too watery.
My top picks for creating that true aesthetic jar look are thin slices of fresh banana layered next to bright raspberries. For a different vibe, try diced mango with a sprinkle of toasted coconut flakes!
Essential Equipment for the Overnight Oats Aesthetic Jar
You really don’t need much for this recipe, which is another reason I love it so much! The key piece of equipment is simple, but important for the final look.
Forget fancy mixing bowls for the initial blend, though. We’re keeping cleanup minimal, which is always the goal in my kitchen!
- Glass Jar: This is the critical item. I use a standard pint-sized Mason jar, but any clear, sealable glass container works. You absolutely must use a clear jar to get that stunning Overnight Oats Aesthetic Jar look we are aiming for. If you can’t see the beautiful layers, what’s the point?
- A Mixing Spoon or Fork: Just for stirring the base ingredients together before chilling.
- A Lid or Sealable Top: Keep that goodness fresh in the fridge!
The beauty relies entirely on visibility. A cloudy plastic container just doesn’t capture the light or show off those gorgeous fruit divisions. Having a clear, straight-sided jar lets your layering artistry truly shine through when you take that final morning peek!
Step-by-Step Instructions to Make Your Overnight Oats Aesthetic Jar
This is where we move from dreaming about pretty breakfasts to actually making them happen! Remember, the process is split over two days. The first part is fast, and the second part is mandatory waiting. If you skip the waiting part, you end up with soupy, sad oats instead of the creamy, structured layers we are aiming for! You can see a great guide on speeding up some similar recipes here, but for texture, we have to wait.
Trust the process; those 8 hours of chilling are what turn simple oats into that perfect base for our layered oats jar.
Preparing the Base Overnight Oats Aesthetic Jar Mixture
Grab your clean glass jar—this is where everything happens, so no need for extra bowls! First, toss in your 1/2 cup of oats and the 1 tablespoon of chia seeds. Then pour in the 3/4 cup of milk and the 1 tablespoon of honey.
Now, here’s a little tip: use a fork or a small whisk and stir like crazy for about 30 seconds. Seriously, mix it until everything looks totally combined. You have to make sure those chia seeds aren’t clumped at the bottom or they won’t gel properly. Get a tight seal on that lid, give it a good shake just to be safe, and we are done with the active work!
The Mandatory Overnight Chilling Time
Place that sealed jar right into the refrigerator. And now for the hard part: walking away! You must let this mixture chill for a minimum of 8 hours, or overnight. That’s 480 minutes of quiet transformation time. During this time, the oats and the chia seeds soak up all that liquid, thickening everything up beautifully.
If you try to layer them too soon, you’ll just end up mixing everything up when you try to add the fruit later. Patience pays off, making this the easiest form of meal prepping ever!
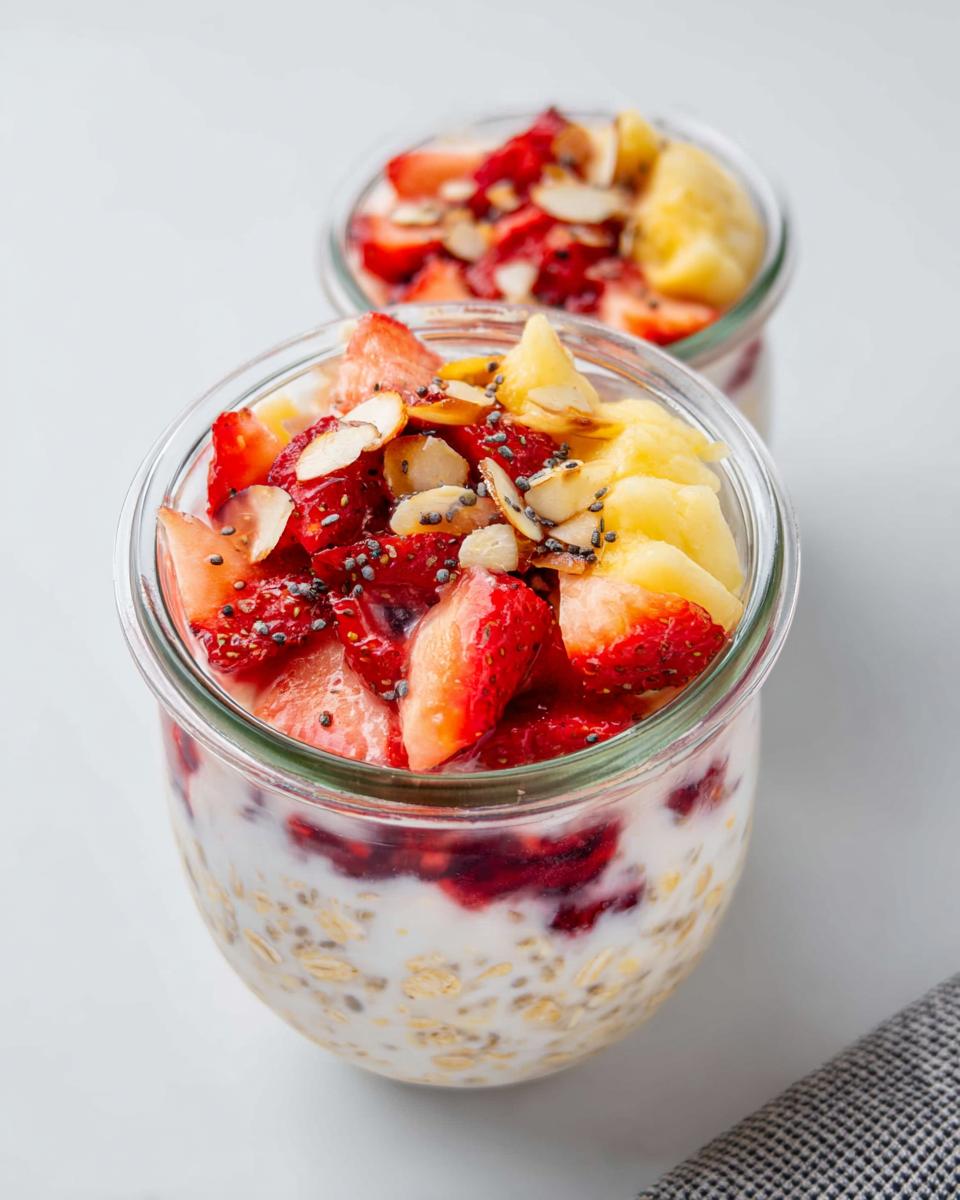
Assembling the Layered Oats Jar in the Morning
Success! Pull that thick, creamy oat base out of the fridge. This is where the aesthetic really starts to show. You are now assembling your breakfast oats display.
Take maybe a third of the chilled oat mixture and gently spoon it into the bottom of the jar. Next, carefully place a layer of your chosen fruit right on top. It’s important to spoon lightly so you don’t push through the bottom layer! Follow that with another layer of oats, then more fruit, repeating until you reach the top. Stop just shy of the rim so you can see all those defined lines! It looks incredible, and you can find some general tips for making oat layers pop here.
Tips for the Perfect Overnight Oats Aesthetic Jar Presentation
Getting that Pinterest-perfect look takes just a tiny bit more thought than just tossing things in there! Since the whole point of this recipe is how gorgeous the Overnight Oats Aesthetic Jar looks, we need to focus on texture stability during assembly.
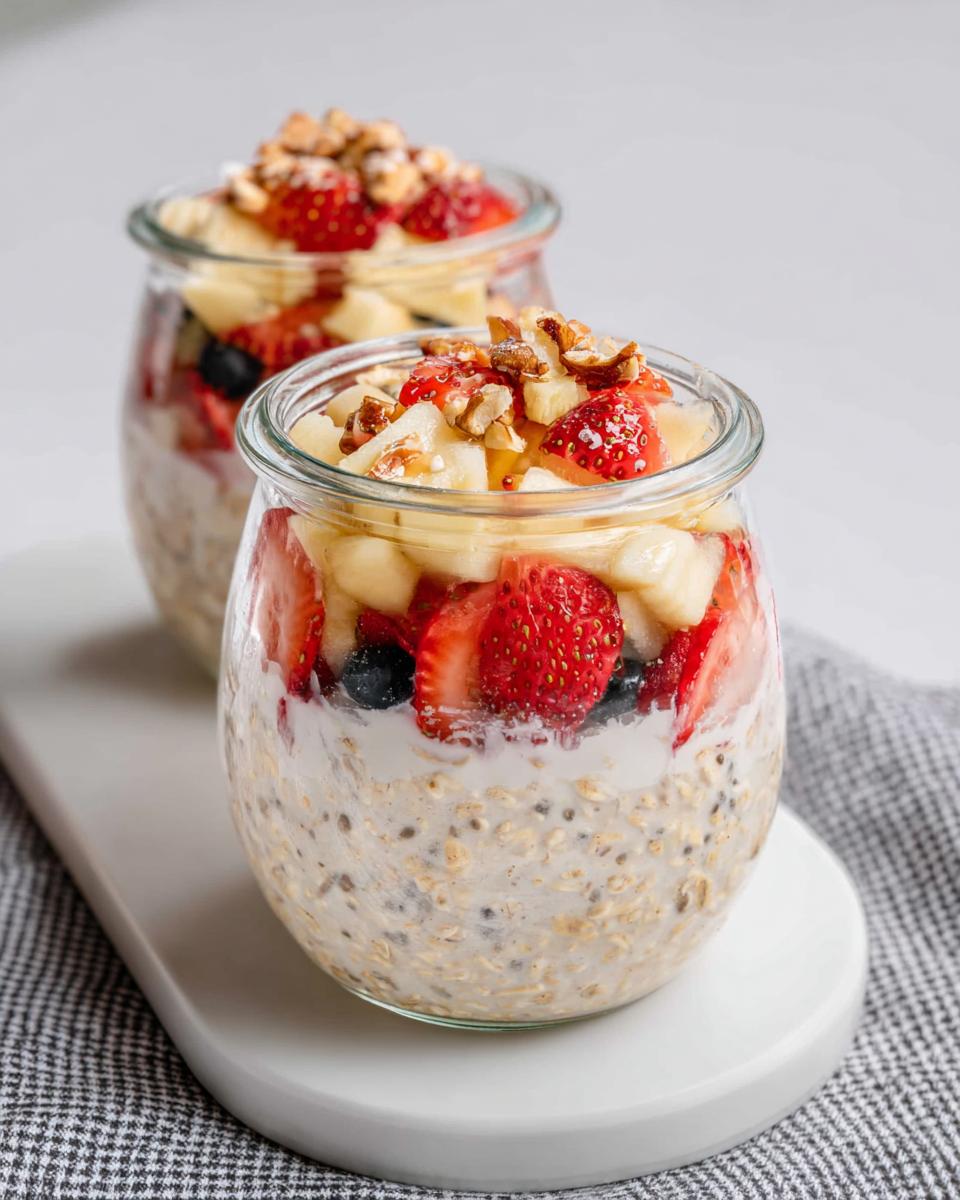
First rule: slice all your fruit thinly and uniformly. Thick chunks will sink or push the oat layers around. We want defined lines, not mudslides!
When you go to layer the fruit in the morning, spoon the fruit *gently* right onto the center of the oat layer. Don’t let it touch the sides of the glass at one point, or it will create a visible streak where you don’t want one. If you pile the fruit on softly, it creates a nice, flat demarcation line between your layers.
Also, make sure your base oats are really, really cold. The colder and stiffer they are, the better they hold up against the weight of the fruit when you start building those perfect divisions. It’s worth looking at how we make a perfectly layered sandwich just for presentation inspiration: Aesthetic Sandwiches!
Variations for Your Breakfast Oats
The base recipe is fantastic exactly as written, but if you’re like me, you probably want to switch things up to avoid eating the exact same thing every morning for a week. The good news is that since the oat-to-milk ratio is so reliable, we can swap things out in the base or add flavor bombs during assembly without ruining the structural integrity of the layered oats jar.
You can find tons of creative ideas out there for inspiration on flavor combinations—check out this whole collection for more yummy inspiration here!
Here are my favorite ways to switch gears while keeping that beautiful aesthetic jar structure intact:
- Go Green with Matcha: For a vibrant, earthy flavor, skip the honey and stir in 1 teaspoon of matcha powder right into the milk mixture before chilling. It turns the entire base layer a gorgeous pale green that looks amazing contrasted with yellow pineapple or white coconut! See my full Matcha Overnight Oats for dosage details.
- Chocolate Power Up: Mix in 1 tablespoon of high-quality unsweetened cocoa powder with your dry ingredients. If you do this, I highly recommend using chocolate protein powder instead of the chia seeds for an extra boost. This gives you a rich brown layer that looks decadent stacked next to peanut butter swirls. My Chocolate Oats section dives into this!
- Swap Your Milk: If you need to go dairy-free, almond milk works great, but it can sometimes make the final texture a little thinner. To combat this, use only 1/2 cup of almond milk instead of 3/4 cup, or substitute that missing 1/4 cup with plain Greek yogurt for extra thickness.
- Spice it Up: A tiny pinch of ground cardamom added to the base mixture adds such a sophisticated, warm note. It pairs incredibly well with layered peaches or chopped dates in the morning assembly. Don’t overdo it, just a slight whisper of spice makes a huge difference in these breakfast oats!
Storing and Keeping Your Overnight Oats Aesthetic Jar Fresh
Okay, we’ve put in all the work to make these jars picture-perfect, so we want to make sure they stay good! Since we aren’t applying any heat, we’re relying completely on the fridge to keep everything marvelous. The great news is that overnight oats are superstars at chilling.
You can totally make these ahead, and they travel beautifully, which is why they are the ultimate meal prep item. Linking up for more great meal prep ideas? You should check out my guide on Protein Bowls!
Here is the simple breakdown for keeping your art perfect:
- How Long They Last: For the absolute best texture and flavor, I recommend eating these within two to three days max. After day three, the oats (especially the ones near the bottom layer) can start to get a little too soft, and those beautifully crisp fruit layers might start weeping juice into the oatmeal.
- Keep it Chilled: Always, always keep your Overnight Oats Aesthetic Jar sealed tightly in the coldest part of your refrigerator. They do not need to be reheated, nor should they generally be left out at room temperature for too long—especially if you used dairy milk. They are meant to be enjoyed cold!
- Maintaining the Layers: This is the trickiest part. If you assemble the full jar with all the fruit layers the night before, the juices *will* start to bleed slightly overnight. If you are making them for a 2- or 3-day stretch, here’s what I do: mix the base oats/milk component ahead of time, store it covered. Then, only assemble the aesthetic fruit layers the night before you plan to eat that specific jar. This keeps the layers looking super sharp for up to 24 hours.
Remember, the chia seeds do their work overnight, setting the base, but fresh fruit has a shelf life of its own. Treat your layers like fresh paint—give them the best chance to look stunning when you finally grab that jar!
Frequently Asked Questions About Layered Oats Jar
It’s totally normal to have questions when you’re trying to achieve peak breakfast perfection! Building that flawless layered oats jar takes a little know-how, especially when it comes to making sure the texture is exactly right. I’ve pulled together a few of the things I get asked most often about these gorgeous jars. If you’re worried about meal prep consistency, you can check out some other great ideas for meal prep planning!
Can I make the Overnight Oats Aesthetic Jar more than two days ahead?
You *can*, but I wouldn’t strongly recommend it if you are serious about that aesthetic! The base mixture—oats, milk, chia—will hold up okay for maybe three days, but the visual appeal starts to suffer quickly. By day three, those beautiful defined lines between your base oats and your fruit layers start to get muddy because the fruit releases its juices into the oatmeal, even when layered carefully.
For the absolute best texture and the sharpest lines in your Overnight Oats Aesthetic Jar, stick to assembling them the night before you eat them, or the night before that at the very longest. They just look freshest when they’re only 12-24 hours old!
What is the best milk for achieving creamy layered oats jar texture?
This honestly depends on what texture you prefer! If you want the thickest, creamiest set possible that mimics a pudding, use whole dairy milk or even half-and-half if you’re feeling decadent. That higher fat content helps everything bind together beautifully overnight.
If you opt for non-dairy milks, I find that oat milk or soy milk tends to give you the best results for that creamy mouthfeel in your breakfast oats. Unsweetened almond milk is usually too watery for this recipe unless you significantly cut back on the liquid amount. If you use almond milk, try using just 1/2 cup instead of the full 3/4 cup listed in the base ingredients, and maybe add an extra half tablespoon of chia seeds to compensate for the thinner consistency.
Sharing Your Beautiful Breakfast Oats Creations
Whew! We made it! You’ve officially mastered the art of making breakfast look this good with this fantastic Overnight Oats Aesthetic Jar recipe. Cooking for me has always been about sharing joy, and what’s more joyful than a stunning, healthy breakfast ready to go?
I really, truly hope you love how easy and gorgeous these layered oats jar creations turn out. They make even my busiest mornings feel a little bit special, honestly.
When you whip up your own visually stunning batch, I would absolutely love to see your artistry! Take a picture! Tag us online—I check every single tag, I promise. Your creations inspire the next round of testing and recipe magic around here.
If this recipe saved your morning routine or just made you smile when you opened the fridge, please consider leaving a quick star rating at the top of the page. Reader feedback helps other people find these easy, beautiful recipes! You can read more about our mission here at Recipes by Betty.
This whole process, from testing the perfect milk-to-oat ratio to perfecting the fruit layering, is all thanks to the amazing team effort here. A huge shout-out to Emily Mitchell, Efficiency & Testing Coordinator at Recipes by Betty, for making sure these instructions are crystal clear so you can nail that perfect aesthetic every single time. Happy scooping!
Overnight Oats Aesthetic Jar
Equipment
- Glass jar
Ingredients
- 1/2 cup oats
- 1 tbsp chia seeds
- 3/4 cup milk
- 1 tbsp honey
Fruit layers
Instructions
- Mix oats, chia seeds, milk, and honey together in the glass jar.
- Cover the jar and chill in the refrigerator overnight.
- In the morning, layer the chilled oats mixture with your chosen fruits in the jar to create a visual effect.