When the dessert craving hits, but you absolutely cannot turn on the oven? Been there, friends! That’s why I cherish my simple, ridiculously good Strawberry Cheesecake No Bake recipe. Seriously, if you need a show-stopping dessert that takes less than twenty minutes of active work, this is your ticket. No fussing with water baths or worrying about cracks!
I remember the first time I made this. I was rushing to get ready for a potluck and needed something refreshing and guaranteed to please a crowd. This recipe felt like a miracle—it came together so fast, and the need for that four-hour chill time felt like cheating because the prep was so minimal. For us busy folks, no-bake desserts are total lifesavers.
We’re talking about that perfect balance of tangy cream cheese, sweet berries, and a buttery crust. It sets up perfectly every time. Trust me, this version is foolproof. I’m Clara Bennett, and as Lead Plate Designer here at Recipes by Betty, I live for creating beautiful, manageable treats like this amazing no bake strawberry cheesecake.
Why This Strawberry Cheesecake No Bake Recipe Works for You
Honestly, you need this recipe in your back pocket. It’s the dessert equivalent of hitting the easy button without sacrificing flavor or presentation. When you’re whipping up this Strawberry Cheesecake No Bake, you’re getting maximum payoff for minimal effort, which is exactly what we busy bakers need!
- Prep time clocks in at just fifteen minutes—I told you it was fast!
- Zero oven time means your kitchen stays cool, and cleanup is a breeze.
- It’s absolutely crowd-pleasing; everyone swoons for the classic flavor combination.
We feature tons of great no-bake treats on the blog, but this one is my personal go-to when I need something impressive fast.
Gathering Ingredients for Your Strawberry Cheesecake No Bake
Getting ready for this lovely dessert is straightforward because we aren’t dealing with fussy baking ingredients—just simple things you likely have around! I like to lay everything out before I start mixing so I don’t have to hunt for things mid-process. Remember, clarity here means faster assembly later!
We are dividing things into two important parts: the crunchy base and the creamy, dreamy filling that makes this Strawberry Cheesecake No Bake so special.
For the Crust Ingredients
You just need two things for the foundation. Make sure those biscuits are crushed down to fine crumbs—I usually pulse mine in the food processor until they look like slightly coarse sand. That’s the secret to a crisp crust that doesn’t crumble when you slice it.
- 1 cup crushed biscuits
- 3 tbsp butter, melted
For the Filling Ingredients
This is where the magic happens, so pay attention to the cream cheese! It absolutely must be softened to room temperature. If it’s cold, you’ll end up with tiny, irritating lumps in your beautiful filling. Also, that strawberry puree needs to be smooth—homemade or store-bought works, just make sure it’s ready to pour!
- 1 cup cream cheese, softened
- 1/2 cup sugar
- 1 cup whipped cream
- 1 cup strawberry puree
Essential Equipment for Making Strawberry Cheesecake No Bake
Since we aren’t turning on the oven, the equipment list is blessedly short! You don’t need fancy gear for this dessert, which is another reason why I love it so much. It’s about getting the job done right with what you already have.
Make sure your electric mixer is ready to go, because you need smooth cream cheese for that perfect texture. Don’t try to whisk this by hand unless you really want an arm workout!
- Mixing bowl
- Electric mixer
- 8-inch springform pan
The springform pan is key here. It lets you release the entire cheesecake intact without flipping it upside down, which is a disaster waiting to happen with something this delicate!
Step-by-Step Instructions for the Easy Cheesecake
This is where we put everything together! Seriously, if you followed the ingredient list, then making this easy cheesecake is like stacking blocks—it’s incredibly simple, provided you follow the order. Before we start, I want you to check out some other easy recipes we have, because once you see how fast this comes together, you’ll be hooked on quick desserts!
Preparing the Crust Base
First things first: the foundation needs to be solid! We just combine those crushed biscuits with the melted butter right in your mixing bowl. Then, dump that mixture into your 8-inch springform pan. Press it down firmly across the bottom. I mean *firmly*—use the bottom of a measuring cup to really compact it against the base. This prevents a crumbly mess when you slice into the finished dessert.
Mixing the Cream Cheese Filling
Now we tackle the filling. Get that softened cream cheese and sugar into your clean mixing bowl. Beat these two together with your electric mixer until they are totally smooth and creamy. No lumps allowed, okay? Once smooth, grab your cup of whipped cream and fold it in. And I mean *fold* it—very gently! We want to keep all that lovely air we just whipped in there, so don’t go crazy beating it again.
Assembling and Swirling the Strawberry Cheesecake No Bake
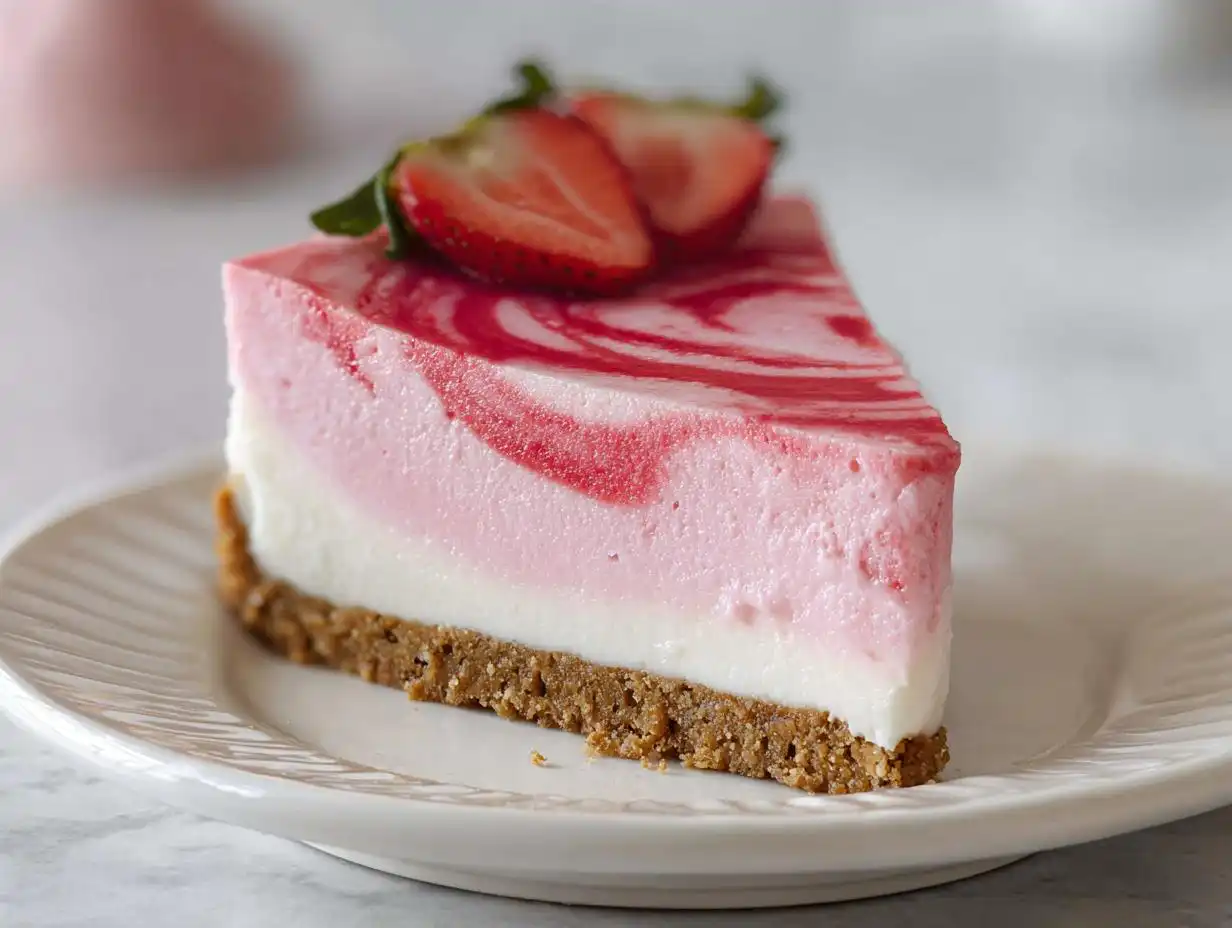
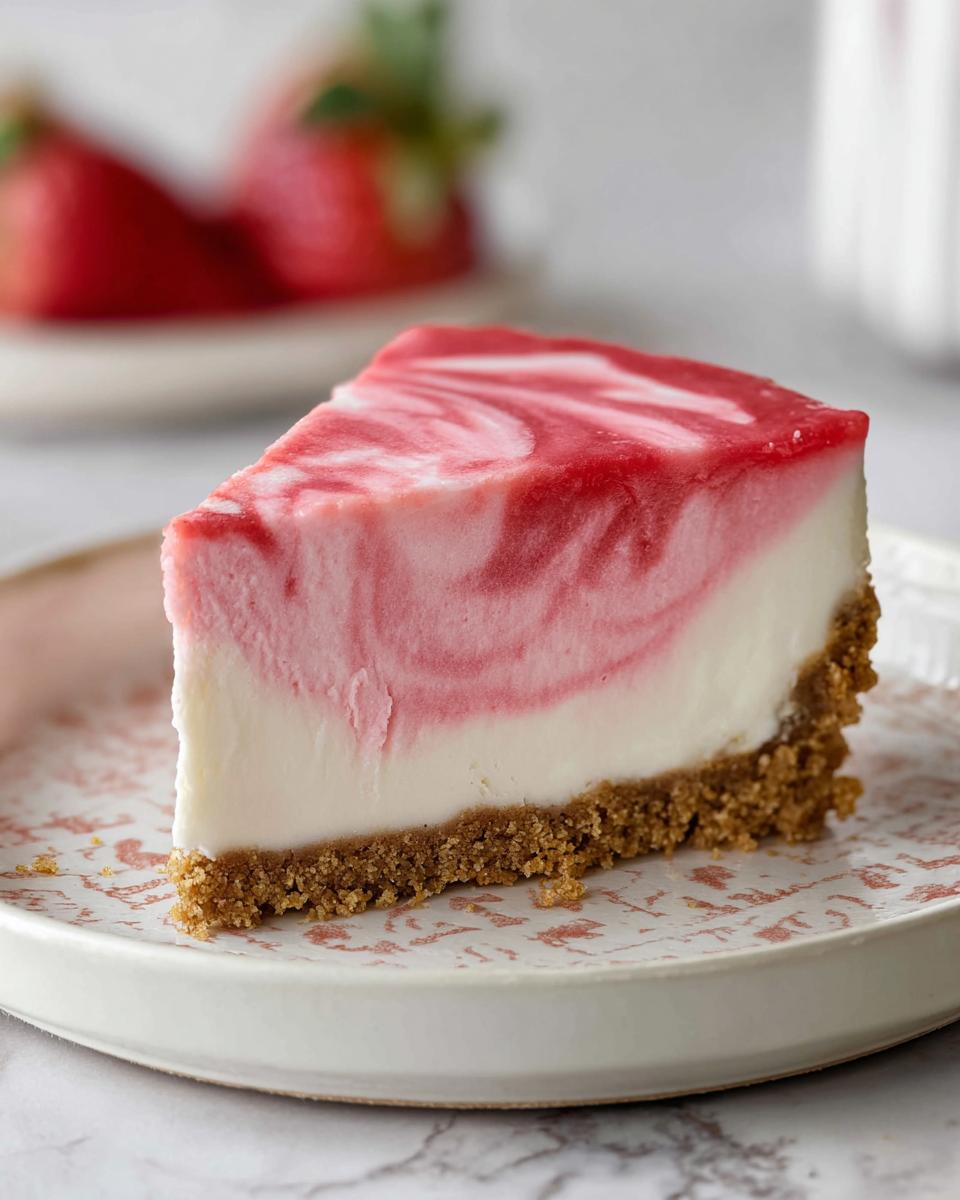
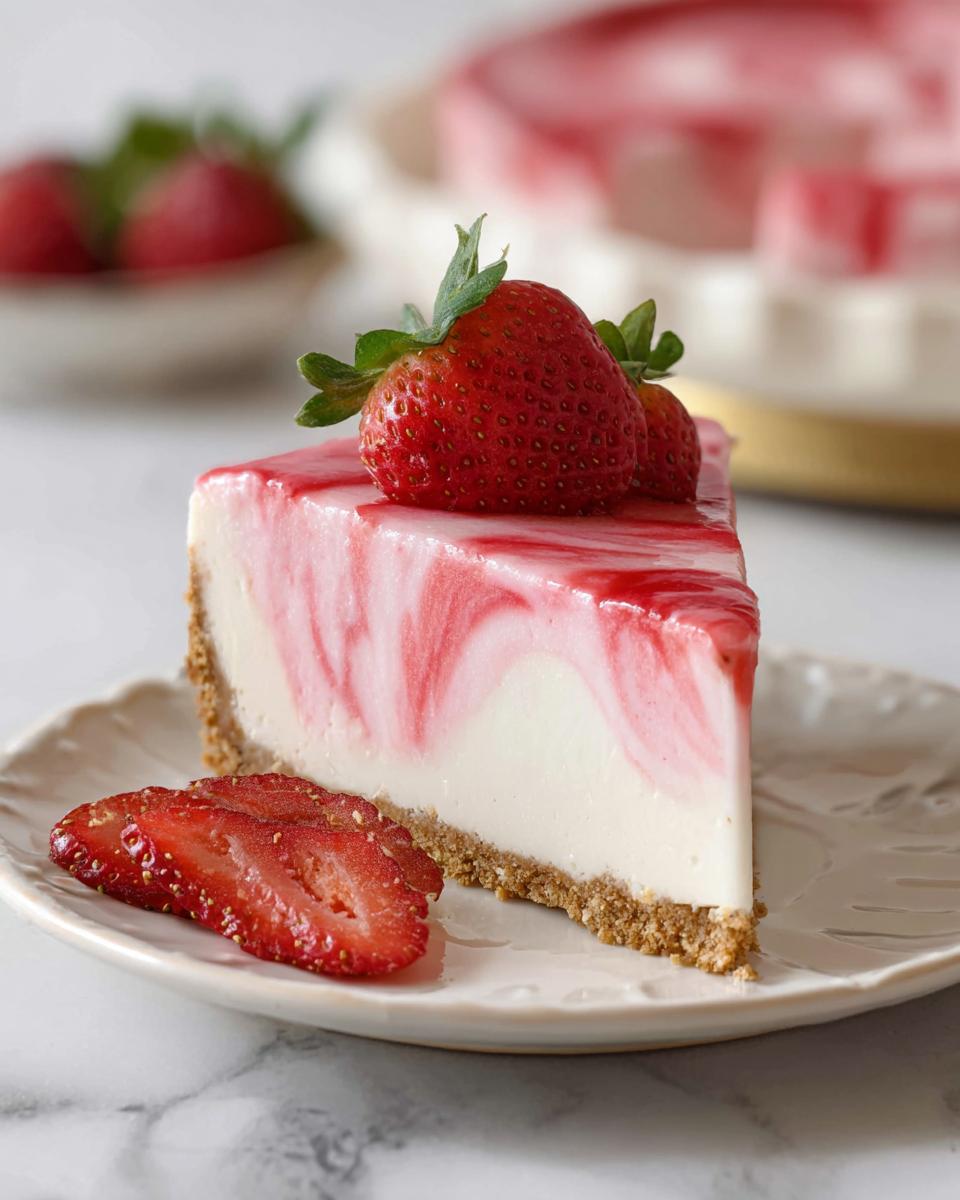
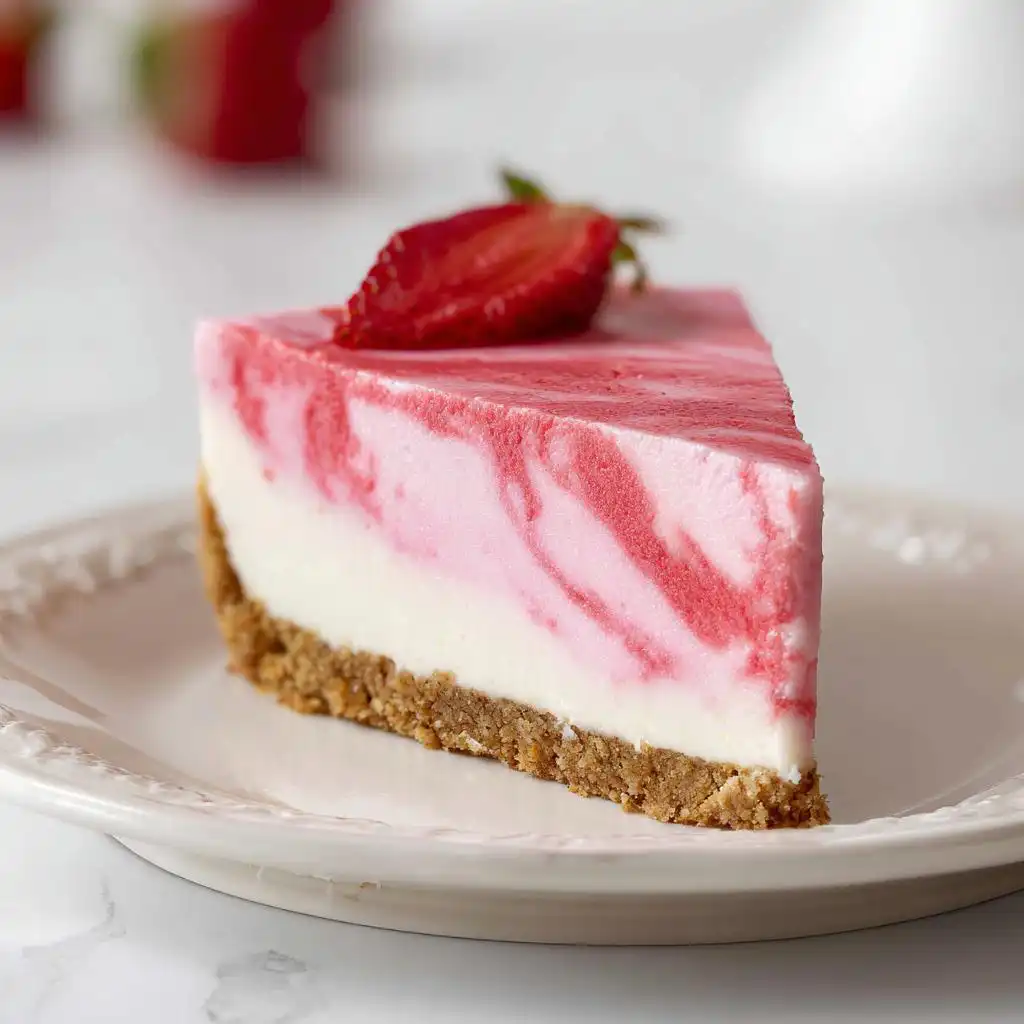
Time for the pretty part! Spread that smooth cream cheese mixture evenly over the pressed crust. Now, take your vibrant strawberry puree and pour it right over the top. Don’t stir it all together! Instead, take a skewer or a butter knife and gently drag it through the layers once or twice to create those gorgeous swirls. That beautiful top layer is what makes the Strawberry Cheesecake No Bake truly irresistible.
The Crucial Chill Time
This is the hardest step: waiting! You absolutely need to chill this dessert for a minimum of four hours to make sure it sets up properly. We need those fats and cream to firm up completely so the slices hold their shape. If you rush this part, you’ll end up with a runny mess. Trust the process; that long 240-minute chill time ensures success!
Tips for Success with No Bake Strawberry Cheesecake
Listen, even though this is a no-bake dessert, there are a few little secrets that separate a stiff, perfect slice from a soupy disaster. If you want your Strawberry Cheesecake No Bake to set beautifully, you have to make sure your primary dairy components are right. Always, always use full-fat cream cheese.
Seriously, do not try to use the low-fat stuff here; it has too much water, and it will absolutely refuse to firm up after chilling. Also, make sure your whipped cream is stiff before folding it in. It should hold mountains when you lift the beater!
When it comes time to serve this beauty, warm your knife under hot water and wipe it clean between each slice. This prevents that sticky, pulling mess and gives you those perfectly clean wedges you see in pictures. You can check out some more general fantastic baking wisdom over at my post about expert baking tips.
Variations on the Classic Strawberry Cheesecake No Bake
While this recipe for Strawberry Cheesecake No Bake is perfect just the way it is, sometimes you want to mix things up a little, right? That’s the fun of dessert making—tweaking things to suit your mood! I love making subtle switches that keep the structure the same but give you a totally new experience.
The base crust and the texture of the filling are so reliable that you can play around with the flavor notes without any fear of the whole thing collapsing. If you’re looking for inspiration, we have tons of fun strawberry recipes on the site, but here are a couple of twists on this cheesecake that I adore.
First, forget waiting for strawberries! You can swap that 1 cup of strawberry puree for raspberry puree. Raspberry adds this gorgeous tartness that really contrasts beautifully with the sweet, creamy filling. It just feels a little more sophisticated, honestly.
Or, if you still want that strawberry flavor but want to brighten it up, try adding a little citrus zest right into the cream cheese mixture before you fold in the whipped cream. I usually add the zest of half a lemon. It cuts through the richness perfectly, making the whole no bake strawberry cheesecake feel lighter and zingier. It’s amazing how much flavor a little bit of zest brings to the party!
Storage and Reheating Instructions for Your Dessert
The great news about making a dessert that doesn’t involve baking is that storage is super simple, but we do need to be respectful of that gorgeous dairy content. Since we skipped the oven, we absolutely cannot zap this in the microwave!
Reheating a no-bake dessert just melts it back into its liquid components, and we want that firm, sliceable texture we waited four hours for. So, definitely no reheating attempts on this one; it’s meant to be served cold straight from the fridge.
For leftovers, you’ll want to keep it covered right inside that 8-inch springform pan if you haven’t sliced it all yet. If you have cut pieces, wrap them tightly in plastic wrap or transfer them to an airtight container. Because of the high dairy content, it tastes best within three to four days. After that, the crust might start absorbing some moisture from the filling, and we don’t want soggy biscuits!
Frequently Asked Questions About No Bake Strawberry Cheesecake
I always get questions swirling around about this recipe once people try it out! It’s so fun seeing everyone’s successful (and sometimes slightly sticky) results. Since this is such an easy cheesecake to make, most questions center around ingredient prep or setting time. Don’t sweat it if you have a query—I’ve covered the most common ones right here for you. If you’re looking for other fun individual portions, check out my recipe for no-bake strawberry cheesecake cups!
Can I use pre-made graham crackers for the crust of the no bake strawberry cheesecake?
Oh, absolutely! If you’re running short on time and have graham crackers handy, you can totally swap them out for the crushed biscuits. They work just as well. Since graham crackers can sometimes be a bit drier than other biscuits, just keep an eye on the melted butter. If your mix seems too dry when you press it, add just another teaspoon of melted butter until it holds together when squeezed in your hand.
How can I make this an easy cheesecake using different berries?
That’s the beauty of this formula! This is the perfect base for experimenting. You can easily swap out the strawberry puree for blueberry or even a mixed berry blend. The key is making sure whatever fruit you use is pureed until smooth, just like the strawberries. The slight tartness balances the richness of the cream cheese so well, no matter which berry you choose!
Why did my filling not set properly in the no bake strawberry cheesecake?
If your finished dessert is running a bit soupy, nine times out of ten it comes down to one of two things, honestly. Either your cream cheese wasn’t fully softened, which prevents it from combining smoothly with the sugar, or your whipped cream wasn’t whipped enough before you folded it in. Remember, that whipped cream brings all the lightness and air structure! And please, please do not skip that full minimum chill time!
Estimated Nutritional Data for Strawberry Cheesecake No Bake
If you’re counting macros or just curious about what you’re enjoying, here are the estimated nutritional facts per slice for this amazing Strawberry Cheesecake No Bake. Remember, these numbers are always estimates based on standard ingredient density, okay? They can shift slightly depending on your specific brands.
- Calories: 350
- Fat: 20g
- Carbohydrates: 40g
- Protein: 5g
- Sugar: 25g
Enjoy every single bite of this effortless dessert!
Strawberry Cheesecake No Bake
Equipment
- Mixing Bowl
- Electric mixer
- 8-inch springform pan
Ingredients
For the Crust
- 1 cup crushed biscuits
- 3 tbsp butter, melted
For the Filling
- 1 cup cream cheese, softened
- 1/2 cup sugar
- 1 cup whipped cream
- 1 cup strawberry puree
Instructions
- Combine the crushed biscuits and melted butter. Press this mixture firmly into the bottom of an 8-inch springform pan to form the crust.
- Beat the cream cheese and sugar together until smooth. Fold in the whipped cream gently.
- Spread the cream cheese mixture over the crust. Pour the strawberry puree on top and swirl it lightly into the filling using a knife or skewer.
- Refrigerate the cheesecake for at least 4 hours, or until firm.