There is just something magical about eating outside, isn’t there? Whether it’s spreading a blanket in the park or heading down to the beach, sunshine and fresh air make even the simplest meal feel like an event. But let’s be honest, packing for a picnic can be a total nightmare. You want it to be easy, you want it to travel well, and you absolutely don’t want soggy bread!
That’s why I perfected this recipe. It’s the ultimate solution for stress-free outdoor dining because this Wrap Sandwich Picnic is designed to hold up. I used to dread packing traditional sandwiches, watching the lettuce wilt before we even found parking! These wraps changed everything for our family outings. They’re sturdy, flavorful, and completely foolproof, making them the best choice for any adventure.
Why This Wrap Sandwich Picnic is Your Go-To Meal
When I’m packing up for an outing, I need food that won’t fight me later, and these wraps are champions of convenience. Seriously, they make outdoor meals so much easier to manage. Forget messy layers that slide apart the second you lift them!
Here’s why this Wrap Sandwich Picnic always comes with me:
- They travel beautifully! Because they are rolled tight and sliced last, everything stays put until you unwrap it.
- No soggy bread dilemma here—tortillas are far more resilient under pressure.
- The creamy yogurt sauce keeps the filling moist in a good way, not a watery way.
- Prep takes minutes, which means less time in the kitchen and more time basking in the sun! You can even check out my thoughts on other quick bites over here: easy healthy snack ideas.
Essential Ingredients for Your Wrap Sandwich Picnic
Okay, let’s talk what goes inside! The beauty of this recipe is that the fillings are fresh, bright, and hold together really well. I always make sure I have a colorful mix. When you’re grabbing things at the store for a great avocado chicken salad style filling, remember that quality really matters for simple recipes like this.
For the Wrap Components
These are the stars of the show, folks. Pay close attention to the tortillas—this is your structure!
- Two large tortillas. And listen to me: use the freshest ones you can find! My rule is if they feel stiff, they can crack during rolling, and nobody wants picnic wrap shrapnel.
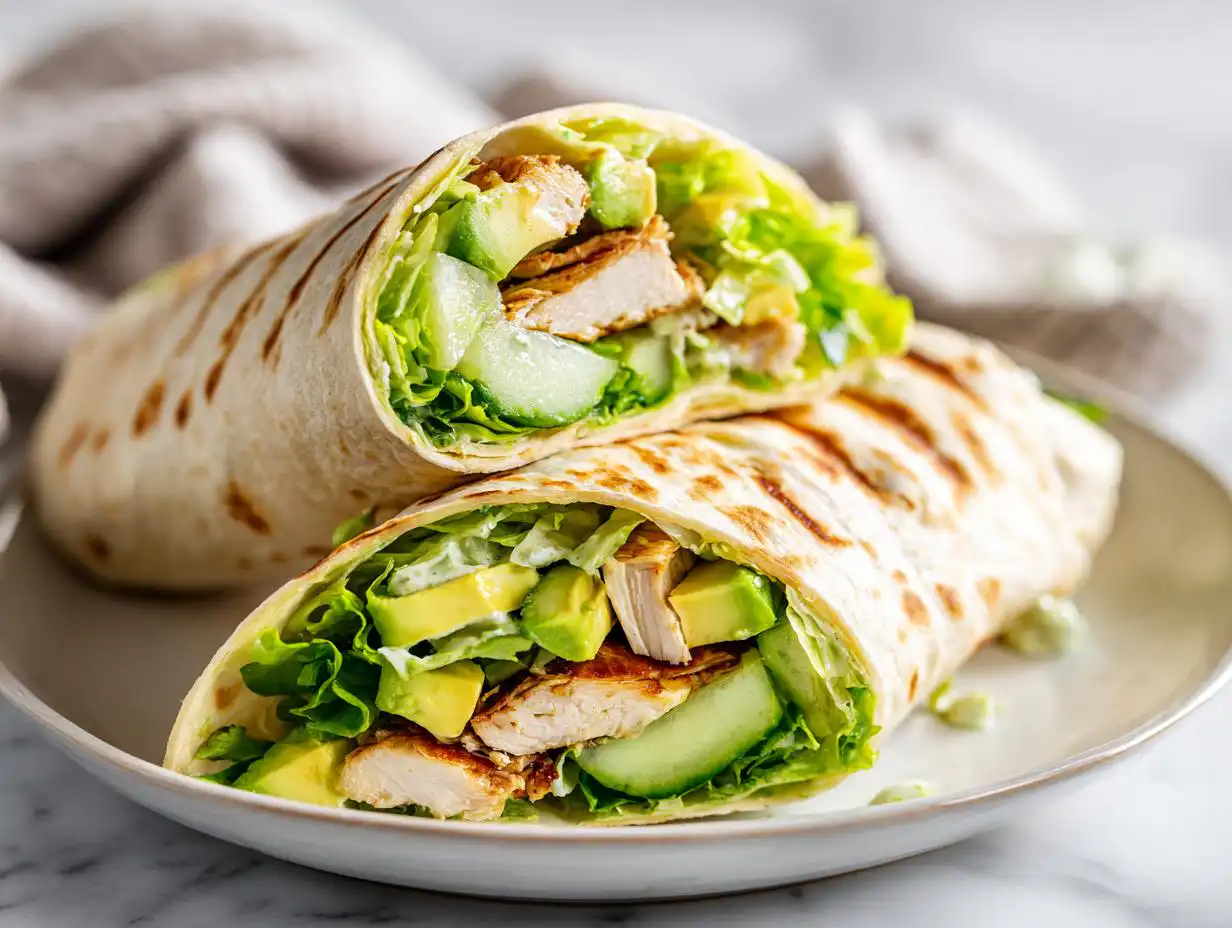
- One cup of grilled chicken, make sure it’s sliced super thin so you get even layers.
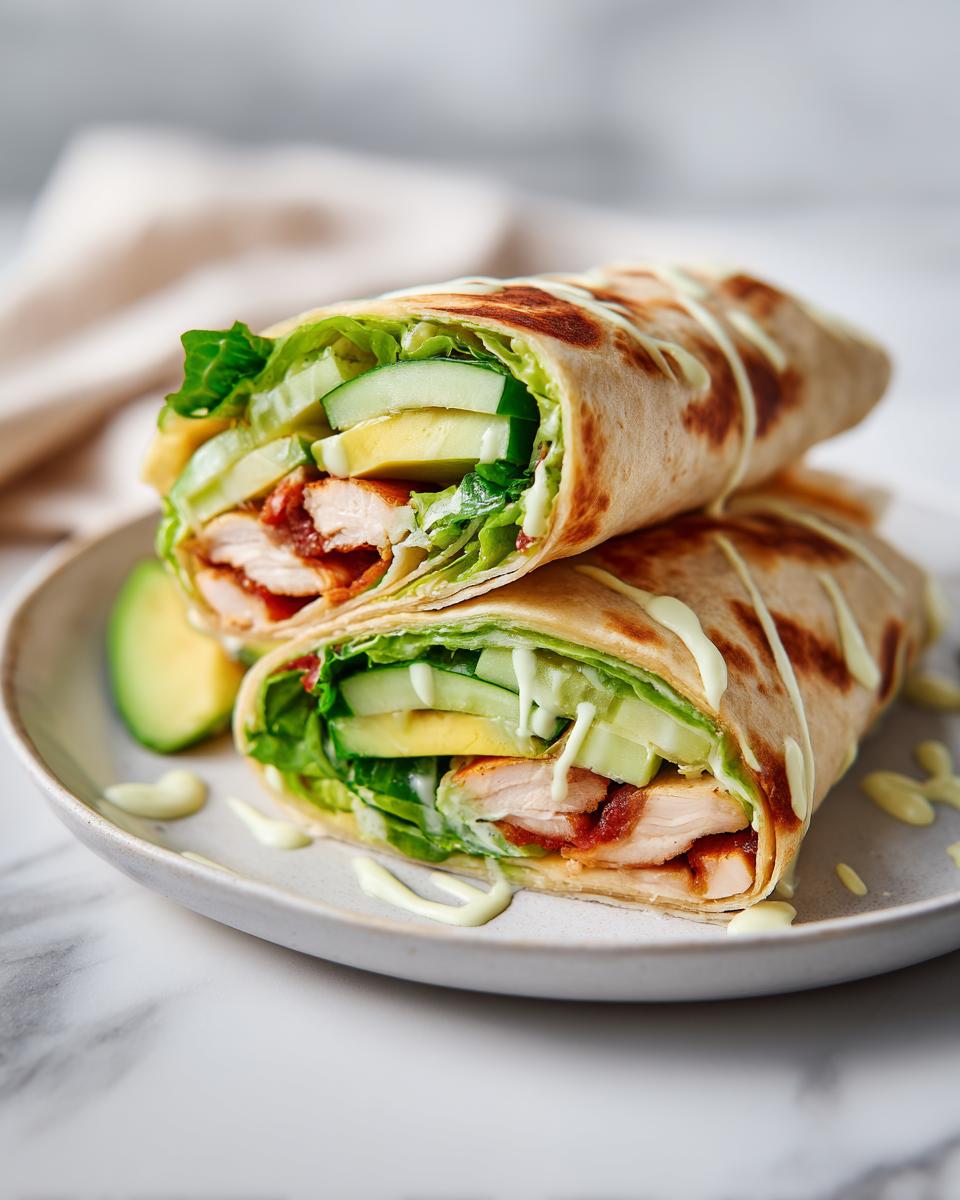
- Half an avocado, sliced right before you assemble—we don’t want browning!
- Half a cup of lettuce. I usually use romaine because it stays crisp a little longer than softer leaf varieties.
- Half a cup of cucumber, thinly sliced or chopped depending on what you prefer.
For the Flavorful Sauce
This sauce isn’t just mayo; it’s the glue that keeps your perfect Wrap Sandwich Picnic from falling apart on the drive over. It adds just the right tang and creaminess!
- A quarter cup of Greek yogurt. It’s zesty and thick—much better than regular dairy here.
- One tablespoon of fresh lemon juice.
- One teaspoon of garlic powder.
- Just a tiny pinch of salt to wake everything up.
Simple Steps to Assemble the Perfect Wrap Sandwich Picnic
Putting these wraps together is almost laughably fast, which is exactly what we need when the weather is gorgeous and we want to be outside! Remember, since these are going on an adventure, technique matters just as much as the ingredients. If you want ultimate structure for your meal, check out some variations here: high-protein chicken wrap recipe.
Preparing the Tortillas and Sauce
First things first: you have to warm those tortillas! I just pop mine in a dry skillet over medium heat for about 15 seconds per side, or even in the microwave for ten seconds wrapped in a damp paper towel. This makes them flexible so they won’t snap when you roll them. Next, it’s sauce time. In a small bowl, whisk together that Greek yogurt, lemon juice, garlic powder, and salt until it’s totally smooth. Don’t skip this—you want that flavor base covered edge-to-edge!
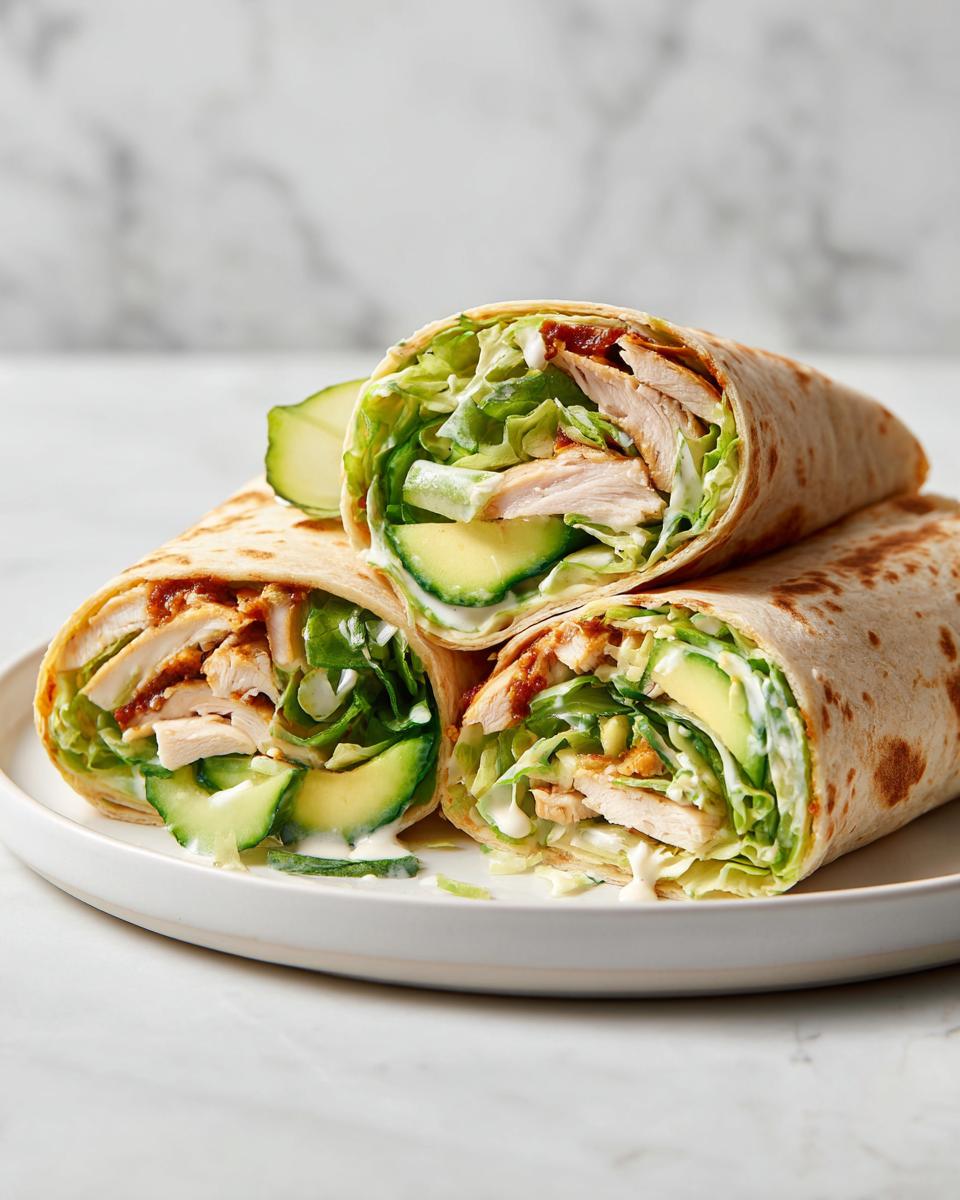
Layering and Rolling the Easy Picnic Wrap
Once sauced, you need to work quickly! Layer your thinly sliced chicken right down the middle layer. Then, tuck in your lettuce and cucumber slices. Don’t overstuff it, that’s beginner picnic mistake number one. Now for the secret to a tight roll: fold the two short sides of the tortilla in toward the middle first, almost covering your fillings. Then, roll it up firmly away from you, keeping that initial fold tight. This creates a really secure easy picnic wrap.
Resting and Packing Your Wrap Sandwich Picnic
This step is non-negotiable for travel food! After you roll them, lay the finished wraps seam-side down on a cutting board. Let them just rest there for about three minutes. Seriously, don’t skip this resting time! It lets the moisture from the sauce settle in and essentially “glues” the wrap together so it won’t unravel on the bumpy car ride. Finally, slice the Wrap Sandwich Picnic diagonally, wrap each half tightly in parchment paper or foil, and they are ready for the cooler!
Expert Tips for a Successful Picnic Chicken Wrap Sandwich
Getting these wraps packed correctly is half the battle when you’re planning a great outdoors lunch. If you want that perfect picnic chicken wrap sandwich to look as good when you eat it as when you packed it, you need to think about portability!
Here are my absolute must-do tips for picnic success:
- The Shred vs. Slice Decision: If you are using pre-cooked chicken, slightly shredding it instead of slicing it thinly helps things mesh better inside the wrap. Slices can sometimes create a bump that makes rolling difficult.
- Keep Wet Stuff Separate: If you are adding tomatoes (though I left them out of the main recipe because they are notorious moisture bombs!), always pat them completely dry with a paper towel first. Moisture equals sogginess!
- The Parchment Paper Hug: After slicing diagonally, wrap each piece tightly in parchment paper, then secure it with a rubber band or a strip of kitchen tape around the middle. This packaging keeps the cut sides protected and makes them easy to hand out without touching the filling. Check out some other great quick prep ideas here: avocado chickpea bowl recipe.
Ingredient Notes and Substitutions for Your Wrap Sandwich Picnic
You know how it goes—sometimes you’re missing one ingredient, or maybe you need to make a quick swap because someone in the family is picky! Luckily, this Wrap Sandwich Picnic recipe is really tough to mess up, even if you have to substitute something minor. I’ve made this so many times using whatever I had on hand in the fridge!
Keeping things practical is key when you’re packing for an outing. If you’re doing some weekly prep, you might be interested in my guide on low-carb chicken meal prep to have chicken ready to go!
What if I don’t have Greek Yogurt?
The Greek yogurt is there for its thickness, trust me. If you absolutely don’t have it, my first choice is using half cream cheese (softened!) and half sour cream to get that creamy texture back without adding too much liquid. You might need a tiny bit less lemon juice if you go that route, as cream cheese can be thicker.
If you’re aiming for lower fat, plain, full-fat mayonnaise works in a pinch, but you’ll lose that lovely tangy zip that the yogurt brings. Just measure it cup-for-cup if you need a direct swap.
Swapping Out the Greens and Avocado
Honestly, this recipe is very forgiving with the veggies, which is great for using up what’s left in the crisper drawer! If you’re out of cucumber, finely shredded carrot or even thinly sliced bell pepper works wonders—they add crunch that survives the travel time.
Avocado is wonderful, but it browns fast, right? If you’re making these further ahead than I usually do, you can skip the avocado entirely and substitute it with a spoonful of hummus spread thinly on the tortilla instead. Hummus acts as a great barrier against sogginess too, which is a huge win for any wrap sandwich picnic!
Serving Suggestions for Your Outdoor Meal
The wrap itself is pretty substantial, loaded with protein and fresh veggies, so you don’t need a huge spread to make it feel like a feast. When I pack these up, I always prioritize sides that require zero fuss and don’t need to stay piping hot or ice cold.
Here are my top three things that always go into the picnic basket alongside the wraps:
- Crunchy Kettle Chips: You can’t beat the salty snap of plain kettle-cooked chips. They travel perfectly fine in their bag, and the crunch is such a lovely contrast to the soft wrap texture. We usually grab a bag of sea salt & vinegar if we’re feeling adventurous!
- Simple Fruit Salad: I chop up melon, grapes, and some sturdy berries—strawberries or blueberries mainly. I mix them together right before I leave and toss them into a sealed container. It’s refreshing, hydrating, and feels fancy without any extra effort.
- Homemade Energy Bites: If I have an extra ten minutes the day before, I whip up a batch of my favorite energy bites. They are phenomenal picnic food—dense, sweet, and they travel perfectly in a small tin. They make a great small treat to follow the main course. You can find the recipe I use right here: healthy energy bites recipe.
Keep it simple, keep it packed tight, and the focus stays on enjoying the fresh air!
Storage and Reheating Instructions for the Wrap Sandwich Picnic
Because these are designed to be eaten miles from your kitchen, how you wrap them for storage is crucial! If you prep these for your Wrap Sandwich Picnic ahead of time, you have to manage moisture migration, or you’ll end up with a mushy mess by lunchtime.
My best advice is to absolutely avoid plastic wrap if you can. Plastic tends to trap condensation right against the tortilla, which accelerates sogginess. I learned that the hard way once when I packed them too early!
The Importance of Parchment and Foil Wrapping
Right after you roll your wraps tight and slice them diagonally, switch into packing mode. Take two sheets of parchment paper for each half-wrap. Lay one sheet down, place the cut wrap on it, and then wrap it snugly but not aggressively tight. You want to compress it just enough so that the ingredients don’t shift when you move the cooler.
If you’re wrapping them the day before, sometimes I’ll even go one layer further: I wrap the parchment-wrapped half tightly in a sheet of aluminum foil. The foil acts as a better moisture barrier than parchment alone, and it keeps the shape perfectly stable. This double wrap system is the secret to having a great lunch ready when you arrive. You can find more tips on making your whole lunch prep easier in my post about meal prep snack boxes that beat stress.
Keeping Things Cool for Picnic Safety
Since we are using grilled chicken and that yogurt-based sauce, food safety is a big deal, especially on a hot day. Always place your wrapped Wrap Sandwich Picnic pieces in a well-insulated cooler. Don’t just toss them in the top layer where the sun might hit the bag!
Make sure you line the bottom of your cooler with freezer packs. I usually nestle the wrapped sandwiches right next to a block of ice or a commercial freezer pack. We want them to stay chilled until serving time. If you are making these ahead, store them in the fridge, but aim to transfer them to the cooler within an hour of leaving your house.
A Quick Note on Reheating (If You Must!)
Let’s be real: these are best enjoyed chilled or at cool room temperature. They are designed to be light and refreshing for an outdoor meal!
But, if a surprise cold front hits your picnic spot and you *must* warm them up (maybe you swapped chicken for pulled pork?), you’ll want to unwrap them completely from the foil, maybe even give them a tiny spritz of water, and wrap them loosely in a paper towel before zapping them in a microwave. Honestly, though? Just eat them cold. That’s when they taste best!
Frequently Asked Questions About Making a Wrap Sandwich Picnic
I get asked all the time about making these ahead of time, especially when someone is planning a big outdoor event or trying to streamline their packing process. It’s totally doable, but you have to treat the tortilla wrap with a little respect so it doesn’t turn into mush before you get to the park!
Can I make this easy picnic wrap the night before?
You absolutely can prep most of the components the night before, but if you’re worried about sogginess, I’d hold off on the final assembly. The greens and the yogurt sauce are the main culprits here; they start to bleed moisture into the tortilla overnight.
If you assemble the easy picnic wrap the night before, use the double-wrapping trick (parchment then foil) and store it flat in the coldest part of your fridge. I would suggest giving it no more than a 12-hour head start. For best results, assemble everything right before you head out the door, but you can certainly chop your chicken and mix your sauce the day before to save yourself ten crucial minutes in the morning!
What is the best way to pack a picnic chicken wrap sandwich to keep it cold?
Keeping chicken safe is probably the most important part of packing anything for a day trip! You need an insulated cooler, period. Don’t just rely on a thin lunch bag.
My trick for the perfect temperature control for your picnic chicken wrap sandwich is layer packing. Put your stiffest items, like canned drinks or solid ice blocks, at the bottom. Then, place your wrapped sandwiches right next to or directly on top of a commercial ice pack—not just loose ice, as that melts and creates water.
I pack the wraps tightly together to help them insulate one another, and then I wrap a towel or some newspaper around that whole bundle before putting it in the cooler. That extra insulation keeps things frosty longer. It’s all about slowing down the heat transfer!
If you’re looking for general lunch packing strategies, you might find some helpful ideas in my general lunch category archive here: lunch ideas.
Estimated Nutritional Data for This Recipe
I have to preface this by saying I am a cook, not a certified nutritionist! I ran the ingredients through a couple of online calculators just to give you a basic idea of what you’re eating when you make these wraps. This data is purely an estimate for two wraps, assuming standard serving sizes for things like grilled chicken breast and full-fat Greek yogurt.
The final breakdown will totally depend on the brand of tortilla you buy—some are huge and fluffy, and others are thin and light. Since these are designed for quick packing, I focused on fresh ingredients, so expect a good balance of protein and healthy fats!
- Calories: Approximately 450–500 per wrap
- Total Fat: Around 18g to 22g per wrap (mostly from the avocado and yogurt)
- Protein: Roughly 30g per wrap (thanks to that chicken!)
- Carbohydrates: Generally 40g to 45g per wrap (depending heavily on tortilla size)
Keep in mind that if you swap the Greek yogurt for sour cream or use a low-carb tortilla, these numbers will shift quite a bit! This recipe is wonderfully flexible, but for an accurate count for your own dietary needs, you’ll always need to plug in your specific items.

Wrap Sandwich Picnic
Equipment
- Skillet or Microwave (for warming tortillas)
Ingredients
For the Wrap
- 2 large tortillas Use fresh tortillas to prevent cracking
- 1 cup grilled chicken sliced thin
- 1/2 avocado sliced
- 1/2 cup lettuce
- 1/2 cup cucumber
For the Sauce
- 1/4 cup Greek yogurt
- 1 tbsp lemon juice
- 1 tsp garlic powder
- 1 pinch salt
Instructions
- Warm tortillas slightly to prevent cracking.
- Mix the Greek yogurt, lemon juice, garlic powder, and salt to create the sauce. Spread the sauce evenly across the surface of each tortilla.
- Layer the sliced chicken and vegetables evenly over the sauce.
- Fold the sides of the tortilla inward and roll tightly to secure the filling.
- Let the wraps rest seam-side down for 2 to 3 minutes before slicing to help them maintain their shape.
- Slice the wraps diagonally and wrap each one in parchment paper for easy transport to your picnic.