
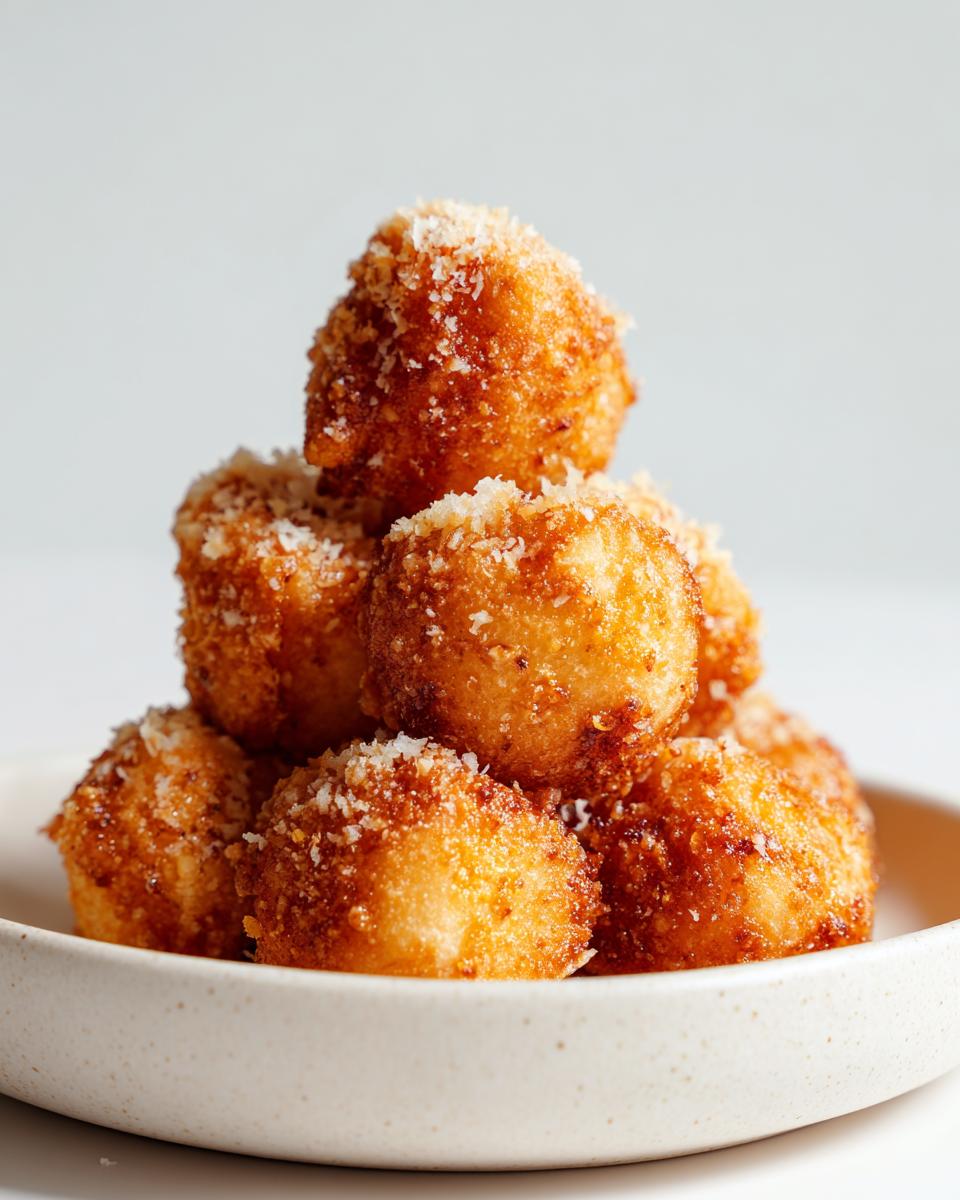
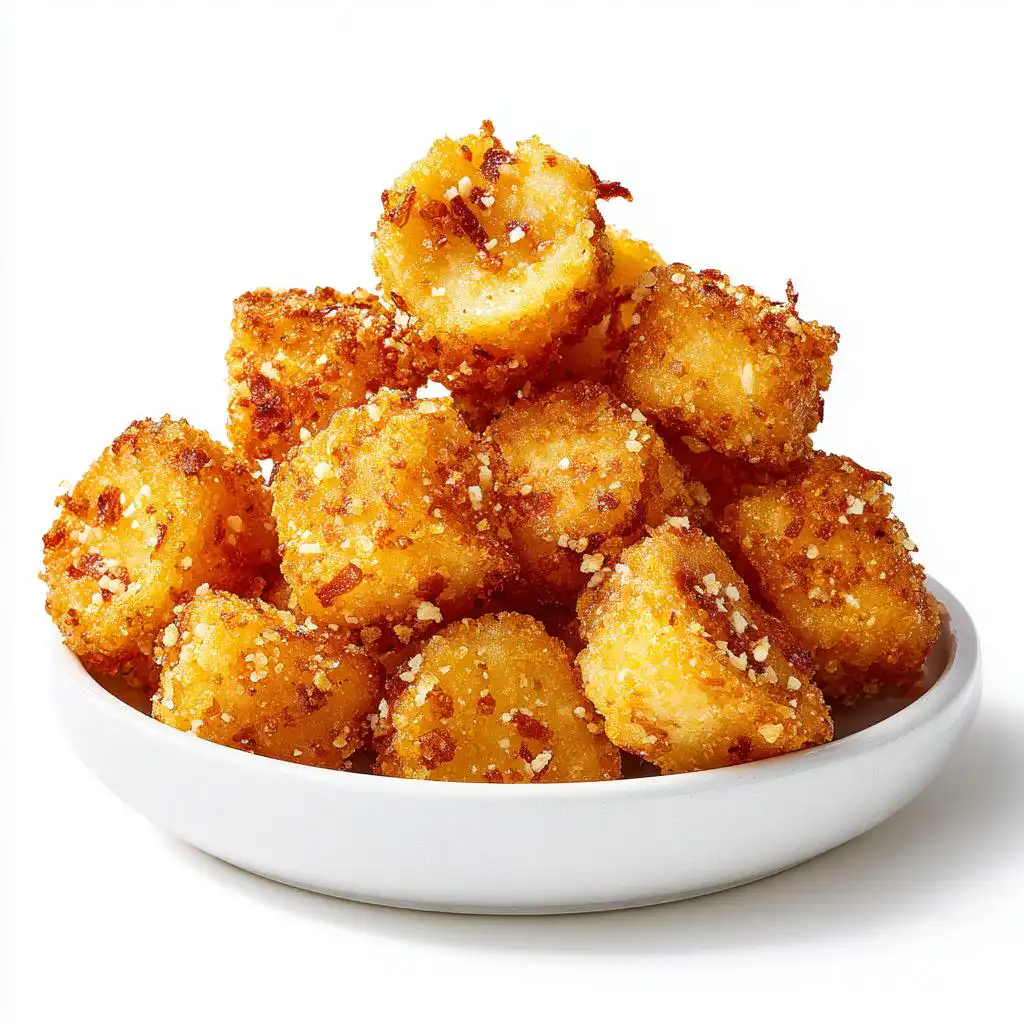
Oh my gosh, are you ready for a snack that will change your life? Forget sad chips and boring dips! We are talking about transforming regular refrigerated tortellini into something magical. These Fried Parmesan Tortellini Bites are everything you want in an appetizer: crispy, super cheesy, and seriously addictive. I remember the first time I pulled these out of the hot oil—the outside cracked perfectly, and the cheese center was actually steaming. Trust me, getting that perfect crunchy shell around that soft, warm inside is the real goal here, and I’ve cracked the code!
Why You Will Love These Fried Parmesan Tortellini Bites (Italian Party Dishes)
Honestly, these little guys fly off the plate faster than I can make them, and I truly think they deserve a spot at every single gathering you host this year. They check every box for a winning finger food!
- They are such simple homemade Italian Party Dishes—you start with store-bought tortellini, which cuts down on so much fuss!
- That incredible texture contrast—a shatteringly crisp shell guarding a gooey, cheesy interior—is just pure joy.
- They make the best Cookout Finger Foods because they hold up surprisingly well if you keep them warm, though they are definitely best fresh from the fryer.
- I love them because they use simple pantry dredging ingredients; no weird specialty flours required here, folks!
- You can whip up a huge batch surprisingly fast once you get into the rhythm of coating them.
- They are completely satisfying, even if you’re serving them alongside fancier appetizers like those Caprese Cucumber Bites I made last summer.
Essential Ingredients for Perfect Fried Parmesan Tortellini Bites
You can’t rush perfection, and that starts with having the right building blocks ready to go! The key to awesome Fried Parmesan Tortellini Bites is making sure the tortellini is completely cold before you even think about breading it—seriously, this is critical for texture! Don’t worry about finding anything crazy; this list uses mostly standard fridge and pantry items.
Here’s what you need gathered on your counter before you start dredging. I always lay everything out in the order I’ll use it:
- 10 oz cheese tortellini: Crucially, these must be cooked until just done (al dente) and then completely chilled! If they are warm, they’ll turn mushy when they hit the oil.
- 1 cup all-purpose flour: This is our first stop for coating—it helps everything else stick!
- 2 large eggs: Give these a good whisk until they’re frothy and totally blended.
- 1 cup breadcrumbs: I usually use plain ones, but Panko works if you want extra texture.
- 1/2 cup parmesan cheese: Make sure it’s finely grated; we’re mixing this right into the breadcrumbs.
- 1 tsp Italian seasoning: This is what gives that lovely, savory Italian flavor kick.
- Oil for frying: You need enough to reach about an inch or two deep in your pan.
And because no appetizer is truly complete without a dipping partner, make sure you have these ready for serving:
- Warm marinara sauce (the warmer the better for that temperature contrast!)
- Extra parmesan cheese for a final dusting right when they come out of the fryer.
Step-by-Step Guide to Making Fried Parmesan Tortellini Bites
Alright, this is where the magic happens! Making these babies look like professional, crispy appetizers is all about setting up your stations correctly. The absolute most important thing you need to remember from the last section—cool tortellini! If they’re warm, the coating slides right off, and we end up with oily, sad little pasta puddles instead of glorious Fried Parmesan Tortellini Bites. We want that crunch factor, so pay attention to the prep!
Preparing the Tortellini and Dredging Stations
First thing’s first: make sure those tortellini are fully cooled down after boiling. Seriously, stick them in the fridge for a bit if you need to! Now, set up three shallow bowls, side by side, for our dredging process. In the first bowl, put your flour. In the second bowl, pour your beaten eggs. In the third and final bowl, mix your breadcrumbs with the grated parmesan and the Italian seasoning—this is where the flavor really concentrates!
Take a cooled tortellini and roll it gently in the flour first. Shake off the excess! Next, dip it completely into the egg wash. Finally, press that eggy tortellini firmly into the breadcrumb mix. Really press that coating on so it adheres well; this sealed crust is what locks in the gooey center.
Frying Technique for Crispy Fried Parmesan Tortellini Bites
Time to get the oil hot! You’re aiming for about 180°C, which is around 356°F. If you don’t have a thermometer (I forget mine all the time!), you can drop a tiny pinch of breadcrumb mixture in—if it sizzles immediately and turns golden in about 30 seconds, you’re good to go! Don’t overcrowd your skillet like I almost did the first time; you need space for the oil to keep that temperature steady.
Drop those coated bites in carefully—remember, the hot oil means splatter, so stand back a bit! They frankly only need about 2 to 3 minutes total. Look for that perfect golden-brown color all over. Once they look perfectly crispy, scoop them out quickly with a slotted spoon and get them straight onto paper towels to drain. That quick drain means they stay crispy, just like my famous homemade mozzarella sticks!
Tips for Success When Making Fried Parmesan Tortellini Bites
I’ve learned a thing or two after making batches of these Fried Parmesan Tortellini Bites for every game night under the sun. If you want truly professional, crispy results every single time, you need to pay attention to a couple of simple checks!
Here are my biggest secrets—things that stop you from ending up with a soggy mess or having your beautiful coating peel right off into the fryer:
- The Chill Factor is Not Optional: I cannot stress this enough: the tortellini MUST be cold. If they are freezer-cold, even better! Cold pasta meets hot oil creates steam that flashes off quickly, giving you that perfect, sealed crust. Warm pasta sweats, the coating softens, and boom—soggy mess.
- Press, Don’t Just Roll: When you are in that final breadcrumb station, don’t just gently roll the egg-covered tortellini around. You want to physically press the breadcrumb mixture onto the egg. Get the parmesan and seasoning really embedded in there. Think of it like giving them a little hug to make sure they wear their crunchy armor tightly!
- Oil Temperature Discipline: If the oil isn’t hot enough, the crust absorbs too much fat before it crisps, which makes them greasy. If it’s too hot, the outside burns before the center gets warm. Stick to that 350-360°F range. If you’re looking for more details on precision heat, I found some fantastic general advice over at my favorite baking tips page—the temperature rules are similar!
- Drain Immediately and Thoroughly: As soon as they come out, they need to hit paper towels or a wire rack set over a sheet pan. Don’t let them pile up on each other, either; spread them out if you can. Piling them traps steam, and that steam is the enemy of crispiness!
Making Fried Parmesan Tortellini Bites Ahead of Time (Easy Make Ahead Appetizers)
I know, I know! When you’re planning a big party or trying to get ready for a summer cookout, who has time to fry things right before guests arrive? That’s why these are fantastic Easy Make Ahead Appetizers. The key is honestly in how you prep them before they hit the oil. You absolutely cannot fry them all the way through ahead of time and expect them to be good later—no amount of reheating will bring back that fresh-from-the-fryer crunch.
But you CAN do the coating prep well ahead of time! This saves you so much time when everyone is walking in the door. Make sure you follow these steps carefully:
- Prep and Coat Everything: Follow the dredging steps exactly—flour, egg, breadcrumbs. Get every single tortellini perfectly coated and laid out on a baking sheet lined with parchment paper.
- Freeze Uncooked: Once they are all coated, put that whole baking sheet into the freezer flat for about an hour until they are rock solid. This stops them from sticking together!
- Bag Them Up: Once frozen solid, transfer them into a large, heavy-duty freezer bag. Squeeze out as much air as you can. They will keep beautifully like this for up to a month!
When you are ready to serve your Fried Parmesan Tortellini Bites, you don’t even need to thaw them! I pulled out a bag last week for a spontaneous get-together, and it was so easy. Just heat your oil up to that perfect 180°C, and fry them straight from frozen. You will need to add about 1 to 2 minutes extra cooking time since they are frozen solid, but they come out wonderfully crispy.
If you’re looking for other ideas for party prep that lets you relax on the big day, check out some of my favorite easy make-ahead appetizers. Having tasks delegated to different days is the secret to enjoying your own parties!
Serving Suggestions for Your Fried Parmesan Tortellini Bites
Okay, so you’ve nailed the frying, they are golden, they are crispy, and everyone is already fighting over the first batch. While that warm marinara sauce is absolutely classic and totally required, we can definitely jazz up the dipping situation for your next big shindig! These little bites are so sturdy, they actually make fantastic Cookout Finger Foods because they travel well from inside the kitchen to the backyard patio table without falling apart.
Don’t just settle for one dip! Variety makes any spread look amazing, and frankly, sometimes you want something cooling to contrast that hot, savory crunch. Here are a few ways I like to present my Fried Parmesan Tortellini Bites:
- The Tangy Ranch Remix: Ditch the traditional Italian herbs for a second and serve them with a really thick, homemade ranch dressing. The cool buttermilk and fresh dill are unbelievable with the salty parmesan breading.
- Spicy Kick: If your crowd likes things heating up, a spicy vodka sauce or even a swirl of Calabrian chili paste mixed into your mayo base offers a fantastic slow burn.
- Pesto Perfection: This is my lighter, fresher option. A bright, homemade pesto (or a really good quality store-bought one) drizzled over the top right as they come out of the oil is divine. The basil is so complementary!

If you are trying to build a whole party spread, don’t forget to think about portability! These work so well alongside things you can set out on a big platter. If you’re looking for inspiration on how to present a big array of snacks that look beautiful but are still simple, check out my guide on making a fantastic easy food board. These tortellini bites are always the star attraction on any sharing platter!
Storage and Reheating Fried Parmesan Tortellini Bites
So, maybe you actually made it through the plate without eating every single batch—good for you! Or maybe you just ended up with a giant pile of leftovers, which is also fantastic because these keep well, provided you treat them right. Storing your beautiful Fried Parmesan Tortellini Bites incorrectly is the fastest way to turn that crispy dream into a sad, floppy memory, and we absolutely can’t have that on my watch!
The main enemy here is steam, which is why the microwave is completely off-limits. I know it’s fast, but the microwave turns everything that was crispy instantly soggy. It just redistributes that moisture right back into the breading, and honestly, it’s a tragedy to witness.
How to Store Your Leftover Tortellini Bites
Storing these properly for later snacking is super simple. Once the bites have cooled down completely to room temperature—and I mean fully cooled, not even slightly warm—you need to seal the air out! Pop them into an airtight container. If you’re worried about them sticking together, you can use parchment paper between the layers, but generally, if they are fully cooled, they won’t fuse too badly.
They generally stay great in the fridge for about three days. After that, they start to dry out a little, even sealed up tight. If you know you won’t eat them within three days, I highly recommend freezing them instead!
The Best Way to Reheat and Bring Back the Crunch
Reheating is the moment that restores true faith in leftovers! For these Fried Parmesan Tortellini Bites, we need dry heat circulation. Forget the microwave entirely; we are going for oven crispness or that air fryer magic!
Oven Method: Preheat your oven to a medium temperature, around 375°F (190°C). Spread the cold or room-temperature bites out on a baking sheet in a single layer—don’t overlap them! Bake them for about 8 to 10 minutes, giving them a quick toss halfway through. You’ll know they are perfect when the outside just starts to feel firm and golden again.
Air Fryer Method (My Favorite): If you have an air fryer, this is your superhero tool! A quick 4 to 5 minutes at 370°F (185°C) usually does the trick. Since the air fryer circulates heat so intensely, it blasts that crispness right back without drying out the cheesy filling. A quick spritz of cooking spray right before air frying can even help revive any dull spots on the breading!
Frequently Asked Questions About Fried Parmesan Tortellini Bites
I get so many questions whenever I share these recipes, and that’s totally normal! When you’re making something this fun and delicious, you want to make sure you get it right. Since these are one of my favorite Easy Appetizer Recipes, I’ve gathered the most common things folks ask me about getting these Fried Parmesan Tortellini Bites perfect!
Can I bake these instead of frying?
Oh, I know baking sounds healthier, and yes, you totally *can* bake them! However, I have to be honest with you: they won’t achieve that shatteringly crispy texture that makes them famous. If you must bake, preheat your oven to 400°F (200°C). Spray both sides of the coated tortellini generously with cooking spray—don’t just mist, really coat them! Bake for about 15-20 minutes, flipping halfway through, until golden brown. They will be crispier than just tossing them in flour, but they still won’t have that deep, rich flavor that frying brings.
What kind of tortellini works best for this recipe?
For the best flavor payoff and texture, you absolutely want to use refrigerated cheese tortellini that is pre-cooked, or you cook fresh ones until just al dente. The dough holds up the best during the coating and frying process. Frozen tortellini is a bit trickier because it releases a lot of water as it thaws, which can make your coating soggy. If you use frozen, you *must* thaw and pat them completely dry before cooking them according to package directions, and then chill them thoroughly!
Can I use Panko instead of regular breadcrumbs?
Yes, and I highly recommend it if you can find them! Panko breadcrumbs, the Japanese style, are flakier and coarser than standard dried breadcrumbs. When they fry, they puff up a bit more, giving you an intensely crunchy bite. If you use Panko, you might want to reduce the amount of added parmesan slightly, or just make sure you press them on really well so they adhere nicely to the egg wash. They make these Fried Parmesan Tortellini Bites extra special!
Why is my coating falling off during frying?
This is usually a temperature issue, honey! If the oil isn’t hot enough, the coating has time to absorb oil before it sets, making it lose its grip. The tortellini needs to hit that hot oil—180°C or 356°F—and immediately start sealing up. Also, make sure you are pressing that final breadcrumb coating on firmly after the egg wash. If you’re looking for more deep-dive tips on making appetizers that always stay together, you might want to check out the general tips I gathered here: my easy appetizer guide.
Author Information and Next Steps
Whew! We made it through the delicious journey of making the crispiest, cheesiest snack known to man. I always love talking about food, and sharing my secrets for the perfect Fried Parmesan Tortellini Bites with you is seriously the best part of my week. If you want to know more about my philosophy in the kitchen and see some other fun projects I’ve worked on, feel free to check out my About Page!
Now, the only thing left to do is get cooking! I really, really want to know how these turned out for you. Did they stay crispy? Which dipping sauce did your family grab first? Don’t be a stranger! Leave me a star rating right below, or better yet, snap a picture of your golden bites and tag me on social media. Happy frying, friends!
Fried Parmesan Tortellini Bites
Equipment
- Skillet or deep fryer
- Paper towels
Ingredients
- 10 oz cheese tortellini cooked and cooled
- 1 cup breadcrumbs
- 1/2 cup parmesan cheese grated
- 2 eggs beaten
- 1 cup flour
- 1 tsp Italian seasoning
For Serving
- warm marinara for dipping
- extra parmesan for topping
Instructions
- Cook the tortellini until just al dente. Cool the tortellini completely to prevent them from breaking during coating and frying.
- Set up your dredging stations: one bowl with flour, one bowl with the beaten eggs, and a third bowl with the breadcrumbs mixed with the grated parmesan cheese and Italian seasoning.
- Coat each cooled tortellini first in flour, then dip it into the egg mixture, and finally press it into the breadcrumb-parmesan mixture until fully coated.
- Fry the coated tortellini in hot oil at 180°C (356°F) until they are golden brown and crispy, which takes about 2 to 3 minutes.
- Remove the tortellini bites from the oil and drain them on paper towels. The final texture should be crunchy outside with a warm, cheesy center.
- Serve the bites immediately with warm marinara sauce for dipping and a sprinkle of extra parmesan cheese.