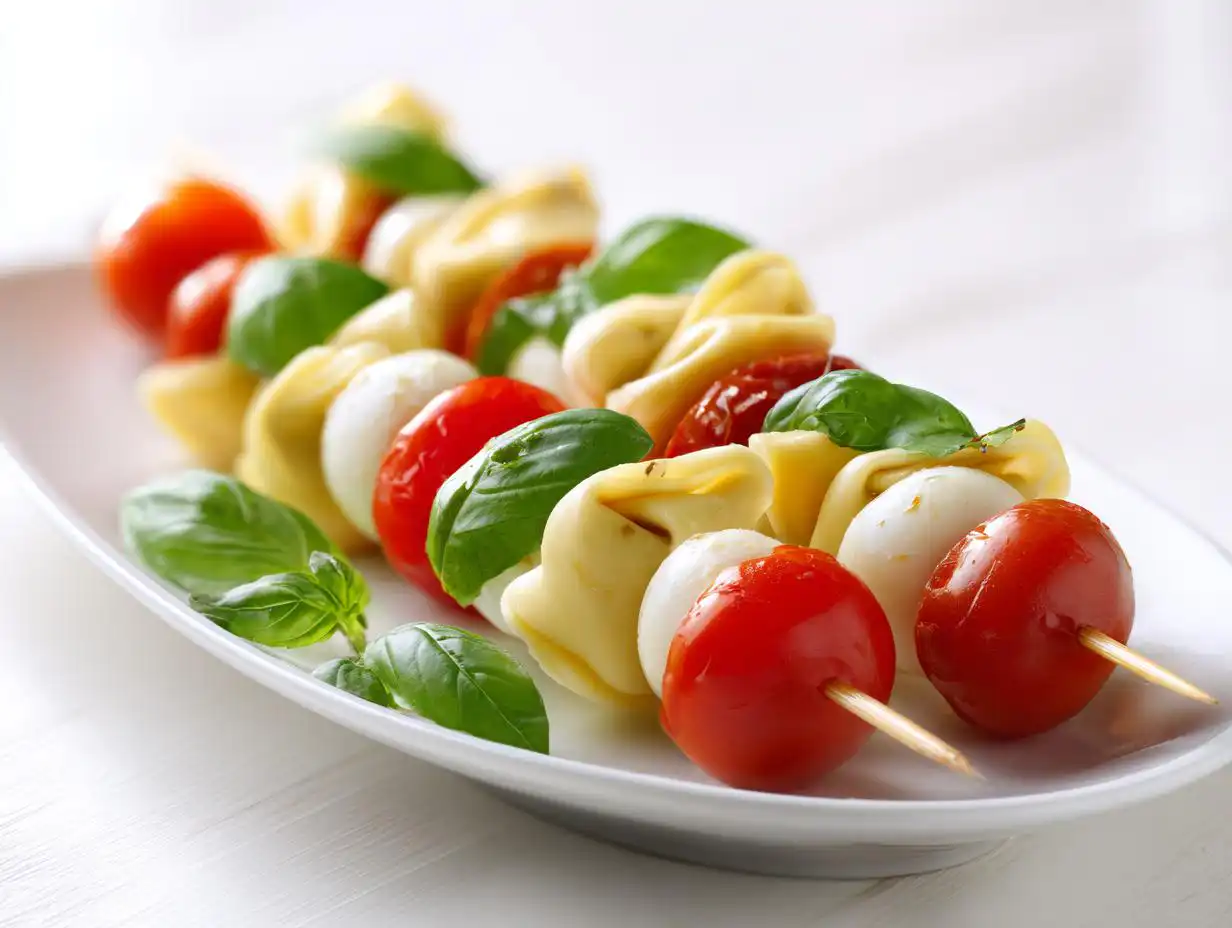
When you’re planning a party, the food should be simple, fun, and maybe a little bit messy in the best way possible, right? Forget standing over a hot stove all night! That’s why I immediately fell in love with these **Cheesy Tortellini Kabobs**. Seriously, combining cheese and pasta on skewers made this dish so much fun to serve at my cousin’s graduation party last summer—everyone went nuts for them!
We’re talking about the ultimate **Cookout Finger Foods**. They hit that perfect trifecta: they’re easy to prep way ahead of time, they taste like you spent hours on them (but you didn’t!), and they have that irresistible Italian flavor thanks to the fresh basil and seasoning.
If you need a guaranteed crowd-pleaser that looks impressive but takes almost no active time, you’ve found your winner. These skewers are practically foolproof, and I’m so excited to share the simple secret behind them. This recipe comes to us from Grace Williams, a fantastic contributor here at Recipes by Betty.
Why You Will Love Making Cheesy Tortellini Kabobs
Listen, if you’re anything like me, you want appetizers that shout “effortlessly delicious!” These kabobs are famous in my little cooking circle because they just tick all the right boxes. They really shine as some of the best Easy Make Ahead Appetizers you could ask for. You truly can’t go wrong!
- They are genuine party food! Serving things on a stick just automatically makes people way happier, don’t you think?
- Minimal actual cooking time—you just boil the pasta briefly, and that’s the only heat requirement!
- They travel well. If you’re bringing these to a potluck or a friend’s house, they hold up beautifully in the cooler.
- The flavor profile is amazing: creamy cheese, bright tomato, and that fresh pop of basil. It’s Italian comfort food, but portable.
- You can assemble these the morning of your party, whisk them into the fridge, and forget about them until it’s time to serve. That’s a win for the host!
- They are naturally gluten-free friendly if you swap out the little pasta parcels for something else, though frankly, the tortellini are the star!
Essential Ingredients for Perfect Cheesy Tortellini Kabobs
Okay, this recipe is almost laughably simple ingredient-wise. That’s what I love about it! When you keep the ingredient list short, you want to make sure every single thing you use is high quality. Trust me, using great tomatoes makes a world of difference when they are sitting right next to that creamy cheese.
Before you even start, make sure everything is ready to go. These are mostly assembly, so having your pasta cooked and cooled before you start skewering is essential. You can check out some great tips in my piece about other fresh appetizer ideas, too, but here is exactly what you need:
- 10 oz Cheese tortellini, cooked
- 1 cup Mozzarella balls, (grab the little ones, if you can find them—they are perfect for skewers!)
- Cherry tomatoes
- Basil leaves
- 2 tbsp Olive oil
- 1 tsp Italian seasoning
Seriously, that’s it! No complicated dressing, no sauces to simmer. Just good, fresh components ready to be threaded. It’s such a relief when a party food requires only basic pantry staples and a trip to the produce aisle.
Equipment Needed for Your Cheesy Tortellini Kabobs
You don’t need a whole arsenal of fancy gadgets for this appetizer, which is another huge plus when you’re trying to keep the kitchen clean before guests arrive! Like I said, this recipe is mostly assembly, but you do need two main things to make it happen.
First up, you absolutely must have a small pot. This is just for boiling your cheese tortellini until they are perfectly tender. You want them cooked, but not mushy, since they’ll be handled a little bit more later on.
The Right Skewers Make All the Difference
The star of the show here isn’t the cheese or the pasta, it’s the skewer itself! You’ll need skewers to turn this pasta salad into portable party food. I prefer the standard wooden ones you buy at the grocery store—the 6-inch size is usually perfect for these ingredients.
A practical tip: If you are using wooden skewers, please remember to soak them in water for at least 20 minutes before you start building. If you skip this, they might burn or snap right when you try to grill them or when they get too hot on a serving tray. Don’t skip the soak! It’s a tiny step but saves you a load of frustration later on when you’re trying to arrange these gorgeous picnic-ready appetizers.
Step-by-Step Instructions for Cheesy Tortellini Kabobs
Getting these ready is my favorite part because it moves so fast! Don’t worry; we’re staying well under the 25 total minutes required for this dish, even accounting for the critical chilling time. Remember that the prep time is about 15 minutes, and the actual cooking is just about 10 minutes spent boiling water. Follow these steps exactly, and you’ll have stunning, ready-to-serve skewers.
Preparing the Tortellini Base
First things first, we have to get that pasta ready. Pop your cheese tortellini into a pot of lightly salted boiling water according to package directions, or until they float and are tender. You’re looking for that perfect ‘al dente’ texture, not something that’s going to turn to mush when you skewer it. You can brush up on my essential rules for cooking pasta perfectly if you’re feeling nervous about that step!
Now, here is the most important part of this first step: Drain the pasta well and immediately transfer it to a baking sheet or a shallow dish. You absolutely must let these cool completely—almost to room temperature, if not totally chilled—before you start poking holes in them with the skewers. If they are warm, they’ll stick together and slide right off when handled!
Assembling the Cheesy Tortellini Kabobs
Once that tortellini is nice and cool, it’s time for the fun, artistic part! Grab those soaked skewers and start alternating your main ingredients. I like to make a little pattern just to make them look extra good on the platter.
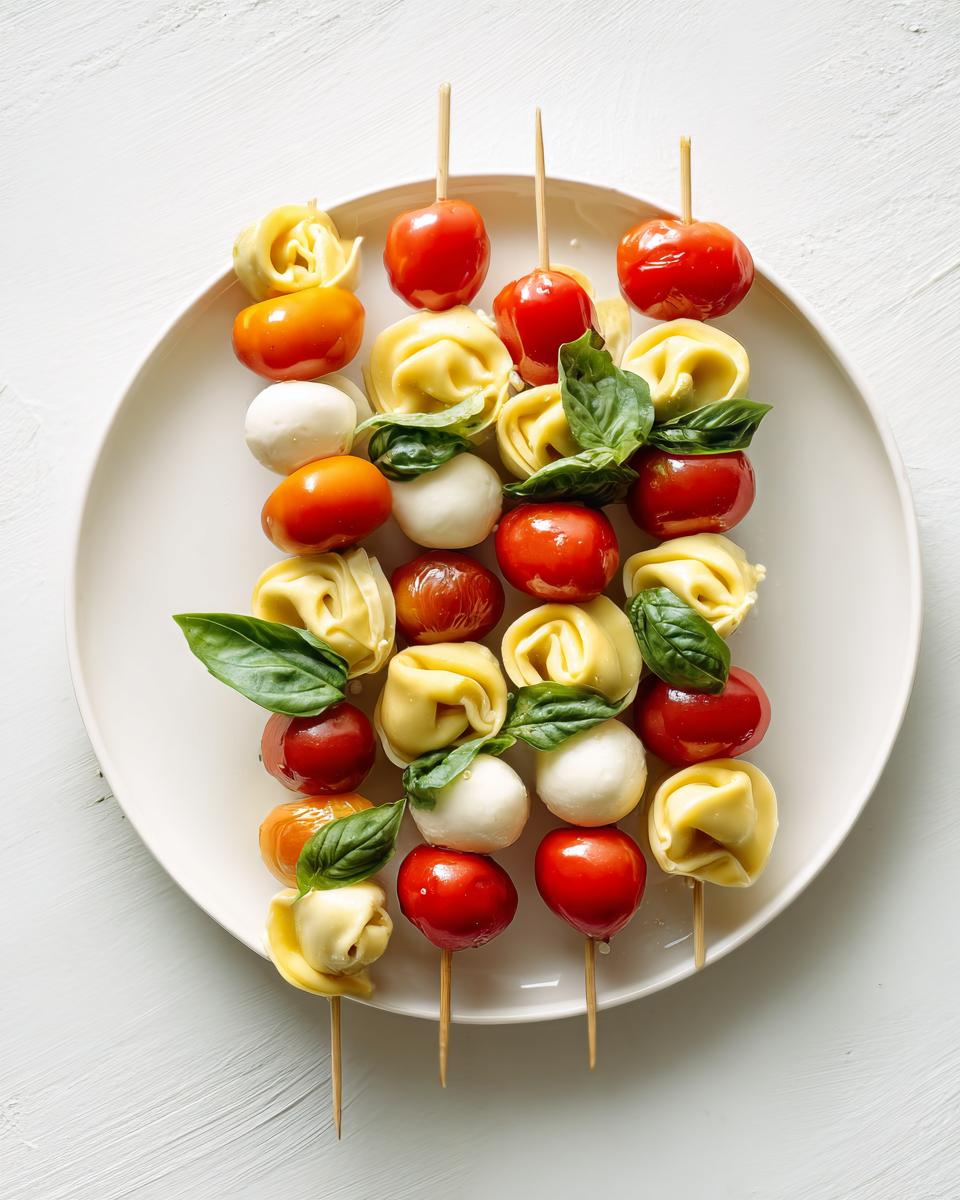
My go-to order is: one tortellini, followed by a little mozzarella ball, then a bright red cherry tomato, and finally, a gorgeous, fresh basil leaf tucked in just behind the tomato. Then, repeat it! You can usually fit three full sets (tortellini, cheese, tomato, basil) onto a smaller skewer before it gets too heavy or tipsy.
Seasoning and Chilling the Cookout Finger Foods
We are almost done! This step is what takes our simple skewers and makes them taste like they came from a fancy Italian caterer. In a small bowl, whisk together your 2 tablespoons of olive oil and 1 teaspoon of Italian seasoning. You just want a light coating, nothing heavy enough to make the pasta slippery.
Gently brush this seasoned oil all over your assembled **Cookout Finger Foods**. Don’t be shy, but don’t drench them either! Then, the final magic step: Transfer all the finished kabobs to a serving platter (I like to stand them up vertically if possible) and cover them loosely with plastic wrap. Pop them in the fridge to chill for at least 30 minutes, or up to four hours. This chilling time really helps the flavors marry and ensures these appetizers are firm and easy to handle when party time hits!

Tips for Making the Best Cheesy Tortellini Kabobs
Even though this recipe is incredibly simple, a few little secrets can take your kabobs from good to absolute showstoppers. I’ve learned that when you’re dealing with fresh ingredients that aren’t cooked much, the quality really matters. If you want the best results and want everyone asking for your recipe, pay attention to these small details!
Selecting the Right Mozzarella
The cheese is half the battle here! You need to use small mozzarella balls, often called “ciliegine” or “pearls.” Don’t try to cut up a big block of supermarket mozzarella unless you absolutely have to. Why? Because the pre-cut kind sweats and gets kinda slimy once it warms up, and trust me, that’s not a texture you want next to your tender pasta.
The small, fresh mozzarella balls are packed in water, and that keeps them soft and creamy. When you skewer them, they look perfectly portioned. If you can only find those pearls packed in brine, just drain them really well and pat them slightly dry with a paper towel before they hit the skewer. That little bit of dryness helps them stick to the basil better!
Don’t Overcook That Pasta!
This is where people go wrong time and time again. You are boiling the tortellini only to cool it down and handle it later. If you cook it fully to package directions for a main dish, it’s going to be too soft, and as soon as you thread it, it will tear or squish. I’ve ruined a whole batch by getting distracted!
Aim for about two minutes less than what the package suggests. It should feel slightly underdone when you pull a piece out, because it will soften *just a touch* more as it cools for that crucial chilling period. I always recommend checking out my thoughts on perfecting cooking techniques because these small timing details matter everywhere in the kitchen.
Boosting the Make-Ahead Flavor
Since we insist on chilling these for hours to let them firm up, why not use that time to really infuse that Italian flavor? If you’re making these far in advance, consider soaking your basil leaves in the olive oil mixture for about 15 minutes *before* you brush it on. The delicate basil will release some of its essential oils right into the oil.
Another sneaky trick if you’re serving these at a big summer bash? Add a tiny splash of good quality balsamic vinegar—just a few drops—to your oil and seasoning mix. It adds that beautiful, slightly tangy depth that complements the tomatoes perfectly. Just remember, if you add vinegar, you must serve them within the first few hours, as the acid can start to break down the basil faster.
Serving Suggestions for These Italian Party Dishes
These little bites are spectacular all on their own, truly! But when you are putting together a spread for a big gathering, you need them to mingle beautifully with other things on the table. These **Italian Party Dishes** look fantastic when presented thoughtfully. Presentation is everything when you’re trying to impress, even if the food is super simple.
Presentation Ideas That Pop
Since these are already on sticks, you have a built-in presentation advantage! Don’t just lay them flat on a boring sheet pan. Grab a tall ceramic pitcher or a pretty mason jar. You can actually arrange the skewers so they stand up vertically, creating a stunning centerpiece on your appetizer table. It makes them look like little edible bouquets!
I also love filling the bottom of the serving container with something decorative and edible. Crushed ice works to keep them cold, but if you’re serving indoors, try laying a bed of fresh arugula or even some contrasting roasted red peppers at the bottom. It catches the eye and adds more color!
What to Pair with Your Kabobs
Because the flavors here are so fresh—cheese, tomato, basil—they pair wonderfully with complementary dips that add richness or punch. The absolute best thing you can serve these next to is a creamy, garlicky dip. Think about serving them next to a fabulous Bruschetta Dip. If the dip is slightly chunky, people can quickly dip the bottom of the kabob right into it for an extra flavor boost!
If you are serving these alongside other **Italian Party Dishes**, keep the seasoning profiles similar. Maybe you have a plate of cured meats, some marinated olives, or perhaps some crusty Italian bread with olive oil nearby. The little pearls of mozzarella absorb just enough olive oil from our seasoning brush that they don’t need a heavy sauce, but a little pool of good quality olive oil on the side for dipping the exposed pasta never hurts!
Make-Ahead and Storage for Cheesy Tortellini Kabobs
I preach about appetizers that double as helpers, and these are the poster children for that philosophy! Honestly, they get *better* when you make them ahead of time. That chilling period we talked about? That’s mandatory storage time, people! You can totally prepare these at your leisure, which is why they are legendary among hosts who want to enjoy their own parties.
You can safely assemble these babies entirely and keep them tucked away in the fridge for up to four hours before you plan to serve them. Any longer than that, and the basil starts to get a little sad looking, even though the pasta and cheese are totally fine. Always use a very tightly sealed container or wrap that platter really well with plastic wrap to stop the tortellini from drying out or absorbing any funky fridge odors.
Can I assemble these the day before?
If you’re hosting a huge event like a game-day feast or a big family gathering, prepping the day before sounds amazing, I know! For the absolute freshest look, I’d suggest only cooking the tortellini the day before and keeping them stored in an airtight container in the fridge. Then, on party day, pull them out, let them warm up for about 15 minutes on the counter, and then assemble the skewers.
If you insist on assembling them the night before, they will still be totally edible the next day! Just know that the basil leaves might get a little wilted or dark where they touch the plastic wrap. If this happens, don’t panic! Just pull off the sad basil leaves right before you serve them and replace them with a few fresh ones you grabbed over the counter. It seems like extra work, but a fresh basil garnish makes them look brand new for your beautiful picnic spreads!
What about leftovers?
Well, I rarely have leftovers of these, but when I do, the storage is straightforward. Eat them within 1-2 days max. Because the tortellini is cooked and the mozzarella is fresh, you don’t want to leave them sitting around for too long. Store any remaining kabobs in a sealed container in the refrigerator.
Truthfully, they taste best cold or at room temperature. If you try to zap these in the microwave to heat them up? Don’t do it! The mozzarella will turn into chewy rubber bands, and the tomatoes will get all weird and watery. Just pull them out about 20 minutes before you want to snack on the leftovers. They are really meant to be served chilled, which keeps them tasting bright!
Frequently Asked Questions About Cheesy Tortellini Kabobs
I get so many questions about these skewers after I post them online! They are so simple that people worry they must be missing a trick. Nope! They are just that easy, but I totally get wanting extra assurance, especially when entertaining. Here are the top things readers always ask me about making great **Italian Party Dishes**.
Can I grill these Cheesy Tortellini Kabobs?
That is a fantastic question for summer parties! If you want to warm them up or give them a slight char, yes, you absolutely can grill them! Since the tortellini are already cooked, you aren’t cooking them through; you’re just warming them up lightly. Make sure your grill grates are super clean and well-oiled so nothing sticks.
When grilling, stick to low heat, and only leave them on for about 1 minute per side. Watch them like a hawk! You just want the mozzarella to get slightly melty, not to explode or turn brown. Pull them off the heat *before* the cheese starts dripping!
What kind of cheese works best besides mozzarella pearls?
While I stand by the small fresh mozzarella balls because they look so elegant, you can totally swap them out if you can’t find them. The key is choosing a cheese that holds its shape well when slightly warm or cold. I highly recommend using small cubes of provolone cheese if you want something firmer.
Another option that tastes amazing—and this is slightly different for flavor—is using small balls of sharp, aged white cheddar. Cheddar brings a bit more tang that compliments the tomato beautifully. For some seriously deep flavor notes, maybe even try a smoked scamorza, cut into cubes, but check out my thoughts on choosing the best cheese for structure first!
How can I turn these into heartier Cookout Finger Foods by adding meat?
Oh, adding pepperoni or salami transforms these into a super satisfying mini-meal! If you want to include meat, you need something firm enough to thread onto the skewer without flopping off. Small cubes of hard salami or little folded-over slices of prosciutto work like a dream.
If you use pepperoni, try slicing the small “cup and char” style ones in half—they look fantastic folded in half, almost like a flower. Just remember that adding meat means you might want to skip the Italian seasoning drizzle, as pepperoni usually brings plenty of its own salt and spice to the party!
Do I have to use fresh basil, or can I use dried herbs?
You absolutely should use fresh basil! It’s not optional if you want that classic Italian flavor pop we’re aiming for. Dried herbs just don’t have the same aromatic, bright lift, especially when paired with the mild mozzarella and the acidic tomato. When you bite into that skewer, you need that burst of fresh herbal flavor to cut through the richness of the cheese and pasta.
If fresh basil is simply impossible to find (maybe it’s deep winter), your next best bet would be adding a tiny piece of jarred, sun-dried tomato (the kind packed in oil) to the skewer instead. It won’t taste the same, but it adds a nice chewy texture and sweetness that dried herbs just can’t deliver.
Recipe Notes and Author Credit for Cheesy Tortellini Kabobs
We covered a lot of ground, but just a final little note about presentation to make these **Cheesy Tortellini Kabobs** truly shine on your buffet table. You absolutely must arrange the finished kabobs vertically on a wide serving platter—it makes them look so much more intentional!
Go ahead and garnish the platter itself with extra fresh basil leaves scattered all around the base of the skewers. It just ties the whole green, red, and white Italian theme together beautifully. It adds that professional touch, even though we know how ridiculously easy this recipe is!
By Grace Williams, contributor at Recipes by Betty.
Recipe Notes and Author Credit for Cheesy Tortellini Kabobs
We covered a lot of ground, but just a final little note about presentation to make these Cheesy Tortellini Kabobs truly shine on your buffet table. You absolutely must arrange the finished kabobs vertically on a wide serving platter—it makes them look so much more intentional!
Go ahead and garnish the platter itself with extra fresh basil leaves scattered all around the base of the skewers. It just ties the whole green, red, and white Italian theme together beautifully. It adds that professional touch, even though we know how ridiculously easy this recipe is!
If you want to dive deeper into who we are and see more amazing contributions like this one, you can always check out the About Us page on the site!
By Grace Williams, contributor at Recipes by Betty.

Cheesy Tortellini Kabobs
Equipment
- Small pot
- Skewers
Ingredients
- 10 oz Cheese tortellini cooked
- 1 cup Mozzarella balls
- Cherry tomatoes
- Basil leaves
- 2 tbsp Olive oil
- 1 tsp Italian seasoning
Instructions
- Cook the tortellini until tender. Cool the tortellini completely.
- Assemble the skewers. Alternate tortellini, mozzarella balls, cherry tomatoes, and basil leaves onto each skewer.
- Brush the assembled kabobs lightly with olive oil and sprinkle with Italian seasoning.
- Chill the kabobs until you are ready to serve them.