Honestly, who said breakfast had to be boring? I mean, you have five minutes before you need to run out the door, so you grab two slices of bread. But those two slices? They deserve better! I figured that out a while ago when I was slogging through recipe testing and needed something fast but beautiful for lunch. Suddenly, just slicing an avocado a certain way and adding a drizzle of oil completely changed my perspective. It was all about creating that perfect, vibrant Breakfast Toast Aesthetic!
It’s amazing how stacking simple ingredients elevates the whole meal. I’m Emily Mitchell, and as a Testing Coordinator over at Recipes by Betty, I see hundreds of dishes a week, but I always come back to this method. It takes ten minutes, tops, but it looks like you spent all morning styling it for a magazine cover. Trust me, transforming basic toast into something visually stunning is easier than you think.
Achieving the Perfect Breakfast Toast Aesthetic: Ingredients You Need
Okay, listen up, because the magic behind a truly great Breakfast Toast Aesthetic isn’t fancy equipment; it’s nailing these core ingredients! We’re keeping this super simple, focusing on quality where it counts, especially that creamy green layer we all love. Precision matters here, especially if we want those incredible layered looks for photos!
If you’re using store-bought bread, go for something hearty—a sourdough or a thick-cut whole grain works miles better than flimsy white bread. It needs to stand up to the toppings without getting soggy fast. Remember, everything tastes better when it looks amazing, right?
Core Components for Your Breakfast Toast Aesthetic
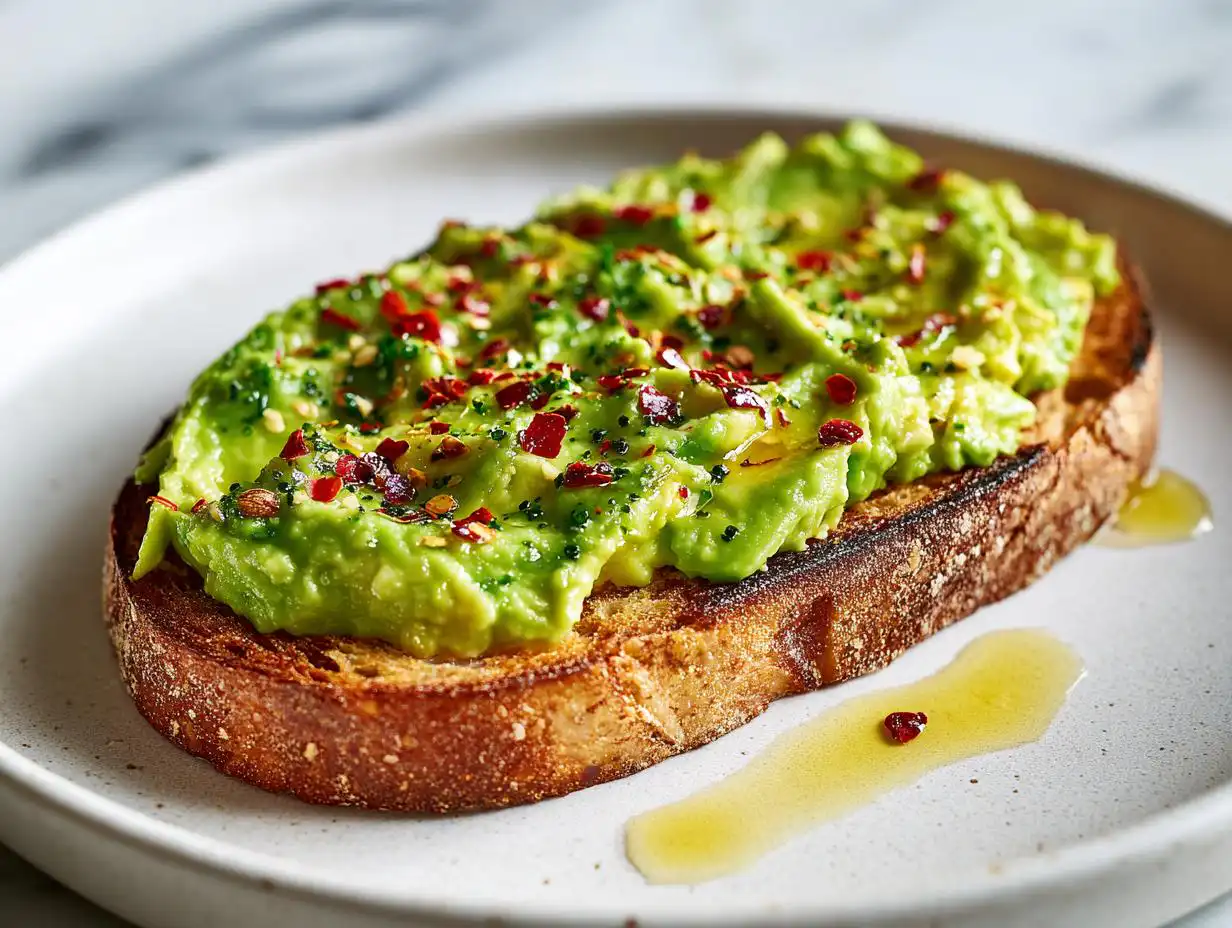
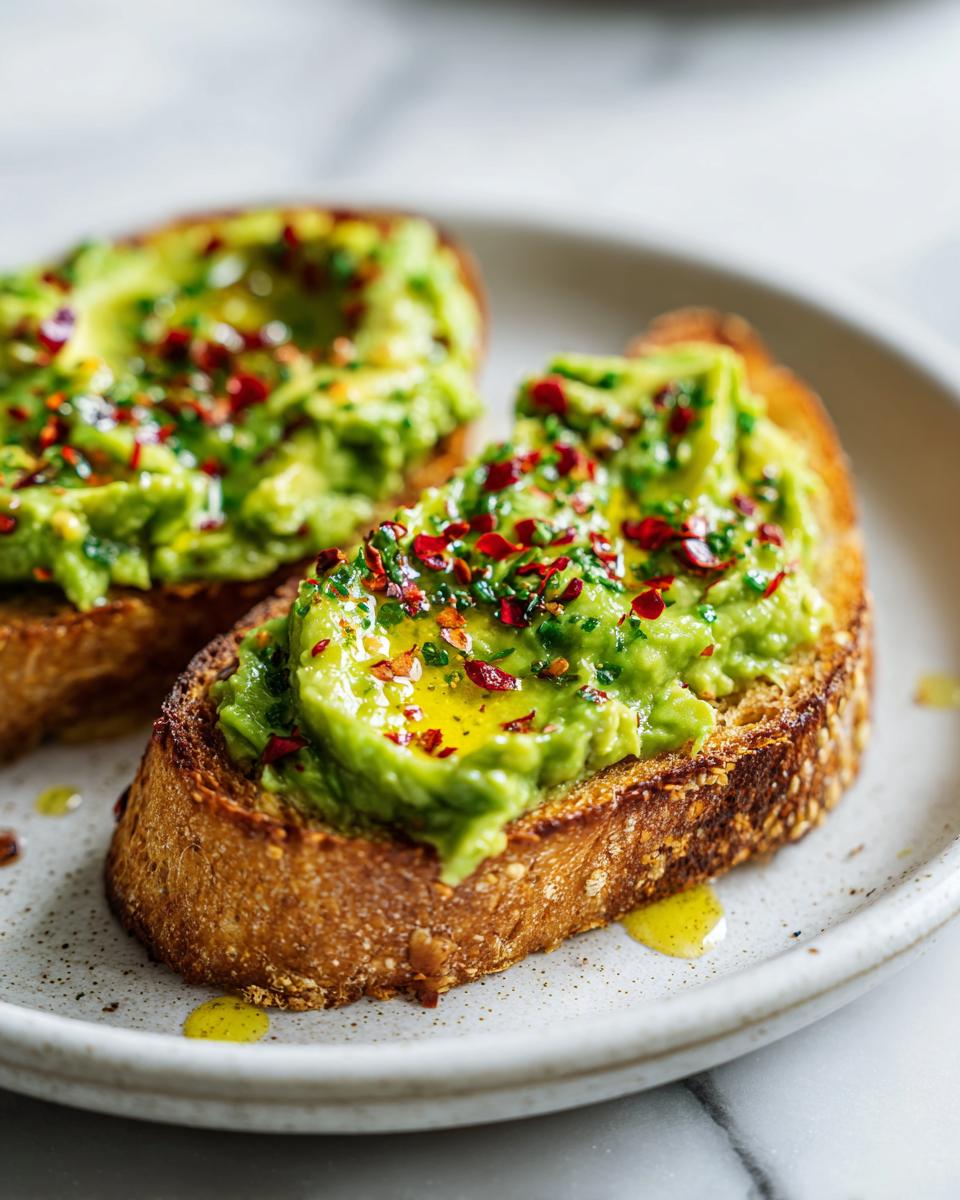
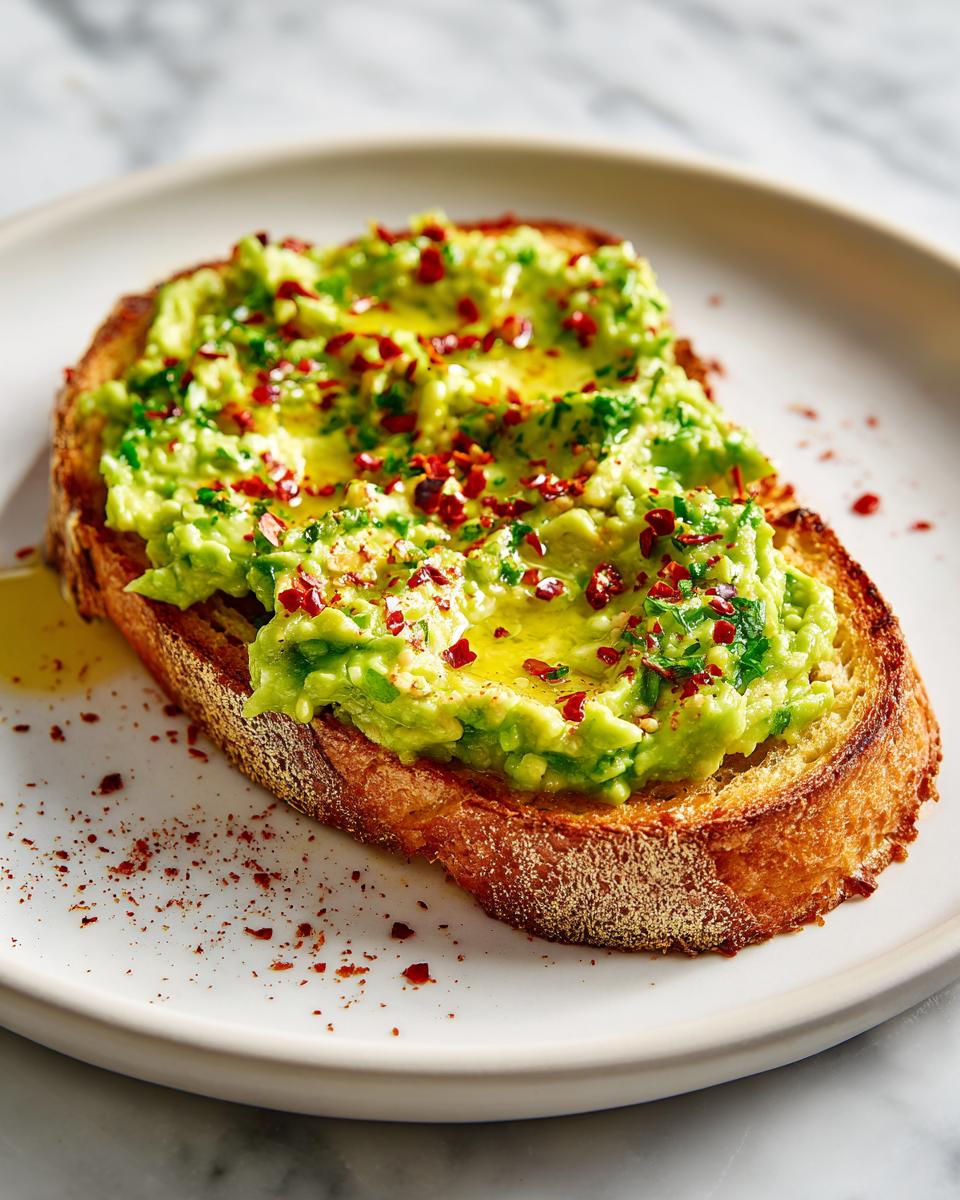
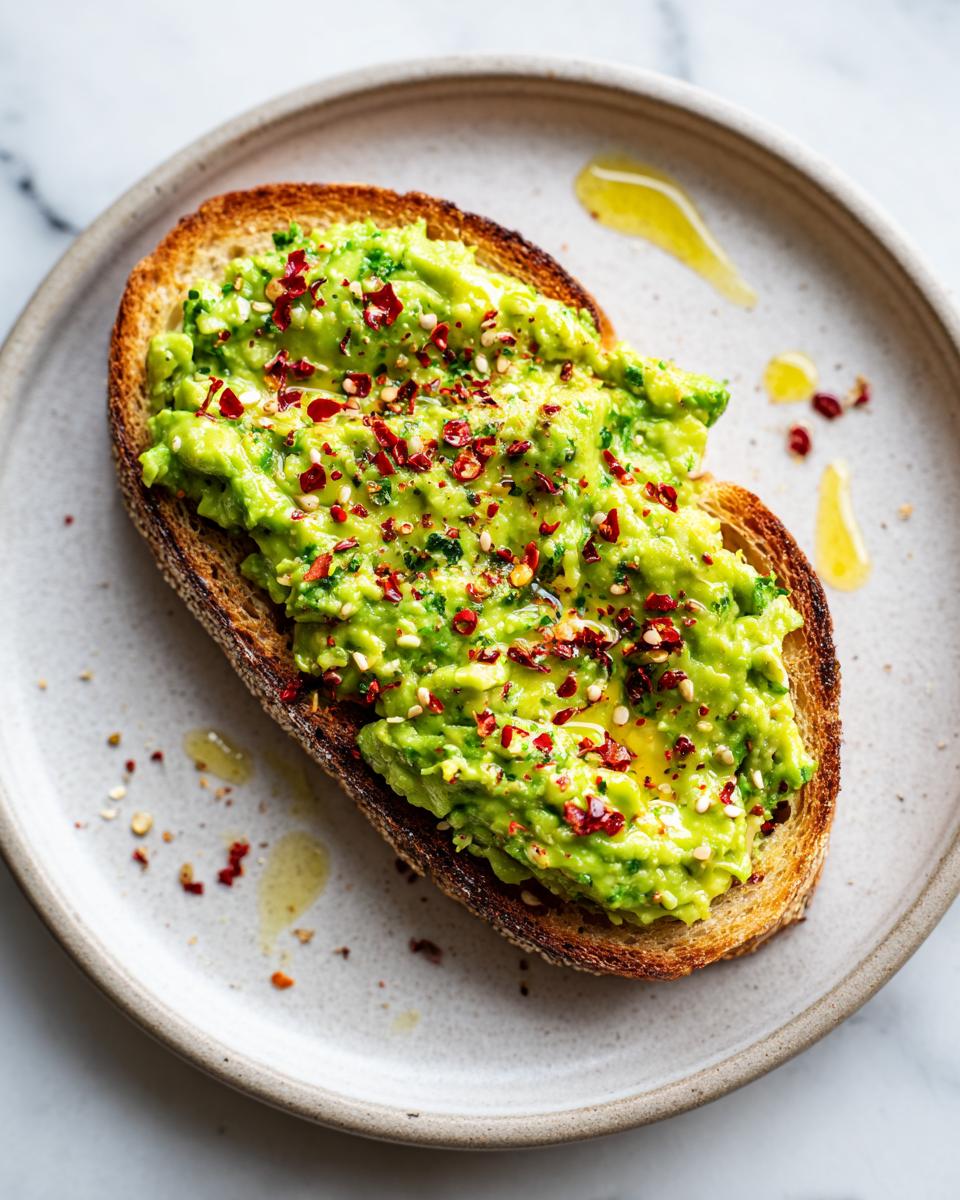
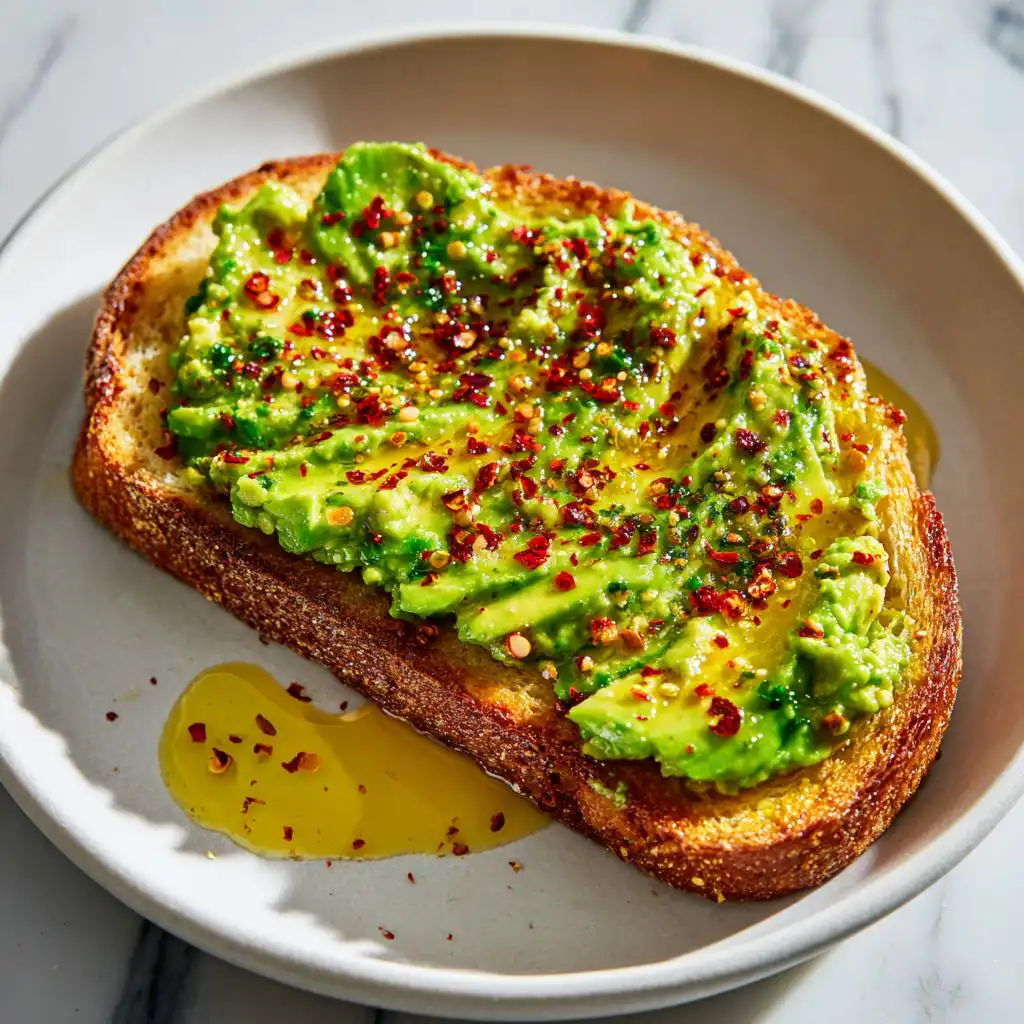
- Bread: You need 2 slices, and they should be toasted until they are perfectly golden brown and crispy. The crunch is non-negotiable for texture contrast!
- Ripe Avocado: Just one, but it must be perfectly ripe. Test it by giving it a gentle squeeze; it should give slightly. We are mashing most of it, but make sure to save a few slices for that beautiful fan-out presentation later.
- Olive Oil: 1 tablespoon is perfect for drizzling. I prefer a good quality extra virgin olive oil here since we aren’t cooking it away. You can check out my notes on why choosing the right salt matters when using yummy oils like this. It really ties the flavor together!
- Seasoning: Salt and pepper, used to taste. Don’t be shy with the salt once the avocado is mashed—it really boosts the flavor.
- Chili Flakes: Use them to taste! A little sprinkle on top is what gives us that gorgeous pop of contrasting red color against the green.
Essential Equipment for Your Breakfast Toast Aesthetic
You don’t need a full professional kitchen to achieve that stunning viral look, I promise! For this level of simplicity, we rely on just a few key tools. Frankly, if you own a toaster and can mash something with a fork, you’re already halfway there. Don’t let complicated gadget names scare you off!
Tools for Preparation and Plating
- Toaster: Obviously! You must get that base bread nice and crispy. I actually use mine on one of the higher settings, just for that loud, satisfying *crack* when you bite into it.
- A Sturdy Fork: This is your primary avocado-mashing tool. I like one with slightly duller tines so I can get a good, rustic mash—we don’t want baby food here, we want texture!
- Small Offset Spatula: Okay, this is my secret weapon for plating, and you absolutely need one if you’re taking pictures. It helps you spread the mashed avocado evenly right to the edges without dragging crumbs everywhere, making that plating look super clean and professional.
Step-by-Step Guide to Your Breakfast Toast Aesthetic
This whole process is clocked at about 10 minutes total, which is insane for how good these look. Remember, we aren’t just making breakfast; we’re curating a moment! Get your toaster fired up right away because a perfectly crisp base is essential for our Breakfast Toast Aesthetic. Don’t rush that toasting part!
Preparing the Base and Avocado Spread
First things first, let’s tackle that avocado. You want a mash that has character, not swampiness. Take your perfectly ripe avocado and mash it up right in a small bowl using your trusty fork. I like mine with some intentional chunks—that little bit of uneven texture looks so much better than completely smooth paste. Season it generously now with salt and pepper while you’re mashing; taste it! Does it need more zing? Fix it now before it hits the bread.
Assembling the Final Breakfast Toast Aesthetic
Once your bread is toasted (I prefer mine golden brown with just a hint of char on the rougher spots!), spread that seasoned mash across both slices evenly. Now we layer for visual impact! Take your remaining avocado—the slices you saved—and arrange them artfully over the mash. Next, take that pretty olive oil and drizzle it over the top. It catches the light beautifully! Scatter your chili flakes right over the slices for that beautiful color contrast.
For the final touch to lock in that stunning style, you can check out my favorites for styling similar dishes here: It really sells the look! The ultimate goal is creamy avocado sitting beautifully on a sturdy, crispy base. Don’t wait to eat it—the visual appeal starts fading the second those slices cool down!
Tips for Next-Level Breakfast Toast Aesthetic Presentation
Okay, you’ve got the perfect mash and the crispy bread—now let’s talk about presentation because that’s what makes this a true Breakfast Toast Aesthetic moment! The key here is layering color and texture. If everything is one flat green blob, it just looks sad, right? We need depth!
Always try to create visual interest. If you used mashed avocado, leave one corner slightly less covered, or use some thinly sliced avocado fanned out on the other slice. That mix of creamy vs. structured texture is what stops the eye. Also, think about contrast! Those bright red chili flakes I mentioned? They pop against the green. White ones, like sesame seeds or cracked sea salt, work wonders too.
For a high-impact look, consider what you’re plating on! A dark slate board or a plain white marble surface makes the colors of the toast jump right out. If you want more visual inspiration to elevate your morning meal, I’ve gathered some of my favorite styling tricks over in the breakfast category. Remember, presentation is half the fun!
Variations on the Avocado Toast Aesthetic
I know, the classic avocado smash is perfect, but who wants to eat the exact same thing every day, even if it looks fantastic? I’ve been experimenting nonstop with other ways to give your morning slice some flair while keeping that gorgeous visual appeal. It’s all about swapping ingredients without losing that beautiful color contrast we worked so hard for!
If you’re bored, you can pivot to other amazing savory toppings. Think smoked salmon ribbons or a sprinkle of everything bagel seasoning—it adds texture and crunch, which is just as important as the flavor! If you want to see how I combine avocado with other creamy textures, check out this amazing feta and avocado concept; it shows how layering similar colors can still look dynamic.
Making Your Avocado Toast Aesthetic Healthier
If you’re trying to keep things light but still crave that visual punch, making a healthy toast version is super easy! First off, swap out standard bread for a hearty seed or sprouted grain loaf. That extra texture in the bread itself instantly ups the aesthetic quality, trust me.
Instead of piling on heavy cheese, try adding microgreens or alfalfa sprouts after you’ve finished your chili flake sprinkle. They add height and a vibrant, fresh green color that photographs incredibly well. A light squeeze of lime juice instead of extra salt can also brighten up the flavor profile while keeping the topping light and completely transparent for that perfect finish.
Serving Suggestions to Complement Your Breakfast Toast Aesthetic
You’ve nailed the toast—it’s pretty, it’s creamy, it’s perfectly seasoned. But you can’t just stare at it, right? Breakfast isn’t complete without a great beverage pairing! Since this dish is relatively light and packed with fresh flavor, you should pair it with something that feels equally bright and clean.
I’m all about a good drink that complements the richness of the avocado without overpowering that delicate chili flake dusting. Coffee is always an option, sure, but if we are aiming for that elevated morning feel, we need something special!
If you want a cooler, incredibly flavorful option that still fits that healthy vibe, you absolutely have to try my recipe for a silky vegan iced chai latte. It’s creamy, perfectly spiced, and sipping it alongside that crunchy toast just feels luxurious. It’s fantastic for weekend brunches when you have a little more time to savor the morning!
When it comes to sides, keep them small and colorful. Think about adding some fresh fruit on the plate for a contrasting texture and sweetness. A small bowl of sliced berries—strawberries or tart raspberries work wonderfully—adds another pop of color that really enhances the overall plating! Don’t overdo the sides; the toast is the star, so keep everything else supporting the main event.
Storage and Reheating for Your Breakfast Toast Aesthetic
Here’s the hard truth, my friends: the absolute best version of this morning masterpiece is the one you eat the second you put the chili flakes on it. Seriously, texture is everything when we’re chasing that high-quality Breakfast Toast Aesthetic!
The beauty of toast is its wonderful crunch, and unfortunately, that crunch degrades faster than almost any other breakfast item. The moment moisture from the avocado hits that crispy surface, the clock starts ticking. If you’re planning your day and thinking about making this ahead of time, stop right there! Don’t do it to yourself.
If you absolutely must prep components, keep them separate. You can mash the avocado and keep it sealed tightly in the fridge—add a tiny squeeze of lemon juice to help keep the color bright. Store the bread slices separately, maybe in a paper bag so they don’t get overly soft. But that topping definitely needs to sit out for 15 minutes before serving to warm up slightly, so you’re not spreading cold avocado!
Reheating? Forget about it. Putting a fully assembled piece of avocado toast in the toaster oven just melts the oil and makes the bread soggy in the middle while aggressively burning the edges. The topping becomes a greasy mess. If you must reheat anything, just pop the naked toast slices back in the toaster for about 45 seconds to revive *some* of that crispness, then start the assembly from scratch. Trust me on this one; reheating compromises the entire aesthetic!
Frequently Asked Questions About Breakfast Toast Aesthetic
I get so many questions anytime I post one of these vibrant plates online! It’s all about the little details that make the difference between a snack and a showcase piece. Here are the things folks ask me most often when trying to nail that perfect Breakfast Toast Aesthetic!
How do I stop my avocado from turning brown on the toast?
This is the age-old struggle, isn’t it? Oxidation is real, especially when you’re trying to prep a few slices for a photo session! My best piece of advice is speed—if you’re eating it immediately, you’re usually fine. But if you need it to sit for a bit, there are two things I always do. First, mash your avocado and stir in just a tiny squeeze of fresh lemon juice. It really fights off that browning! Second, make sure you apply a thin layer of olive oil *directly* onto the mashed avocado before you add the final slices or sprinkles. The oil acts like a seal, blocking the air exposure.
What kind of bread works best for the avocado toast aesthetic?
Hands down, you need density! Thin, flimsy sandwich bread just can’t handle the weight and moisture of that creamy topping, and it will collapse under pressure. For the best avocado toast aesthetic, I swear by thick-cut sourdough or a dense multi-grain loaf. You want those substantial edges to toast up beautifully crunchy. That deep golden, slightly rough surface gives the avocado something substantial to grip onto, preventing slippage and keeping that beautiful structural integrity we’re looking for!
If you want to see another example of how texture really plays into presentation, check out this amazing avocado chickpea bowl. It’s all about layering different textures to keep things interesting!
Share Your Breakfast Toast Aesthetic Creations
Now that you have the secrets to making your toast look like it belongs in a fancy food magazine, I really want to see what you come up with! Cooking is always more fun when you share the results, even if it’s something as simple as toast. Don’t keep those beautiful, vibrant creations to yourself!
If you tried out this method and achieved that perfect creamy-meets-crispy texture, please snap a picture! Tag me when you post it online because I genuinely love seeing how everyone personalizes their toppings. It’s so inspiring to see how one simple base can handle so many different kinds of creativity.
If this super easy technique worked for you, please take a moment to leave a rating right below this article. Your feedback tells me which recipes are worth keeping on rotation! And if you have any specific questions about styling or substitutions, you can always reach out directly through the contact form. Happy styling, and enjoy your perfectly aesthetic breakfast!
Breakfast Toast Aesthetic
Equipment
- Toaster
- Fork
Ingredients
- 2 slices bread toasted
- 1 ripe avocado
- to taste salt
- to taste pepper
- 1 tbsp olive oil
- chili flakes
Instructions
- Mash the avocado with salt and pepper until you reach your desired texture.
- Spread the mashed avocado evenly over the toasted bread slices.
- Drizzle the olive oil over the avocado layer.
- Sprinkle chili flakes over the top for flavor.
- For presentation, add sliced avocado and seeds for a layered look. The final texture should be creamy avocado over a crispy base.