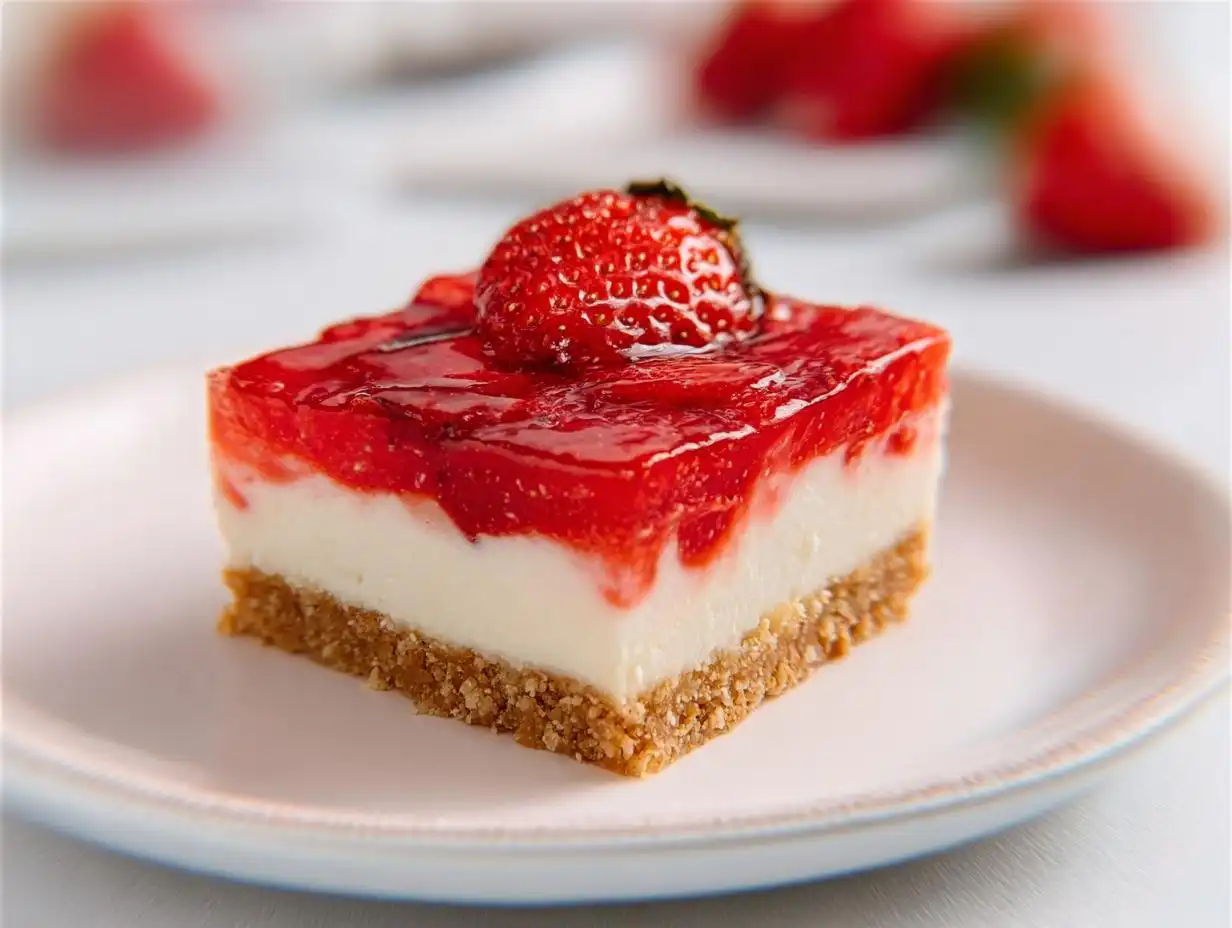
Oh, if you’re anything like me, sometimes you just crave that unbelievably smooth, decadent dessert that still manages to taste bright and fresh. Honestly, nothing hits that spot better than a creamy baked layer floating over a buttery crunch. That’s exactly what we’re making today: the absolute best Strawberry Cheesecake Bars you’ll ever try!
My favorite part about this recipe is that perfect contrast—the sharp, sweet strawberry puree against that thick, tangy cheesecake layer. It’s a truly balanced experience, and it’s shockingly easy to pull off. I promise you these baked gems are going to be your new go-to for potlucks and weeknight cravings alike. I’m Clara Bennett, and as Lead Plate Designer here at Recipes by Betty, I can testify that presentation and flavor go hand-in-hand with these beauties.
Why You Will Love These Strawberry Cheesecake Bars
I mean, why wouldn’t you love them? They tick every single dessert box we have. Trust me, once you taste this recipe, you’ll be looking for excuses to make them every week. Here’s the quick snapshot of why they are so great:
- Incredibly creamy texture that just melts in your mouth.
- Surprisingly easy assembly—no fussy water baths needed here!
- That gorgeous, bright strawberry flavor cuts right through the richness.
They truly are the ultimate indulgence. If you want something similar but spoonable, you should check out my recipe for no-bake strawberry cheesecake cups, but for a proper square, these baked bars can’t be beaten!
Essential Equipment for Perfect Strawberry Cheesecake Bars
You don’t need a million fancy gadgets for these bars, which is another reason I love them! We just need the basics to manage the layers properly. Make sure you have what you need ready to go before you start mixing, because once that crust is ready, we move fast.
You absolutely must have a good, sturdy 9×13 inch baking pan. This is the frame for our entire dessert, so make sure it’s up to the job!
Now, here’s my non-negotiable tip, the one thing that saves my sanity every single time I make these, whether they are strawberry dessert bars or regular cheesecake: parchment paper. Don’t just grease and flour the pan!
You’ll want to line that 9×13 pan with parchment paper so that two sides stick up over the edge like little handles. When the bars are completely chilled—and they *have* to be chilled—you just lift those handles, and the entire block of cheesecake slides right out. No struggling, no cracking the edges, just perfect squares ready for cutting. Trust me on this little trick; it takes the stress right out of baking!
Gathering Ingredients for Your Strawberry Cheesecake Bars
Okay, ingredient gathering time! This is where we set ourselves up for success. When you keep your components separate, it’s so much easier to move through the recipe without stopping to measure things halfway through mixing. For these rich, creamy squares, we need three main groupings. Remember, good ingredients make for amazing flavor, so I always grab the best cream cheese I can find—though I’m not above grabbing some amazing flour from people like King Arthur Baking when I need it!
If you love fruity layers, you might also want to peek at my recipe for strawberry cream sandwiches for another sweet fix!
For the Graham Cracker Crust
The base has to be sturdy enough to hold up all that creamy goodness. Don’t skimp on pressing this down firmly!
- 1.5 cups graham crackers, crushed (you want fine crumbs!)
- 5 tbsp butter, melted
For the Creamy Cheesecake Filling
This is the heart of the recipe, so temperature matters here. Those two cups of cream cheese? They absolutely have to be softened to room temperature. Trust me, if they are too cold, you’ll end up with lumps, and nobody wants a lumpy cheesecake filling!
- 2 cups cream cheese, softened
- 0.75 cup sugar
- 2 eggs
- 1 tsp vanilla extract
For the Strawberry Topping
We’re keeping the topping straightforward so the strawberry itself shines through. For this recipe, we are relying on a prepared puree for that perfect texture and spreadability.
- 1 cup strawberry puree
Step-by-Step Instructions to Make Baked Cheesecake Bars
Alright, let’s get baking! This process is quick because we’re layering everything in one pan. The goal here is making sure each layer bonds perfectly with the next. You’ll find that once this crust is down, things move pretty quickly toward the oven. We want gorgeous baked cheesecake bars!
Don’t forget, you can find great tips on laying out your layers by reading my guide on 7 layer bars—it uses the same concept of building a solid base!
Preparing the Crust and Initial Bake
First things first: turn that oven up to 175°C (350°F). We need it hot and ready! Now, grab that 9×13 pan and make sure you’ve lined it with parchment paper with those handles hanging over the sides. That’s your lifeline later, remember?
Mix up your graham cracker crumbs and that melted butter until it looks like wet sand. Then, press it down firmly into the bottom of the pan. I like to use the flat bottom of a measuring cup to really pack it in tight! Pop that crust into the preheated oven for exactly 8 minutes until it sets up nicely. Take it out, but leave the oven on!
Mixing the Creamy Cheesecake Filling
While the crust is resting, get your filling going. You must start with that beautifully softened cream cheese and beat it with the sugar until it’s completely smooth—no lumps, I mean it! Think creamy clouds, not cottage cheese.
Next, add your eggs, but here’s the key: add them one by one. Mix just until the yellow disappears after each egg. Over-beating after adding the eggs can whip in too much air, which leads to cracks later. Finish it up by gently stirring in that vanilla extract by hand until just combined.
Baking and Setting the Strawberry Cheesecake Bars
Gently pour that gorgeous cream cheese mixture right over your warm, pre-baked crust. Try to keep it level. Put the whole thing back into the 350°F oven for about 30 to 35 minutes. You’re looking for the center to be *set*. It shouldn’t jiggle wildly when you gently nudge the pan—just a slight wobble is okay!
Let the bars cool down completely on the counter first—this is crucial! Once they are room temperature, spread on that lovely strawberry puree evenly across the top. Then, and this is the hardest part, they need a minimum of 2 hours, ideally more, chilling in the fridge. That mandatory 120 minutes of chill time locks in that perfect structure so you can cut clean squares.
Expert Tips for Perfect Strawberry Cheesecake Bars
Getting these layers looking magazine-perfect takes just a tiny bit of insider knowledge. My biggest piece of advice, which I learned after one batch turned into a cracked mess, is controlling the temperature of the filling ingredients.
Remember how I stressed that the cream cheese needs to be softened? Well, the eggs should also be room temperature. Cold eggs hitting that creamy base can cause the mixture to curdle slightly, which leads to those tell-tale cracks once they cool down. We want smooth sailing!
Another key point for these glorious strawberry dessert bars is the puree. Make sure it’s not too watery before you spread it on top; otherwise, it will seep down into the cheesecake layer. If your puree seems thin, just simmer it gently on the stove for a few minutes until it thickens up a bit. You can read more about general baking success in my guide on secrets to perfect scones; the principles of temperature control cross over!
If you look at what the pros do, like those at Bon Appétit, they always look for that gentle bake. Don’t rush the cooling process either; letting them cool slowly is just as important as the baking itself!

Storing and Reheating Your Strawberry Cheesecake Bars
Okay, you’ve successfully made these stunning Strawberry Cheesecake Bars, and now you need to keep them perfect! Since these have that creamy filling and fresh fruit topping, storage is all about keeping things cool and protected.
The absolute best way to keep these fresh is chilling them immediately after they’ve been fully set with the strawberry puree. Don’t try to store them on the counter! They need to stay in the refrigerator.
Get that airtight container ready. If you have a large one, place a single layer of bars inside, but if you have to stack them, put a sheet of wax paper or parchment paper between each layer. This stops the strawberry topping from sticking to the cheesecake underneath. They’ll stay perfectly fresh and delicious in the fridge for about five to seven days. Honestly, they rarely last that long in my house!
Now, can you reheat them? Well, you don’t really *reheat* cheesecake bars; you serve them chilled. Reheating them would make that lovely filling turn soupy and sad. If you happen to have a rogue bar that got left out and warmed up, just pop it back in the fridge for 30 minutes to firm up again before enjoying that cool, creamy texture.
If you need to store them longer term, freezing is an option, but I’ll cover that in the FAQ section because it involves a specific wrapping technique to protect that lovely topping!
Frequently Asked Questions About Strawberry Cheesecake Bars
I love getting your questions! Whenever I post a recipe, especially one as layered as these Strawberry Cheesecake Bars, people always have little tweaks or concerns. Don’t worry; that’s completely normal. We want everyone to have success in their kitchen!
If you happen to be experimenting with different fruit flavors, you might also want to check out my guide on no-bake strawberry cheesecake parfaits—it gives you some fun ideas for layering!
Can I use fresh strawberries instead of puree for the topping?
You totally can, but you need to be careful with the texture if you swap out the puree! If you decide to use fresh strawberries, I highly recommend slicing them beautifully and maybe macerating them slightly with a tiny bit of sugar for about 15 minutes to pull out some juices. If you just dump sliced berries on top, those juices will run everywhere once you slice into one of the strawberry dessert bars.
For the best visual appeal and to keep things tidy, I usually layer some sliced strawberries on top of a slightly thickened strawberry jam instead of pure puree. It gives you that fresh fruit look without sacrificing the structure we worked so hard to achieve underneath!
How do I prevent my baked cheesecake bars from cracking?
This is the number one fear when baking anything cheesecake-related! The biggest culprit is usually shocking the cool cheesecake with dry, hot oven air. My go-to tip, which is super easy, is to turn the oven off about 10 minutes before the baking time is up, but *leave the bars inside* with the oven door slightly ajar.
This lets them cool down gradually in that warm environment. You’re basically giving them a slow “time out” before they meet the cool kitchen air. Gradual cooling lets the centers relax smoothly, preventing that sudden surface tension that causes the dreaded crack. It works like magic for these baked cheesecake bars!
Can these be frozen?
Yes, absolutely! Freezing is a lifesaver if you know you won’t eat them all right away. Just make sure the bars are completely cooled and the strawberry topping is fully set in the fridge first. Don’t slice them yet!
Wrap the whole block tightly—and I mean TIGHTLY—first in a layer of plastic wrap, and then wrap that again in foil. This double layer protects them from freezer burn and stops any fridge odors from seeping in. They freeze beautifully for up to two months. When you want to enjoy them, just unwrap them and let them thaw overnight in the refrigerator. You might want to let them sit on the counter for about 20 minutes before slicing, but they cut much cleaner when they are still quite cold!
Serving Suggestions for These Strawberry Dessert Bars
Once you’ve chilled these beauties and cut them into perfect little squares, you might wonder what to put beside them on the plate. Honestly, they are fantastic all on their own, but sometimes a little something extra just elevates the whole experience, right?
Since we have that rich cheesecake flavor mixed with the sweet-tart strawberry, you want accompaniments that either enhance that creaminess or offer a little bit of crunch or texture contrast. They already have that graham crust, but who ever said you can’t add more texture?
For presentations at a party, skip the heavy sauces! A little whip of fresh, softly sweetened whipped cream on the side of the plate looks so elegant next to these strawberry dessert bars. It just makes the whole plate look lighter, even if the bar itself is rich.
If you’re looking for a more complex pairing, a tiny drizzle of a lemon or lime glaze would be heavenly—that little bit of citrus really wakes up the strawberry flavor. If you’re interested in other fresh, bright strawberry ideas, you have to try my recipe for fresh strawberry mousse, it’s divine!
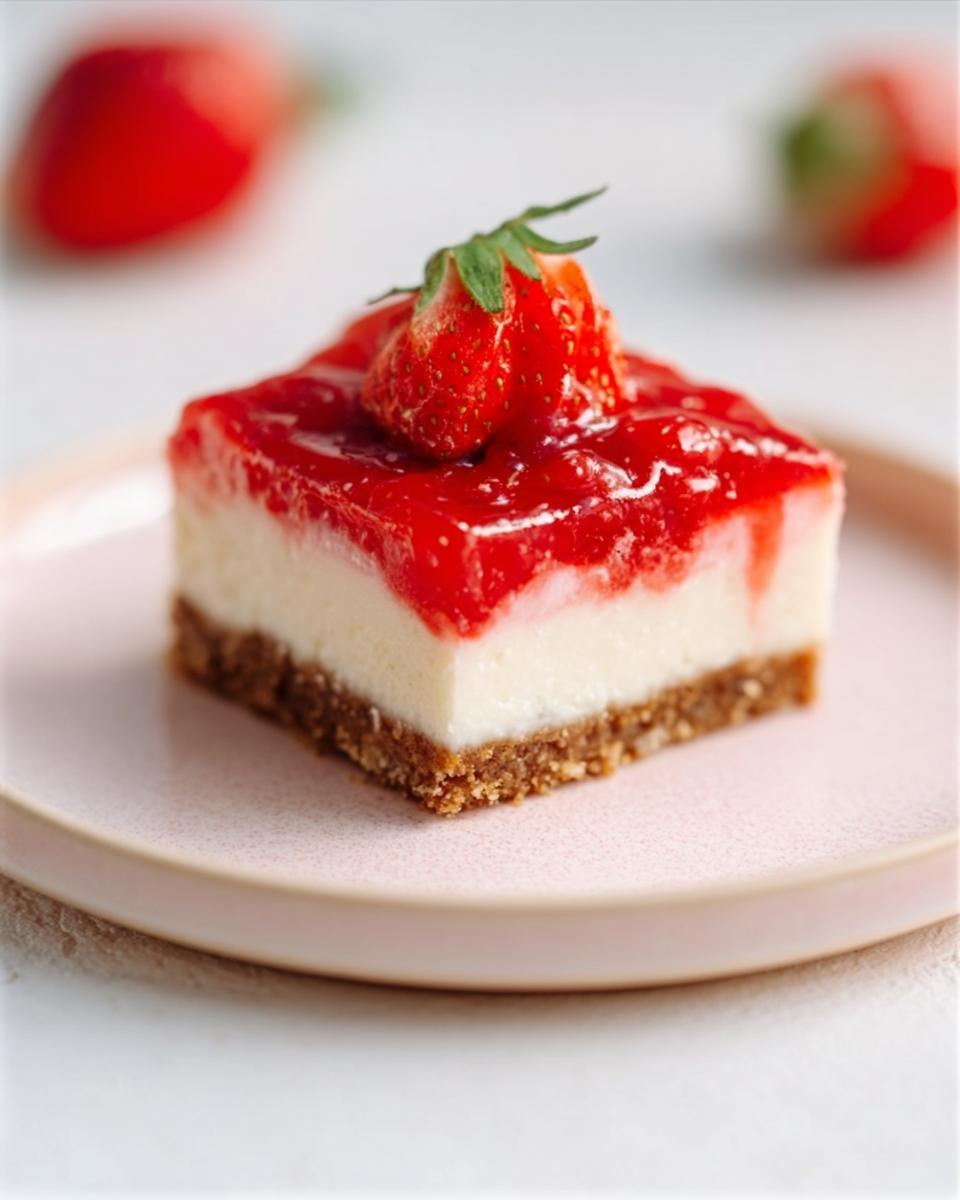
And please, whatever you do, don’t forget the fresh slice of strawberry perched right on top of each bar when you serve them. It’s the easiest garnish, and it lets everyone know exactly what amazing flavor bomb they are about to enjoy!
Nutritional Estimate for Strawberry Cheesecake Bars
You know I focus way more on flavor than counting calories, but since you asked! When you’re dealing with rich ingredients like cream cheese and butter, you know these aren’t exactly salad material. These are truly indulgent treats, but it’s good to have a general idea when you’re making a big batch.
I ran these through a standard calculator based on the ingredients here—two cups of cream cheese and all that graham cracker crust—so take these numbers with a grain of salt. Recipes change slightly based on what brand of cream cheese you use or even the exact size of your eggs. This is just a ballpark estimate for one of the 12 bars.
For more detailed nutritional breakdowns on desserts, sometimes I check out sites like Epicurious, but for my home baking, this is usually enough to satisfy my curiosity!
Here is the estimated breakdown per bar:
- Calories: Approximately 310 – 340 kcal
- Total Fat: Around 19g
- Protein: Roughly 5g
- Total Carbohydrates: Near 33g (mostly from sugar and crust)
See? Decadent! But oh man, totally worth every single bite. Just remember, these are estimates, and my family certainly never stops at just one!
Strawberry Cheesecake Bars
Equipment
- Oven
- 9×13 inch baking pan
Ingredients
For the Crust
- 1.5 cups graham crackers, crushed
- 5 tbsp butter, melted
For the Filling
- 2 cups cream cheese, softened
- 0.75 cup sugar
- 2 eggs
- 1 tsp vanilla extract
For the Topping
- 1 cup strawberry puree
Instructions
- Preheat your oven to 175°C (350°F). Line a 9×13 inch baking pan with parchment paper, leaving an overhang for easy removal.
- Mix the crushed graham crackers and melted butter together until combined. Press this mixture evenly into the bottom of the prepared pan to form the crust.
- Bake the crust for 8 minutes. Remove from the oven.
- In a bowl, beat the softened cream cheese and sugar together until the mixture is smooth. Add the eggs one at a time, mixing well after each addition. Stir in the vanilla extract.
- Pour the cream cheese mixture over the warm crust. Bake for 30 to 35 minutes, or until the center is set.
- Let the bars cool completely at room temperature. Once cool, spread the strawberry puree evenly over the top.
- Chill the bars in the refrigerator for at least 2 hours before serving.
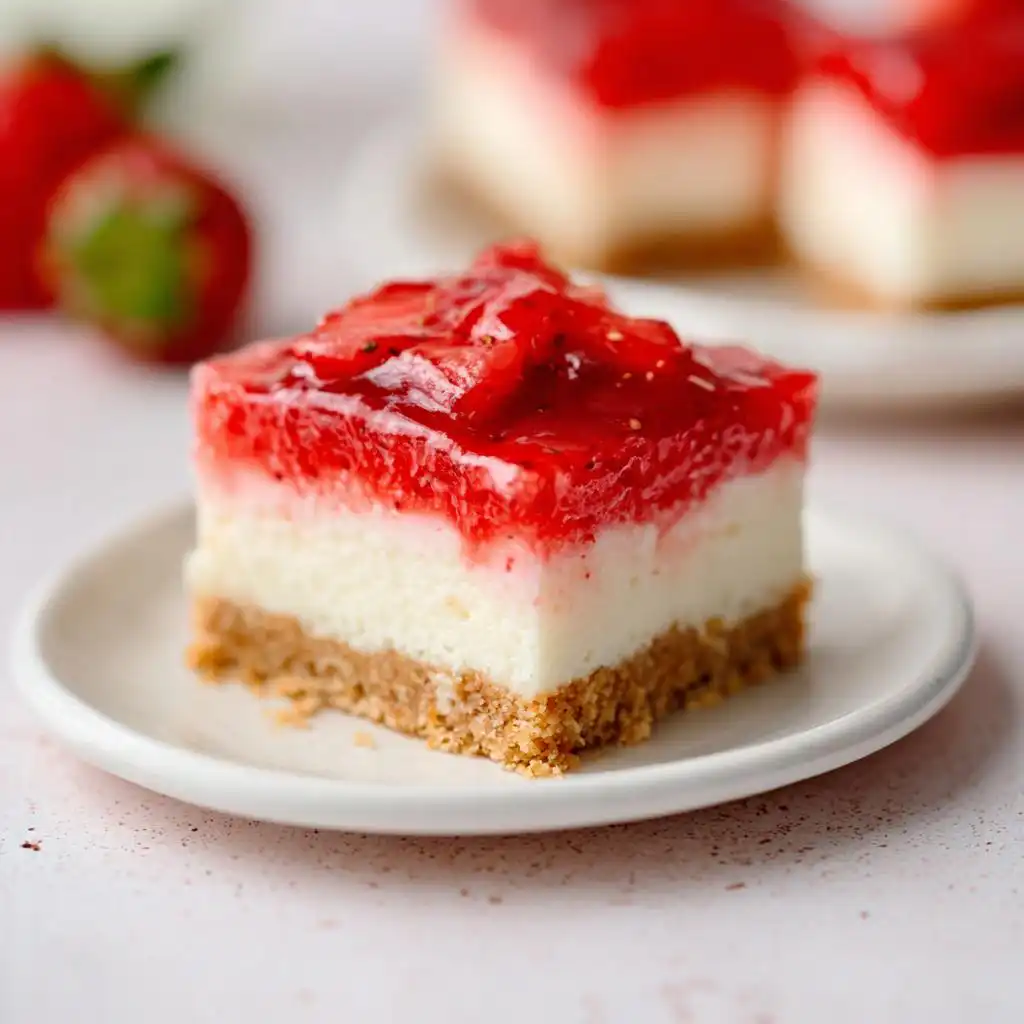
- Cut the chilled bars into clean squares. Top each square with fresh strawberries for presentation.