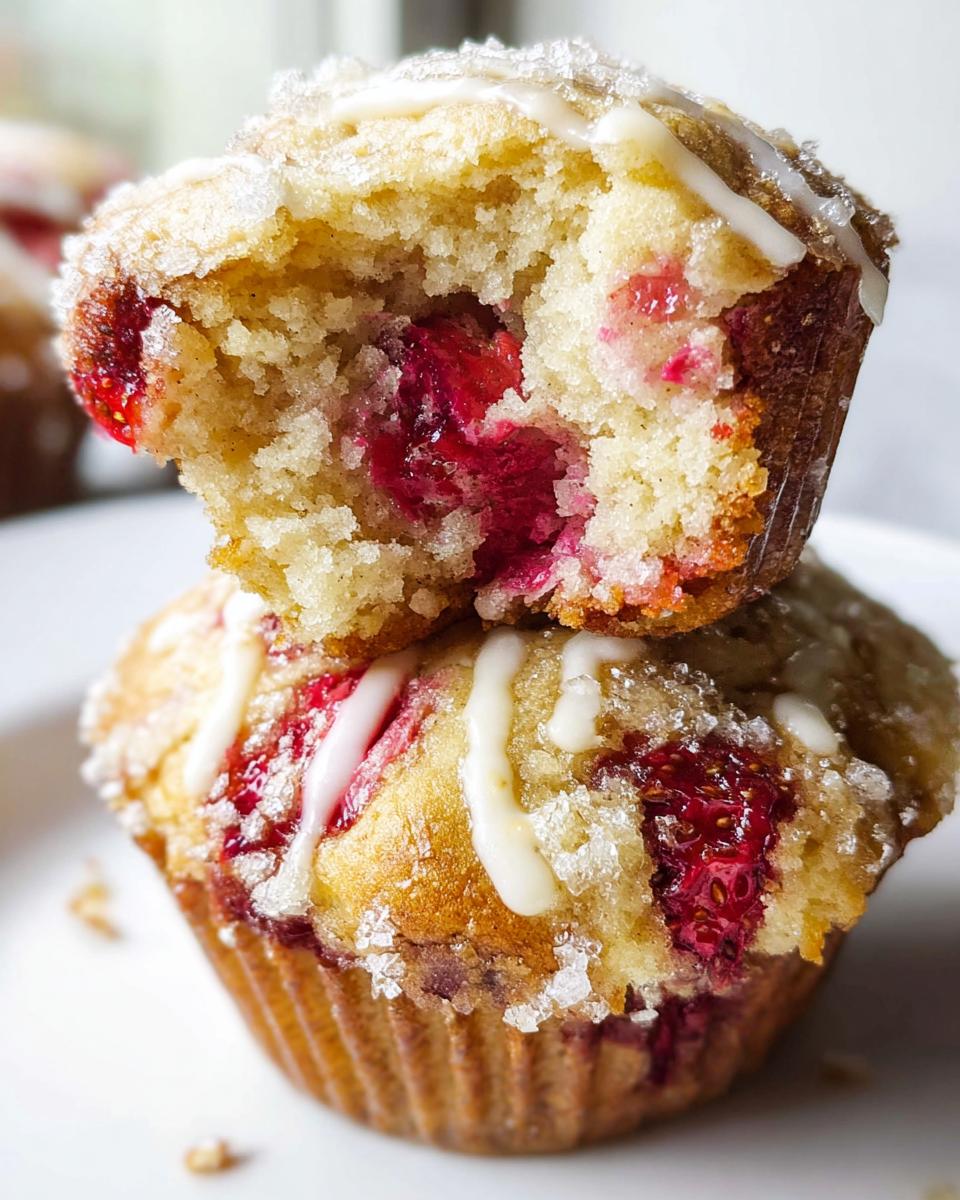
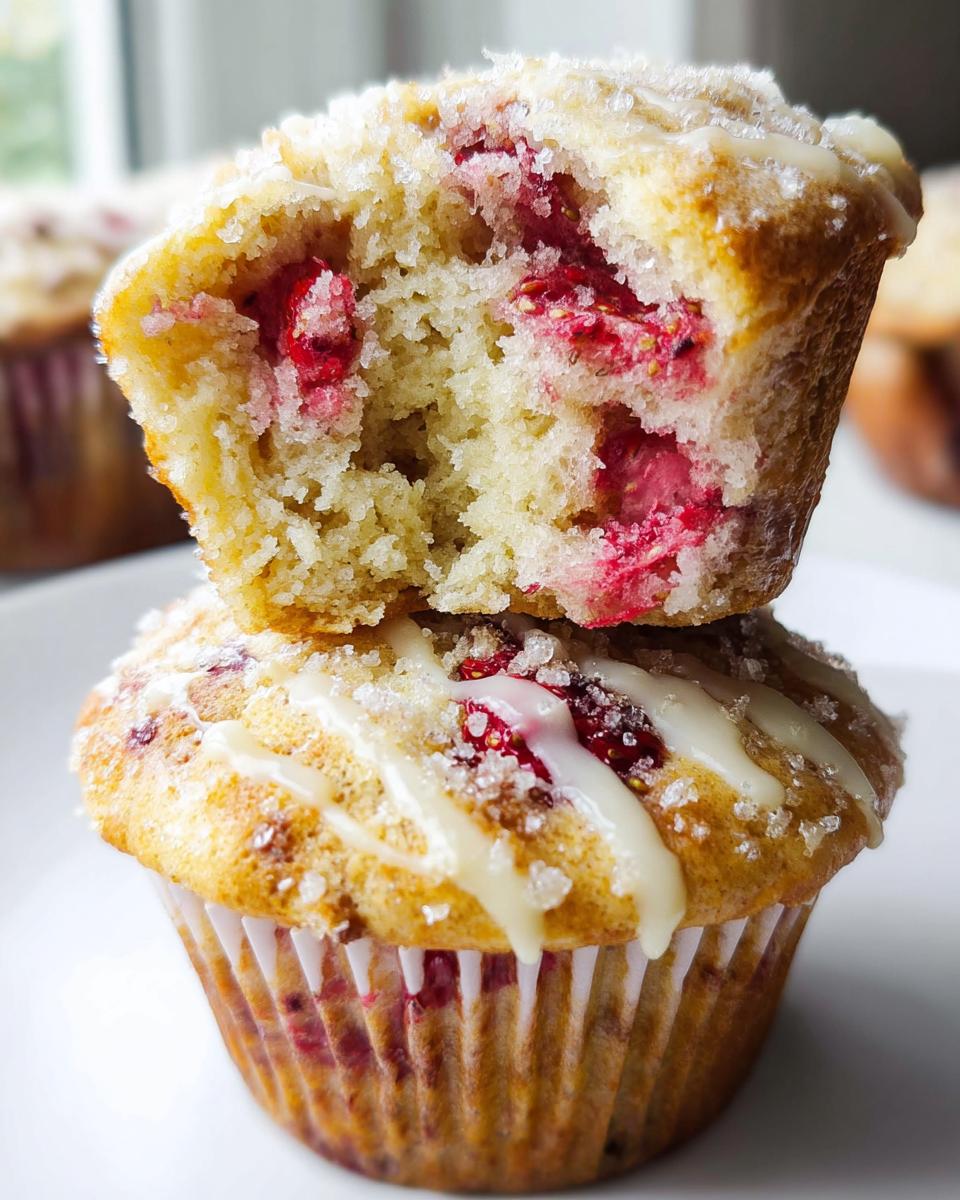
Honestly, there’s nothing quite like walking into a fantastic bakery and grabbing a muffin that’s perfectly domed and tender all the way through. Well, I’ve cracked the code, and trust me, you don’t need a commercial oven to achieve it! These Strawberry White Chocolate Muffins are my absolute go-to when I need something sweet but still impressive enough for brunch. The secret? I discovered that the fatty, creamy sweetness of the white chocolate just melts into the fresh strawberry tartness in the most incredible way.
When I first tried combining them, I was worried the white chocolate would overpower the beautiful pink berries, but it didn’t! It just elevates them, giving you that rich, indulgent bite you expect from a gourmet treat. They are so easy, which is why they quickly became a weekend staple in my house.
Why You Will Love These Strawberry White Chocolate Muffins
I know you’re going to fall head over heels for this recipe, just like my whole family did. These aren’t your sad, pre-packaged snacks! They truly deliver that incredible texture you dream about when you think of high-end treats.
- They are absolute showstoppers! Seriously, they bake up with that gorgeous, slightly cracked, high dome top that screams bakery muffins greatness.
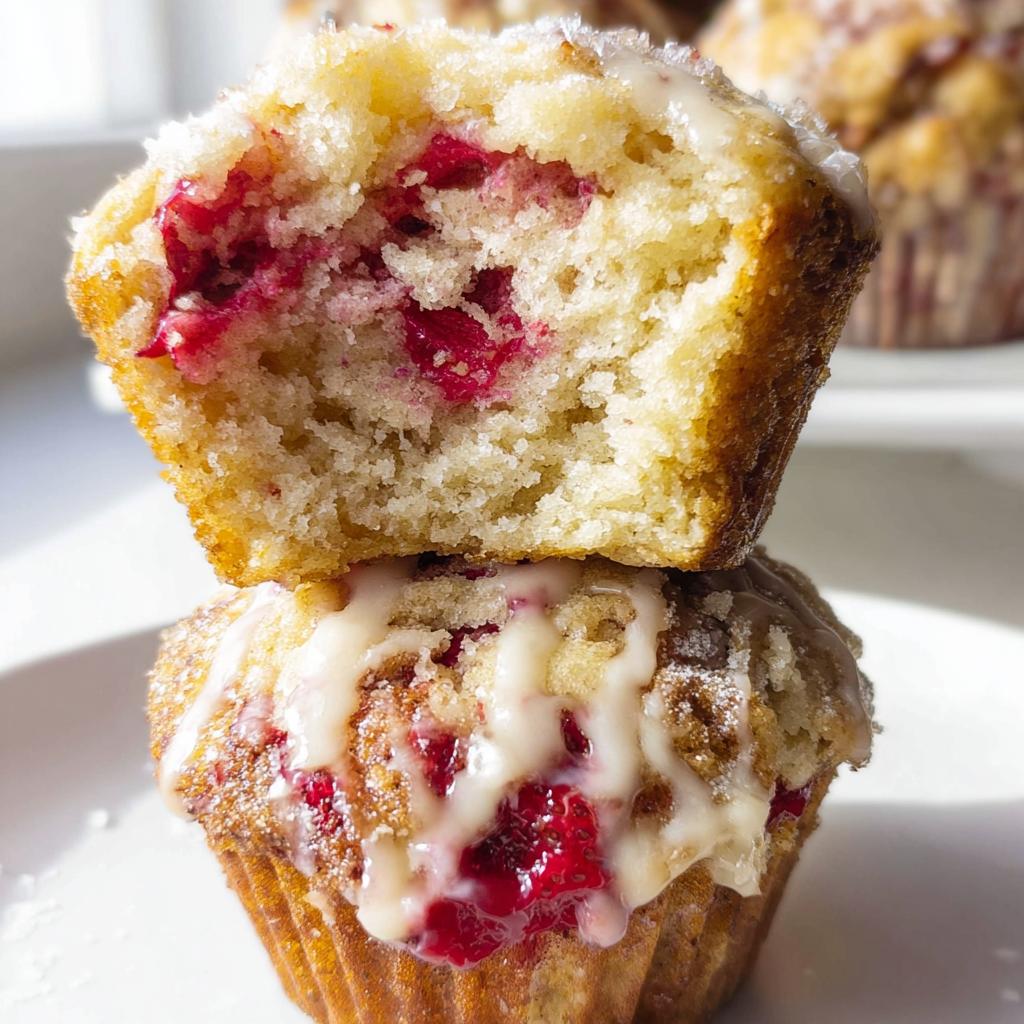
- The pairing of fruit and chocolate is just divine. The tart burst of the strawberries cuts right through the buttery sweetness of all that melted white chocolate. It’s the perfect balance—not too sweet, just right!
- You won’t believe how fast these come together. If you can mix two bowls, you can master these Strawberry White Chocolate Muffins. The prep time is ridiculously quick!
- They freeze beautifully, too. Make a double batch, and you’ve solved breakfast for the next week. Just pop one in the microwave for thirty seconds, and it’s like it just came out of the oven.
If you love hearing baking secrets that make everyday recipes feel special, you should check out my tips for making the perfect scones too. You might learn a new trick or two there!
Essential Ingredients for Perfect Strawberry White Chocolate Muffins
Picking the right ingredients is honestly half the battle when you want that perfect bakery flavor. Don’t try to sneak anything past me here! I listed out exactly what I use below. Having these on hand makes whipping up this batter a total breeze. If you’re ever wondering about salts, I have some thoughts on the difference between kosher and sea salt—but for these muffins, just use what you have!
For the Strawberry White Chocolate Muffins Batter
We need our dry stuff and our wet stuff separated, just like any good muffin recipe. Make sure your strawberries are chopped relatively small—we don’t want huge chunks sinking to the bottom!
- Dry Ingredients:
- 1 3/4 cups flour
- 3/4 cup sugar
- 1 tsp baking powder
- 1/2 tsp baking soda
- 1/4 tsp salt
- Wet Ingredients:
- 2 large eggs
- 1/2 cup milk (whole milk works best for richness!)
- 1/3 cup vegetable oil (or another neutral oil)
- 1 tsp vanilla extract
- The Good Stuff:
- 1 cup strawberries, chopped
- 1/2 cup white chocolate chips
For the Sweet Topping
This is non-negotiable if you want that crunchy top. It’s just two things, but it makes a huge difference when you bite into them!
- 2 tbsp sugar (just regular granulated sugar is perfect here)
Equipment Needed for Making Strawberry White Chocolate Muffins
Before you even think about preheating the oven, let’s chat about what you need sitting on your counter. You don’t need a million fancy gadgets for these, which is another reason I love them so much! Having everything ready means the mixing process—which needs to be fast—goes smoothly.
For 12 glorious muffins, you’ll want to make sure you have these basic items gathered:
- A standard muffin tin. This is a must! Make sure it’s a twelve-cup size if you want to keep the recipe exactly as written.
- Muffin liners. I always use paper ones—it makes cleanup practically non-existent, which is a huge win in my book.
- A couple of sturdy mixing bowls. You need one for the dry stuff and one for the wet stuff, right? Keeps things tidy!
- A whisk and a spatula. You’ll use the whisk for the eggs and the spatula for folding everything together gently.
If you’re organized and have your pans ready to go, you’re already halfway to achieving those perfect bakery muffins!
Step-by-Step Instructions for Bakery Muffins
Okay, buckle up because this is where the magic happens! We’re going fast here, but we need to be gentle. The key to those amazing, tall bakery muffins is speed mixed with minimal stirring once the wet hits the dry. You want 12 muffins, so let’s get that tin lined and the oven cranked up!
- First things first, get your oven set to 180°C (350°F). While that’s heating up, line your muffin tin with the paper liners. Don’t skip this step!
- Grab your big bowl—this is for the dry team. You’re whisking together the flour, the 3/4 cup of sugar, baking powder, baking soda, and salt. Give it a good swirl to make sure everything is distributed evenly.
- Now for the wet team in a separate, smaller bowl. You need to whisk those two eggs until they are nicely combined, then mix in your milk, oil, and that vanilla extract.
Mixing the Dry and Wet Components
This is the moment of truth! Pour all your wet ingredients right into the bowl holding the dry stuff. Now, listen to me: Mix it with a spatula, and only mix until you *just* see the flour disappear. Seriously, stop mixing! If you see a stray streak of flour, that’s fine. Overmixing equals tough muffins, and we want tender ones!
Folding in Fruit and Baking the Strawberry White Chocolate Muffins
Once you have that slightly lumpy batter, it’s time to gently fold in the chopped strawberries and all those glorious white chocolate chips. Use an under-and-over motion. Don’t stir them in like you’re making soup!
Divide that wonderful batter evenly between your 12 muffin cups—they should look about two-thirds full.
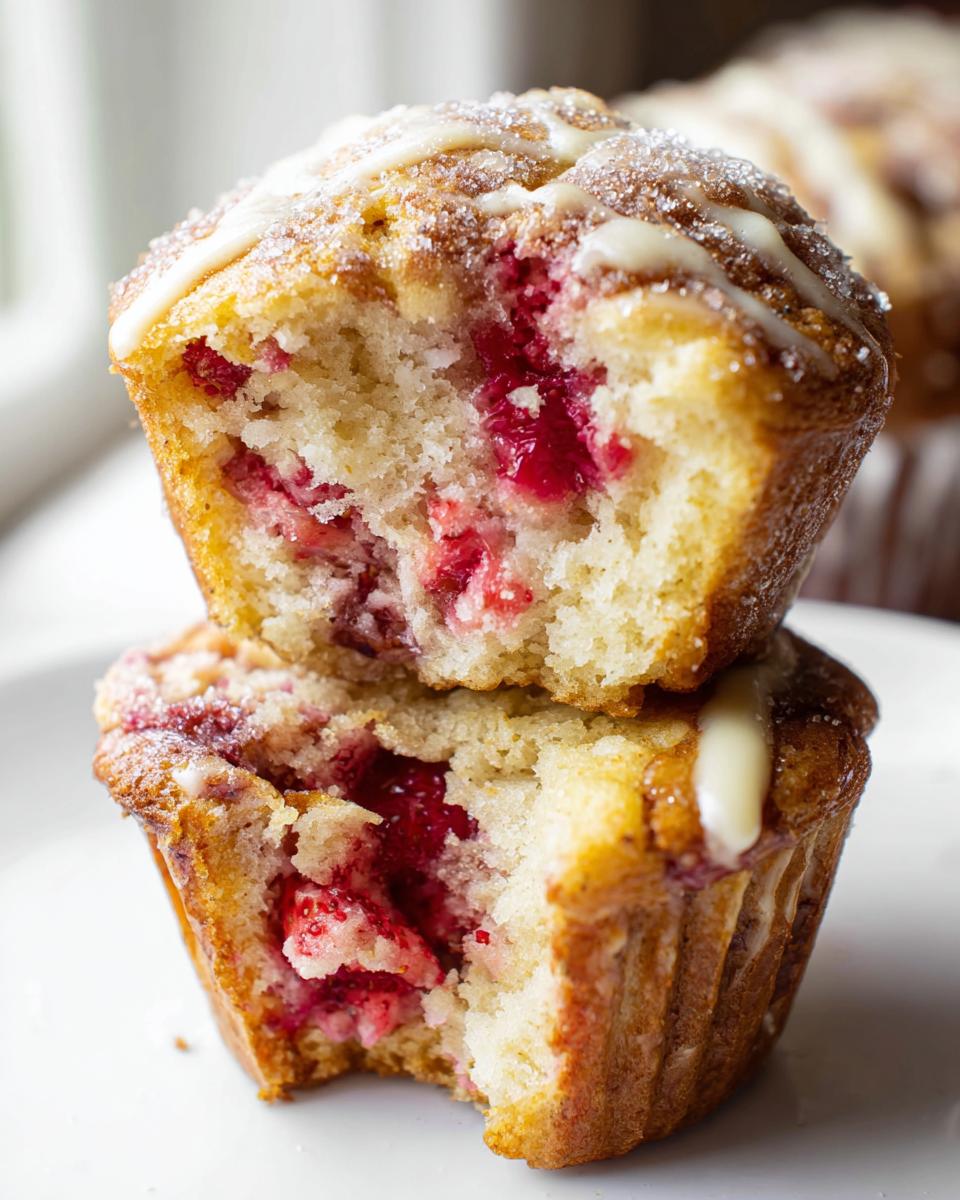
Here’s the final flourish for that gorgeous look: Take your reserved 2 tablespoons of sugar and sprinkle just a tiny bit over the top of each muffin. That makes a lovely, crunchy cap!
Pop them into the oven for 18 to 22 minutes. You are looking for a toothpick inserted right into the center of a few of your best-looking Strawberry White Chocolate Muffins to come out clean. If it has moist crumbs clinging to it, they’re done! Let them cool slightly before diving in. If you want an amazing recipe to compare notes with, check out my decadent pancake recipe; it shares some of that same indulgent spirit!
Tips for Success with Strawberry White Chocolate Muffins
Even though this recipe is super simple, a few little tricks can take you from “good muffin” to “OMG I have to buy these from you!” territory. I learned these the hard way when my first few batches ended up a little sad and flat. If you pay attention to these small things, your fruit won’t sink, and you’ll get that satisfying dome top every single time. It’s all about respecting the batter!
First, let’s talk temperature on those mix-ins. If you are using *fresh* strawberries, that’s ideal, but they need to be handled correctly. If the strawberries are soaking wet or too cold from the fridge, they can actually weigh down your batter and cause sinking.
Here are my top tips:
- Toss the Fruit Gently: Before you fold your chopped strawberries and white chocolate chips into the batter, toss them lightly in about a tablespoon of your reserved flour mixture. This little coating helps the fruit cling to the batter instead of sinking directly to the bottom when baking. If you’ve ever struggled with fruit sinking in a pound cake, you know this trick helps there too—I use it all the time! You can read more about keeping fruit from sinking right here.
- Don’t Over-Whisk the Wet into the Dry: I can’t say this enough! Once those wet ingredients hit that flour mixture, you switch from whisking to gentle folding with a spatula. Stop mixing the second the dry streaks disappear. A lumpy batter is a happy batter in muffin making. If you mix too long, you develop gluten, and that gives you those tough, chewy muffins instead of the soft, tender crumb we want.
- The Hot Oven Trick for Domes: If you really want those professional-looking bakery domes, you need to shock the batter! Make sure your oven is fully preheated to 350°F (180°C). Fill those cups right up to the rim—almost overfilling them—and get them into the hot oven immediately. The quick, intense heat at the start helps the edges set fast, forcing the middle to puff up high before it has time to settle. For more general advice on how to treat your batters right, check out my scone tips; even though it’s for scones, the principles of gentle mixing hold true!
- Fill Those Liners Fully: Don’t be shy! Fill those paper liners right up to the top, or even just shy of the brim. If you only fill them halfway, you’ll end up with sad, small discs instead of magnificent muffins. We want big volume!
Storage and Reheating Instructions for Your Strawberry Chocolate Muffins
The problem with delicious baked goods like these strawberry chocolate muffins is that they never last long enough to worry about storage, but when you *do* manage to save a few, knowing the right way to keep them fresh is crucial!
Since these are so moist from those beautiful strawberries, they actually stay quite nice on the counter for a bit, provided your kitchen isn’t too humid.
Room Temperature Storage
If you plan on eating them within two days, just leave them right on the counter. However, you need to cover them up! Don’t put them in the fridge unless you absolutely have to—cold air really dries out baked goods faster, and we don’t want that.
- Place your cooled muffins into an airtight container.
- If you only have a plastic bag, squeeze out as much air as you can before sealing it.
- They should be good for about two days. After that, I really recommend freezing them unless you notice them starting to feel a little stale.
Freezing for Long-Term Freshness
Freezing is my preferred method if I make a double batch. This recipe freezes like a dream! This is how you keep them tasting like they just came out of the oven next week.
- Make sure the muffins are completely cool before you wrap them. Warm muffins create condensation when frozen, leading to icy spots—yuck!
- Wrap each muffin *individually* tightly in plastic wrap. I double-wrap them just to be safe from freezer burn.
- Tuck those individually wrapped muffins into a heavy-duty freezer bag or an airtight container designated for freezer use.
- They’ll last beautifully for up to three months this way.
The Reheat Trick
When you’re ready to enjoy one straight from the freezer, don’t let it thaw on the counter for hours; you’ll lose that fresh-out-of-the-oven vibe.
Here’s my secret: Unwrap the frozen muffin, place it on a paper towel, and microwave it for about 20 to 30 seconds. It warms the white chocolate just enough to feel gooey again, and the moisture comes right back! Seriously, try this—it restores the whole experience.
Variations on Strawberry White Chocolate Muffins
While this recipe for Strawberry White Chocolate Muffins is absolutely perfect as written—trust me, I tested it a million times!—sometimes you just need to mix things up a little bit to keep things exciting in the kitchen. I love making small tweaks based on what I have lying around or what flavors I’m craving that day. These little changes still respect the beautiful texture we worked so hard to achieve!
When you play around with baked goods, you want to make sure you don’t mess with that delicate balance of wet and dry, so I always keep my additions small—nothing that changes the overall volume too much! If you’re looking for inspiration on flavor blends that totally work, check out my post on my cranberry orange muffins; the citrus and berry combo is amazing!
A Hint of Citrus Brightness
If you want your strawberries to really sing, you need a little acidity to wake them up! Adding lemon zest is my favorite way to do this. The tartness plays so nicely with the sweet, creamy white chocolate. Before you mix the wet ingredients, just zest one whole lemon into the sugar. It perfumes the whole batter as it mixes.
If you’re feeling extra wild, swap out that teaspoon of vanilla extract for a teaspoon of good quality lemon extract instead. But be careful, extract is potent! Start small next time and see how much you love that bright flavor kicking through.
Chocolate Swap: Hello, Milk Chocolate!
Sometimes you just don’t have white chocolate chips, or maybe you just prefer the deeper flavor of actual cocoa. You can absolutely swap that 1/2 cup of white chocolate chips for milk chocolate chips. Milk chocolate has a stronger flavor, though, so you might want to dial back the vanilla slightly, or perhaps keep the lemon zest in this version to balance it out.
I’ve also tried semi-sweet chips, but honestly, they can sometimes overpower the strawberries. Milk chocolate gives you a richer, slightly more intense dessert feel, turning these into wonderful strawberry chocolate muffins.
Adding a Little Crunch with Nuts
If you aren’t worried about anyone having nut allergies, throwing in some chopped nuts adds a fantastic textural contrast to the soft muffin and gooey chips. My pick here would be pecans.
Walnuts are a classic pairing with fruit, but pecans have a softer, buttery crunch that complements the white chocolate better, in my opinion. If you use nuts, fold in about 1/3 cup along with your strawberries and chips. Remember to gently fold, fold, fold!
Frequently Asked Questions About Strawberry White Chocolate Muffins
I know you might still have a few burning questions floating around before you dive into making these muffins! That’s totally fair. Baking is all about confidence, and knowing the answers to the tricky bits makes all the difference. I’ve gathered the questions I get asked most often about these sweet treats. If you’ve ever wondered about using different fruit or trying to get that perfect bakery look, this section is for you. These Strawberry White Chocolate Muffins are versatile, but a few tips go a long way!
Can I substitute fresh strawberries with frozen ones in this recipe?
Yes, you absolutely can! I know sometimes we only have bags of frozen berries in the freezer, and we need a muffin fix *now*. If you use frozen strawberries, here is the crucial step: DO NOT thaw them first! If they start to thaw, they release too much liquid, and you’ll end up with pinkish-gray batter instead of bright spots of red.
Take your frozen strawberries straight from the freezer and toss them gently in just about one tablespoon of your measured flour from the recipe *before* folding them into the batter. That light coating creates a little protective layer that helps stop the fruit from sinking down to the bottom of the muffin liners. It’s a lifesaver when you’re working with frozen fruit!
What is the best way to achieve bakery muffins texture?
Oh, achieving that high dome and tender crumb—that’s the goal, right? It comes down to two things that I hammered home in the instructions, but they are worth repeating because they are make-or-break moments!
First, and this is non-negotiable, is **not overmixing**. As soon as the wet ingredients are incorporated into the dry, stop moving the batter! If you mix until it’s perfectly smooth, you develop the gluten in the flour, and that gives you a tough, squashed muffin. Lumps are your friends here, trust me.
Second, think about the temperature shock. Make sure your oven is fully preheated to 350°F (180°C). You want that immediate blast of heat on the exterior of the batter. This sets the structure fast, forcing the center to climb up and create that gorgeous, high-rising dome top that makes these look like true bakery muffins. Don’t open the oven door until the very last few minutes of baking, either!
Can I skip the sugar topping on these muffins?
You *can* technically skip it, but I really wouldn’t recommend it if you’re aiming for that bakery-style experience! The 2 tablespoons of sugar you sprinkle on top are what crystalize during baking. That tiny bit of extra sugar creates a wonderfully crunchy, slightly coarse crust that contrasts perfectly with the soft, moist interior. It adds texture and a little visual appeal. If you skip it, your muffin top will be softer and slightly duller, but it will still taste amazing, of course!
If you want to explore more delicious pink treats, my archive of strawberry recipes has tons of inspiration for you!
Share Your Strawberry White Chocolate Muffins Experience
Now that you’ve tried these decadent treats, I genuinely want to hear about them! Part of the joy of sharing recipes is seeing how they turn out in different kitchens. Did you try the lemon zest variation I mentioned? Or did you stick to the classic combination of strawberries and white chocolate?
Please take a moment to leave a star rating below—it really helps other bakers know this recipe is tried, tested, and totally worth the effort. If you tweaked the sugar or added something special, drop a comment letting us know. I read every single one and I might even feature your amazing creation on my social media!
Don’t forget, if you ever have questions or want to send me feedback directly about any recipe, you can always reach out via the contact page. Happy baking, friends!
By Grace Williams, contributor at Recipes by Betty.
Strawberry White Chocolate Muffins
Equipment
- Muffin Tin
- Muffin liners
- Mixing Bowls
Ingredients
Muffins
- 1 3/4 cups flour
- 3/4 cup sugar
- 1 tsp baking powder
- 1/2 tsp baking soda
- 1/4 tsp salt
- 2 eggs
- 1/2 cup milk
- 1/3 cup oil
- 1 tsp vanilla extract
- 1 cup strawberries, chopped
- 1/2 cup white chocolate chips
Topping
- 2 tbsp sugar
Instructions
- Preheat your oven to 180°C (350°F). Line a muffin tin with paper liners.
- In a large bowl, mix the flour, 3/4 cup sugar, baking powder, baking soda, and salt.
- In a separate bowl, whisk together the eggs, milk, oil, and vanilla.
- Pour the wet ingredients into the dry ingredients. Mix until just combined. Do not overmix.
- Gently fold in the chopped strawberries and white chocolate chips.
- Divide the batter evenly among the muffin liners, filling each about two-thirds full.
- Sprinkle the remaining 2 tablespoons of sugar over the tops of the muffins.
- Bake for 18 to 22 minutes, or until a toothpick inserted into the center comes out clean.