There’s just something about the smell of a campfire that sends me right back to childhood evenings, sticky fingers, and that perfect combination of melted chocolate, snap of graham cracker, and gooey marshmallow. Right? Well, I’ve bottled that whole experience up for you, no bonfire required!
Forget fussy assembly; this recipe is pure magic because it’s ridiculously simple—one of those perfect Easy Desserts With Few Ingredients. We’re making S’mores Magic Cookie Bars that just bake up perfectly in one pan. Trust me, these bars remind me why s’mores flavors never go out of style—one bite always brings that cozy feeling back. You just mix, layer, and bake! If you’re looking for easy treats that taste totally indulgent, you’ve found your new favorite baking idea.
Why You Will Love These S’mores Magic Cookie Bars (Easy Treats)
Honestly, these are my go-to when I need something fast and everyone loves it. They check every box for busy families or casual bakers. They’re truly some of the best Easy Treats out there!
- Super simple assembly that screams Simple Desserts
- That classic campfire flavor that tastes incredible right out of the oven
- They feed a crowd easily since they bake up perfectly in one pan
Gathering Ingredients for S’mores Magic Cookie Bars
The best part about these bars—they feel like a major baking accomplishment, but honestly, the ingredient list is so short! It’s why they qualify as one of those wonderful Easy Desserts With Few Ingredients. You just need a few pantry staples to build those iconic layers. I always lay everything out before I start, which is the secret to staying organized when you’re trying to build up those layers of flavor.
Crust Ingredients
We need the sturdy base first! You can’t skimp here because this crust has to hold all that gooey goodness we layer on top. Make sure your butter is fully melted and ready to combine.
- 200 grams of graham cracker crumbs (that’s about one full sleeve, crushed fine!)
- 120 grams of melted butter
Filling Ingredients for S’mores Magic Cookie Bars
This is where the magic really happens. Seeing these ingredients come together never gets old. If you have any leftover sweetened condensed milk, you should definitely try it in my caramel bars next!
- 400 grams of sweetened condensed milk (Don’t grab evaporated milk—it has to be the sweet kind!)
- 150 grams of chocolate chips (I use semi-sweet, but feel free to mix in some milk chocolate!)
- 150 grams of mini marshmallows (The minis blend much better than the big ones, trust me.)
Step-by-Step Instructions for Perfect S’mores Magic Cookie Bars
This is truly where these Easy Treats shine because there’s almost no effort involved! We’re aiming for that perfect melt and set here. Remember, prep is super fast, but we have to be patient during the cooling to get those clean cuts later.
Preparing the Crust Base
First things first, get your oven warmed up—we need it at 175°C (350°F). Grab your graham cracker crumbs and your melted butter and just mix them in a bowl until everything looks sandy and damp. That’s the foundation for your S’mores Magic Cookie Bars!
Press that mixture firmly into the bottom of your prepared 9×13 inch pan. I use the bottom of a measuring cup to pack it down really tight so we don’t get any crumbling later.
Layering the Gooey Components
Next up is the sticky, sweet layer. Gently pour that entire can of sweetened condensed milk right over your crust. Try to get it spread out from edge to edge without dragging up too many crumbs.
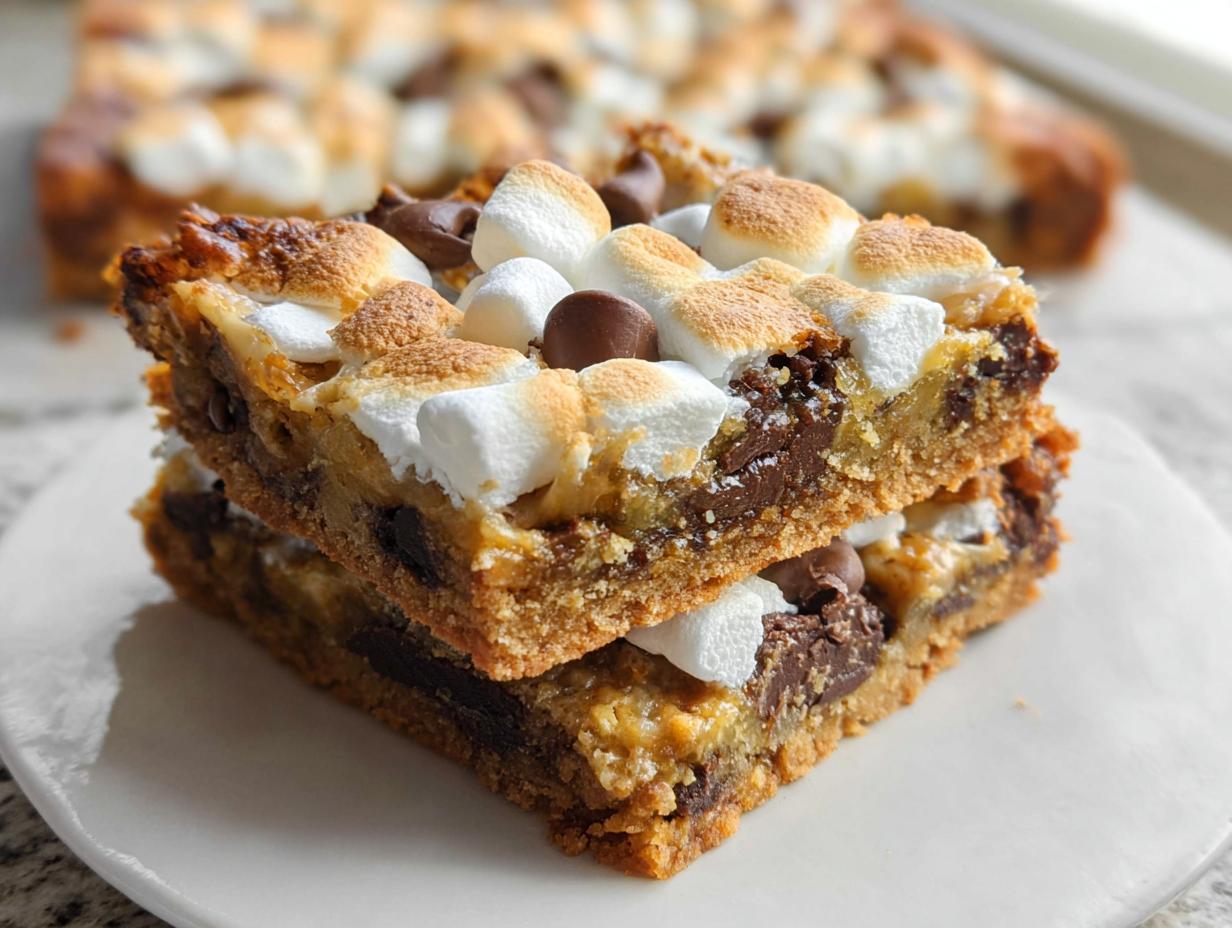
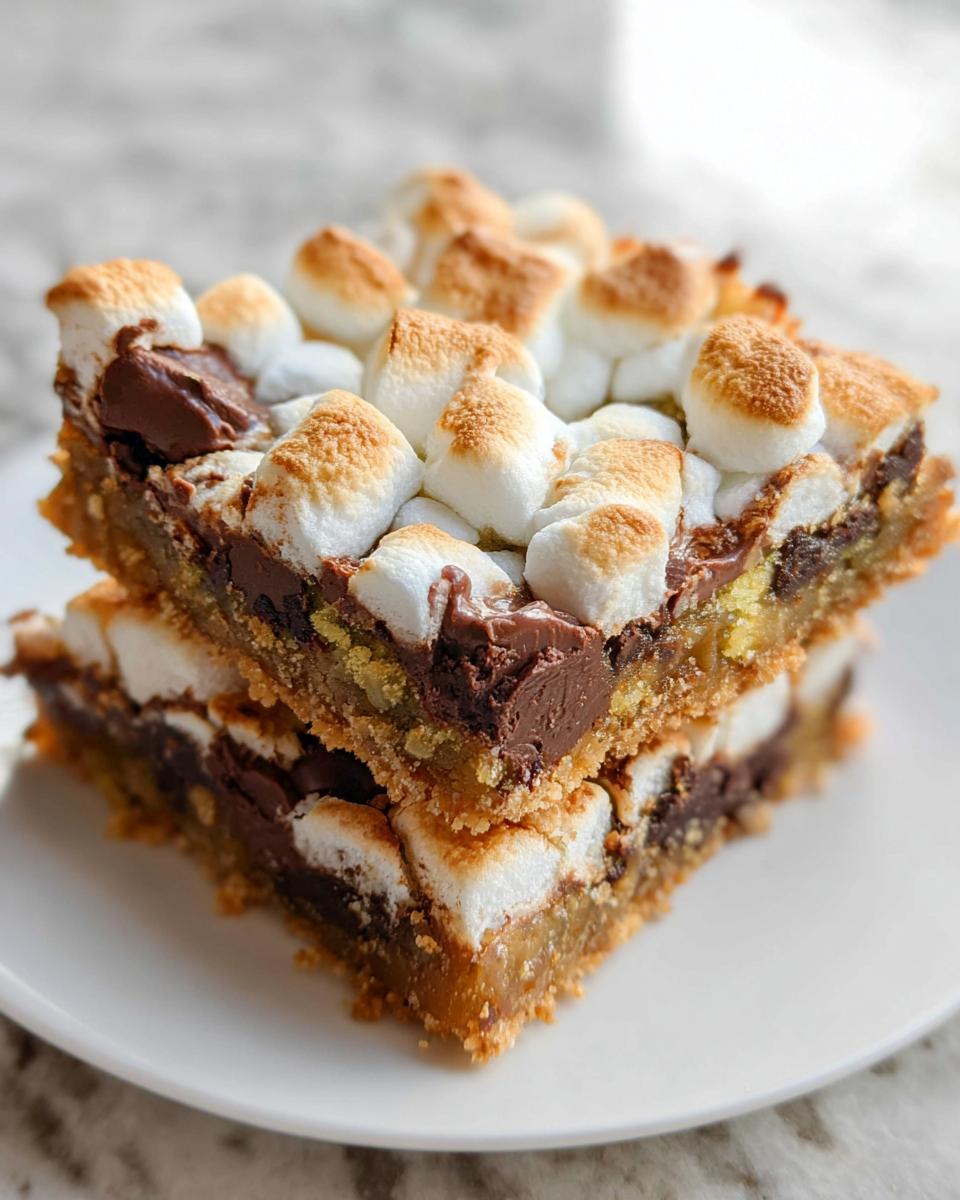
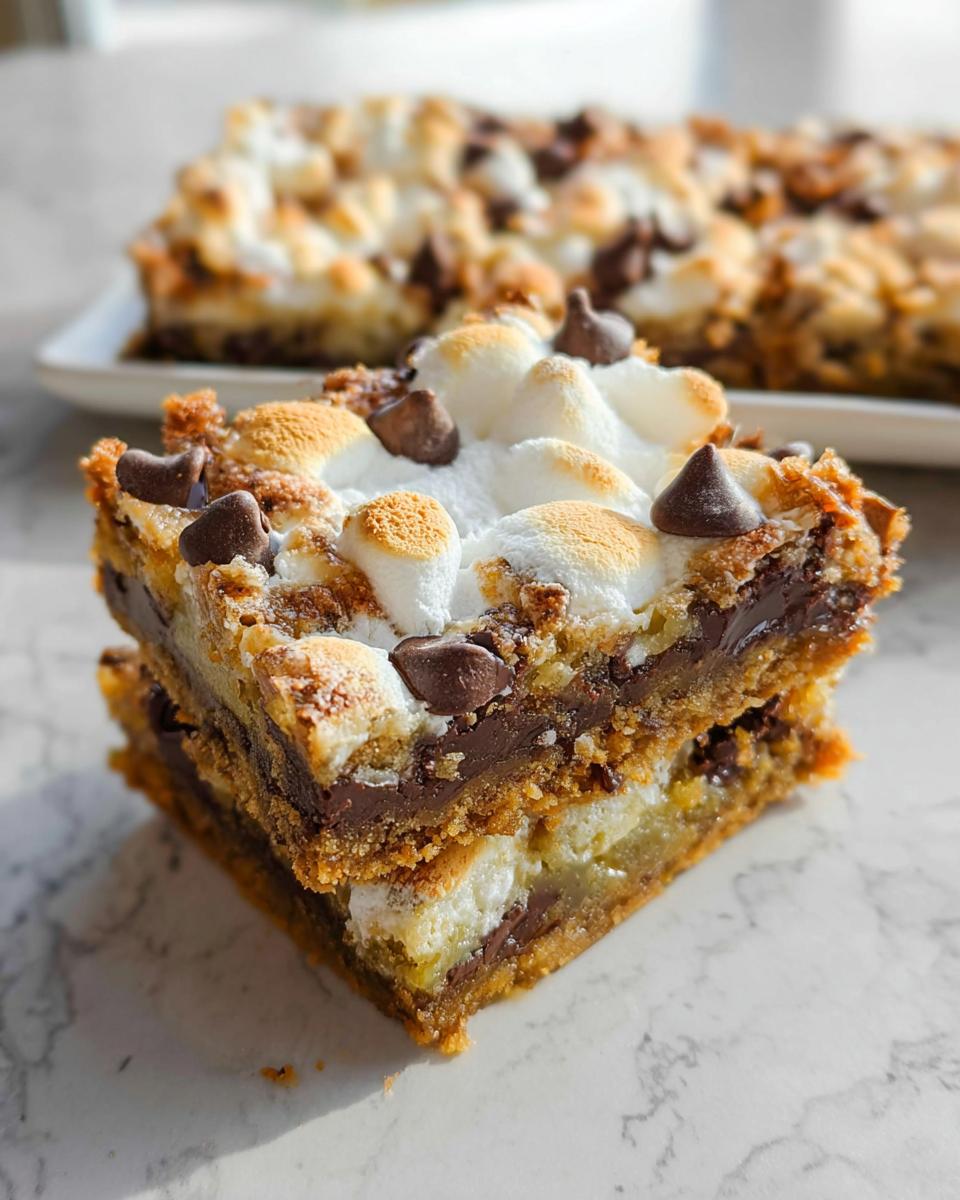
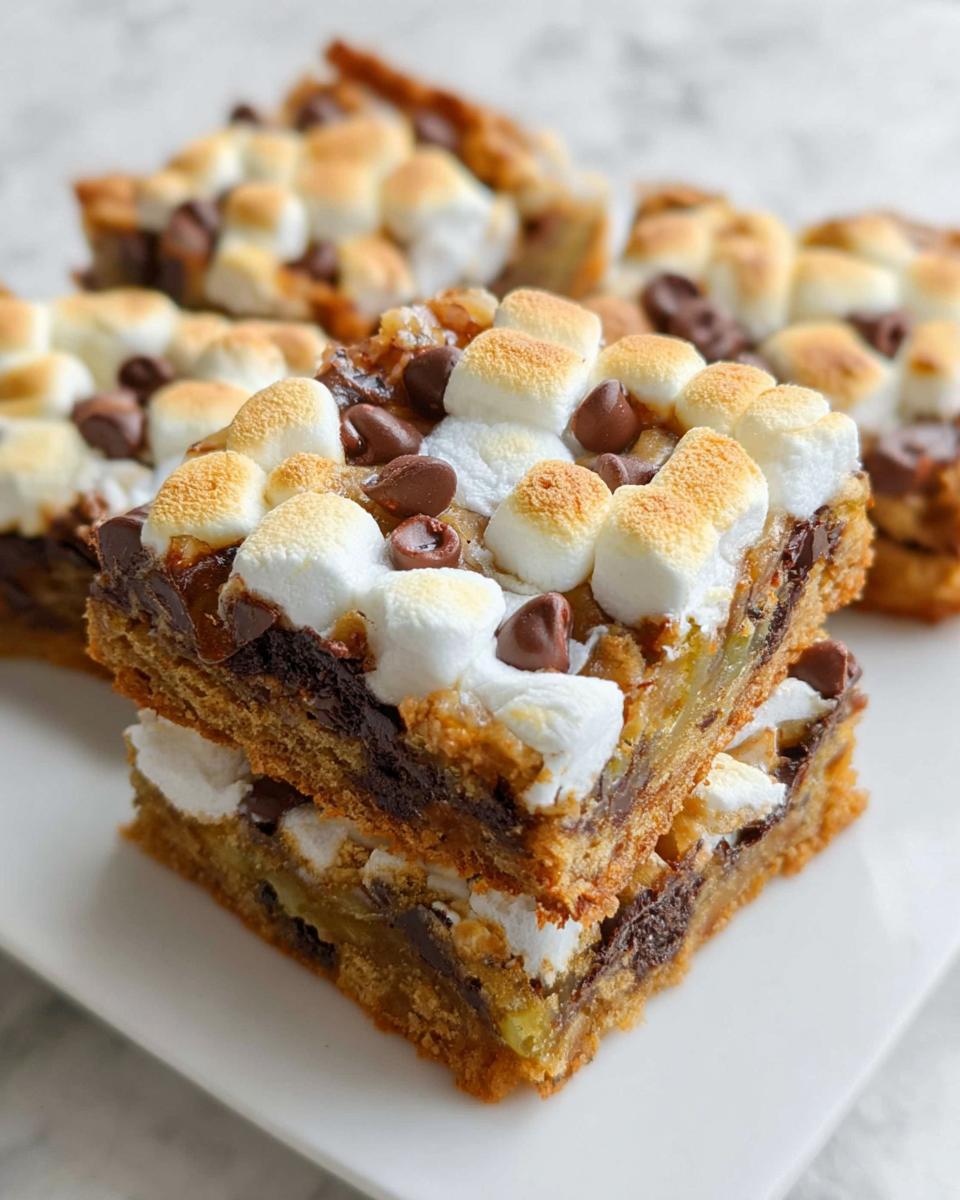
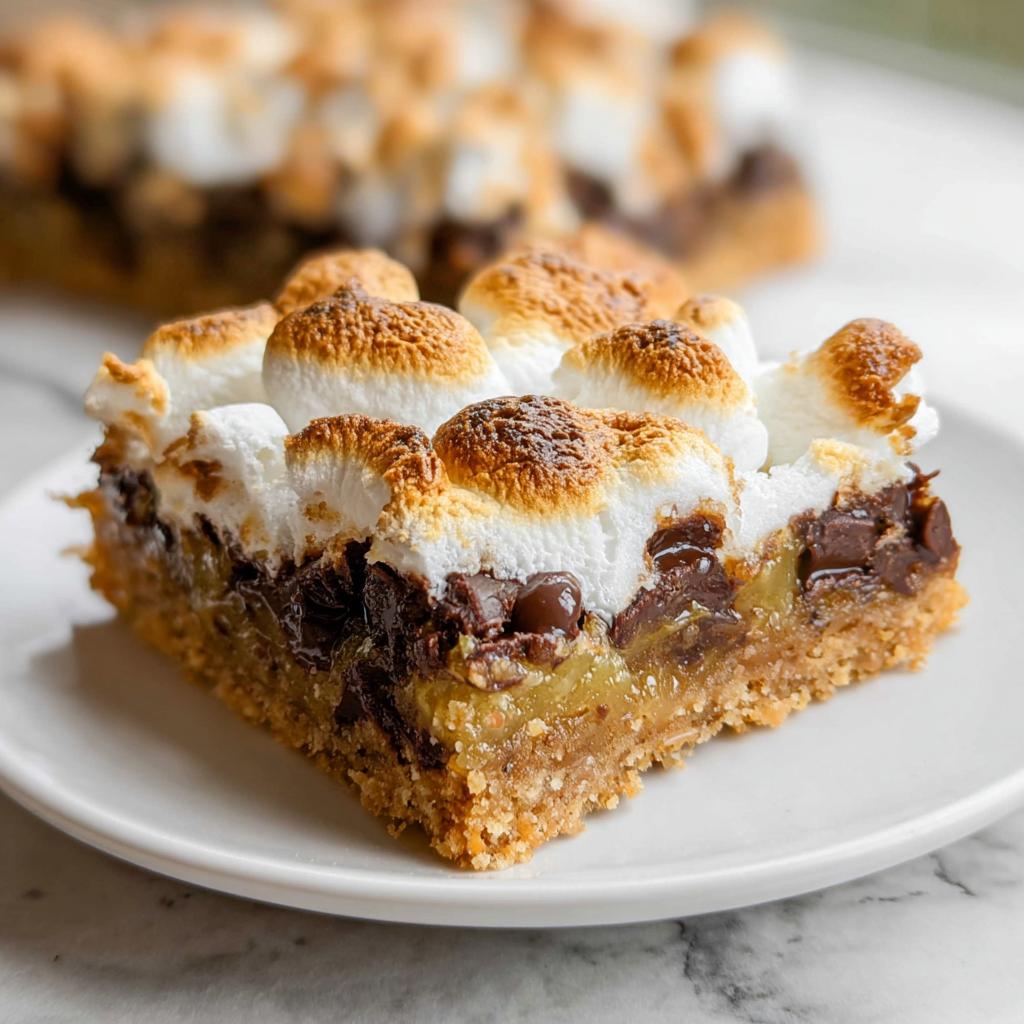
Now, shower the top with those chocolate chips and then cover everything evenly with the mini marshmallows. Don’t pile them too high in one spot; an even layer guarantees the best bite every time.
Baking and Finishing Your S’mores Magic Cookie Bars
Pop the pan into the preheated oven and bake this beauty for about 25 minutes. You want the edges to look just slightly golden brown.
Now, here’s a little trick if you want that true campfire look: if the edges look set but the marshmallows aren’t quite toasted, stick it under the broiler for just a minute or two. Watch it like a hawk, though! Broilers are fast and can burn sugary tops in seconds. Cooling is mandatory—you need a full 60 minutes for the layers to set before slicing!
Tips for Success with S’mores Magic Cookie Bars
Even though these are some of my favorite Easy Treats because they are so simple, there are tiny things you can do to make sure they go from great to absolutely legendary. Pay attention to the cooling time—that’s the make-or-break step for these layered bars!
You absolutely must let them cool completely, and I mean it. Trying to cut them warm means you get a gooey, sticky mess that smears across your cutting board. You need that full 60 minutes for the condensed milk layer to firm up just enough so the bars hold their shape when you slice them. Think of it as necessary patience for that perfect, clean square.
If you are going for that deeply toasted, deeply caramelized marshmallow top, use that broiler trick I mentioned, but be warned: it’s fast! You want the marshmallows to just start turning golden brown—no black spots allowed. Pull the pan out the second you see color, because residual oven heat will keep cooking them even after you take them out.
Also, when you press down that graham cracker crust, really pack it in tight. If the crust is loose, the melted butter and condensed milk will seep down into the bottom, making the crust soggy instead of sturdy. Use a flat measuring cup to really compact those crumbs before you start layering the rest of your ingredients.
Ingredient Notes and Substitutions for S’mores Magic Cookie Bars
Since these S’mores Magic Cookie Bars are such a simple recipe—only five main things!—there isn’t a lot of room for major swaps, but I get asked about the cracker and the chocolate all the time. Because the ingredient list is short, every single one pulls its weight, so we have to be mindful of what we swap out.
When it comes to the graham cracker crumbs, if you happen to be out of the traditional ones, you can sometimes pull off digestive biscuits in a pinch, though you might lose a bit of that classic picnic flavor we are aiming for. Just make sure whatever cracker you use, you crush it up until it’s very fine—we don’t want big chunks floating around in the crust!
Chocolate chips are super flexible; semi-sweet gives you a great balance against the intense sweetness of the condensed milk, but feel free to use milk chocolate if you want something sweeter overall, or even toss in some dark chocolate chunks for a richer contrast. If you have chocolate bars lying around, break them up roughly instead of using chips! Those varying sizes melt wonderfully.
As for marshmallows, I insist on the mini ones. They melt evenly across the surface, giving you that continuous, gooey sheet. If you only have large marshmallows, you really must chop them up into smaller pieces before sprinkling them on. Otherwise, you end up with big air pockets where the marshmallows didn’t melt down, and that ruins the otherwise perfect texture of these Easy Dessert Ideas!
Making S’mores Magic Cookie Bars for a Crowd
If you’re planning a summer cookout, a school event, or just have a house full of hungry people, you know you need good, reliable spotted desserts that don’t require tons of fuss. That’s exactly why this recipe is one of my absolute favorite Easy Desserts For A Crowd!
Since these bars are baked in a standard 9×13 inch pan, they yield about 12 generous squares. That might be enough for your family, but if you’re hosting more folks—say, 20 or more—doubling this recipe is incredibly simple. It’s a wonderful feature of almost any “magic bar” style recipe.
You don’t need to adjust the temperature or the time when you double it, which is fantastic! You just need a second 9×13 pan, or maybe one of those large 12×17 half-sheet pans if you want a thinner bar everyone can grab quickly. Just be sure to divide your crust mixture and pour your condensed milk evenly across both pans before topping them off.

Because it’s such a straightforward dump-and-layer process, as opposed to scooping individual cookies, you save loads of time. Pulling two pans out of the oven at the same time that smell like a bonfire? That’s maximum efficiency for minimum effort, and that’s how we keep our simple desserts stress-free!
Storing and Serving Your S’mores Magic Cookie Bars
So you’ve made these incredible S’mores Magic Cookie Bars—now you have to guard them! Since they are so soft and gooey, storage is a little different than a standard cookie. The key thing to remember is the cooling time we already talked about; you must get them fully set before you even think about slicing or storing them away.
For short-term serving, say for a barbeque right after they’ve cooled for that mandatory hour, keeping them on the counter is fine. I just cover the pan loosely with foil to keep dust (and hungry fingers) off the beautiful toasted marshmallow tops. They’re best enjoyed the day they are made for that ultra-ooey texture!
Keeping Them Fresh for Later
If you have leftovers—which, honestly, is rare in my house—you need to know how to keep that condensed milk layer from getting weepy or sticky against the wrapper. I find that storing them in an airtight container at room temperature works best for up to three days. The marshmallows might lose a bit of their bounce after day one, but they are still totally delicious.
Do NOT store them in the fridge if you can help it! I learned this the hard way. When these bars go into the cold, that condensed milk layer gets hard and chewy, taking away all that lovely soft texture that makes them magic bars. If you absolutely have to refrigerate them for longer storage, just let them sit out on the counter for at least 30 minutes before serving so they can soften up again.
Serving Ideas That Double Down on Gooey
Serving these is almost as fun as baking them because you can lean into that campfire vibe! Since they are so sweet, I love pairing them with something simple to cut through the richness. Think a scoop of vanilla ice cream—the cold against the slightly soft bar is heaven.
If you want to serve them warm (which bypasses the cooling time issue a little bit), you can flash-heat them gently. Try microwaving an individual bar for about 10 seconds. The chocolate will melt right back into that stretchy marshmallow goo. It makes them taste freshly baked again if you need easy homemade desserts ready instantly!
Another nice touch is to melt a little extra chocolate or marshmallow fluff and drizzle it over the top just before serving if they are a day old. It freshens up the look and adds an extra layer of that campfire goodness we all love!
Frequently Asked Questions About S’mores Magic Cookie Bars
I know you’ve got questions! When you’re dealing with layers like condensed milk and marshmallows, naturally you want to make sure everything sets up just right so your bars come out beautifully clean. These often come up when people are looking for foolproof Easy Dessert Ideas!
Can I make these S’mores Magic Cookie Bars ahead of time?
Oh yes, you absolutely can! Actually, I kind of prefer it when they are made a day ahead of time. The absolute most important thing is that you let them cool completely—that means the full 60 minutes we talked about—before you even try to slice them, otherwise, they turn into a sticky mess. Once they are cut, they store just fine at room temperature for a couple of days. They are fantastic make-ahead Easy Treats for parties!
Are S’mores Magic Cookie Bars considered Easy Desserts With Few Ingredients?
If simple is what you’re after, you hit the jackpot here! When you see them all layered up, they look complicated, but we are talking just five main components: graham crackers, butter, condensed milk, chocolate, and marshmallows. That puts them right at the top of the list for Easy Desserts With Few Ingredients. You won’t spend ages hunting through your pantry for 15 different things, which I love.
How do I prevent the marshmallows from getting too hard?
This happens sometimes, especially if you store the bars in the fridge, and nobody wants a rock-hard marshmallow on their s’more! The key is twofold. First, use the *mini* marshmallows because they melt down into the fluff better than the big ones do during the 25-minute bake time. Second, try to keep them stored at room temperature covered loosely. If they do get a little stiff after a day, just zap the individual bar under the broiler for about 30 seconds, or pop it in the microwave for 5-10 seconds, and they go right back to being perfectly soft and gooey.
Nutritional Estimates for S’mores Magic Cookie Bars
Okay, let’s talk real talk for a second. We know these S’mores Magic Cookie Bars are pure, unadulterated campfire joy, and they are absolutely packed with rich condensed milk and chocolate. Because of that, they register higher on the indulgence scale than, say, an apple! But that’s part of the fun, right? You make these for treating yourself!
Here are the approximate numbers based on the standard recipe and serving size of 12 bars. Remember, I’m a home baker, not a certified nutritionist, so these figures are just good estimates based on the ingredients we used. If you use a different brand of chocolate or sugar-free condensed milk, your counts will change!
For one bar, based on the recipe details, you’re looking at something like this:
- Calories: Approximately 350
- Total Fat: Around 16g (with about 9g saturated fat, thanks to all that butter and chocolate!)
- Carbohydrates: Roughly 45g
- Sugar Content: We’re sitting near 30g of sugar here, which is what makes them taste so fantastic!
- Protein: About 5g
If hosting a party, just do the math! If you double the batch, you double the total nutritional content and then divide it by 24 servings. These are meant to be a delicious, occasional Homemade Dessert when the craving for chocolate and marshmallow hits hard!
Share Your Homemade Desserts Experience
That’s it! You’ve made the ultimate childhood treat baked right in your own kitchen. I truly hope these S’mores Magic Cookie Bars bring back all those warm, cozy memories for you and your family the way they do for mine. They are such foolproof Homemade Desserts—perfect for everything from last-minute gatherings to just satisfying a serious chocolate craving.
I absolutely live to hear how your batches turned out! Did the marshmallows get perfectly toasted? Did you have any trouble waiting that whole hour for them to cool down and set? Please leave a quick rating and share your experience in the comments below. Knowing how these simple treats fit into your own Baking Ideas means the world to me!
If you want to send me a note about scaling up the recipe or ask questions about substitutions, feel free to reach out through the contact page. Happy baking, everyone!
By Hanna Foster, Adaptation Specialist at Recipes by Betty
S’mores Magic Cookie Bars
Equipment
- 9×13 inch baking pan
- Mixing Bowl
Ingredients
Crust
- 200 g graham cracker crumbs
- 120 g melted butter
Filling
- 400 g sweetened condensed milk
- 150 g chocolate chips
- 150 g mini marshmallows
Instructions
- Preheat your oven to 175°C (350°F). Mix the graham cracker crumbs and melted butter together in a bowl.
- Press the crumb mixture evenly into the bottom of your prepared baking pan to form the crust.
- Pour the sweetened condensed milk evenly over the crust layer.
- Sprinkle the chocolate chips and mini marshmallows over the condensed milk layer.
- Bake for 25 minutes, or until the edges are lightly golden.
- If you want a more toasted top, lightly broil for 1 to 2 minutes, watching carefully to prevent burning.
- Cool the bars completely before you slice them. This allows the layers to set properly.