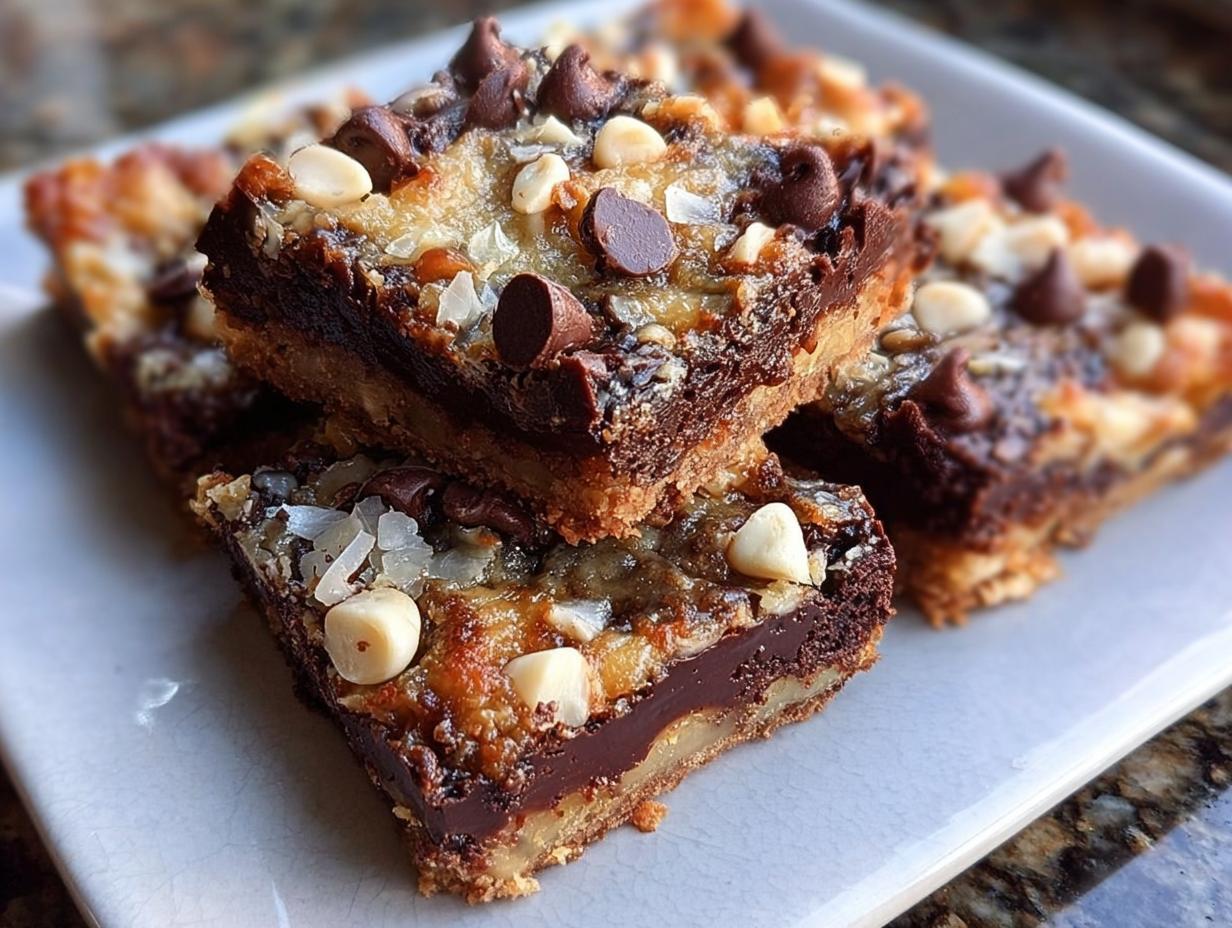
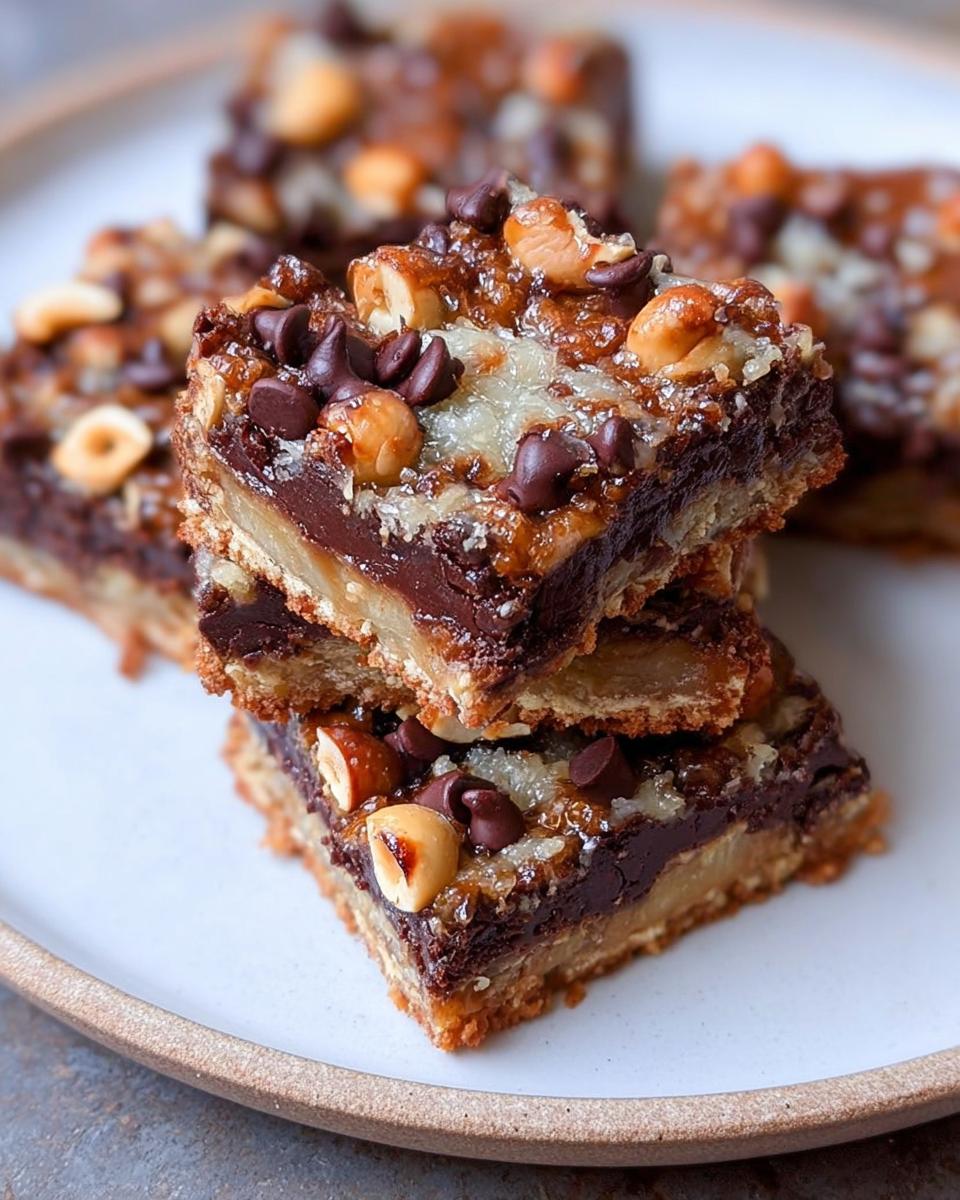
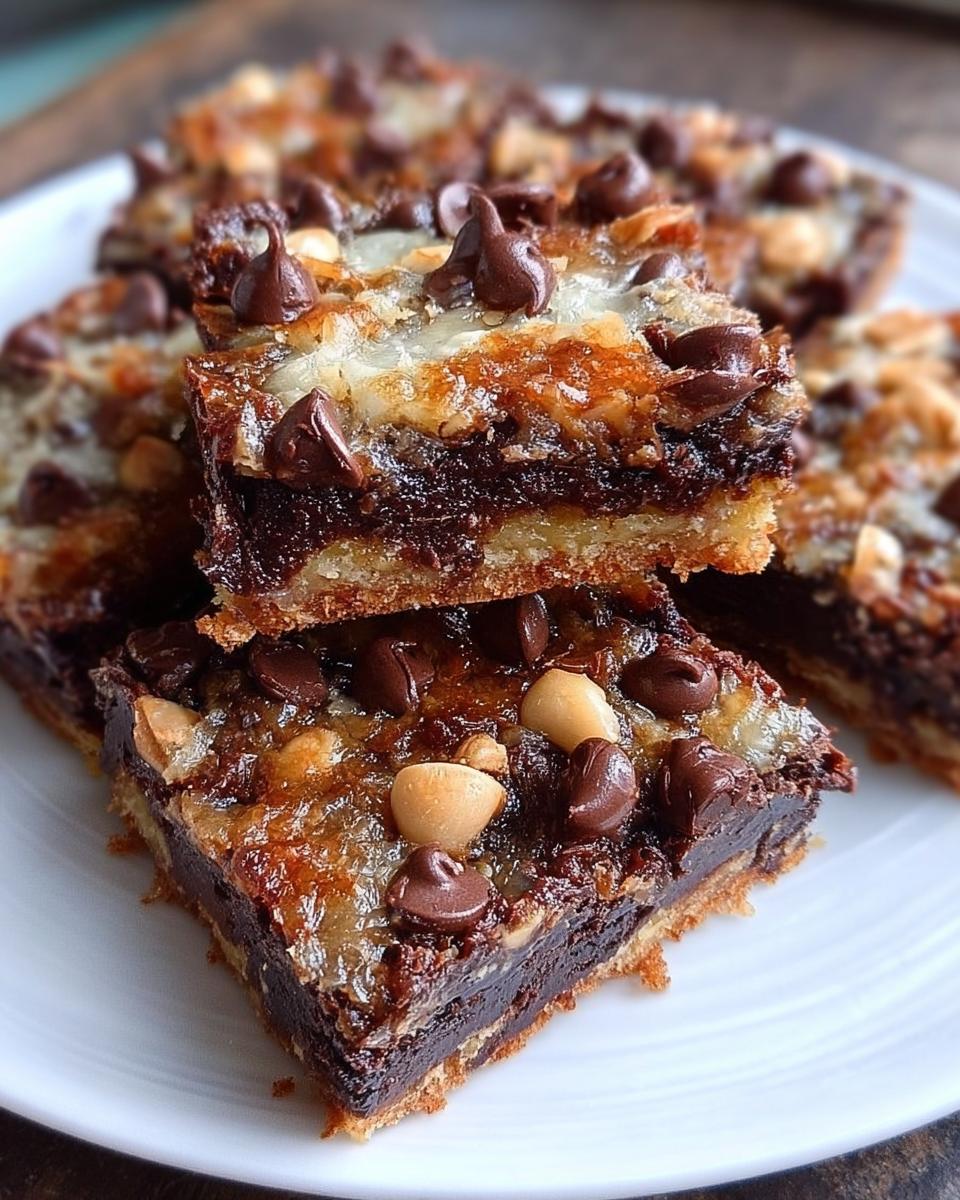
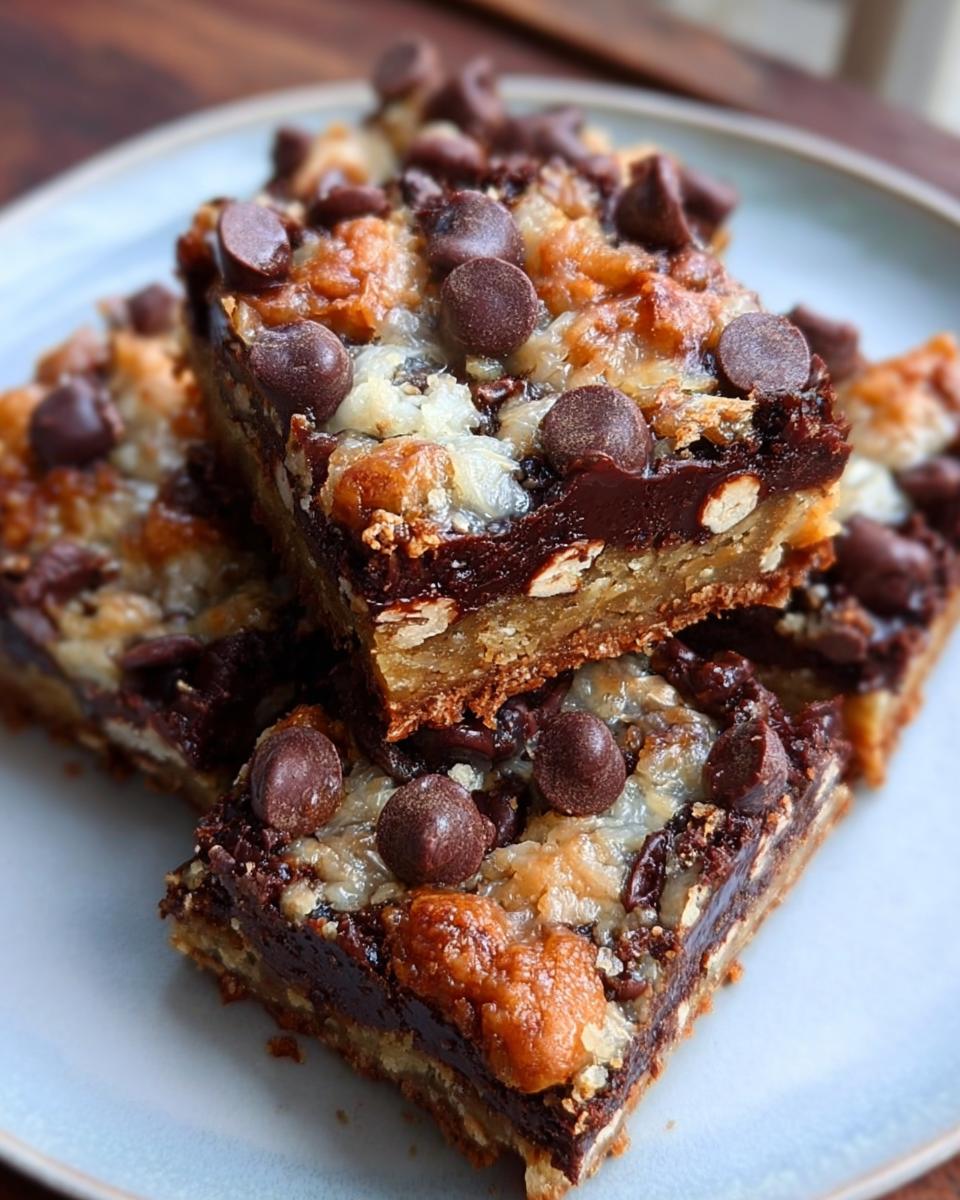
Oh, that unmistakable craving hits you, right? That deep, dark desire for something rich, gooey, and unapologetically chocolatey, but you just don’t have the energy for fussy baking. Trust me, I know that feeling! That’s why I am so thrilled to share these absolute game-changers with you: my totally addictive Nutella Magic Bars. These bars are the epitome of simple desserts—just a few ingredients, a quick layer assembly, and you get layers of incredible hazelnut magic that just melts in your mouth.
Nutella desserts always remind me of after-school treats we’d sneak into the kitchen to make together—simple bars that felt extra special after a long day. They deliver huge flavor payoff for very little work, which is exactly what we busy home cooks need.
Why You Will Make These Nutella Magic Bars Again and Again
Seriously, friends, these aren’t just good cookies—they are the pinnacle of easy treats. I’ve tried hundreds of recipes trying to find that sweet spot between low effort and high reward, and these Nutella Magic Bars nail it every single time. They solve that evening craving instantly because they are categorized as one of the best simple desserts you can throw together.
- They truly are one of the easiest desserts with few ingredients; you probably have most of what you need already!
- The total prep time is under ten minutes, which means faster gratification, which we all need.
- That combination of buttery graham, sweet condensed milk, and rich hazelnut is just pure comfort food heaven.
- These bars hold up beautifully, making them fantastic for bake sales or office potlucks.
- If you love those classic seven-layer bars but want a chocolate-hazelnut twist, this is your new go-to baking idea. Check out my tips for the classic version right here if you want to compare!
Gathering Ingredients for Your Nutella Magic Bars
When I say these are easy dessert ideas, I mean it! The real beauty of these Nutella Magic Bars is how few components they need. You’re not going to be digging through your pantry for twelve random spices or finding obscure flours. We are building this treat in two simple stages: the base and the glorious, gooey flood of toppings.
Gather everything before you start mixing, because once you combine the butter and crumbs, you’ll want to move fast to get these into the oven. Take a peek at what you need below; it’s straightforward stuff that creates something truly special.
For the Crust
The foundation has to be firm enough to hold all that decadent topping, so we keep it simple and buttery. You only need two things here:
- 200g graham cracker crumbs – make sure they are fully crushed!
- 120g butter, melted until smooth and glossy.
For the Gooey Layers of Nutella Magic Bars
This is where the magic actually happens! We use sweetened condensed milk as the binder that holds everything together while it bakes, turning wonderfully gooey. If you are buying premium chocolate, you can check out Ghirardelli, but honestly, any decent chip works great. If you love caramel versions, I have a fantastic Caramel Magic Cookie Bar recipe you should try next!
- 400g of sweetened condensed milk – don’t substitute this, it’s essential!
- 180g of your favorite Nutella spread.
- 150g chocolate chips (milk or semi-sweet works).
- 100g shredded coconut.
Step-by-Step Instructions to Make Nutella Magic Bars
Okay, we have our ingredients lined up, the oven is ready—it needs to be preheated to 175°C, by the way—so now we just assemble this masterpiece! This is the fun part where everything comes together in minutes. Since these are some of the best easy desserts with few ingredients, the steps are incredibly straightforward, but timing matters for that perfect gooey texture.
Preparing the Base for Your Nutella Magic Bars
First things first, get that crust ready. Grab your buttery graham crumbs and pour that melted butter right in a bowl. Mix it up until it looks like wet sand—you want it just combined enough to stick together when you squeeze it. Press this mix firmly and evenly into the bottom of whatever baking dish you are using. I usually use a 9×13 pan for these, but whatever fits your crowd works. Press down hard with the bottom of a measuring cup to make sure it stays put!
Layering the Sweetness for Perfect Nutella Magic Bars
Now for the sweetness! Slowly pour that thick, beautiful sweetened condensed milk right over the top of your crust. Try to pour it in a circular pattern so it settles evenly without digging into the graham base too much. Next, take your warm Nutella—it spreads much easier when slightly warm—and dollop it over the milk. Gently spread it around; don’t swirl aggressively, or you’ll mix it up too much! If you are looking for more simple ways to make magic happen in the kitchen, check out my guide to simple desserts that wow.
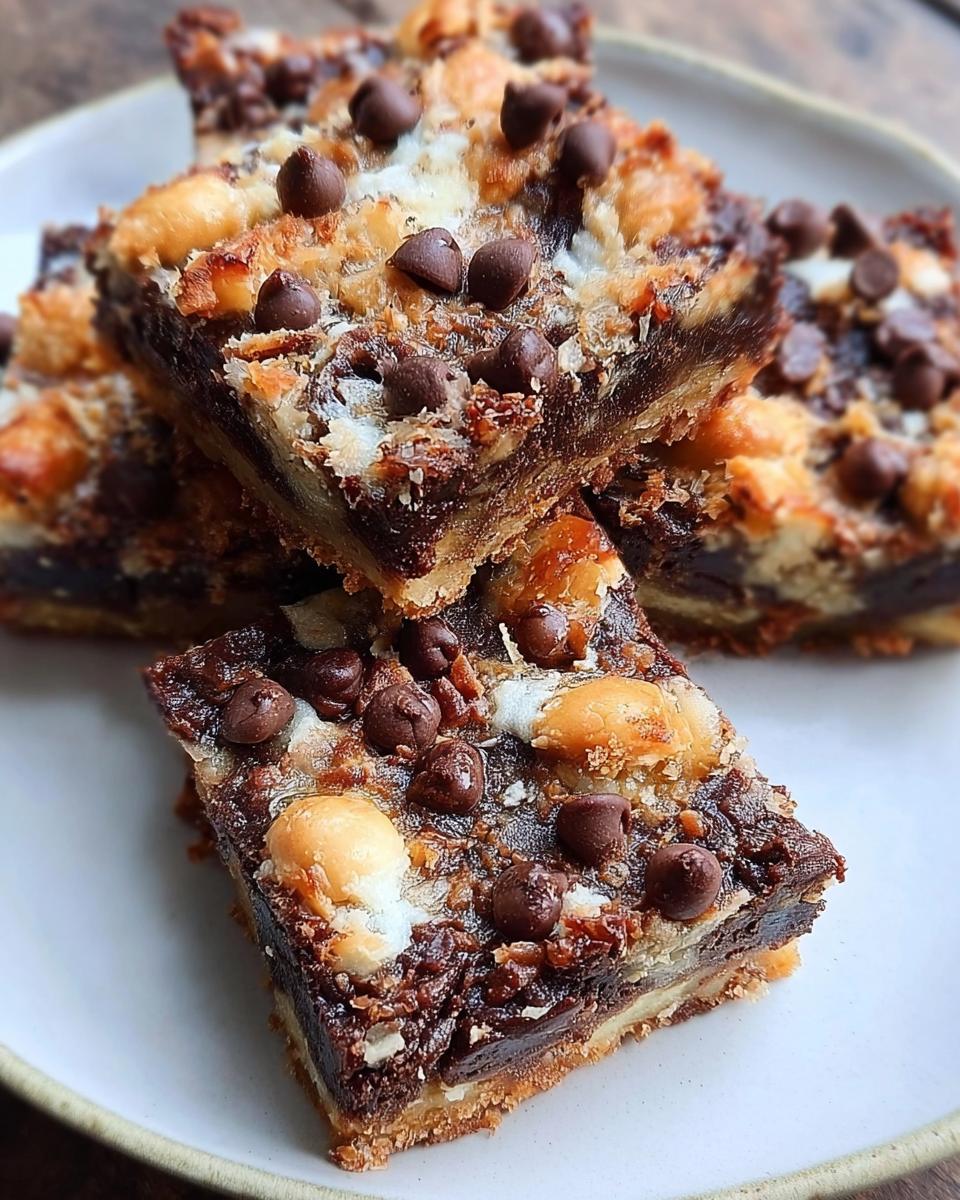
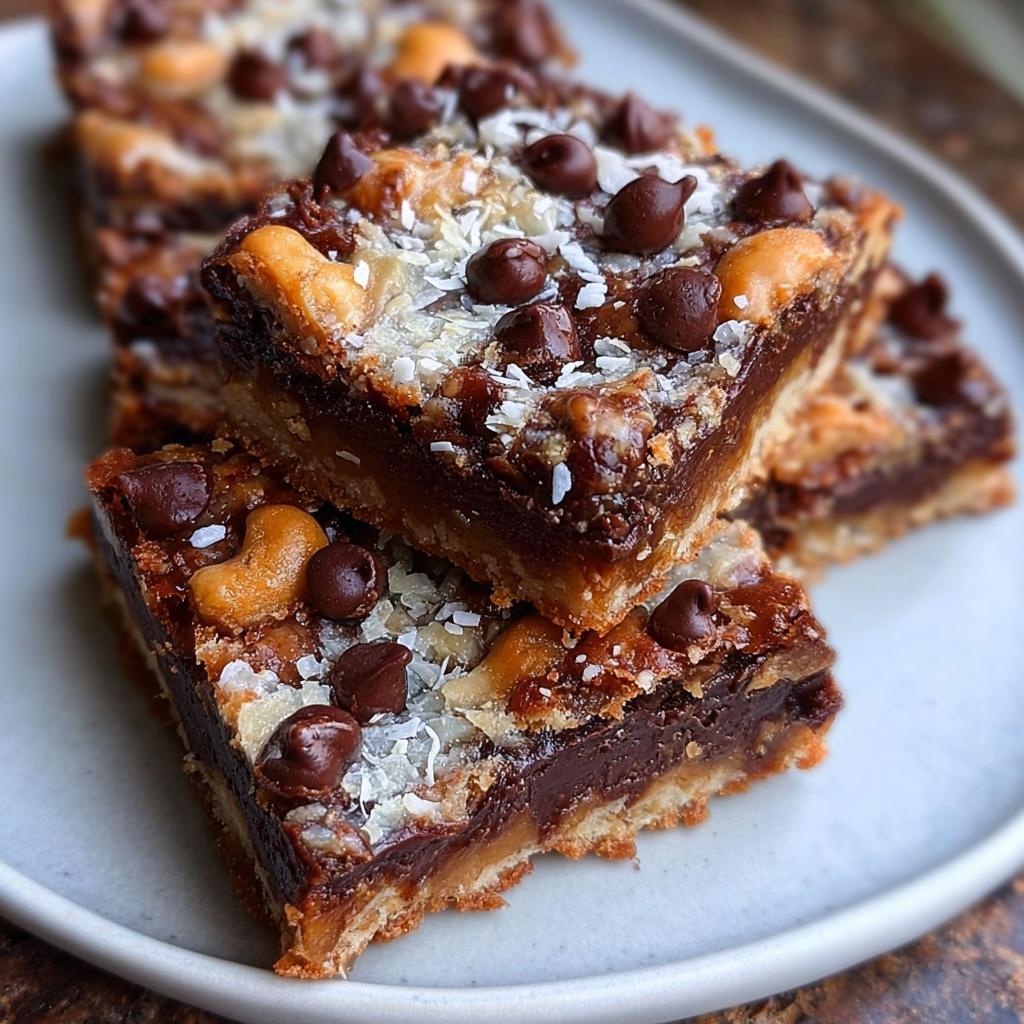
Finally, sprinkle those chocolate chips and the shredded coconut evenly over the top. Now we are ready for the heat!
Baking and Cooling the Easy Treats
Pop the dish into that preheated oven for about 25 to 30 minutes. You are looking for the edges to look set, and the top should be lightly golden. You’ll know they are done when the whole dish smells like a decadent dessert dream! This final step is crucial: let the bars cool completely on a wire rack—I mean truly cool. If you cut them warm, they turn into a chocolatey puddle. Waiting for them to set ensures you get those perfect, clean squares.
Expert Tips for Perfect Nutella Magic Bars
Even though these are some of the simplest desserts imaginable, a tiny bit of insider knowledge goes a long way to making these Nutella Magic Bars look magazine-worthy when you serve them. My biggest frustration used to be getting them out of the pan in one piece!
Here’s my top secret for easy removal that ensures you get 12 beautiful squares every time: you have to use a parchment paper sling. Just line your baking dish with parchment paper, leaving about 2 inches hanging over two opposite sides. When the bars are cool, you just grab those flaps and gently lift the entire baked slab right out! It’s brilliant.
For that ultra-gooey middle, don’t overbake! The layers should look mostly set, but still a little wobbly in the very center. They will firm up as they cool. If you struggled with perfect layers before, check out my essential guide on expert baking tips—it really helps with overall texture control!
Ingredient Notes and Substitutions for Nutella Magic Bars
So, let’s talk about the components because even the easiest desserts rely on the right stuff! While these Nutella Magic Bars are designed to be minimal, knowing how to work around ingredients or what to swap is always smart. For example, I’ve heard people ask about swapping the condensed milk, but honestly, that’s the glue that holds the magic together; trying to substitute it usually ends up turning this into a muddy mess rather than a structured bar.
When it comes to the chocolate chips, feel free to mix and match! If you have some dark chocolate chips lying around, throw those in with the milk chocolate for extra depth. Or maybe you want to use Reese’s Peanut Butter Cups instead for a triple threat? Go for it! Just be mindful that using ingredients like M&M’s might change how evenly they melt, but who cares when it tastes that good, right? You can definitely check out other candy options like those made by Mars if you want a different candy texture on top.
And of course, the star: Nutella. If, for some wild reason, you absolutely cannot stand hazelnut (I’m judging, but I understand!), you could technically use melted peanut butter or even Biscoff spread, but then you are moving into a different category of deliciousness. I highly recommend sticking to the Nutella for the authentic flavor, though. It just melts and blends into that condensed milk layer so perfectly, creating those irresistible swirls we love in these bars.
Serving Suggestions for These Easy Desserts
Once your Nutella Magic Bars have cooled completely—that might be the hardest part of this whole process, waiting for that gooey center to set up perfectly—you get to the fun part: serving them! These bars are so rich and deeply flavorful that they don’t really need much fuss, but sometimes a little addition takes them from a great treat to an unforgettable dessert spread. Since these fall squarely into the category of easy dessert ideas, they are perfect for serving up alongside something lighter.
When it comes to pairing, you want something that cuts through that intense chocolate-hazelnut richness. A slightly tart flavor works wonders! Think fresh raspberries or a scoop of really bright vanilla bean ice cream. The creaminess of the ice cream is great, but that little bit of sharp fruit cools down the sweetness on your tongue.
Now, about temperature: Do you serve them warm or cold? For Nutella Magic Bars, I really, really recommend serving them at room temperature or even slightly chilled. If you try to serve them warm, they tend to fall apart because the condensed milk layer hasn’t fully stabilized. When they are cool, you get that satisfying chew from the coconut and the clean snap when you bite into the chocolate. If you’re looking for another intense but easy chocolate hit, you have to try my three-ingredient chocolate mousse!
If you’re building a serious dessert table, these bars are amazing cut into smaller squares and served alongside strong coffee or an espresso. That bitterness just loves the sweetness of the Nutella. They are simple, but wow, are they satisfying!
Storage and Reheating Instructions for Nutella Magic Bars
One of the great things about these bars, besides being some of the best homemade desserts ever, is that they are surprisingly sturdy! Unlike a fussy cake that needs immediate attention, these Nutella Magic Bars are pretty happy to sit around waiting for you to finish your busy day. Knowing how to store them properly keeps that gooey layer happy and prevents stickiness.
Because of the rich fat and sugar content, these bars are remarkably stable, but they do need protection from air exposure, especially on the top where the coconut and chocolate are sitting.
For room temperature storage, make absolutely sure they are fully cooled before attempting to store them. If you try to put them away while they are still even slightly warm, the condensed milk base will sweat, and the layers will get messy. Once fully set, store them in an airtight container at room temperature for up to three days. If your kitchen is super warm, though, you might want to move them to the fridge sooner.
- Room Temperature: Up to 3 days in an airtight container.
- Refrigerated: Up to one week. They firm up a bit more when chilled, which actually helps when slicing!
Now, about reheating? Honestly, I almost never reheat these. They are designed to be chewy and decadent right out of the container. If you warm them up, you risk melting out all that hard-earned goodness you waited for while they cooled, turning your perfect bar into a gooey mess again. If you absolutely must have a warm bite, try popping just one bar in the microwave for about 5 to 10 seconds, but please, watch it closely. Serve them chilled or at room temperature for the absolute best texture!
Frequently Asked Questions About Nutella Magic Bars
You’ve got all the steps down, but sometimes a few last-minute questions pop up before you commit to making these wonderful Nutella Magic Bars. That’s perfectly fine! I get asked the same things all the time because people want to make sure their easy treats turn out perfectly gooey. I’ve gathered my answers to the top reader queries right here for you!
Can I make Nutella Magic Bars ahead of time?
You absolutely can! In fact, I often recommend it. These are such wonderful homemade desserts because they actually taste even better the second day once all those layers have completely settled and chilled together. The best way to prep them ahead is to let them cool completely after baking, slice them, and then store them in an airtight container in the refrigerator for up to a week. They pull out perfectly ready to serve!
Are these bars suitable for a large party?
Oh yes, they are tailor-made for a crowd! If you’re looking for easy desserts for a crowd, skip the complicated individual cookies and go straight for these. Since you bake them in one dish, scaling up is super easy—just get a bigger dish, or bake two batches! They slice cleanly (once chilled!), serve easily without plates needed, and everyone loves a rich chocolate and hazelnut flavor, making them a guaranteed hit at any gathering. They’re far easier than trying to manage a huge sheet cake!
What if I don’t have graham crackers for the crust?
If you’re out of graham crackers, don’t panic! The crust needs to be something sturdy that will hold up to the condensed milk, so we look for something similar in texture or flavor. My first choice would be shortbread cookies, crushed up the same way. If you have those, just use the same weight of melted butter. Another great option, especially if you like a different flavor profile, is vanilla wafers or even crushed Oreos (just pull out the white cream filling first!). The base is important because it stops the milk from soaking right into the pan, but you have a few options for these easy treats!
If you’re after even more lightning-fast baking ideas, you can always check out my list of easy desserts with few ingredients for inspiration when cupboard space is low!
Share Your Nutella Magic Bars Creations
Well, that’s it! I sincerely hope you’ve printed this out or saved it to your favorites because these Nutella Magic Bars are going to become a staple in your kitchen. They are so satisfying to pull out of the oven, and honestly, they taste even better the next day because those gooey layers settle in perfectly. If you give these an attempt, please, please come back and tell me how they went!
Did they set up nicely for you? Were your edges crispy? Did you manage to wait the full cooling time before slicing (I sure hope so!)? Leave a comment below and let me know your thoughts, and don’t forget to give this recipe a star rating! Sharing your experience helps other home cooks feel confident trying out new baking ideas.
If you had any hiccups or want to share a photo of your spread, you can reach out to me directly over at the contact page here. Happy baking, everyone!
About the Author: Grace Williams
By Grace Williams, Contributor at Recipes by Betty.
Nutella Magic Bars
Equipment
- Baking dish
Ingredients
Crust
- 200 g graham cracker crumbs
- 120 g melted butter
Layers
- 400 g sweetened condensed milk
- 180 g Nutella
- 150 g chocolate chips
- 100 g shredded coconut
Instructions
- Mix graham crumbs with melted butter. Press this mixture firmly into the bottom of a baking dish to form the crust.
- Pour the sweetened condensed milk evenly over the crust layer.
- Spoon the Nutella over the surface and gently spread it out.
- Sprinkle the chocolate chips and coconut evenly over the top.
- Bake at 175°C for 25 to 30 minutes, or until the layers are set.
- Allow the bars to cool completely before you slice them into individual bars.