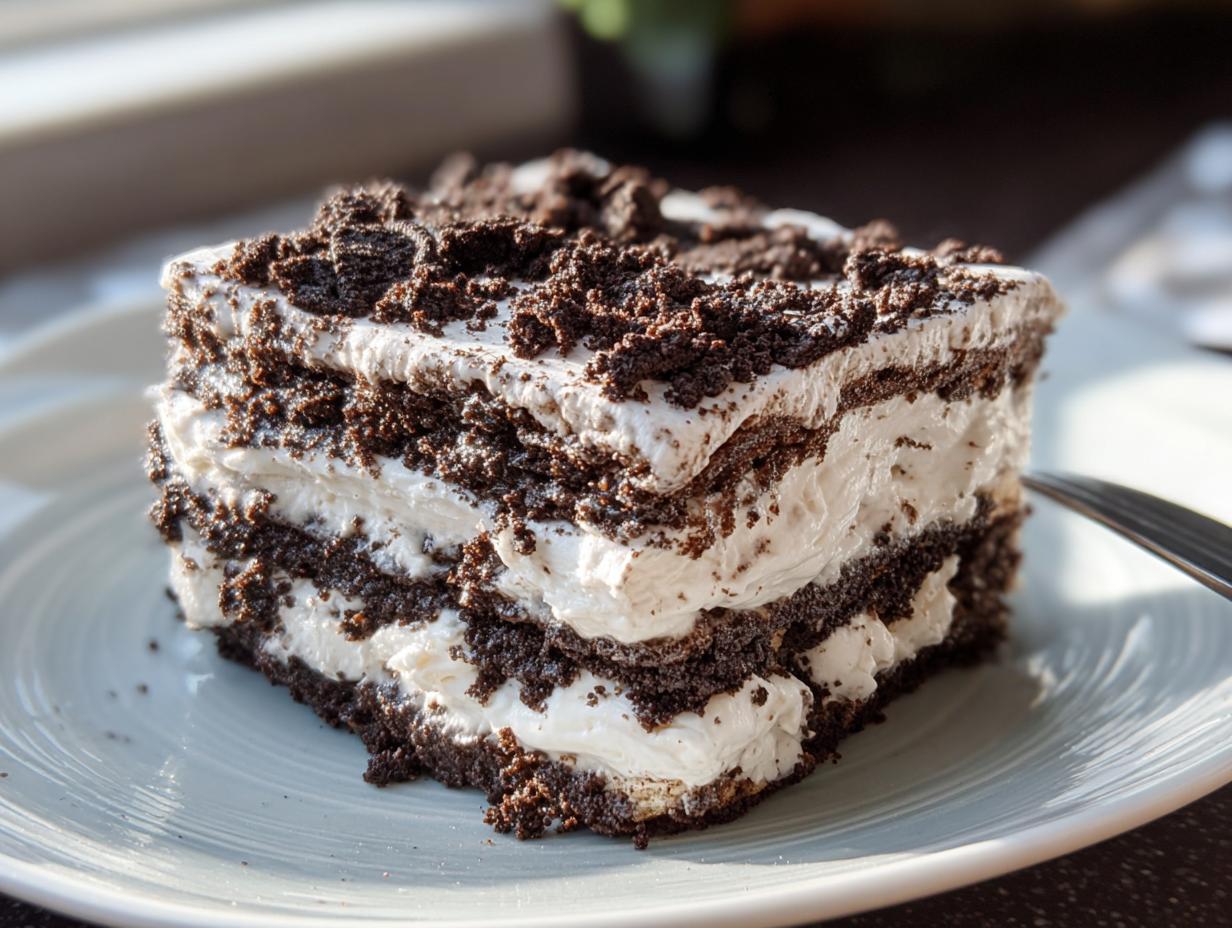
If you’re like me—someone who loves dessert drama but hates getting the oven blazing hot in the middle of summer—then this recipe is your new best friend. Seriously, sometimes the best desserts require zero actual baking, just chilling! It’s truly shocking how stunning this cake is when you finally cut into it. The first time I sliced into this cake for a photoshoot, the clean Oreo layers looked so striking that I almost didn’t want to disturb them. It reminded me how even the simplest no-bake desserts can feel truly show-stopping. Trust me when I say this No-Bake Oreo Icebox Cake is going onto your regular rotation immediately. I’ve developed hundreds of recipes, but sometimes nothing beats the simplicity of Oreos and cream!
Why This No-Bake Oreo Icebox Cake Is Your New Favorite Summer Chocolate Dessert
I know you’ve got a stack of cookbooks, but sometimes you just need something that comes together faster than brewing a pot of coffee. This easy fridge cake is the answer! It’s all about maximum impact for minimal fuss. You seriously won’t believe how good this tastes for how little work is involved.
- Fifteen minutes of active time. That’s it!
- Zero oven heat, which is a blessing in July.
- Only three core ingredients—though you are welcome to explore other great dessert ideas here.
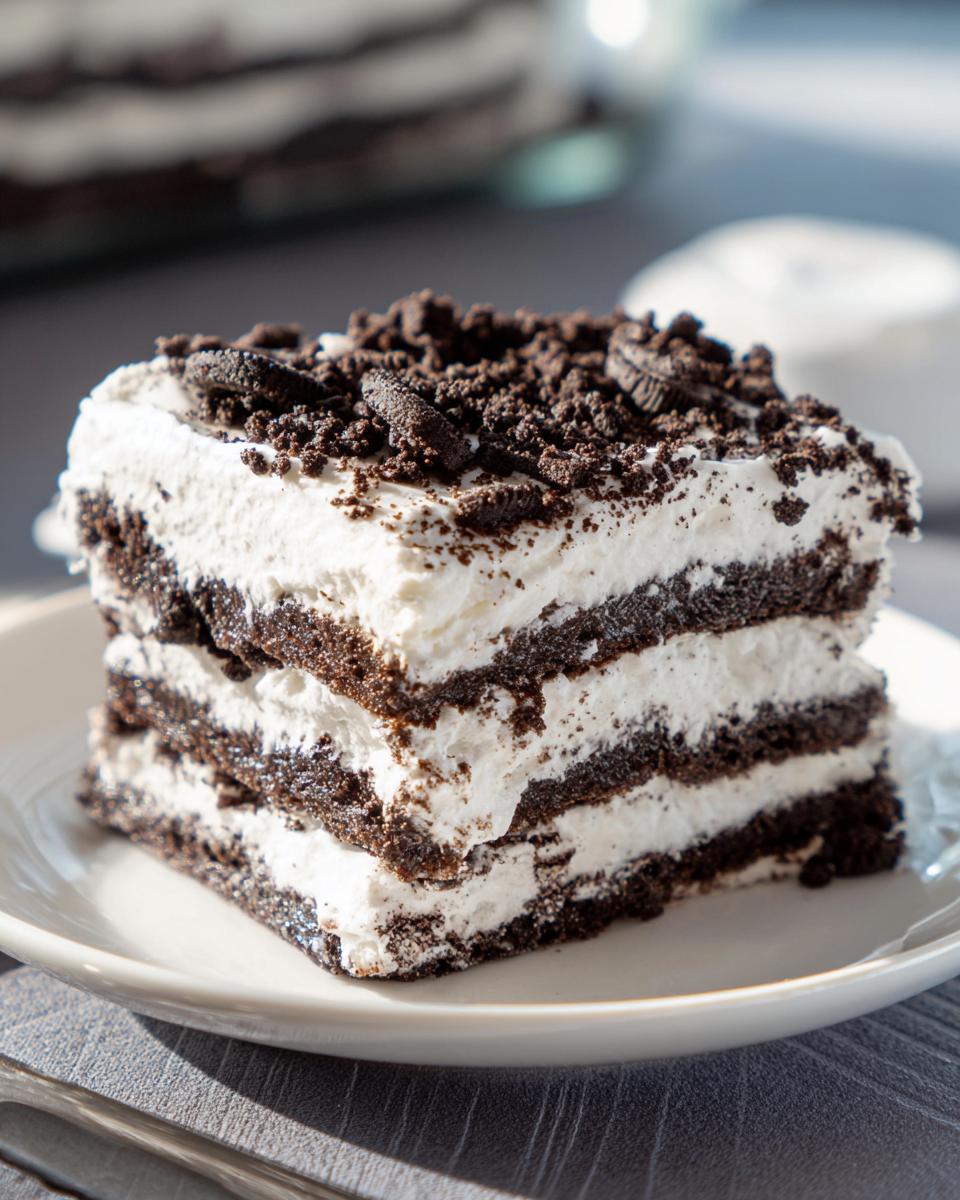
- The dark black and white layers from the Oreo cookies slicing up perfectly is just show-stopping.

Essential Ingredients for the Perfect No-Bake Oreo Icebox Cake
When you are making an icebox cake recipe, you really don’t have any room to hide iffy ingredients. Since there are only three main components, you have to make sure they are top-notch! I always pull everything out beforehand so I can visually check the quality. Remember, assembling this easy fridge cake is fast, so you need everything ready to go when you start whipping that cream.
You need about 300 grams of those classic Oreo cookies—and they must be whole! We aren’t making crumbs here; we are building architecture. Then, you need 480 milliliters of heavy whipping cream. Do not try to cheat this with half-and-half or table cream; it simply will not whip up stiff enough for this layering magic. Finally, about two tablespoons of powdered sugar sweetens that cream perfectly for our no bake oreo dessert.
Ingredient Notes and Substitution Tips for Your Icebox Cake Recipe
Let’s talk details, because details matter when you have so few ingredients. The heavy cream absolutely must be straight from the fridge—ice cold—if you want stiff, beautiful peaks. Warm cream means soup, and nobody wants soup in their icebox cake!
For the sugar, if you don’t have powdered sugar, you can technically use fine granulated sugar, but I really prefer using powdered sugar in the cream. It dissolves so much easier and keeps the texture of your whipped cream unbelievably smooth. If you happen to accidentally use fine sea salt instead of sugar for a second, don’t panic! We’ve all grabbed the wrong shaker in a rush, although I cover the differences in salt in this little guide here. Just taste the cream after you whip it before you start layering!
Step-by-Step Instructions for Your Easy Fridge Cake
Okay, now for the fun part—putting this beautiful chocolate dessert together! It’s so fast, you might even think I missed a step, but I promise, this is all you need to create that amazing, dense layering this icebox cake recipe is famous for. Remember, we aren’t baking anything, so your mixer is doing all the heavy lifting!
First up, get that cream whipped stiff. Pour in your heavy cream and two tablespoons of powdered sugar. Start slow in your mixing bowl, then speed up once it starts thickening. You want stiff peaks—when you lift the whisk or paddle, the cream should hold its shape straight up. If it flops over, keep whipping! If you want even more inspiration on whipping techniques, check out my tips for creamy lemon cups.
Assembling the Layers of the No-Bake Oreo Icebox Cake
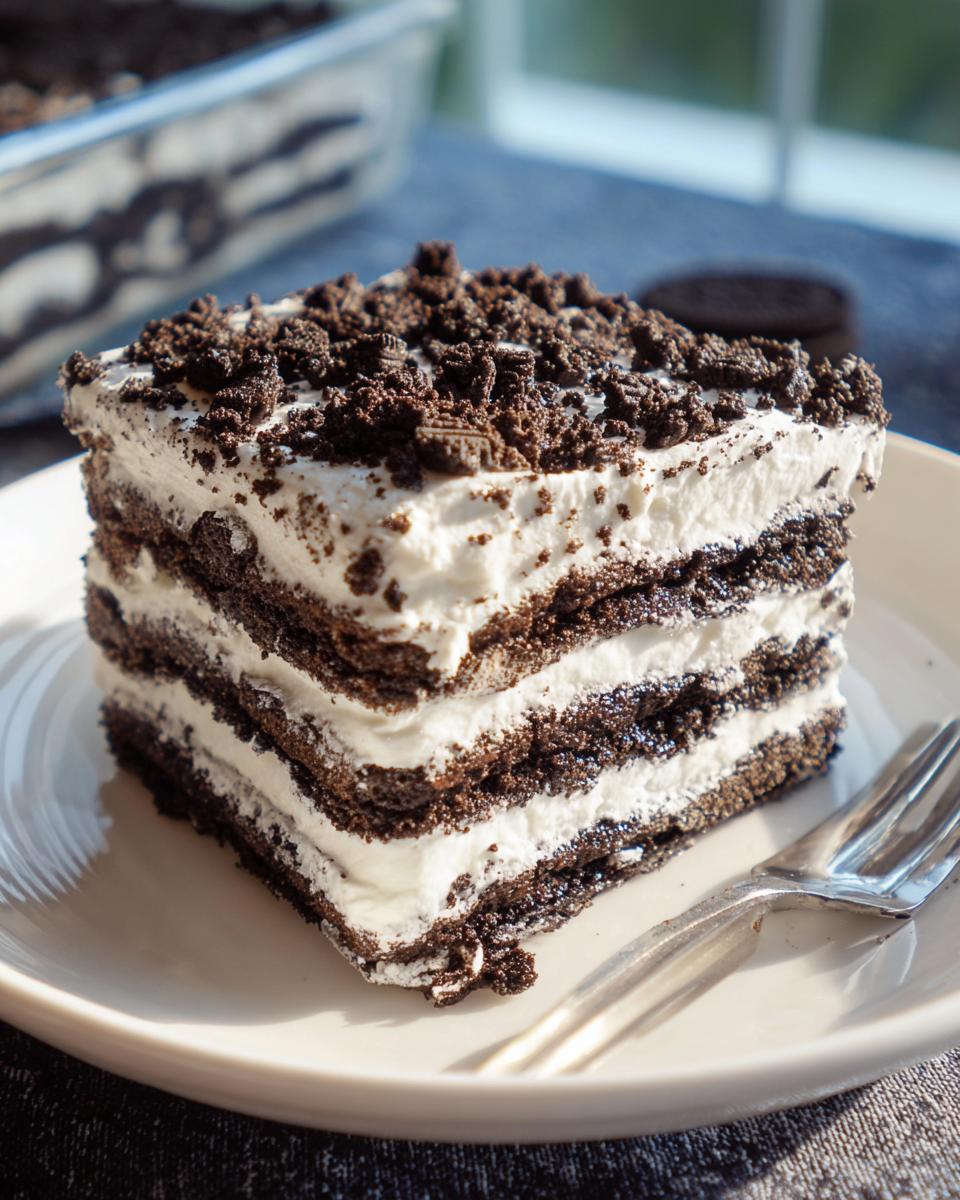
Grab your loaf pan or whatever rectangular dish you chose. Line the bottom with a single layer of those beautiful whole Oreos. Don’t overlap them too much; try to make one even carpet of chocolate. Next, spoon about a third of your perfectly whipped cream over the cookies and gently spread it out. You don’t want to push the cookies around, so be gentle!
Now, we repeat! Cookies, cream, cookies, cream. Keep going until you run out of ingredients, always ending with a smooth, even layer of that luscious whipped cream right on top. Give the whole thing a gentle pat to make sure everything is settled nicely in the pan for those clean slices later on.
Crucial Chilling Time for the Oreo Icebox Cake Recipe
This is where patience pays off, so don’t cheat this step! If you cut into this too soon, you’ll just have soggy cream and hard cookies. We need time for osmosis to happen! You must cover your dish tightly—plastic wrap works great—and tuck it into the fridge for a minimum of eight hours. Honestly, overnight is always best for this easy fridge cake.
During that long chill, the moisture from the cream soaks right into those sandwich cookies, softening them until they have the exact texture of rich, dark cake. When you finally slice into it the next day, you’ll see those gorgeous, distinct layers you worked so hard to assemble. It’s magic, I tell you, pure magic!
Tips for Success When Making a No-Bake Oreo Icebox Cake
Even though this is the easiest dessert under the sun, a few little tricks can turn it from ‘good’ to ‘OMG, what bakery did you buy this from?’ I learned these little secrets the hard way when I was trying to make sure those layers sliced perfectly without turning into a messy pile on the plate.
First, when you are layering, press down just a little bit on that layer of cream before adding the next batch of cookies. You don’t want to smash them flat, just enough pressure to make sure there aren’t any huge air pockets between the cookies and the cream. Nobody wants a hollow space in their summer chocolate dessert!
Second, and this is a game-changer for clean serving: use a parchment paper sling in your rectangular pan before you start assembling. Just cut two strips of parchment paper long enough to hang over the sides of your dish. You build the cake right on top of the paper. When it’s done chilling, you just grab those paper handles and lift the entire magnificent structure out onto your cutting board. It makes slicing so much less stressful!
Don’t forget to taste your cream before you start spreading! Sometimes heavy cream varies in how much air it holds. If your peaks seem a little soft after whipping, just beat in another half teaspoon of powdered sugar at a low speed. Check out some of my other general baking wisdom, especially regarding texture hints, over in my guide on perfect scone secrets—a lot of that soft-vs-stiff cream science overlaps here.
Finally, for that gorgeous, perfect presentation, make sure the very top layer of cream is smoothed out as perfectly as you can get it. That smooth, white canvas is what you see when you cut the first piece, so take an extra thirty seconds to use an offset spatula to make it look flawless.
Variations on the Classic No-Bake Oreo Icebox Cake
The basic oreo icebox cake blueprint is solid gold, but that doesn’t mean we can’t have a little fun with it! Since we aren’t involving any heat, these changes are super easy to implement and can keep this dessert feeling fresh even if you make it once a month. I love experimenting with this recipe because it’s so forgiving when you introduce new flavors.
My first suggestion is to play with the filling—it’s the easiest way to transform this no bake oreo dessert. Instead of plain whipped cream, try folding in a little instant pudding mix! A tablespoon or two of chocolate pudding mix gives you a firmer, richer layer that stands up even better to the cookies. Or, if you are looking for something totally different, try a tablespoon of finely crushed peppermint candies mixed into the cream for a holiday twist that is still a perfectly easy fridge cake.
Another simple idea is changing up the cookie itself. While the classic Oreo is the star, you can absolutely use Golden Oreos or even chocolate graham crackers if you have run out of the classic kind. Just remember, if you use a cracker, the softening time might change slightly, so always err on the side of chilling longer.
For a really decadent feel, especially if you are using a chocolate wafer cookie instead of an Oreo, try adding just a touch of espresso powder to your whipped cream before you whip it. That tiny little kick of coffee flavor brings out the depth of the chocolate so beautifully—it’s fantastic! You can find a similar decadent flavor pairing in my review of a rather interesting Guinness and Oreo combination that I stumbled across once, which uses a similar flavor concept.
If you want something a little fruitier to cut through all that richness, which sometimes happens, you can layer in thinly sliced, softened bananas between the cream layers. Just be mindful of your chilling time if you add fresh fruit, as you don’t want mushy bananas. If you like layered dirt cups, you might enjoy my recipe for Pumpkin Patch Dirt Cups—it uses a similar concept of layering crunch with creaminess!
Serving Suggestions for Your No-Bake Oreo Icebox Cake
Now that you’ve mastered this easy fridge cake, it’s time to make it look as good as it tastes! Since the layers are already so dramatic, you don’t need much fuss. I find that a light dusting of extra powdered sugar right before serving really makes those black and white lines pop. It gives it that finished, professional look without adding any work.
If you want a side drizzle, keep it light! A little sauce goes a long way. A tiny swirl of homemade chocolate ganache or even just a dollop of raspberry sauce adds color beautifully. If you want something super light and airy, a spoonful of plain whipped cream or even a small scoop of vanilla ice cream on the side works great. You can find my favorite recipe for fresh strawberry mousse which goes beautifully alongside this rich chocolate flavor!
Storage and Reheating Instructions for the Oreo Icebox Cake
This is the best part about an icebox cake recipe: the storage is incredibly easy! Since this whole thing relies on chilling, it actually gets better over the first day. I always recommend making it the day before you plan to serve it, just to give those delicious Oreos ample time to soak up all that cream.
When it comes to keeping leftovers of your oreo icebox cake, seal that pan up tight. Plastic wrap pressed directly against the surface of the remaining cake, followed by the lid, works perfectly. You can absolutely keep this in the refrigerator for a good two to three days. It will still be delicious, though after day three, the cookies might start to get a little *too* soft, losing that lovely cake-like structure we worked so hard to achieve.
Now, about reheating? Absolutely not! Since there is no baking involved, there is nothing to reheat here. In fact, you want to keep this as cold as possible. If your kitchen is really warm when you pull it out, I recommend letting it sit on the counter for just five minutes while you grab plates, but no longer than that.
Can you freeze it? Yes, you totally can, though I personally found freezing changes the texture slightly. If you plan to freeze it, I suggest slicing it into individual servings first. That way, you can thaw out just what you need. Wrap each slice tightly in plastic wrap, then maybe foil. It keeps well in the freezer for about a month. When you want to eat a frozen piece of this easy fridge cake, let it thaw in the refrigerator overnight. It thaws beautifully and tastes almost brand new.
Frequently Asked Questions About the No Bake Oreo Dessert
I get asked so many questions about this recipe, and honestly, that just proves how much everyone loves a great oreo icebox cake! People always want to tinker, which I totally get, but most of the time, I tell them to just stick to the plan because it works so perfectly as written. But because I want you to succeed, here are a few things people always wonder about when making this easy fridge cake.
Can I use a different type of cookie in this icebox cake recipe?
You absolutely *can* try! But listen, that perfect, cake-like structure that people rave about comes directly from the specific texture of the Oreo cookie once it softens up. If you use standard chocolate wafers, they tend to break down too quickly and can get a bit mushy instead of yielding that nice, structured layer.
If you tried graham crackers, which I think is a popular question since they are so easy to find, you’ll end up with something much closer to a very creamy dessert bar rather than a cake. It’s still delicious, don’t get me wrong! But those classic Oreos give you that rich, dark ribbon of “cake” that makes this whole thing famous. Try to stick with the original for the very best result!
How long can I keep this easy fridge cake refrigerated?
This is the big question, right? Because it’s so wonderfully moist, you have a little window where it’s absolutely perfect. I find that the sweet spot for this easy fridge cake is right between 12 hours and 48 hours chilled. After that, while it’s still totally safe to eat (make sure you keep it covered tightly!), the cookie layers start to get a little too saturated.
By day four, you might find that the layers have completely lost their structure and it starts feeling more like a thick pudding than a sliceable cake. If you know you won’t get through the whole thing in two days, I highly recommend slicing it into individual portions first and freezing those! Check out my thoughts on freezing this recipe in the storage section above—it works surprisingly well when pre-sliced.
If you’re looking for more delicious ways to use sweet, creamy, layered concepts, you should definitely browse my general collection of dessert recipes. There are always new ideas popping up!
Share Your No-Bake Oreo Icebox Cake Creations
Seriously, now it’s your turn! Making a perfect No-Bake Oreo Icebox Cake is one of those small kitchen victories that deserves celebrating. I really want to see how your layers turned out—did you manage to get those super clean cuts like I did? Don’t be shy!
Please drop a comment down below and tell me if you tried any of my suggested variations, like adding that hint of coffee powder, or if you stuck to the classic simple version. Hearing about your successes (and maybe even your little kitchen oopsies!) is my favorite part of sharing these recipes.
If you made this dish for a party or just for a quiet Sunday night treat, snap a picture and tag me on social media! Knowing that my favorite easy fridge cake is showing up on your family tables means the world to me. And if you have an amazing suggestion for a pairing that I haven’t thought of, let me know! You can always reach out directly if you have questions or just want to say hi through my contact page!

No-Bake Oreo Icebox Cake
Equipment
- Mixing Bowl
- Loaf pan or rectangular dish
Ingredients
- 300 g Oreo cookies Whole cookies
- 480 ml Whipped cream Heavy cream, chilled
- 2 tbsp Powdered sugar
Instructions
- Whip the heavy cream with the powdered sugar until stiff peaks form. This is your filling.
- Arrange a single layer of Oreo cookies on the bottom of your dish.
- Spread a layer of whipped cream over the cookies. Repeat the layering process—cookies, then cream—until you have used all the ingredients, ending with a layer of cream on top.
- Cover the dish and chill the cake in the refrigerator for at least 8 hours, or preferably overnight, to allow the cookies to soften.
- Slice the chilled cake into squares or rectangles and serve immediately.