When the holidays roll around, or if I just have a few too many oranges sitting on the counter, making homemade candied peel is one of my favorite rituals. It smells absolutely incredible in the kitchen! Forget that bland, slightly sharp taste you get from the store-bought stuff, because this recipe for Mixed Peel with Brown Sugar is where the real flavor lives. I’ve always sworn by brown sugar in my testing—it adds this wonderful, deep molasses note that white sugar just can’t touch, whether it’s in a fruitcake or a simple cookie.
Trust me on this one; the richness this sugar provides elevates simple citrus peel into an ingredient you’ll want to use in everything from your morning scones to your holiday stollen. We’re keeping the process traditional, but the flavor payoff is anything but ordinary!
Why This Recipe for Mixed Peel with Brown Sugar Works So Well
When you’re making something preservative like candied peel, you want it to last, and you certainly want it to taste incredible when you finally put it in your bread or bun! This recipe has been tested time and time again, achieving beautiful results that stand up well in heavy baking.
- This method ensures a reliable, professional-grade ingredient we can count on for all our holiday baking projects.
- The double boil is non-negotiable; it gets rid of that harsh, bitter flavor hiding in citrus rind.
We rely on trusted techniques. You can read more about why technique matters so much in our guide on scone tips, but the same attention to detail applies here!
Flavor Profile: The Brown Sugar Difference
This is the game-changer, folks. White sugar gives you pure sweetness, but brown sugar brings along molasses. That molasses acts like an amplifier for the citrus notes, giving your **Mixed Peel with Brown Sugar** a much richer, almost caramel-like background note. It’s what makes it the absolute best choice for dense holiday mixes or even if you’re folding it into your next batch of **Orange Rolls Homemade**. It just tastes deeper and more ‘mature’!
Tips for Getting Perfect Mixed Peel with Brown Sugar
To avoid disappointment, keep these two things front of mind as you work:
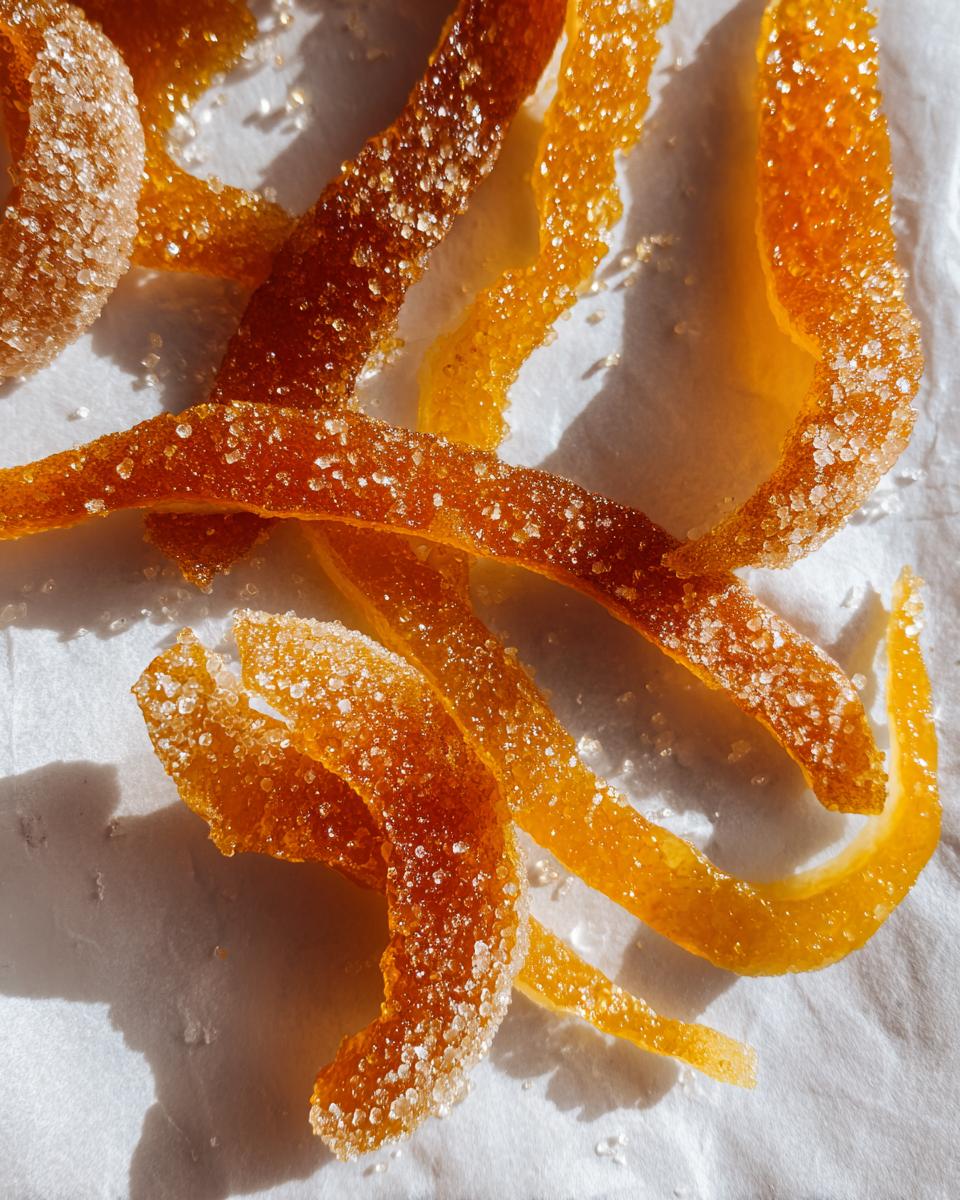
- Cut Evenly: Seriously, take the time to slice your orange and lemon peels into uniform strips. If some are fat and others are skinny, the skinny ones will dissolve while the fat ones stay bitter. Uniformity ensures even syrup absorption.
- The Two-Boil Rule: You must boil and drain the peels twice before adding them to the sugar syrup. This step is crucial for pulling out the harsh bitter oils. Don’t skip it, or your peel will taste sharp!
I always think of this process when I read about mature Christmas cakes, like the kind they make over in the UK; the depth of flavor comes from ingredients like this! You can see how they approach long-term flavor development here: check out this BBC Good Food piece.
Equipment Needed for Mixed Peel with Brown Sugar
Because this recipe is about preserving texture and flavor, good equipment really matters. You don’t need anything fancy or electric—just good, basic kitchen workhorses that can handle a little bubbling syrup. We keep this list short because the method is straightforward, but don’t skimp on the quality of what you use!
Here’s what you’ll need to pull this off perfectly:
- A sturdy Saucepan. Make sure it’s deep enough so the water doesn’t boil over during the twice-boiling step.
- A sharp, thin knife for cutting those peels down to size. Being neat here matters for even cooking!
- Parchment paper for drying. You need something non-stick so your beautiful finished peel doesn’t stick to the counter or a plate when it dries out.
Ingredients for Making Mixed Peel with Brown Sugar
This recipe uses just a few components, but using the highest quality citrus you can find really pays off. Since we are using brown sugar instead of plain white sugar, you get so much more flavor baked right into the peel itself. This makes the final product absolutely perfect for holiday loaves or if you just want to keep some amazing citrus flavor on hand for quick additions to recipes.
For this batch, you will need:
- 2 Orange peels (Make sure they are cut into thin, even strips—this is important for texture!)
- 2 Lemon peels (Also cut evenly; the mix of citrus is what makes this “mixed peel”!)
- 2 cups Water (Used for the initial boiling process to remove bitterness)
- 1.5 cups Brown sugar (Dark or light works, but you know I prefer the richness of dark!)
If you ever want to try swapping out some of the lemon for lime, check out some of my other citrus experiments here: Orange and Lime Mixed Peel Recipe.
Step-by-Step Instructions for Mixed Peel with Brown Sugar
Okay, this isn’t a five-minute job, but trust me, the time you put in now means you have gourmet baking ingredients ready for the entire holiday season! The key here is patience during the boiling phase. We’re working to tenderize those peels and pull out any sharp edge, making sure the brown sugar syrup can really penetrate them fully.
Preparing the Citrus for the Syrup Bath
First things first: make sure your orange and lemon peels are cut into thin, even strips. Use a sharp knife; trying to hack through thick rind leads to uneven results later on. Next, toss those strips into your saucepan and cover them generously with water. Bring that up to a rolling boil for about 10 minutes.
This is step one of our bitterness banishment! Drain them completely. Then, you repeat the whole thing: put them back in the pot, add fresh water, bring it back to a boil for another 10 minutes, and drain again. That double boil is paramount for amazing flavor!
Simmering the Mixed Peel with Brown Sugar
Now we make the magic syrup! In that same clean saucepan—no need to wash it, just wipe it out—mix your brown sugar and the measured water. Bring that mixture to a gentle simmer, stirring until all that lovely brown sugar has dissolved completely. Once your syrup is ready to go, carefully add in those double-boiled peels.
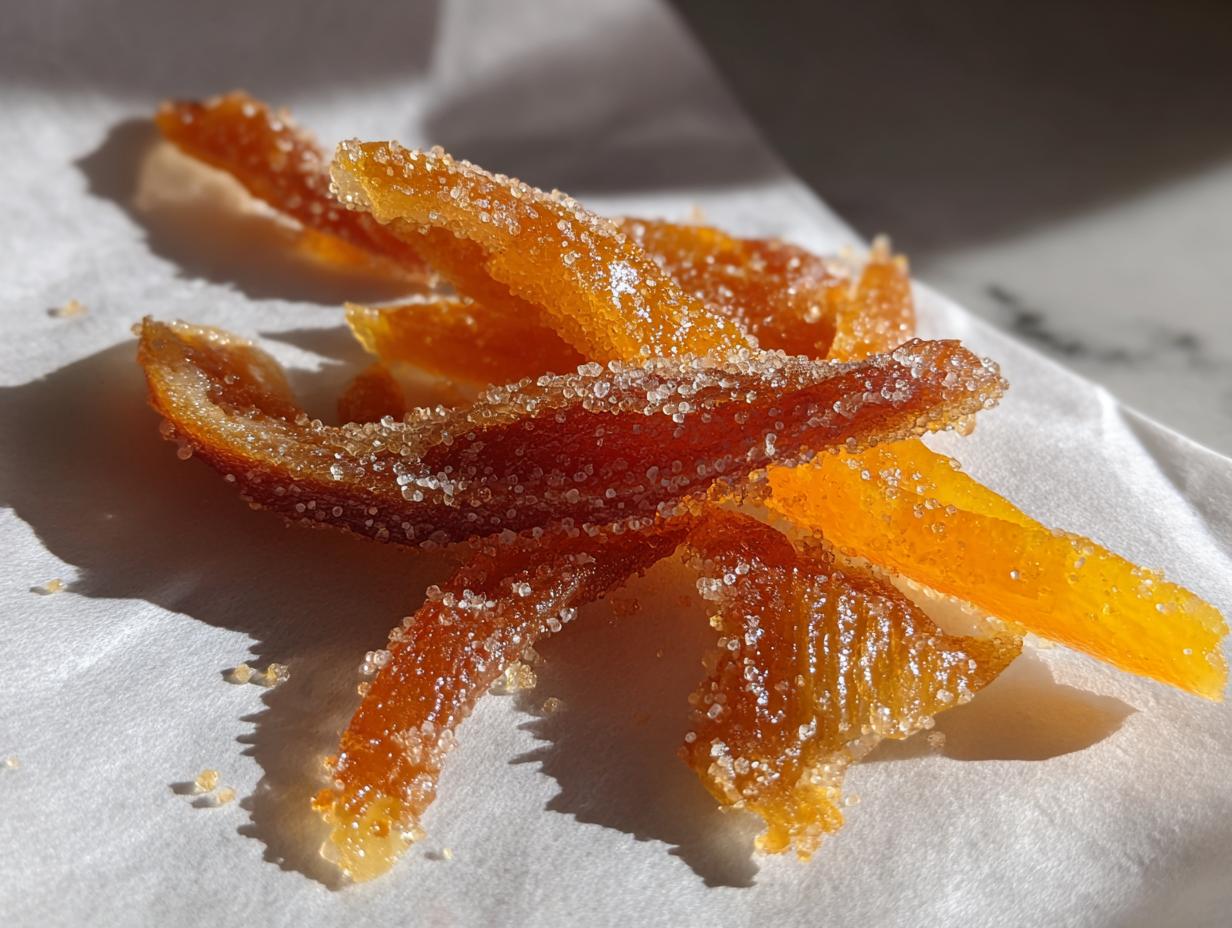
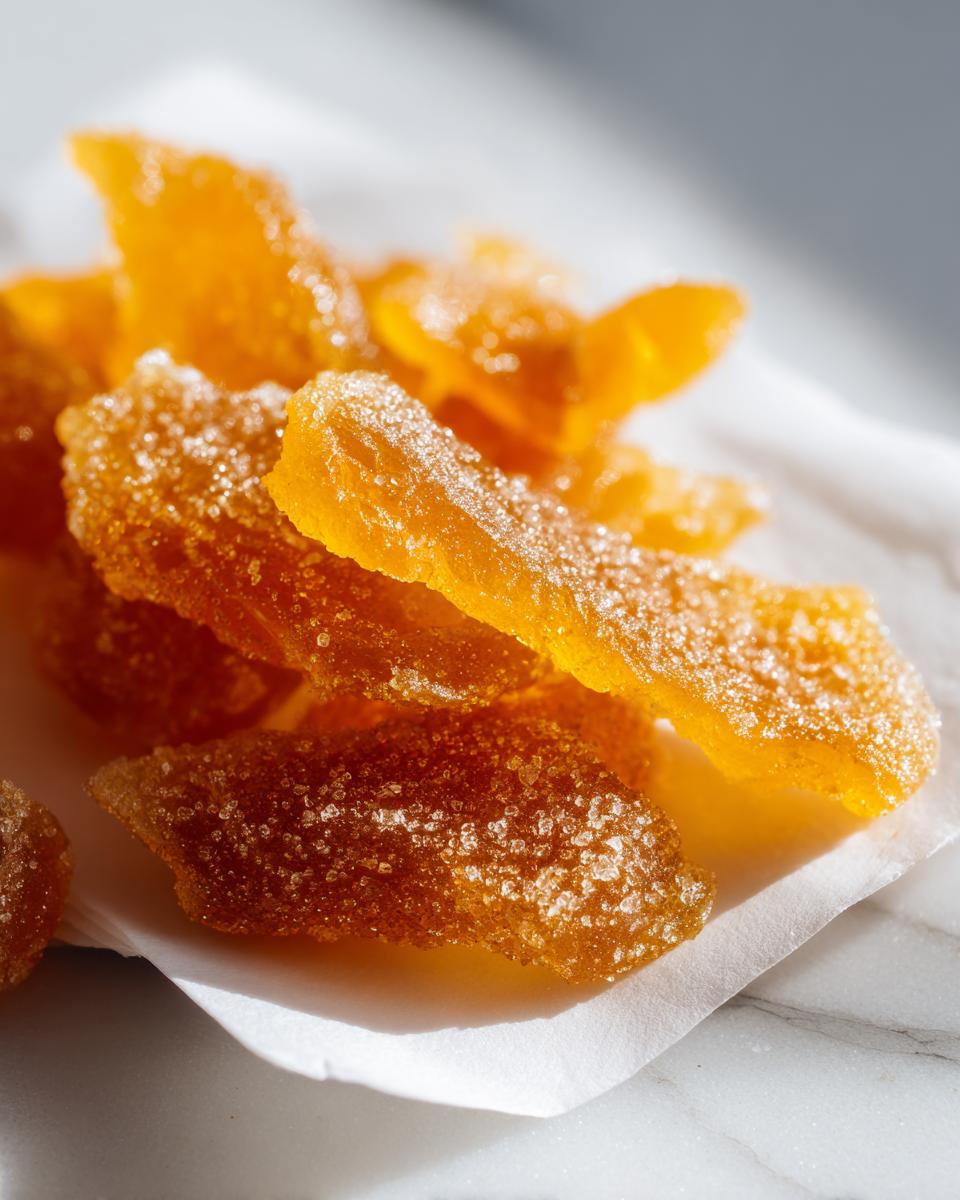
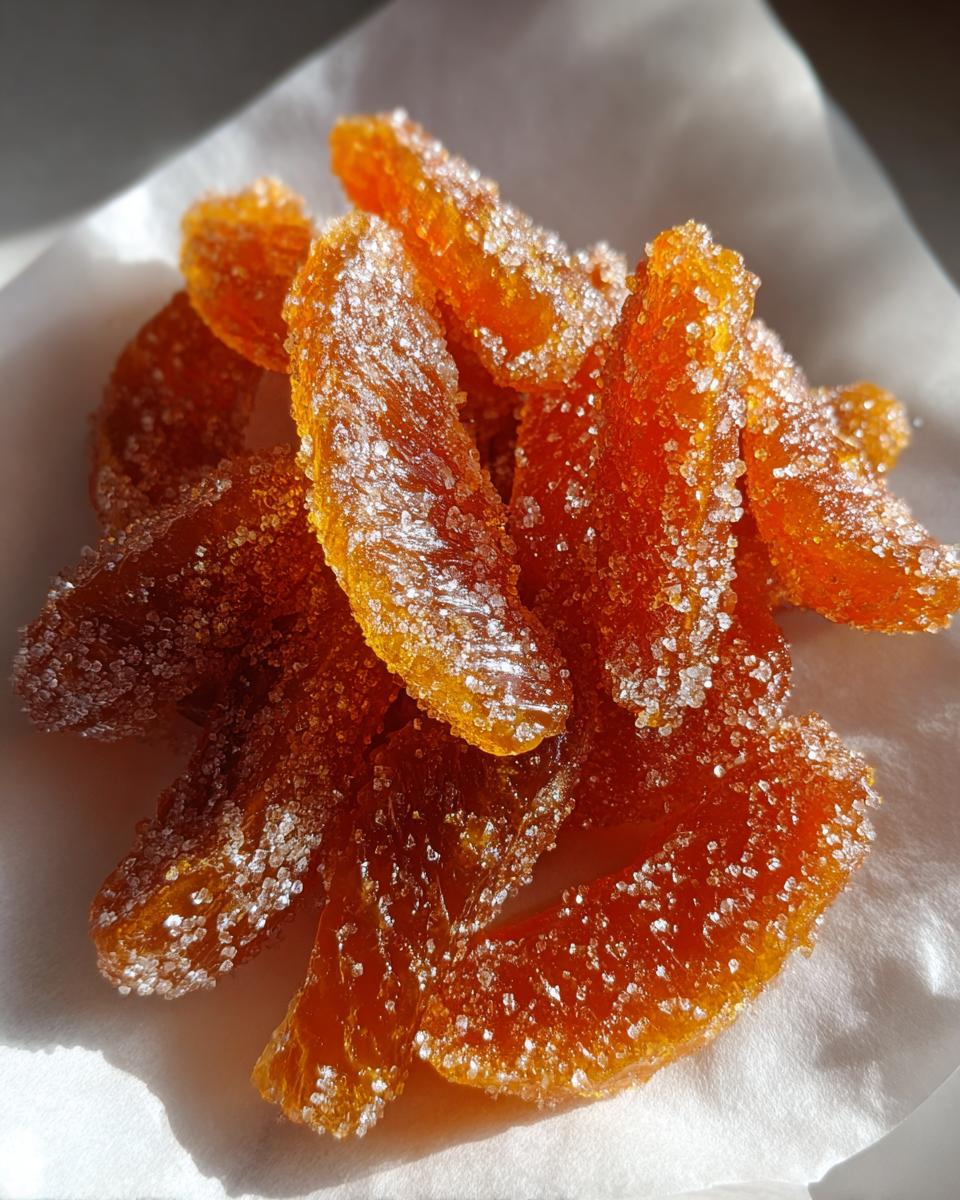
Let this all simmer down together gently. This is where the actual candying happens! You need to cook the peels for about 45 to 60 minutes. Keep an eye on them; you’re done when the peels look fully translucent and slightly floppy. See how that beautiful color has deepened? That’s the brown sugar doing its work!
Drying and Storing Your Finished Peel
Once they look perfect, use a slotted spoon or fork to carefully lift the peels out of the remaining syrup. Lay them out in a single layer on your prepared parchment paper. Don’t stack them up—they need airflow to dry properly!
This is the longest part of the recipe because it’s hands-off: they need at least 240 minutes, which is a solid four hours, to dry completely at room temperature. We’re looking for dry to the touch, not sticky ones that will clump together in storage. If you want to dive into making delicious candied slices, check out these Classic Candied Orange Slices for inspiration on presentation. For more candying science, this piece from Bon Appétit is great: Candied Citrus Peel.
Creative Uses for Your Homemade Mixed Peel with Brown Sugar
Now that you have this beautifully flavored, molasses-rich **Mixed Peel with Brown Sugar**, the world is your oyster! Honestly, once you taste the difference brown sugar makes, you’ll be looking for What To Do With Orange Peels constantly. Having this ready-to-go ingredient is like having a secret weapon tucked away in your pantry for those days when a dessert needs just that extra spark.
Baking Ideas: From Cakes to Orange Rolls Homemade
This peel is tailor-made for hearty, spiced baking. It’s fantastic chopped up small and folded into a classic stollen or a lemon drizzle cake. If you’re making something rich, it holds its own beautifully. But my absolute favorite way to use it is in my favorite cinnamon/citrus swirl recipes. If you want to try something totally different that incorporates a sweet roll base, you should check out these Strawberry Cheesecake Rolls—imagine this mixed peel replacing some of that jam swirl!
Garnishes and Orange Desserts Easy Additions
Sometimes you don’t want a full baking project, and that’s fine too! You can chop this peel up really fine and sprinkle it over the top of yogurt parfaits or cottage cheese for an easy afternoon snack. It’s also wonderful mixed into whipped cream if you’re looking for quick topping ideas for orange desserts easy recipes.
And if you’re feeling decadent, you absolutely have to try dipping these into melted dark chocolate! Take a look at how I finish my chocolate bakes, like Chocolate Fudge Cookies; topping them with a few of these candied strips is just next-level. If you want to see a different type of candied fruit preparation, Alton Brown’s take on candied ginger is also fascinating: Candied Ginger Recipe.
Ingredient Notes and Substitutions for Mixed Peel with Brown Sugar
People always ask me about ingredient swaps, and I totally get it—pantry limitations happen! While I stand firm that this recipe shines because of the brown sugar, there are a couple of minor adjustments you can make without ruining the batch. Remember, this recipe uses both orange and lemon because the combination offers a perfect balance between robust flavor and brightness. Skipping one citrus will definitely change the final profile!
If you’ve run out of lemons, you could try limes, but you might need to boil the lime peels an extra time or two because they tend to hold onto bitterness a bit more stubbornly. For another fantastic citrus pairing that uses oranges, you should look at my recipe for Cranberry Orange Muffins; it shows you how well those flavors play together!
Now, about the sugar: If you only have light brown sugar on hand instead of the dark brown sugar I prefer, that’s an easy fix. Light brown sugar will work just fine; you’ll just get a slightly cleaner, less molasses-forward final product. It’s still miles better than white sugar! If you must use white sugar, I suggest adding about a quarter teaspoon of blackstrap molasses to the syrup mixture to mimic that depth that brown sugar naturally provides. It’s not perfect, but it stops the final peel from tasting too one-dimensional.
Don’t get confused by recipes that use the peels for something like **Canning Mandarin Oranges**; those recipes are usually about preserving the fruit *in* syrup, not candying the rind itself. Keep these peels stored separately for your baking adventures—they are too sugary and dense for simple canning!
Frequently Asked Questions About Mixed Peel with Brown Sugar
I always get so many questions after people try making this peel for the first time because it just tastes so much better than the store-bought jars! Most of the confusion revolves around storage or how exactly to use this fantastic ingredient once it’s done drying. Here are a few things I hear most often in my email inbox.
How long does Mixed Peel with Brown Sugar last when stored correctly?
If you followed the instructions and made absolutely sure those peels were dry—I mean completely dry—after that 240-minute wait, they should last for ages! Seriously. Stored in an airtight container in a cool, dark pantry, they will keep well for at least six months. I sometimes keep them longer, but honestly, they usually disappear into holiday loaves by January. If you notice them getting soft or sticky, that means they absorbed moisture, and you might want to pop them in a very low oven for 15 minutes just to dry out again.
Can I use this peel in savory dishes, or is it strictly for Mandarin Orange Recipes?
That’s a great question about versatility! While this peel is definitely designed to shine in sweet baking—think spice cakes, shortbread, or even if you’re developing your own **Mandarin Orange Recipes**—it can pull off some savory tricks too. The molasses in the brown sugar adds a lovely counterpoint to rich meats. Try sprinkling a tiny bit in a glaze for roast duck or mixing it into a marinade for pork chops. The sweetness balances out salty or vinegary elements perfectly. You can find some other uses for citrus zest and peel in this guide on preventing baked goods from drying out, as citrus helps lock in moisture!
What is the best way to make Chocolate Covered Candied Orange Peels?
Oh, you finished the peel and now you want to make them extra fancy? I love that idea! Once your **Mixed Peel with Brown Sugar** is completely dry and matte, it’s ready for dipping. You just need good quality dark chocolate—I prefer one with 60% cocoa or higher to balance the sugariness of the peel. Melt it slowly over a double boiler, or carefully in the microwave, until smooth.
Dip the peels halfway or fully coat them. A neat trick is to place them on that same parchment paper upside down (chocolate side up) to set. This stops that little pool of chocolate from forming at the bottom. They set up fast at room temperature, but if you’re in a rush, pop them in the fridge for about 15 minutes until the chocolate snaps!
Storage and Reheating Instructions for Your Peel
The beautiful thing about candied peel is that it’s shelf-stable, provided you’ve done the drying step correctly! Once your peel is completely dry after that four-hour waiting period, you need to protect it from humidity. We want that sugary coating to stay firm and separate, not melt into one gooey block.
Store your **Mixed Peel with Brown Sugar** in a clean, airtight container. A mason jar works perfectly, or even a sturdy zip-top bag will do the trick as long as you press out all the extra air. Keep it in a cool, dark cupboard, away from the stove or any area where steam might creep in. If you’re experimenting with preserving other fruits, you might find some useful ideas over at Homemade Fruit Roll-Ups that focus on moisture control!
If you ever notice the peel feeling tacky—usually after a few weeks if your house is quite damp—just spread it back out on clean parchment paper and let it air dry for another hour or two. No need to reheat unless you’re worried about texture!
Baking with Emily Mitchell
Our family’s legacy of preserving the best flavors really shines through in this simple recipe for **Mixed Peel with Brown Sugar**. It’s proof that taking an extra hour to properly treat ingredients—like those citrus peels—can turn an ordinary component into something spectacular for your baking projects. I hope you feel inspired to try utilizing more of those usually-discarded parts of your fresh fruit!
I’m Emily Mitchell, Efficiency & Testing Coordinator here at Recipes by Betty. I love finding ways to layer flavor, and I truly believe the molasses from brown sugar makes all the difference in this sweet treat.
Take a moment after you’ve tried your first batch of this peel. Let me know by leaving a star rating down below just how much you love the flavor depth! And if you do something unexpected with it—perhaps adding it to your next pan of cranberry orange muffins or mixing it into a glaze—I’d absolutely love to hear about your creation in the comments!
Mixed Peel with Brown Sugar
Equipment
- Saucepan
- Parchment paper
Ingredients
- 2 Orange peels
- 2 Lemon peels
- 2 cups Water
- 1.5 cups Brown sugar
Instructions
- Cut citrus peels into thin, even strips.
- Place peels in a saucepan, cover with water, and bring to a boil.
- Boil for 10 minutes, drain, and repeat once more to reduce bitterness.
- In a clean saucepan, combine brown sugar and water; bring to a gentle simmer.
- Add peels and cook 45 to 60 minutes until translucent.
- Remove peels and spread on parchment paper.
- Let dry completely at room temperature before storing.