
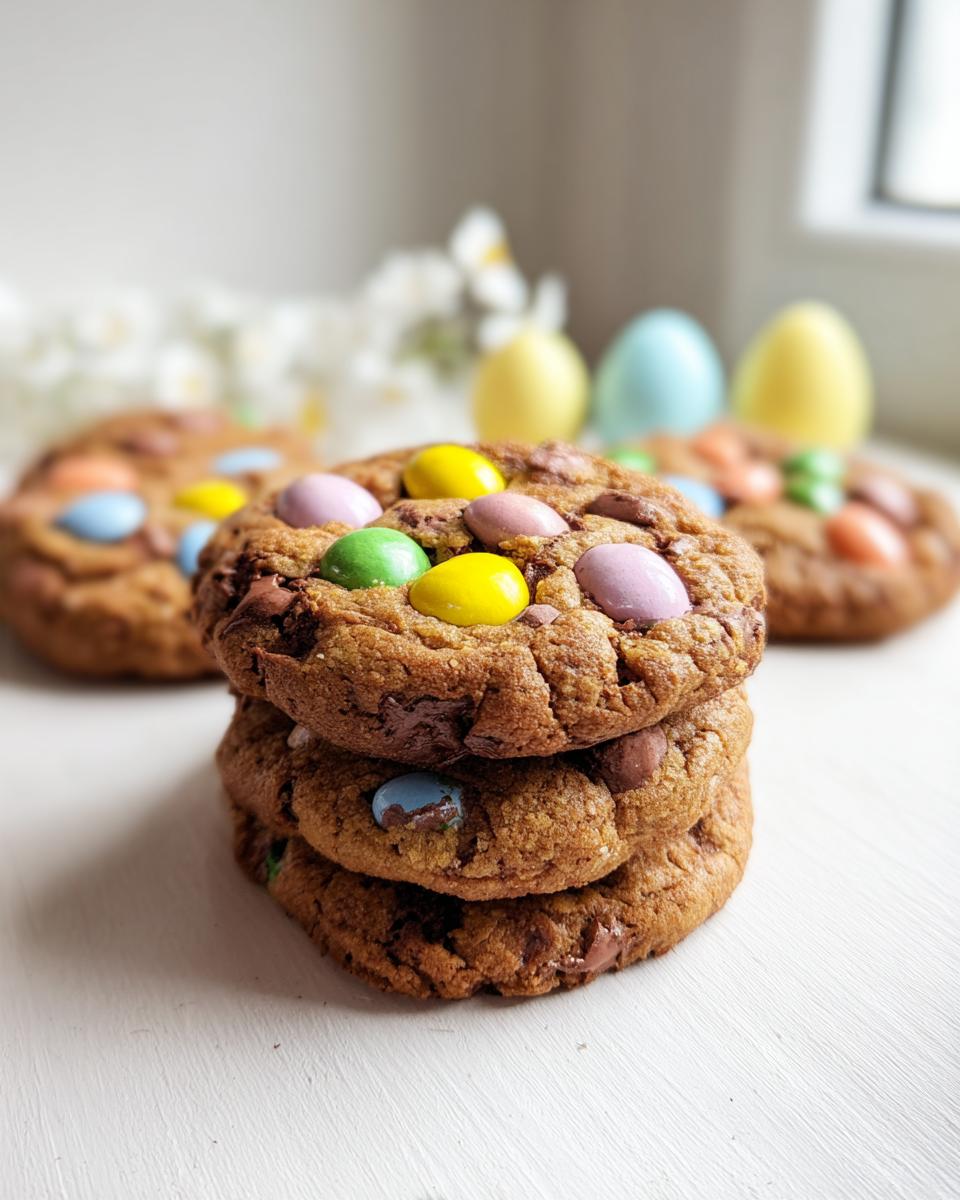
Oh my goodness, is it even Spring until you’ve got bright, crunchy goodness baked into something warm? I swear, Easter baking just hits different, right? Forget those perfectly piped, fussy little shortbreads! What we need right now are robust, chewy cookies studded with color. And trust me, that’s exactly what we’re making today: the absolute best Mini Egg Chocolate Easter Cookies you’ll ever try!
The magic here comes from the texture. Those little candy shells give the most satisfying *crack* when you bite into the soft, rich chocolate dough. It’s the perfect sweet crunch. I’ve refined this formula over a few testing seasons, trying to get the balance just right so they don’t spread too thin.

This simple, crowd-pleasing texture and color combination is something Hanna Foster, our Adaptation Specialist here at Recipes by Betty, perfected during her intensive holiday testing phase last year. You are going to adore how easy these are!
Why You Will Love These Mini Egg Chocolate Easter Cookies
Seriously, these cookies are everything you want when the spring sun starts shining but you still crave that deep chocolate flavor. They bake up so fast, you can have a batch ready before your spouse even notices you started them! I’ve linked some of my other favorite chocolate lover’s desserts if you need more inspiration after these!
Here’s why these are going straight into your permanent rotation:
- They are lightning fast! Prep is only 15 minutes, and they’re out of the oven in about 12. Zero fuss.
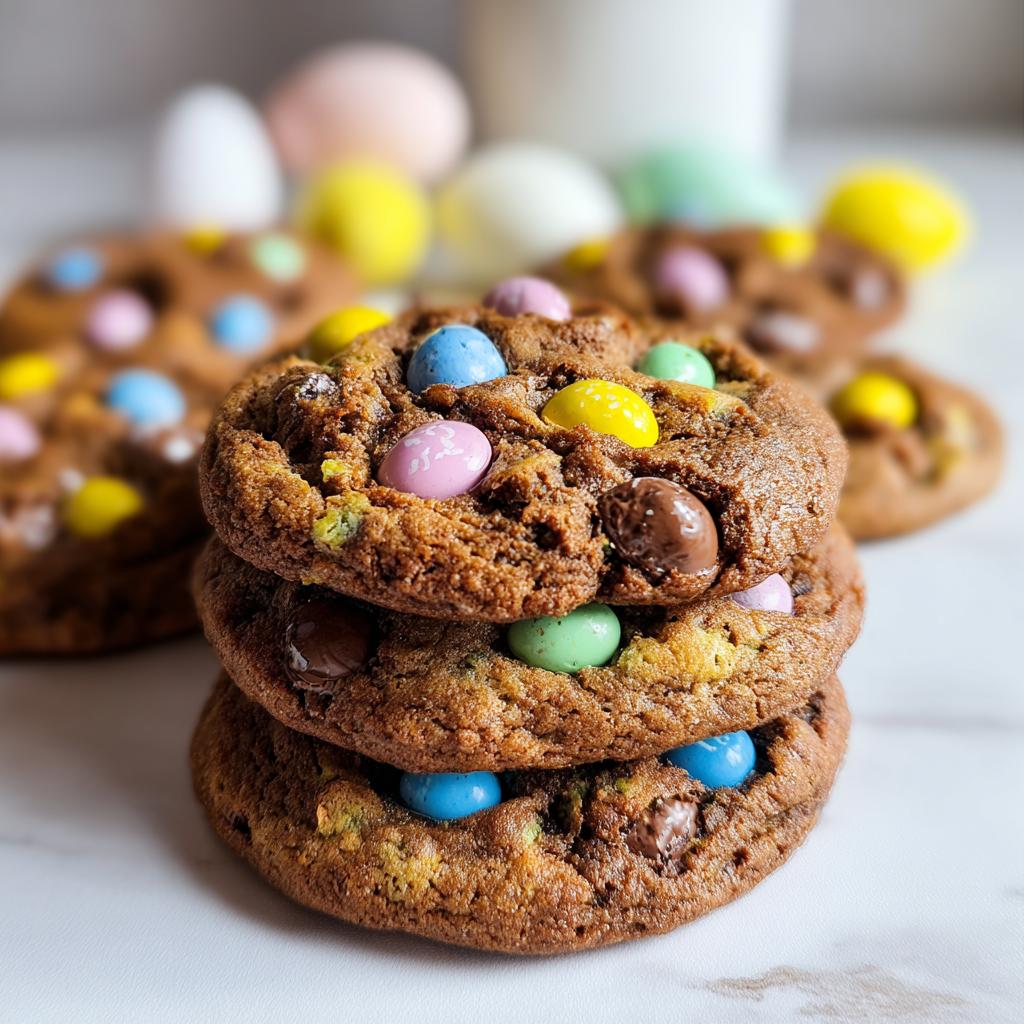
- Talk about shelf appeal! The colorful speckles make them the star of any Easter basket or dessert table.
- You get that amazing texture contrast: a soft, chewy center meets a crisp candy shell when you bite in.
- These are the ultimate beginner chocolate easter cookies—they use basic pantry staples beyond the fun candy.
- They freeze beautifully, meaning you can bake ahead without losing any of that homemade taste.
- They are guaranteed to be the most colorful addition to your lineup of easter dessert cookies!
Essential Ingredients for Perfect Mini Egg Chocolate Easter Cookies
Okay, friends, listen up! While these cookies are fun and festive, we can’t cut corners on the foundation. A great cookie starts with perfectly handled ingredients. I’m keeping this short and sweet because you can see the full amounts below, but make sure your butter is softened—not melted! That air you whip into softened butter is key to getting cookies that are chewy and not just flat disks.
Also, just a quick pointer: if you’re wondering whether to use kosher salt or sea salt, I highly recommend reading our guide on kosher salt versus sea salt if you’re curious, but for this recipe, standard salt is totally fine!
For the Cookie Dough
- 2 cups flour
- 3/4 cup sugar
- 1/2 cup butter (softened to room temperature)
- 1 large egg
- 1 cup mini eggs (I like to roughly chop about half of mine for better distribution!)
Step-by-Step Instructions for Making Mini Egg Chocolate Easter Cookies
Alright, let’s get baking! This process is so quick you won’t even need to put on an apron—though I always recommend it, just in case of happy accidents!
First things first, gotta get that oven hot. Preheat your oven to 180°C. Also, line those baking sheets with parchment paper; trust me, cleanup is ten times easier, and it helps prevent sticking, which is always my favorite tip for faster baking. You can check out some of my general expert advice on foolproof baking over in my post about secrets to perfect scones—the same principles often apply here!
Preparing and Mixing the Mini Egg Chocolate Easter Cookies Dough
Grab your big mixing bowl! We’re starting with the basics: flour, sugar, and that beautiful softened butter. I always say mix these together first until they are just combined and look nicely crumbly. Don’t overmix yet! We want to make sure everything is evenly distributed before we introduce the egg. This initial mix sets up the texture foundation nice and sturdy before all the wet stuff goes in.
Incorporating the Eggs and Shaping the Mini Egg Easter Cookies
Now, crack in that egg and mix until the dough just comes together—it might look a little shaggy, and that’s okay! This is the most important part: gently fold in those beautiful mini eggs. Don’t use the electric mixer here! You want to be gentle so you don’t smash too many of them before baking. Once they are mostly distributed, use a tablespoon or a small cookie scoop to drop uniform balls of mini egg easter cookies dough onto your prepared trays. Keep them about two inches apart!
Baking Your Chocolate Easter Cookies
Pop those trays into your preheated 180°C oven. They only need about 10 to 12 minutes. You’re looking for the edges to turn just barely golden brown. Pull them out when they still look slightly soft in the center—they firm right up on the pan! That perfect bake time is what gives you the wonderful final texture in your Mini Egg Chocolate Easter Cookies.
Tips for the Best Mini Egg Chocolate Easter Cookies
You know I am all about making sure every single batch turns out dreamy. Even though these are super simple, there are a couple of little secrets I’ve learned that really elevate these cookies from good to absolutely show-stopping.
My biggest piece of advice for any cookie with candy pieces is controlling the temperature. If your dough gets too warm before it hits the oven, those beautiful mini eggs will start to melt right into the dough, and we want them to stay distinct and crunchy!
- Chill That Dough, Seriously! Even though they bake fast, giving your dough 30 minutes in the fridge before scooping helps immensely. Chilled dough spreads less into thin, sad wafers, keeping your cookies nice and thick. Think of it as forcing the dough to take a quick nap before it has to do any heavy lifting.
- Don’t Overbake for Crispness: Because we want a chewy interior, a slightly under-baked look when they come out is perfect. They’ll continue to set up on the hot baking sheet. If you wait until they look perfectly done in the oven, they will be hard as rocks when they cool down!
- The Gentle Fold: When you add those mini eggs, use a spatula, not your mixer, and fold them carefully. If you beat them in, the candy shell breaks, and the colors bleed into your pale dough, making everything look kind of muddy. We want clear pops of spring color!
- Use Good Quality Butter: I know I stressed this in the last section, but it’s worth repeating here for texture! Using real butter instead of a substitute just gives you a cleaner, richer flavor base that pops against the sweet candy coating. If you ever worry about dry baked goods, I have some great ideas on preventing pumpkin bread from drying out that could apply here too!
Ingredient Notes and Substitutions for Mini Egg Chocolate Easter Cookies
I get so many questions about swapping things out, especially around the holidays when pantries get a little stripped down! That’s totally understandable. While I really encourage you to stick to real butter for these Mini Egg Chocolate Easter Cookies because it truly makes the texture, I know sometimes you run out or have different needs.
If you are out of the fun stuff—the mini eggs—don’t panic! You can absolutely still make a fantastic batch of chocolate cookies. Think about it: we just need color and a little bit of crunch. I’ve shared some fun additions for savory recipes over at my post about what can I add to ground beef to make it better, and similar principles apply here for creative texture additions!
Here are my thoughts on handling ingredient swaps for this recipe:
- Butter Swaps: If you absolutely must substitute butter, use a high-quality baking stick margarine. Do not use the tub-style soft spreads, though! Those have too much water, and it will change the way your cookie spreads in the oven, likely making them too flat.
- Sweetener Issues: This recipe relies on the granulated white sugar for proper creaming structure. I haven’t tested substitutes like coconut sugar or honey here, and I wouldn’t recommend it for the first batch. Sugar does more than just sweeten; it helps tenderize the crumb!
- Mini Egg Alternatives: If you can’t find the minis, try coarsely chopping up standard-sized chocolate Easter eggs. Just be careful when chopping—wrap them first! You could also use M&M’s, although the chocolate flavor won’t be quite as rich. Even some crunchy chocolate-covered almonds could work if you’re feeling adventurous!
- Gluten-Free Testing: I haven’t personally tested this with gluten-free flour blends, but if you have a favorite 1:1 GF blend, that is usually the safest bet when swapping out all-purpose flour. Results may vary slightly on chewiness!
Making Ahead and Storing Your Easter Dessert Cookies
The absolute best thing about these easy easter dessert cookies is that you don’t have to bake them all at once, which is a lifesaver when you’re juggling multiple holiday treats!
I am a huge proponent of making dough ahead of time. It really helps me stay ahead of the game, and honestly, sometimes the cookie dough tastes even better after it’s had a little nap in the fridge—the flavors just marry up, you know?
Chilling the Dough for Better Baking
If you’re not baking them right away (and I recommend waiting at least an hour!), wrap your dough up tightly in plastic wrap. Keep it sealed in the refrigerator for up to three days. Seriously, three days! When you are ready to bake, just let the dough sit on the counter for about 15 minutes to warm up slightly so it’s scoopable again. Chilling helps prevent spreading, which keeps those mini eggs nestled right where they should be!
If you need to keep them longer, freezing is your friend. Roll the dough into balls, place them on a small tray lined with parchment, and freeze until they are solid. Then, toss those frozen dough balls into a freezer-safe bag. You can store them like that for up to three months!
Storing Baked Cookies
Once they are completely cool—and I mean *completely* cool, otherwise you’ll get condensation and soggy bottoms—store your finished easter dessert cookies in an airtight container at room temperature. If you have a great airtight system, they should stay wonderfully fresh for about five days.
If you’re looking for some other meal prep ideas to save time later in the week, I always turn to my tips for a great meal prep breakfast bowl with protein—it speaks to my love of planning ahead, even if the cookies are usually gone before Day 3 hits!
Baking from Frozen Dough
The best part about freezing the dough balls? You can bake them straight from frozen! Just pop those little scoops onto your prepared baking sheet and add about 4 to 5 extra minutes to the baking time I listed above. Since they start out super cold, they take a bit longer to heat through. Check them at the 15-minute mark, and you should have perfect cookies without any extra effort!
Serving Suggestions for Your Mini Egg Chocolate Easter Cookies
Now that you have this glorious batch of Mini Egg Chocolate Easter Cookies, how do you serve them up? Presentation is half the fun, especially when the colors are this vibrant!
When I make these, I try to under-bake them just a hair because they look so much prettier when they are soft and slightly molten in the center. They pair beautifully with simple things, letting those speckled eggs really shine.

Pairing with Beverages
You absolutely must serve these with a tall, cold glass of milk. It’s a classic for a reason, and the way the milk cuts through the deep chocolate is just heavenly. If you’re looking for an adult pairing for your afternoon coffee break, I find that a strong black coffee is perfect—it balances the sugar explosion the mini eggs bring!
If you wanted to ramp up the decadence (because why not during the holidays?), you could serve them alongside a warm, gentle dipping sauce. I’ve used a slightly thinned-out warm chocolate dip before, inspired by my recipe for chocolate fondue with heavy cream. Just keep the fondue warm, not piping hot, so the cookie doesn’t totally dissolve!
Presentation Ideas
Don’t bother arranging them too neatly on a platter; these are meant to look loved and slightly rustic. Pile them high on a wooden board or a white cake stand so the colors really jump out!
For an extra touch, especially if you are making these as a gift, try tucking one or two extra Mini Egg Chocolate Easter Cookies inside small cellophane bags tied with a pastel ribbon. They look incredibly festive, and everyone loves getting a little bag of homemade cheer!
Frequently Asked Questions About Mini Egg Cookies
I know baking always brings up a few questions, and that’s totally fine! We all want our cookies to come out perfect, especially when we’re relying on those fun seasonal candies to do the heavy lifting visually. Don’t worry if your first batch looks a little different than mine—we can troubleshoot!
If you’ve had trouble with cookies spreading too much in the past, definitely check out my advice on why zucchini fritters aren’t crispy—the moisture control principles overlap quite a bit when dealing with ingredients that release water!
Can I use regular chocolate eggs instead of mini eggs?
Yes, you absolutely can, but you have to be careful! If you use standard-sized chocolate eggs, whether they are filled or solid, you need to chop them up quite a bit. I suggest chopping them roughly into quarters or even smaller chunks. If you put in a whole, giant piece of chocolate, it will interfere with the cookie forming a nice, even shape. We want texture variety, not one giant chunk of stuff sticking out of your mini egg easter cookies!
How do I stop the mini egg colors from bleeding?
This is the one that always trips people up! Those bright candy shells look so pretty, but if you mix them too vigorously or let the dough hang around too long before baking, the color starts to dissolve and turns the cookie dough a weird, murky blue or pink. The trick is simple: chill your dough first! A nice cold dough slows down the color transfer. Then—and this is key—fold them in right at the very last minute. Only mix until they are just distributed, and get those scoops onto the tray immediately.
What is the best way to store these cookies to keep them fresh?
Because these are primarily a butter-and-sugar cookie base, they keep their freshness really well, provided you seal them up right! Once they are totally cool—I mean room temperature cool, no warmth lingering at all—place them in an airtight container. I prefer using a glass container with a locking lid. They stay fantastic at room temperature for about five days. If you are trying to save them longer, though, remember what I said about freezing the dough!
Nutritional Data Estimate for Mini Egg Chocolate Easter Cookies
Okay, so while I’m busy focusing on making sure the texture is chewy and the colors are bright, I know some of you are tracking nutrients, and I totally respect that! Before we dive in, I have to give you the standard, but crucial, disclaimer. These numbers are just estimates based on the standard ingredient amounts provided in the recipe. If you use extra butter or a different brand of chocolate, these figures will shift!
This information is based on the recipe yielding one standard batch. These Mini Egg Chocolate Easter Cookies are definitely a treat, but knowing what’s in them helps us enjoy them guilt-free, right? For the full legal breakdown, you can always sneak a peek at our privacy policy, but here’s the quick scoop on what you can expect:
Here is my best estimate for the whole batch:
- Calories: Likely in the range of 2800–3200 (Keep in mind this is the whole batch, not per cookie!)
- Total Fat: Around 150g (That lovely butter is doing its job!)
- Protein: Approximately 35g
- Total Carbohydrates: Around 380g (Mostly from the sugar and the candy shells!)
If you divide this batch out into, say, 24 medium-sized cookies, you’re looking at roughly 120–135 calories per cookie. That’s a pretty decent little splurge for something that tastes this much like springtime and chocolate!
Share Your Mini Egg Chocolate Easter Cookies Creations
Now that you’ve baked up a batch (or maybe three!) of your beautiful Mini Egg Chocolate Easter Cookies, I am dying to know how they turned out! Honestly, seeing your photos and hearing about your successes—or even any little mishaps you had to troubleshoot—is the absolute best part of sharing these recipes.
I poured a lot of love (and butter!) into perfecting the balance of crunch and chew for you, and I really hope they brought a little burst of colorful happiness to your Easter table. If you made them, please take a moment to scroll down and leave a rating for the recipe. Stars are great, but even better is telling me what you thought!
Did you manage to keep the colors from bleeding? Did you sneak a few dough balls before they made it into the oven? Tell me everything! Your feedback really helps us keep building up the trust and experience around these recipes. If you have any lingering questions or just want to share a picture of your cooling rack situation, please reach out to us directly via our contact page. We always love hearing from our amazing bakers!
A huge thank you again for trusting Hanna Foster, Adaptation Specialist, with your holiday baking plans. Happy Easter, everyone!
Mini Egg Chocolate Easter Cookies
Equipment
- Mixing Bowl
- Baking Sheet
Ingredients
Cookie Dough
- 2 cups flour
- 3/4 cup sugar
- 1/2 cup butter
- 1 egg
- 1 cup mini eggs
Instructions
- Mix the dough ingredients together in a bowl.
- Fold the mini eggs into the dough mixture.
- Scoop the dough onto a baking tray.
- Bake at 180°C for 10 to 12 minutes.