When I crave something truly satisfying that still feels good for me, I immediately turn to big, beautiful bowls filled with hearty ingredients. Forget complicated Chinese cooking recipes or hours spent simmering stocks; this is easy Asian food done right! We are talking about the quickest, crunchiest take on a Japanese favorite, making this Katsu Bowl with Brown Rice a weeknight hero. Honestly, I put this recipe through the wringer during meal-prep testing because I needed a base that wouldn’t turn to mush, and let me tell you, the brown rice base absolutely held up! It’s wholesome, quick, and delivers all that fantastic flavor you want in Japanese food recipes without hogging your entire evening.
Why You Will Love This Katsu Bowl with Brown Rice
Seriously, why wouldn’t you love this? This katsu bowl takes one of my favorite Asian cuisine recipes and makes it lightning fast. It’s the perfect easy Asian dish for a busy weeknight!
- It’s ready in about 30 minutes total, start to finish.
- The brown rice keeps things feeling wholesome and filling.
- The crunch of the katsu paired with the tangy sauce is just addictive!
- Everything is cooked in one skillet, which means cleanup is a breeze. If you love easy Asian food, this is for you.
Essential Ingredients for Your Katsu Bowl with Brown Rice
Getting this recipe right relies on having the right building blocks, and thankfully, most of these are pantry staples! Trust me, keeping your pantry stocked with essentials for Japanese food recipes makes whipping up fast dinners possible.
For the crispy chicken, we need our standard dredging station: 60g of plain flour, one nice big egg (make sure it’s thoroughly beaten!), and 100g of breadcrumbs. You can definitely use Panko if you have them, but regular works fine for this quick weeknight version.
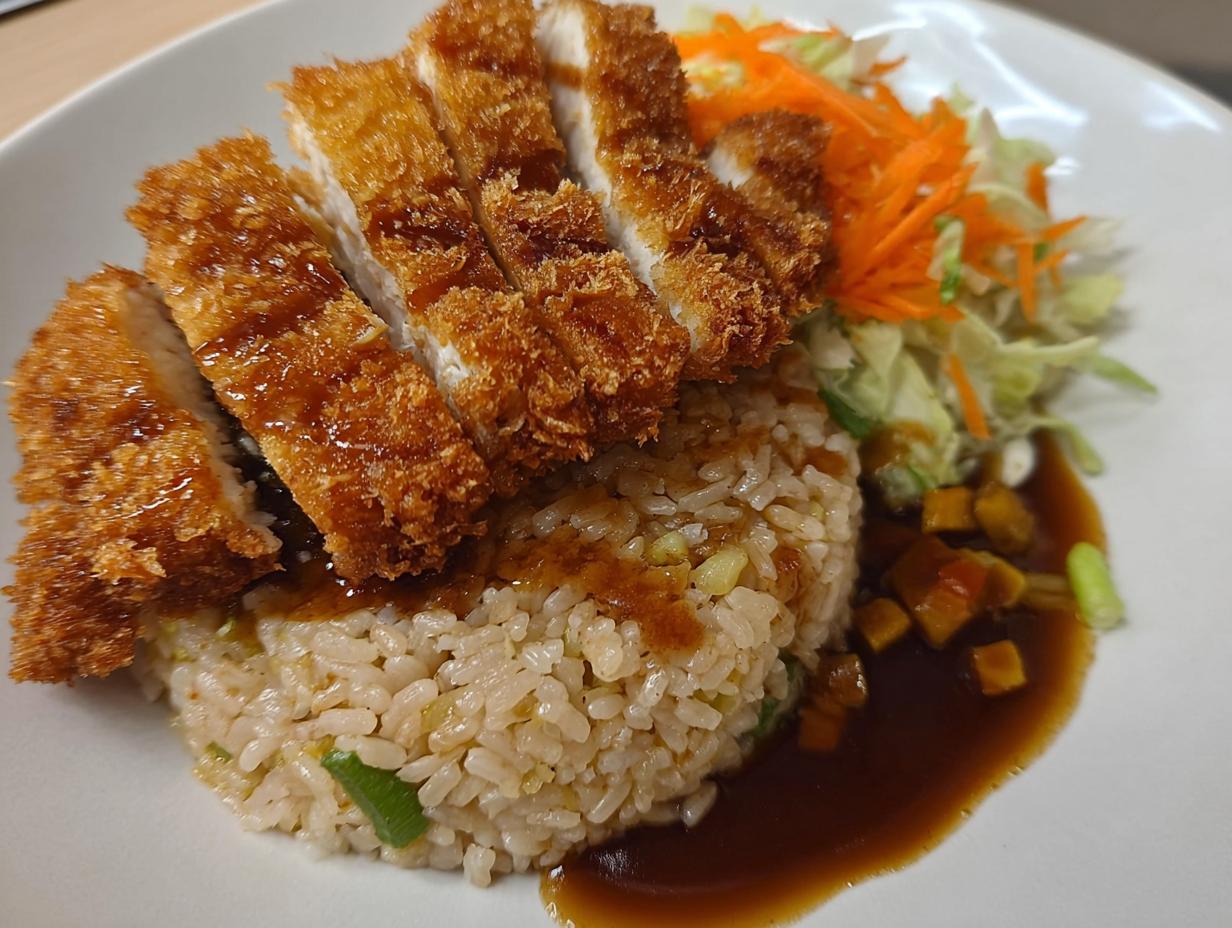
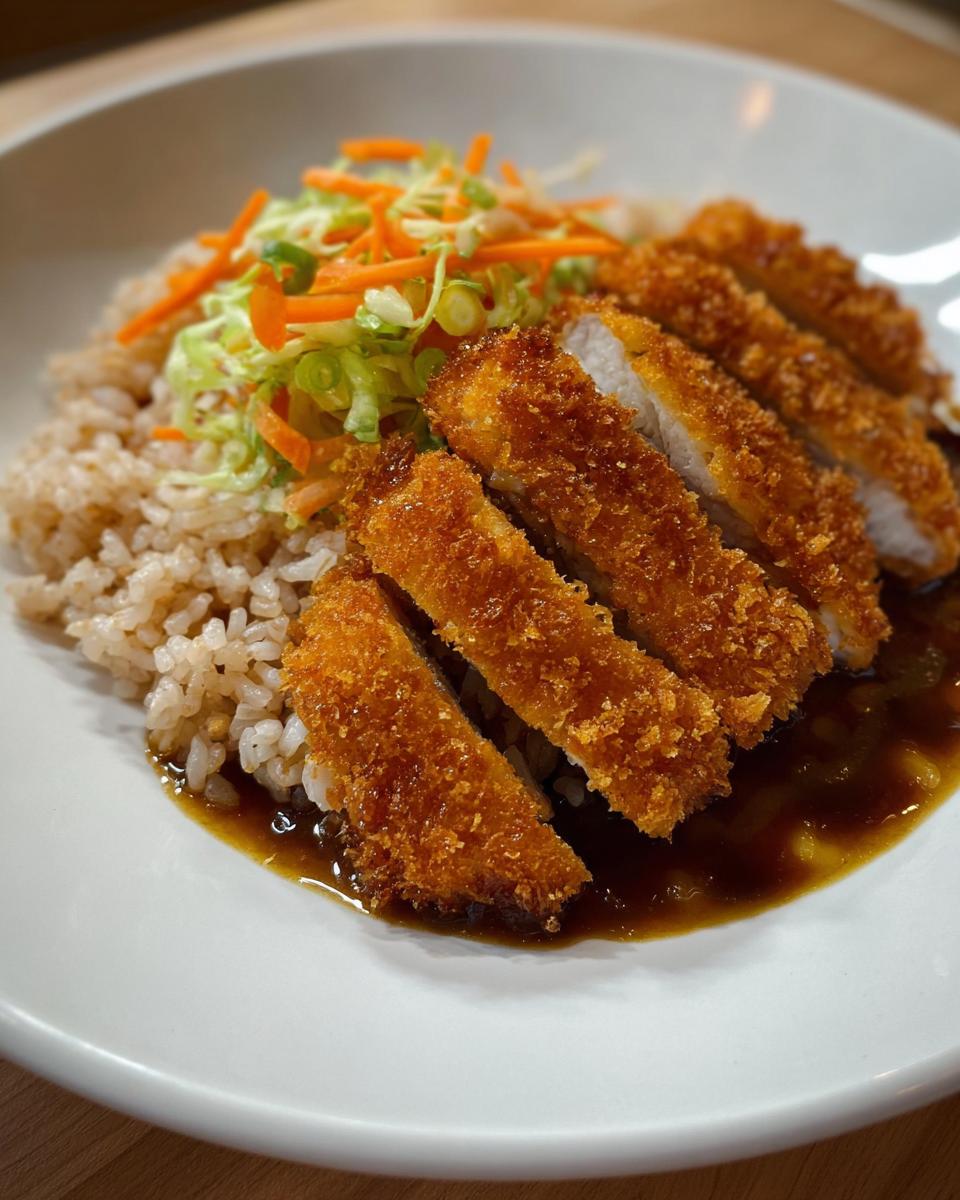
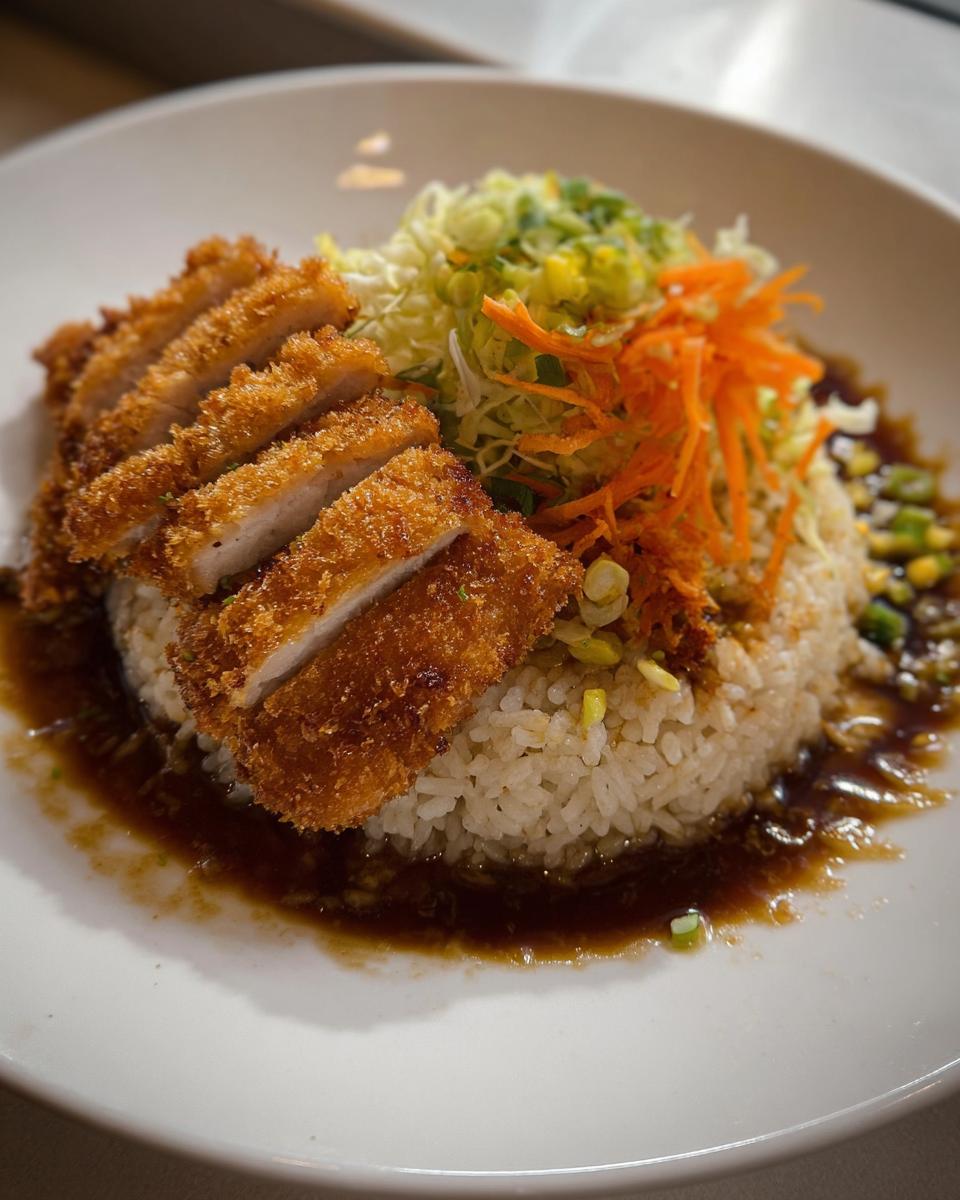
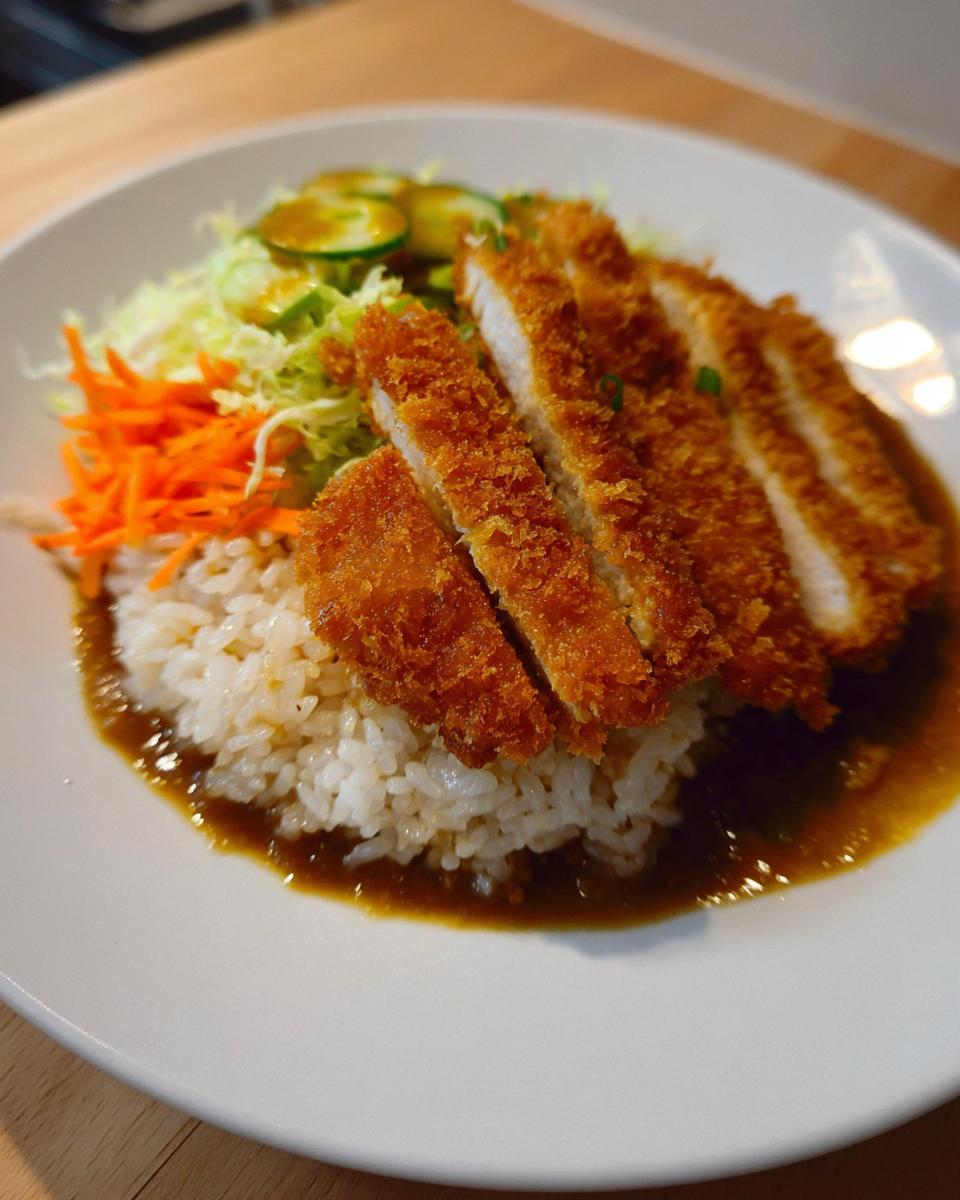
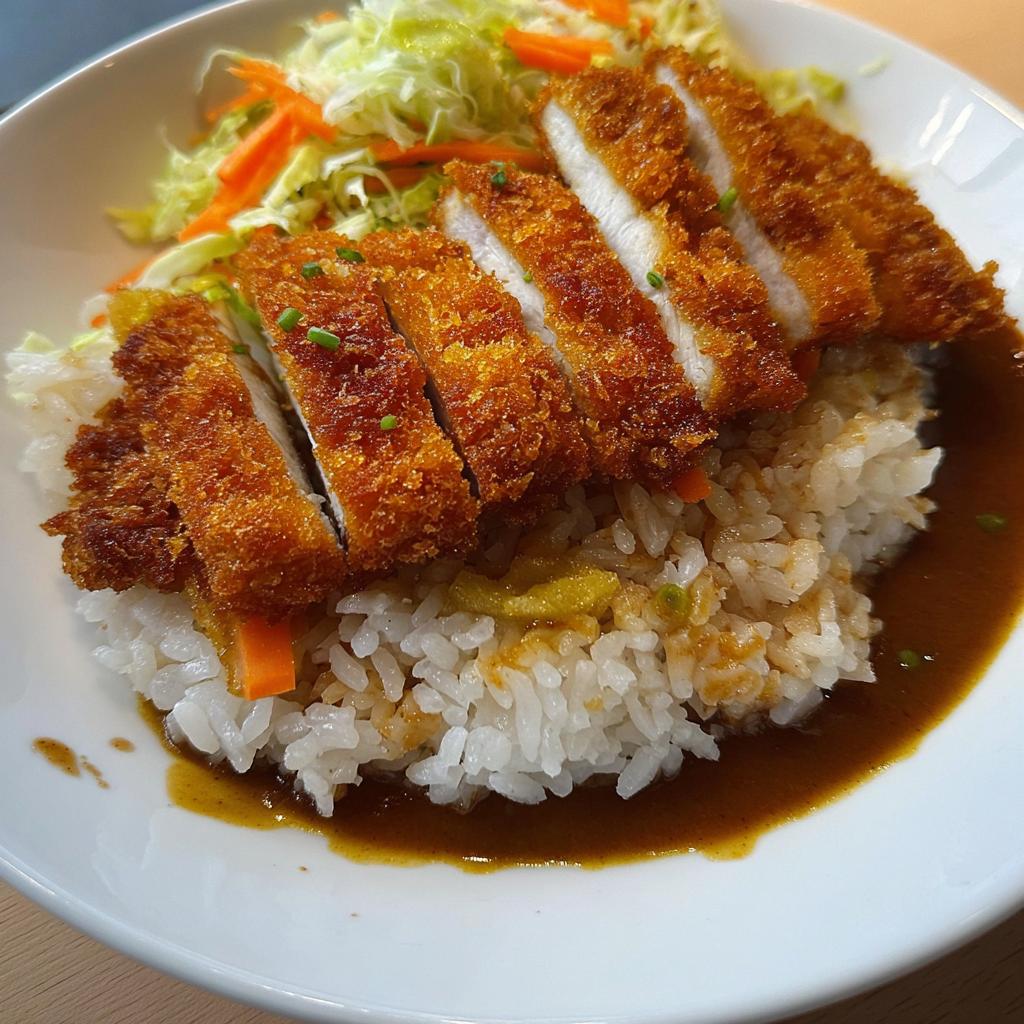
Then we have our bowl components. You’ll need 300g of pre-cooked brown rice—this is key for saving time! Layer that with 100g of shredded cabbage and 50g of fresh grated carrots for that nice little crunch and color. Finally, don’t forget the star sauce! Grab about 30ml of your favorite katsu-style sauce, making sure you grab an alcohol-free version if that’s what your family prefers. If you’re looking for other ways to use eggs, check out my recipe for soy sauce boiled eggs!
Equipment Needed for the Katsu Bowl with Brown Rice
When it comes to whipping up these delicious Japanese meals, the good news is we aren’t dragging out every single gadget we own. Nope! For this Katsu Bowl with Brown Rice, we are keeping things incredibly simple.
You only really need one main cooking tool for the star of the show, the chicken katsu.
- Skillet: Make sure you grab a good, sturdy skillet. This isn’t an air fryer chicken katsu bowl, so we’re frying it right here! You want one large enough to hold the chicken pieces without cramping them in the oil.
- Cutting Board and Knife: Essential for flattening those chicken breasts to an even thickness—trust me, even thickness equals even cooking!
- Shallow Dishes or Plates: You’ll need three separate plates ready for your dredging station (flour, egg, breadcrumbs). Get this set up first; it makes the assembly part go way faster!
That’s really it! See? Even the easiest Asian food ideas don’t have to mean complicated gear. Having your skillet warmed up and ready means you can move straight into the breading process.
Step-by-Step Instructions for an Easy Katsu Bowl with Brown Rice
Okay, this is where the magic happens, and honestly, it goes faster than you think! Remember, for any good Asian food recipe, consistency matters, especially when we are dealing with thinner cuts of meat. My favorite trick is to place the chicken breasts between two pieces of plastic wrap and use a meat mallet—or even the bottom of a heavy pan—to flatten them evenly. You want them about half an inch thick so they cook through at the same time!
Preparing and Breading the Chicken
Get your little dredging station set up before you even touch the chicken. First, the flour goes on plate one. Then the beaten egg on plate two. And finally, the breadcrumbs on plate three. Take that flattened chicken breast and coat it thoroughly in the flour first—shake off any excess! Next, dunk it right into the egg wash, letting the extra drip off for just a second. The last step is critical: Press that piece firmly into the breadcrumbs. Don’t just lightly toss it; really press those crumbs onto the surface so you get a genuinely crunchy crust later. Make sure both sides are totally coated!
Cooking the Chicken Katsu
Time to heat up that skillet! We want our 30ml of oil warming up over medium heat. You don’t need a deep fryer, just enough oil to cover the bottom of your pan generously. Once the oil looks shimmering—careful, it splatters!—gently lay in your breaded chicken. I usually have to cook these in batches so the pan isn’t overcrowded, which lowers the oil temperature. You’re looking for that gorgeous golden-brown color, which takes about 4 to 5 minutes per side. Always check that chicken reaches a safe internal temperature before you pull it out, even if it looks perfect on the outside. Remember you can see how I handle cooking chicken perfectly when I make slow-cooker teriyaki!
Assembling Your Katsu Bowl with Brown Rice
Once the katsu is cooked, take it out onto a rack or paper towel to drain off any extra oil, and quickly slice it into bite-sized strips. Now we build! Start with a generous scoop of that pre-cooked brown rice right into the bottom of your bowl. Next, arrange your fresh toppings—the shredded cabbage and grated carrots go side-by-side over the rice. Finally, lay those perfectly sliced, crunchy pieces of chicken on top. Drizzle everything with your 30ml of alcohol-free katsu sauce and dig in! These bowls look amazing, almost as good as the ones you see on sites like Just One Cookbook, but made lightning fast right here at home.
Tips for the Best Katsu Bowl with Brown Rice
If you want that fantastic crispy exterior on your katsu that doesn’t get soggy when it hits the sauce, you need to remember a few tricks I learned through painful, soggy-katsu trial and error. It’s all about temperature control and presentation, even when making something as simple as these easy Asian dishes.
First, when you are heating the oil, don’t just guess! You want the oil hot enough that the breadcrumbs immediately sizzle when they hit the surface—if they just sink slowly, the oil is too cold, and your chicken will soak up all that nasty grease. If you’re looking for an even easier crust, check out my recipe for air fryer chicken katsu bowl next time!
My biggest tip for the final meal is to slice the chicken *right* before you assemble the bowls. If you slice it too early for meal prep, the steam gets trapped, and the crunch dies a little death. Get that rice warm, slice the hot katsu, and assemble only when you are ready to eat!
Ingredient Notes and Substitutions for Your Katsu Bowl
I get asked all the time about swapping things out in my Asian food recipes. Sometimes you just don’t have the exact ingredient the recipe calls for, or maybe you’re serving someone who can’t eat chicken. Don’t panic! This Katsu Bowl with Brown Rice is super forgiving, but a few swaps make a big difference in the final result.
Let’s talk protein first. If you’re avoiding chicken, you can absolutely swap in thin-cut pork chops for an authentic Tonkatsu feel! They take almost the exact same amount of time to cook. For my vegetarian friends looking for other great Asian food ideas, firm or extra-firm tofu works magic here. Just press the moisture out really, really well before you dredge it in the flour, egg, and breadcrumbs. If you’re trying out my baked version, tofu is even easier!
Now, about the rice. For speed and nutrition, I insist on brown rice, especially since it held up so well during the meal prep testing. If you are in a real rush or prefer a traditional Japanese meal experience, white rice is fine, but be warned: white rice tends to get a little softer faster once it starts sitting in the fridge.
And what about those amazing crunchy breadcrumbs? Panko breadcrumbs are the gold standard for the crispiest katsu crust because they are lighter and flakier than standard breadcrumbs. If you only have regular crumbs, that’s okay—just be sure you press them onto the chicken really hard during the breading process so they adhere well. A little extra press goes a long way!
Serving Suggestions for this Japanese Food Recipe
A Katsu Bowl with Brown Rice is already a complete meal, right? You’ve got your lean protein, you’ve got your whole grain base, and you have some fresh vegetables for texture. But hey, we’re home cooks, we love making things *extra* special! If you’re serving this up for company instead of just for a quick dinner, a few little additions can really elevate this from an easy Asian dish to a fantastic spread.
My absolute favorite way to dress this bowl up is with simple garnishes. Think about presentation, even for your everyday katsu bowl with sesame dressing! A sprinkle of toasted white or black sesame seeds right over the top of the cabbage and carrots just gives everything a beautiful visual appeal and a tiny nutty crunch. Similarly, don’t skip the fresh green onion, thinly sliced on a sharp diagonal. It adds a sharp, fresh bite that cuts through the richness of the fried katsu.
If you need a bit more substance on the side, keep it light so it doesn’t overpower the katsu flavor. I usually reach for something crisp and clean. A simple shredded cucumber salad tossed in rice vinegar and a dash of soy sauce is perfect—it’s extremely refreshing and fits right into our category of Asian Cuisine Recipes. You definitely don’t need anything heavy, especially since you already have the rice!
For those days where you have a little more time and want something truly authentic, you can always look up guides on traditional accompaniments, like those found on sites like Japan Guide. But honestly, even if you just quickly whip up a side of my crockpot teriyaki sauce to drizzle on top *alongside* the katsu sauce, you’ll have a winner!
Storing and Reheating Your Katsu Bowl with Brown Rice
One of the biggest hurdles with any fried food, even amazing Japanese food recipes like this, is leftovers. Nobody wants soggy fried chicken the next day! Since this Katsu Bowl with Brown Rice was designed to be a meal-prep star, we have to be smart about how we store it. The secret to success here is separation, separation, separation!
If you are packing these up for lunches later in the week, don’t assemble them completely until you are actually ready to eat. Keep the cooked brown rice in one airtight container. Place the shredded cabbage and grated carrots, maybe even with a tiny spritz of water or lemon juice to keep them crisp, in a separate small container. Then, the star—the chicken katsu—needs its own dedicated place. If you store it too close to the moist veggies or the warm rice, that beautiful breading is doomed.
When it comes time to reheat, this is where we focus on bringing back texture. Reheating the components separately is always best for these easy Asian dishes. If you are using a microwave, just heat the rice and veggies until they are steaming nicely. Then, the katsu—I highly recommend you skip the microwave entirely for the chicken! Pop it into a toaster oven or a standard oven set to about 375°F (190°C) for about 5 to 8 minutes. This low and slow approach lets the heat warm the chicken through while crisping up that breadcrumb coating again. Trust me, it mimics the crunch much better than the microwave ever could!
If you are looking for more strategies on making your healthy meals last longer, you should definitely check out my guide on low carb chicken meal prep techniques, which uses some similar principles for keeping things fresh!
Common Questions About Making a Katsu Bowl with Brown Rice
Even with a recipe as straightforward as this Katsu Bowl with Brown Rice, questions always pop up! I love hearing from you all, especially when you’re diving into new aspects of Asian cuisine recipes. Here are a few things I hear most often when folks are trying this out for the first time.
How do I make sure the katsu stays crispy if I’m making these for lunch later?
This is the perennial question for all Japanese food recipes involving breading! As I mentioned before, separating your components is number one. But if you *must* reheat the whole thing together, use an air fryer or a conventional oven—never the microwave—and reheat just the chicken part first until it’s sizzling, then add the rice and veggies for a minute to warm through. This keeps your easy Asian dishes enjoyable!
My chicken breasts were unevenly thick. How much does that affect the cooking time?
It affects everything! If one end is thin and the other is thick, the thin end will be dry by the time the thick end cooks through. That’s why I push so hard for flattening them evenly to about half an inch. If they are truly uneven, you might need to pull the thinner pieces out a minute or two early and keep the thicker parts cooking a bit longer. Don’t be afraid to check the internal temperature!
Can I substitute the oil? I’d prefer not to fry everything. Can I bake it?
You totally can bake or air fry this! While traditional katsu is pan-fried, if you want to keep your Japanese meals lighter, baking or air frying works well. Just lightly spray the breaded chicken with oil before baking at 400°F (200°C) until golden, flipping halfway. Just know that the crust won’t be *quite* as shatteringly crisp as the pan-fried version, but it’s a great healthy alternative for these easy Asian dishes.
If you’re looking for more dump-and-go inspiration for Asian cooking recipes, you should definitely check out my dump and go Asian chicken dinner ideas next!
Katsu Bowl with Brown Rice
Equipment
- Skillet
Ingredients
- 2 chicken breasts
- 60 g flour
- 1 egg beaten
- 100 g breadcrumbs
- 30 ml oil
- 300 g cooked brown rice
- 100 g shredded cabbage
- 50 g grated carrots
- 30 ml katsu-style sauce alcohol-free
Instructions
- Flatten chicken breasts to an even thickness.
- Coat the chicken in flour, dip it in the beaten egg, and then press it into the breadcrumbs.
- Heat the oil in a skillet over medium heat.
- Cook the chicken for 4 to 5 minutes per side until it is golden brown and cooked through.
- Slice the cooked chicken into strips.
- Assemble the bowls with brown rice, cabbage, carrots, and the sliced chicken.
- Drizzle the katsu sauce over the bowls and serve them warm.