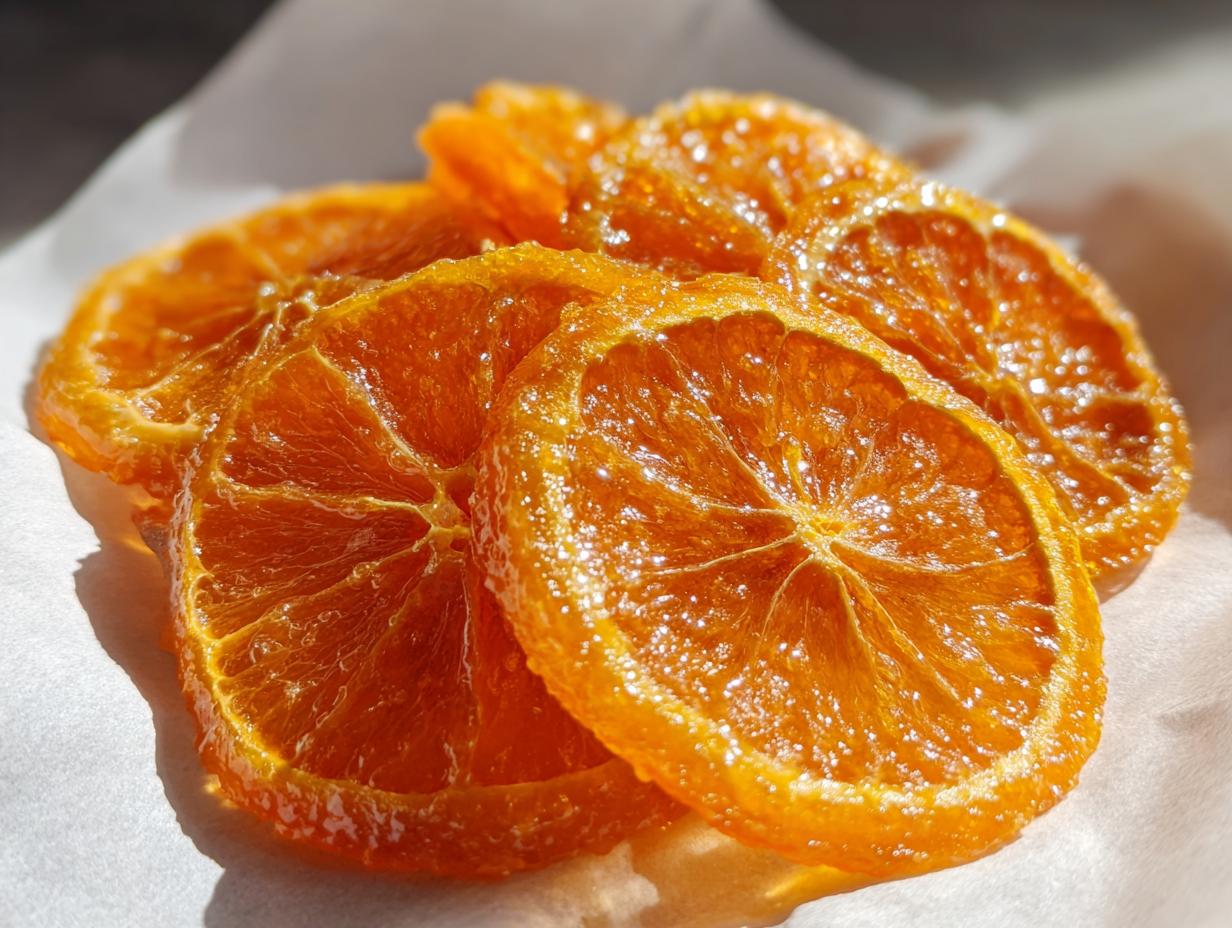
When I’m trying to cut back on refined sugar but still want something sweet and bright, I always turn to citrus. We all love a good orange dessert, right? But sometimes those traditional recipes just rely too much on white sugar. That’s why I got obsessed with developing the **Honey Candied Orange Slices**. Trust me, once you try this naturally sweetened citrus candy, you won’t go back to the old way!
Honestly, honey brings such a softer sweetness that pairs beautifully with citrus during testing. It gives the slices a wonderful depth that plain sugar just can’t touch. It’s simple, it’s bright, and it uses just three things to create something truly dazzling. Watch how quickly these come together!
Why You Will Love These Honey Candied Orange Slices
I just know you’re going to adore how these turn out. They are basically sunshine you can eat! They have a gentle sweetness, and once you see how easy they are, you’ll be making them all the time. Plus, they are such a great way to use up fresh oranges you pick up at the market.

- Naturally Sweetened Goodness: We are skipping the processed sugar! The honey gives these Honey Candied Orange Slices such a beautiful, mild sweetness that really lets the citrus flavor shine through.
- So Simple to Make: Seriously, this recipe only requires three ingredients. Boiling and simmering—that’s what canning is all about, right? You barely have to lift a finger once they hit the heat.
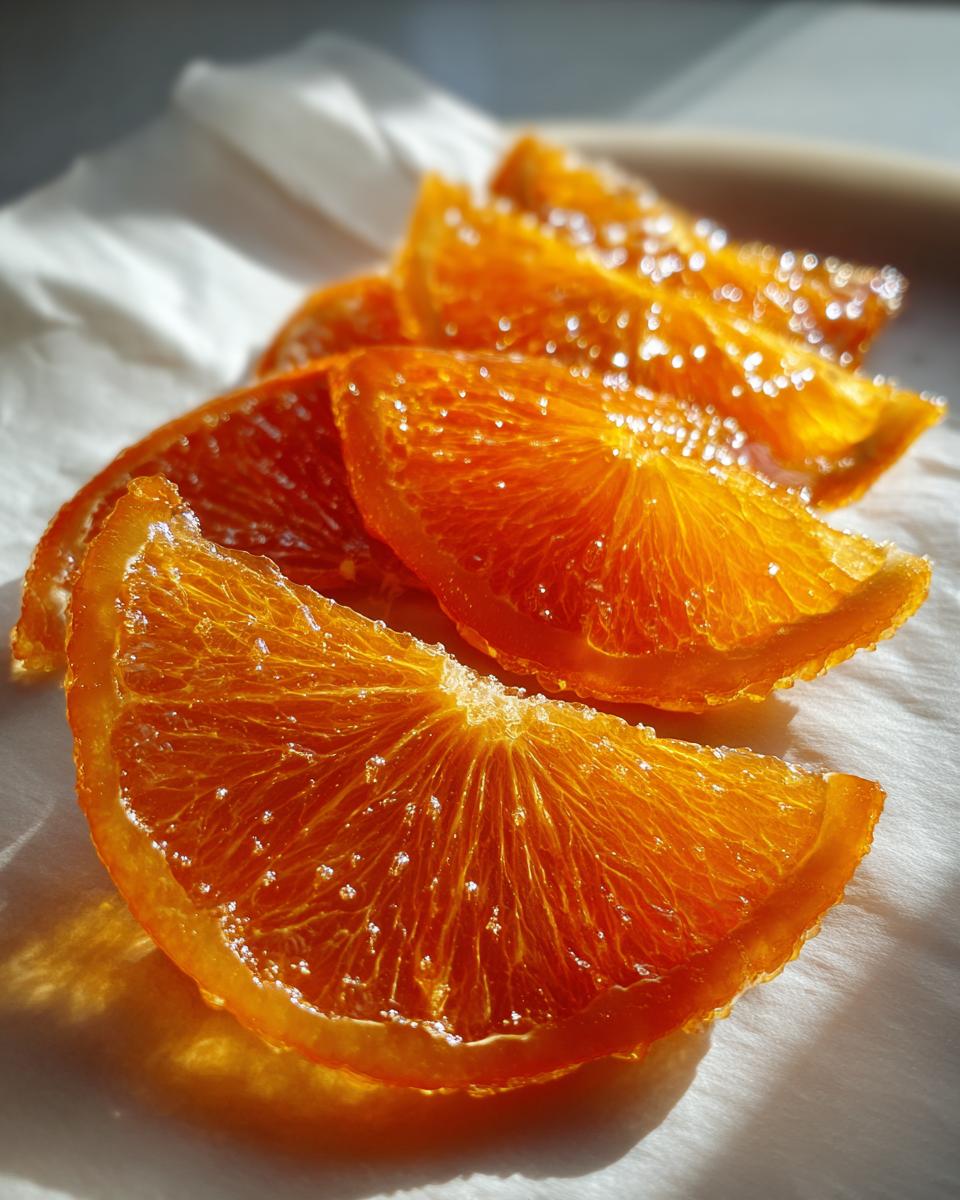
- Perfect Texture: After the blanching step, the oranges become tender but still hold their shape beautifully, giving you that wonderful chew we all look for in candied fruit.
- Versatile and Bright: These aren’t just a snack! You can chop these up and toss them into muffins or use them as stunning, edible garnishes on other orange desserts easy to make. (If you want to see a twist on candied oranges, check out my guide on classic candied orange slices too!).
- Long Shelf Life: When stored right, these last for weeks, which means you can make a big batch now and enjoy them later when you need a little pick-me-up.
- Great for Gifting: Put them in a cute little clear bag tied with twine, and you have an instant, homemade gift that looks totally gourmet.
Essential Equipment for Perfect Honey Candied Orange Slices
Now, don’t let the thought of making candy scare you off! The setup for these Honey Candied Orange Slices is shockingly simple. You only need a few things that I bet you already have sitting in your kitchen cabinets. This isn’t some complicated candy-making operation; this is home kitchen magic!
When I was testing this recipe—trying to get that perfect glossy look—I realized that the right tools really speed things up. You don’t need a specialty candy thermometer or anything fancy. Here’s the short list of what we need:
- A Large Pot: You need this for the blanching step. It has to be big enough to completely cover the orange slices in boiling water without boiling over when you toss them in.
- A Small Saucepan: This is strictly for warming up our glorious honey and water syrup. A small one works so much better than a huge stockpot because you want a decent depth of liquid around those orange slices.
- Parchment Paper: This is our best friend once the simmering is done! You absolutely need parchment paper to lay the sticky slices out on so they can cure and dry without gluing themselves to your counter or cooling rack. Believe me, I learned that the hard way once!</li
Ingredients for Your Honey Candied Orange Slices
Okay, let’s talk shopping! The beauty of making Honey Candied Orange Slices is that it really only relies on three main players. If you’re looking for other ways to use citrus beyond this, make sure you check out my guide on orange and lime mixed peel—it’s fantastic!
When measuring, be precise, especially because we are using honey, which is denser than granulated sugar. Precision here is how we avoid crystallized syrup or slices that stay soft when they should be perfectly candied. Don’t skip the blanching step; it gets rid of that overwhelming bitterness!
For the Naturally Sweetened Syrup
- 1.5 cups water
- 0.75 cup honey
For the Orange Slices
- 2 large oranges, thinly sliced
That’s it! Just two ingredients for the syrup and one for the star of the show. When slicing your oranges, aim for about 1/8 inch thick. If they are too thick, they take forever to candy and don’t get that lovely translucent look. If they are too thin, they tend to fall apart during the gentle simmer. Take your time with the knife here; it really does matter for the final texture of these naturally sweetened citrus candies!
Step-by-Step Instructions for Honey Candied Orange Slices
Alright, this is where the real transformation happens! Making the Honey Candied Orange Slices is mostly hands-off once you get them simmering, but the timing on the first couple of steps is really important for getting that perfect, non-bitter flavor. If you ever wanted to make fruit leather or something similar, mastering this gentle simmer is key—you can see my notes for homemade fruit roll-ups for more low-and-slow cooking ideas!
Preparing the Orange Slices
Before we sweeten things up, we have to get the bitterness out of the peels. If you skip this, your finished candy will taste sharp, not bright. Take your thinly sliced oranges and drop them right into a pot of rolling boiling water. We only want to blanch them for 2 minutes—no longer! This little bath softens them just enough so they absorb the honey syrup beautifully.
Once those two minutes are up, drain them immediately really well. You want those slices as dry as possible before we move them to the sugar mixture, so give that colander a good shake or even gently pat them dry with a paper towel if you have time.
Creating the Honey Syrup Base
Grab your smaller saucepan now for the syrup. We are mixing the water and the honey together. Put this on very low heat. I mean it—LOW. We aren’t trying to boil this; we just want the honey to become fully uniform and liquidy, mixing completely into the water. Stir it gently until everything looks smooth and glassy. If you try to rush this and turn the heat up too high, the honey might start to scorch right on the bottom of the pan, and trust me, that smell is awful!
Simmering and Candying
Once the syrup is ready, carefully place your blanched orange slices into the mixture. Make sure they are lying flat in a single layer, so every piece gets coated equally. If you have too many slices, it’s much better to do this in two smaller batches rather than overcrowding the pot.
Now, reduce the heat again until you have the gentlest simmer—just a tiny bubble breaking the surface every few seconds. Let them hang out here for a full 45 minutes. Patience is your best friend! You’ll know they are ready because the orange flesh will look beautifully glossy and translucent. That shiny look means the sugar syrup has fully penetrated the fruit, and you’ve achieved perfect candying!
Drying Your Finished Slices
When that 45 minutes hits, turn off the heat immediately. Using tongs or a slotted spoon, carefully lift the candied slices out of the simmering syrup. Try to let any extra syrup drip off before setting them somewhere safe.
Lay them out—single file, no overlapping!—onto your prepared sheet of parchment paper. This is crucial: they need time to dry completely before you try to store or serve them. This could take several hours or even overnight depending on how humid your house is. They should feel dry to the touch, not sticky or gooey, before you move them into an airtight jar.
Tips for Success with Naturally Sweetened Citrus Candy
I’ve failed at candying citrus more times than I care to admit when I was first starting out, so I really want to pass on a few tricks to you! Getting that perfect chew without the sticky mess or crystallized syrup is all about managing the heat and the moisture. If you’re interested in mastering other baking techniques, check out my guide on the secrets to perfect scones—it covers a lot of the same principles of gentle handling!
Don’t let minor hiccups stop you! If your syrup starts to look a little cloudy when you pull the slices out, that usually means it might crystallize later. Here are my best pro-tips for avoiding that:
- Don’t Crowd the Pot: I mentioned this before, but it bears repeating! If you pile too many slices into that saucepan, the temperature drops too fast, and the honey mixture starts to simmer unevenly. This leads to some pieces getting cooked too fast and others staying chewy. Do two batches if you have to!
- Acid is Your Friend: To stop that crystallization—where the sugar just decides to turn grainy—a tiny dash of acid helps stabilize the simple syrup. A squeeze of fresh lemon juice (maybe half a teaspoon!) into your honey water before you add the oranges works like a charm to keep the syrup smooth and glossy right to the end.
- Be Gentle When Flipping: Those slices are delicate during the simmering stage. If you need to check on them, don’t use a metal spoon to stir them around. Instead, gently shake the saucepan itself to encourage movement. If you absolutely must nudge a piece, use a silicone spatula very carefully.
- The “Drip Test” for Dryness: When you take them out, if you notice thick, syrupy beads clinging to the bottom of the slice where it rested on the parchment, leave them out longer! They need to cure until they feel nearly dry to the touch. If they are still dripping, they won’t store well at all and will stick together in the jar.
Storage and Reheating Honey Candied Orange Slices
Now that you’ve gone to all that trouble to make these gorgeous Honey Candied Orange Slices, the last thing you want to do is ruin them with poor storage, right? Because we worked so hard to get them perfectly dried on that parchment paper, keeping that texture is the main goal.
These are technically a type of Naturally Sweetened Citrus Candy, which means they are stable, but their texture can change quickly if they get too much moisture! Don’t worry if you don’t eat them all in one sitting; they keep beautifully if you follow these simple rules.
How to Store Your Honey Candied Orange Slices Perfectly
The main enemy here is humidity. If you put warm or slightly sticky slices into a jar, they will steam themselves, and you’ll end up with a sticky, wet mess instead of firm, chewy candy. Only seal them up when they are 100% dry to the touch—like, you could easily pick them up without anything sticking to your fingers.
Once they are cured, here’s the storage drill:
- Put them in an airtight container. Glass jars with tight-fitting lids work the best for me!
- Keep that container in a cool, dark, and dry spot. Think a pantry shelf, not sitting right next to the stove or on top of the fridge where heat collects.
- If you notice any condensation building up inside the jar after a day or two, take them right back out and let them air-dry for another few hours on fresh parchment paper.
If you store them correctly, these sweet treats can last for several weeks! They are a wonderful thing to have on hand when you need a little citrus boost.
Reheating is Usually Not Necessary (Or Recommended!)
This is one of the best parts about candied fruit—it’s shelf-stable! Since we aren’t using any fresh cream or dairy, there’s really no need to reheat your Honey Candied Orange Slices.
If, for some reason, you left a few stragglers out on the counter and they’ve become stiff or hard to chew (maybe due to very low humidity), you can *very* gently warm them up to soften them slightly. I mean gentle! Pop just two or three on a microwave-safe plate and hit the power button for just 5 seconds on 20% power. If you blast them on high, you’ll just end up melting the honey coating off entirely, and that’s a huge bummer.
Most of the time, though, you’ll find they are perfectly pliable and ready to enjoy right out of the jar!
Creative Uses for Leftover Orange Peels and Syrup
Don’t you just hate waste? When I finish candying those beautiful slices, I always have a little bit of that incredible honey-citrus syrup left in the saucepan, and usually, a pile of cooked orange peels too. I try never to throw away good ingredients, especially when they smell this heavenly! We have to talk about what to do with orange peels now, because there are some really brilliant orange peels uses beyond just tossing them.
Saving these remnants is the secret to turning one recipe into three! Think about how fresh oranges make wonderful recipes; we shouldn’t waste any part of them.
Revitalizing the Syrup: Easy Sweeteners
That leftover liquid in your saucepan? Please, don’t dump it! It’s essentially a low-sugar, intensely flavored orange simple syrup now. It’s perfect for things that need an extra bright kick—way better than plain sugar syrup.
Here’s what I do with mine:
- Cocktails or Mocktails: Use a tablespoon or two in iced tea or sparkling water. It feels so much more sophisticated than just adding a slice of fresh fruit.
- Glazing Cakes: If you’re making something like my favorite cranberry orange muffins, brush the warm syrup over the tops right after they come out of the oven. It keeps them damp and adds a flavor surprise!
- Drizzling: Use it like liquid gold over plain yogurt or even French toast on a Sunday morning.
It doesn’t keep forever once opened, maybe about a week in the fridge, so use it up quickly!
What To Do With Orange Peels After Simmering
The peels you pulled out are now tender, sweet, and infused with honey—this is fantastic! They’ve lost that harsh bitterness we usually associate with fresh peels, so they are ready to use immediately. They are technically candied, just softer than the slices we set aside to cure.
If you made a big batch, you can treat these cooked rinds just like you would homemade candied orange peels. Slice them thinly and use them just like that, or try these ideas for what to do with orange peels:
- Chopping for Baking: Dice them up really small. Add them into cookie dough (they are amazing in shortbread!) or stir them right into a bread batter.
- Making Zest: Okay, hear me out! Even though they’ve been cooked, they still have all that great orange oil. You can grate them finely over a dish before serving. The texture is soft, so it blends right in.
- Drying Fully: If you have the patience, you can lay these out again on parchment paper next to your slices and let them dry out completely, almost like chips. Once totally desiccated, you can grind them into a potent, sweet citrus powder to use in rubs or scones later on!
It feels so good using every bit of that beautiful orange!
Frequently Asked Questions About Honey Candied Orange Slices
I always forget to ask the important questions until after I’ve made something, so I figured I’d put some of the things I get asked most often right here. Hopefully, this clears up everything you need to know about perfecting your Honey Candied Orange Slices!
Can I substitute the honey in Honey Candied Orange Slices?
That’s a fair question, especially if you have a honey allergy or just don’t love the flavor! You can definitely swap it out for another liquid sweetener, like maple syrup or even agave nectar. If you use maple syrup, you’ll get a lovely, slightly woodsy flavor profile, which I think works surprisingly well with citrus. However, you need to remember that the flavor won’t be *exactly* the same as these Honey Candied Orange Slices. Honey reacts a little differently during the long simmer, giving this recipe that characteristic soft sweetness we are aiming for. Stick with honey if you want the recipe exactly as intended, but don’t be afraid to experiment a little if you need to!
How do these compare to Chocolate Covered Candied Orange Peels?
Oh, that’s a fun comparison! Chocolate fudge cookies are great, but chocolate-covered versions are a whole different experience. With the chocolate-covered variety, the outer coating is the main event—it’s rich, it’s decadent, and the texture contrast is sharp between the hard chocolate and the chewy peel. Here, with our Honey Candied Orange Slices, the flavor is much brighter and more integrated. The honey soaks right into the fruit all the way through, so you get that gentle sweetness in every single bite, rather than just a chocolate shell.
Do I have to blanch the oranges first?
Yes, please, yes! I know it seems like an extra step when you’re eager to get them simmering, but blanching is non-negotiable if you want great results. Remember, oranges have a lot of bitter oils packed into that white pith, right under the zest. If you skip the 2-minute bath in boiling water, those oils don’t leach out properly. You’ll end up with fantastic-looking slices, but they will have a powerful, slightly harsh bitterness that overpowers the delicate honey flavor. It’s worth the extra step for that clean, bright taste!
Can I use mandarin oranges instead of large oranges?
This recipe really shines with large, thick-skinned oranges, like Navels or Valencias, because you can slice them thinly while still having enough structure to hold up for 45 minutes of simmering. If you use smaller citrus, like mandarins, the slices become way too thin, and they absolutely disintegrate. If you want to explore other small citrus options, you might look up some specific mandarin orange recipes, but for candying slices, stick to the bigger fruit so they turn out beautifully translucent and chewy!
Nutrition Estimate for Honey Candied Orange Slices
Okay, now that we’ve made something so incredibly tasty, we do have to talk a little bit about the numbers, even if I usually try to ignore them when I’m baking! Since we are focused on naturally sweetening versus refined sugar, the profile changes quite a bit for these Honey Candied Orange Slices. Everything comes down to the honey content, of course, since there’s no added white sugar in the main cooking process.
Keep in mind that nutrition facts panels are estimates, and ours are no exception! These numbers change depending on how large your oranges were, and exactly how much honey you ended up using during the simmer. But for planning purposes, here is a rough idea of what you’re looking at per batch.
- Calories: Approximately 750-800 calories per full batch (this recipe makes one batch).
- Total Fat: Very low, virtually 0g, unless you accidentally added a splash of butter instead of water (which I hope you didn’t!).
- Protein: Less than 1g.
- Carbohydrates: High, primarily coming from the natural sugars in the oranges and the honey.
If you find that number a little high for a single serving, remember this recipe makes quite a few slices! If you divide this batch into about 15 to 20 individual slices (depending on the size of your original oranges), the carb count per slice drops way down. This is why I love these as an occasional treat rather than an everyday item—they are concentrated sunshine!
By Emily Mitchell, Efficiency & Testing Coordinator at Recipes by Betty.

Honey Candied Orange Slices
Equipment
- large pot
- Saucepan
- Parchment paper
Ingredients
- 2 large oranges, thinly sliced
- 1.5 cups water
- 0.75 cup honey
Instructions
- Blanch orange slices in boiling water for 2 minutes; drain.
- Warm honey and water in a saucepan over low heat until combined.
- Add orange slices in a single layer to the saucepan.
- Simmer gently for 45 minutes until slices are glossy and translucent.
- Remove slices and place them on parchment paper.
- Let the slices dry completely before you serve or store them.