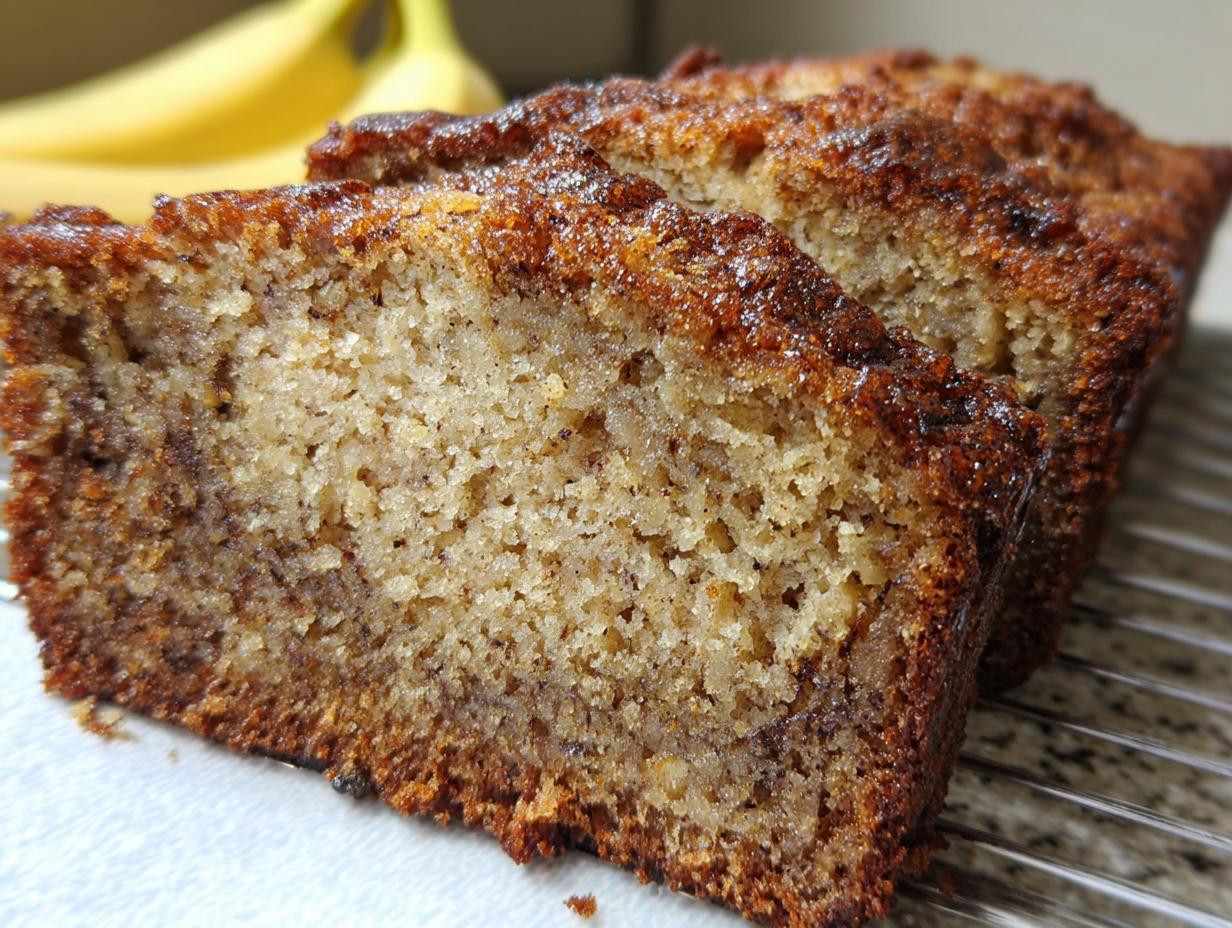
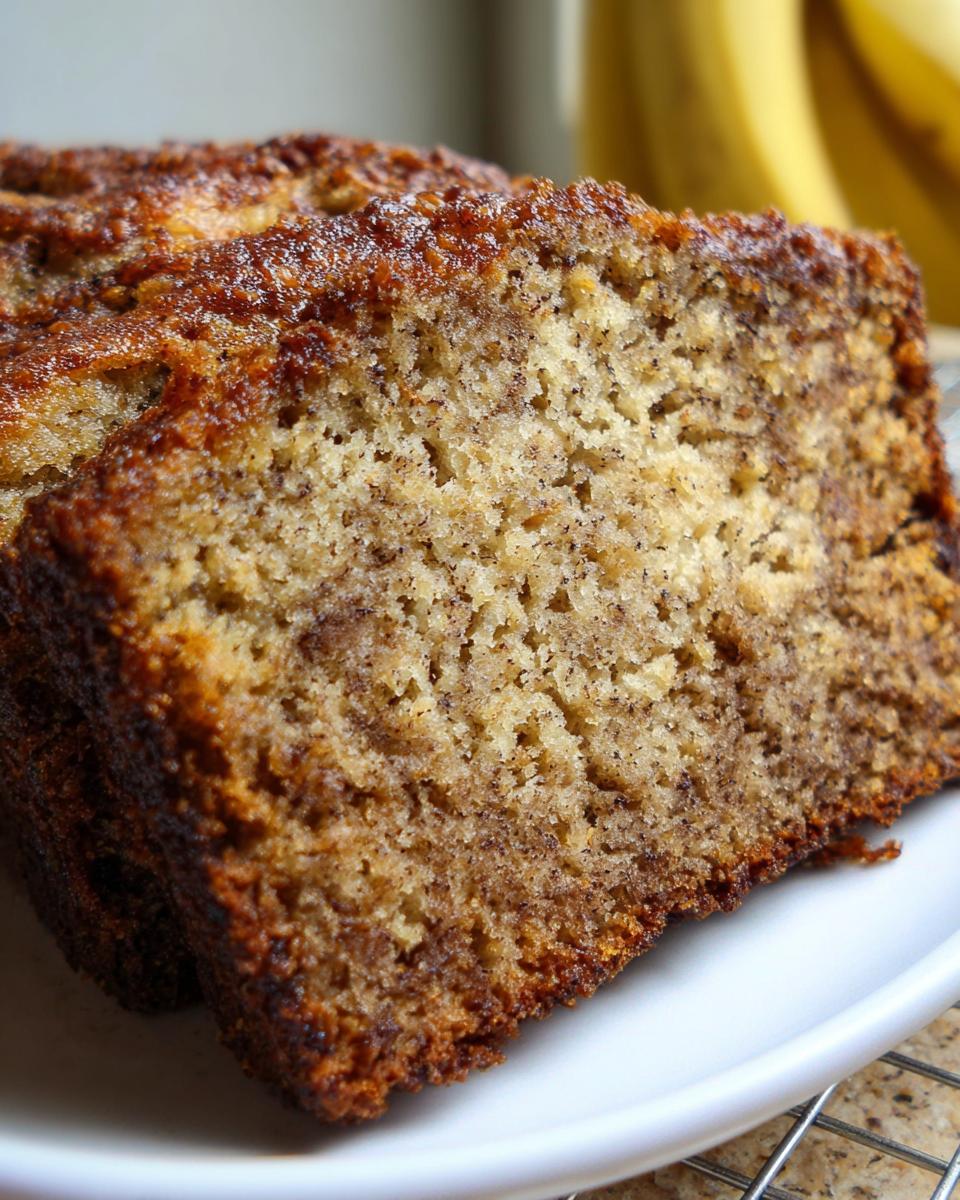
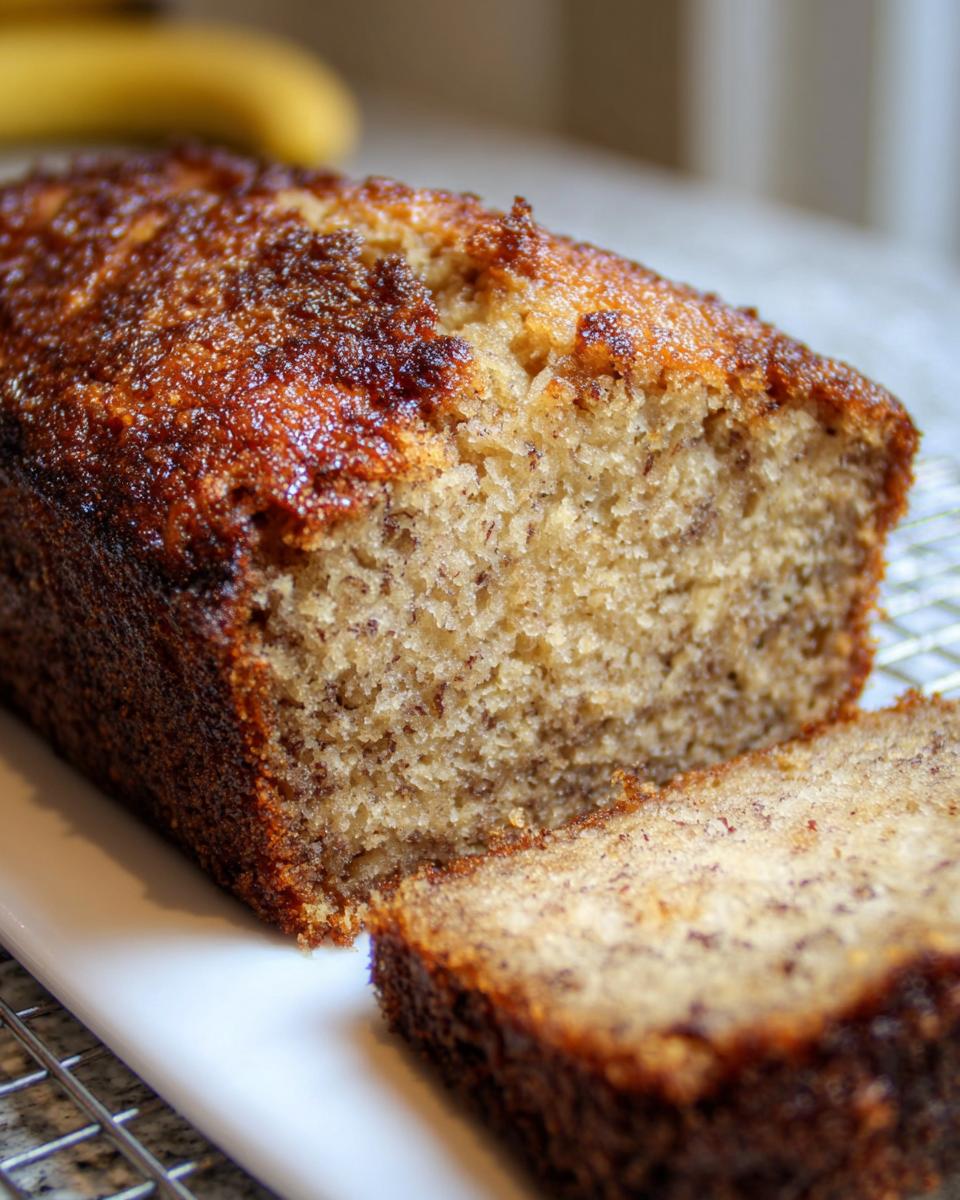
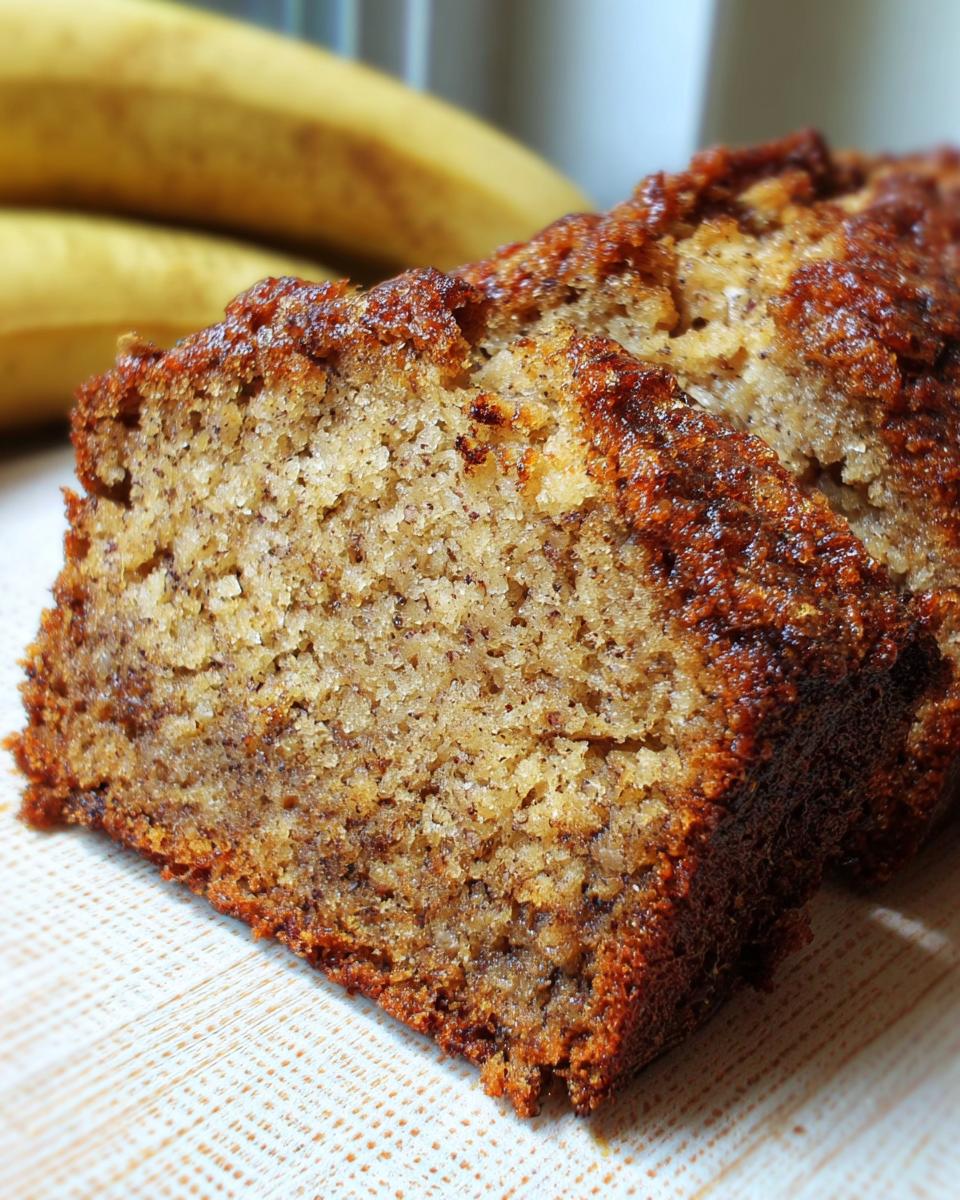
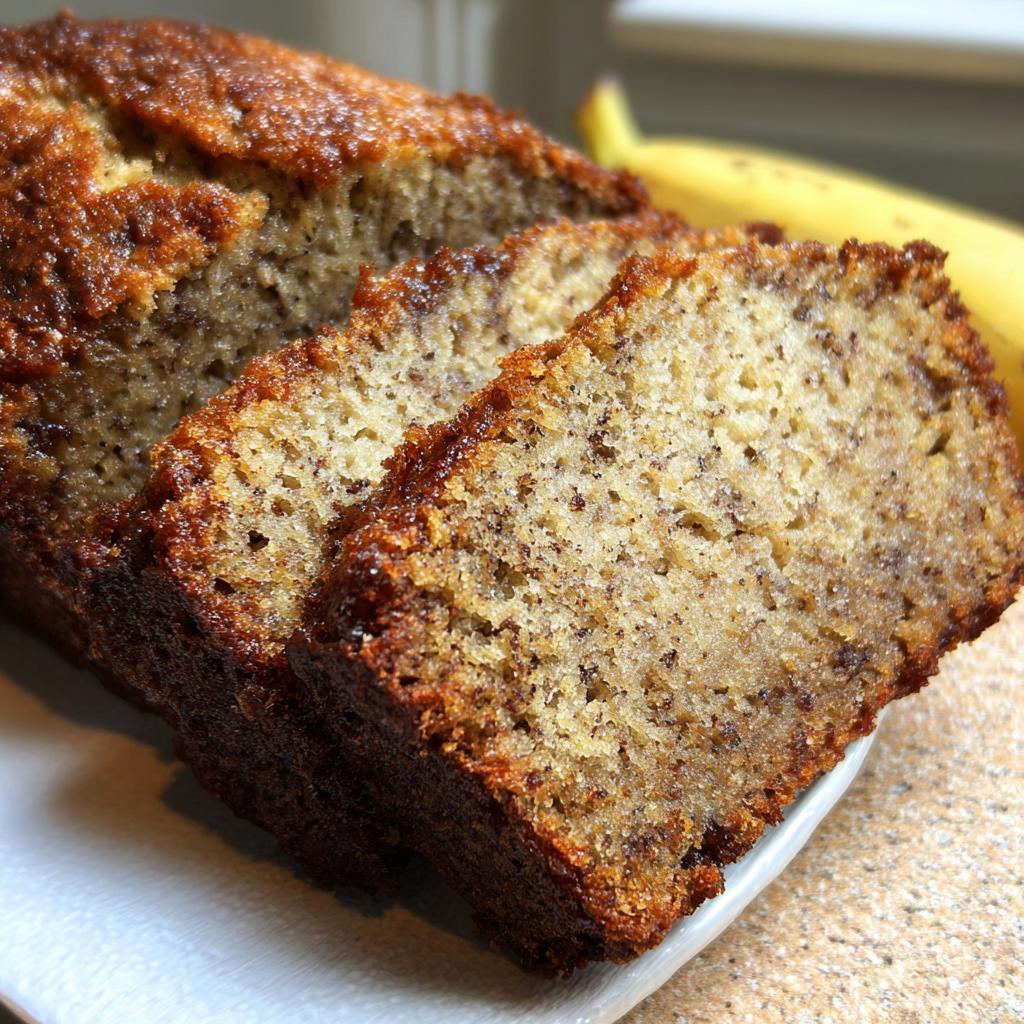
We all know the heartbreak, right? You pull out that loaf expecting tender, dreamy banana bread, and instead, you get something that could double as a doorstop. It’s the great tragedy of home baking! Well, stop searching immediately because I finally perfected the recipe that guarantees cloud-like tenderness every single time. This isn’t just good; it’s the definitive blueprint for **Extra Moist Banana Bread**. This loaf photographed so beautifully that the moisture was visible even before slicing — one of those rare moments when texture speaks through the image itself. I really tested every element, tweaking fats and liquids until I got it right. As the Lead Plate Designer here at Recipes by Betty, my goal is always perfection, and this recipe, developed by me, Clara Bennett, absolutely nails the soft, springy crumb we all chase.
Why This is the Best Banana Bread Recipe Moist (Expert Tips for Moisture)
What makes the difference between a decent loaf and something truly phenomenal? It all comes down to swapping out tradition for pure, science-backed moisture! For this **Extra Moist Banana Bread**, we ditch the butter—gasp! I know, but the subtle flavor isn’t worth the slight dryness it introduces. We rely on a neutral vegetable oil instead. Oil wraps around the flour particles better, preventing gluten formation and keeping everything soft, tender, and wonderfully moist for days long after baking. If you want to learn more about liquid fats in baking, I poured my heart out about it over here: the secret to moist bread. This recipe also follows flavor trends that keep things interesting—it’s a step up from the basics you might find elsewhere, almost begging to be compared to recipes you see in famous magazines like Bon Appétit, though mine is definitely cozier!
Selecting the Best Ripe Banana Recipes
Listen to me: you cannot use yellow bananas! If your fruit still has any hint of yellow showing, put it back in that produce bowl. For what I consider the ultimate in **Ripe Banana Recipes**, the skins need to be almost entirely black, dotted with deep brown spots. That dark color means all the starches have converted to sugar, making the pulp incredibly sweet and, most importantly, ridiculously moist.
When you mash them, they should turn into almost a liquid puree—that viscosity carries so much water content right into your batter. If you’re struggling to get them ripe fast enough, slow-roasting them first can work wonders, but honestly, waiting pays off enormously for this kind of bake!
Gathering Ingredients for Your Extra Moist Banana Bread
Okay, the science part is out of the way, and now we get to the fun part: gathering our building blocks! Since we are aiming for the title of **Best Ever Banana Bread**, quality and quantity matter here. We’re using simple pantry staples, but there are a few places where you absolutely cannot cheat the system if you want that perfect texture and crumb. The measurements listed below are exactly what I use when I’m trying to achieve that gorgeous, visible moisture you saw in the introduction photos. Don’t be scared of the four bananas—they are the true heroes of this batter!
- 4 very ripe bananas (the blacker the better, trust me!)
- 120 ml vegetable oil
- 150 g brown sugar
- 2 eggs
- 1 tsp vanilla
- 200 g flour
- 1 tsp baking soda
- 1/2 tsp salt
- 60 ml milk
Ingredient Notes and Substitutions
Let’s talk specifics so you feel prepared. The vegetable oil is crucial; it’s what locks in that moisture. If you were making a **Brown Butter Banana Bread**, you would melt the butter first, let it brown (don’t burn it!), then let it cool slightly before whisking it in. But for this recipe, stick to the oil for maximum softness!
The milk might seem odd since we have oil, but the small addition of 60ml helps thin the batter just enough so the baking soda activates evenly, giving us a lighter rise without compromising the dense structure. It’s a delicate balance!
Also, make sure your brown sugar is packed tightly! That extra molasses is your friend—it contributes to the color, flavor, and moisture retention. Don’t try to swap it entirely for white sugar, or you’ll lose that signature depth.
Equipment Needed for the Ultimate Banana Loaf
You don’t need a kitchen full of fancy gadgets for this amazing **Banana Loaf**! Keeping the tool count low is part of what makes this a great weeknight bake. Honestly, the two essentials are just a couple of sturdy mixing bowls—one for the wet ingredients and one for the dry—and, of course, your trusty loaf pan.
Make sure that loaf pan is ready to go! We’re going for a perfect release so we can admire that beautiful top crust, so prepping it well is more important than anything else we do in this section.
Step-by-Step Instructions for Super Moist Banana Bread Recipe
Alright, put on your apron! We’re about to turn those brown bananas into the most satisfying **Super Moist Banana Bread Recipe** you’ve ever encountered. The entire process takes maybe fifteen minutes of active work, but the key here is organization. First thing, turn your oven up to 175°C! Get that loaf pan greased and floured right now so you aren’t scrambling later. It’s all about respecting the process!
We work in stages, and this keeps everything light and airy, which is what we need for maximum tenderness. This method just works so well for keeping things perfectly mixed without activating too much gluten, which is the enemy of soft **Breakfast Bread**.
Mixing Wet and Dry Components for Extra Moist Banana Bread
Start by achieving true banana mush. Mash those four beauties until they are practically soup. Then, whisk in everything wet: the oil, the brown sugar, the eggs, and that splash of vanilla. Get it smooth, don’t worry too much about over-whisking this first stage—we need everything incorporated well.
Now for the tricky part: the dry ingredients. In a separate bowl, whisk your flour, baking soda, and salt together thoroughly. This is important because the baking soda needs to be evenly distributed, or you get weird pockets in your loaf!
Here is where you must use restraint. Add those dry ingredients to the wet mixture, and mix only until you see the last streak of flour disappear. I mean it! A few little lumps are okay! If you stir until it’s perfectly smooth, that’s when you develop gluten and turn this into something tough. Stop the moment it comes together. For more science on gentle mixing, check out this great resource: how to keep bread moist, or look at general tips from people like BBC Food.
Baking and Testing Doneness
Pour that batter into your prepared pan and smooth the top gently. It should go right into that waiting oven for about 55 minutes. Now, every oven is a little different, of course, so start checking around the 50-minute mark. We want a golden-brown top that smells absolutely heavenly.
Forget just poking a knife in once! Test it three ways for true confidence. First, you should see the edges of the loaf start to pull away from the sides of the pan just a touch. Second, use a wooden skewer or toothpick inserted into the center. If it comes out with moist, sticky crumbs stuck to it (not wet batter!), you are golden. If it comes out totally clean, you’ve gone a minute too long, but don’t stress!
When it passes the poke test, pull it out. Let it cool in the pan on a wire rack for about fifteen minutes before turning it out to cool completely. Trying to slice it too soon will smash that perfect texture we worked so hard to achieve!
Tips for Achieving Perfect Banana Bread Aesthetic
Baking is half science, half art, and if we’re making the **Best Banana Bread Recipe Moist**, we should make sure it looks just as good as it tastes! We want that visual reward when we pull it out of the oven, that beautiful, slightly cracked dome that just screams, “I am perfectly cooked!” That’s what everyone means when they talk about the lovely **Banana Bread Aesthetic**.
The good news is that achieving a beautiful loaf doesn’t take much extra effort; it mostly just requires timing. A key trick I learned when photographing cakes? You need structural support for that dome, and that comes from how you treat the batter *right* before it goes into the heat. You want to make sure you mix those dry ingredients in *just* enough so that the batter still has some volume when it hits the pan—overmixing deflates it before it even starts baking!
For those gorgeous tops, try sprinkling a mixture of coarse sugar and cinnamon right over the raw batter before you slide it in. That crystallization creates a textured, shiny crust that just traps your eye. If you like a little crunch on top, scattered chopped walnuts or pecans also look fantastic nestled right into the top layer. For ideas on making crusts even more beautiful, I shared my favorite sugary dust recipe here!
Lastly regarding looks, make sure your pan is centered in the middle rack of the oven. Uneven heat distribution is what causes one side to dome higher than the other, and we want balance for a truly show-stopping **Breakfast Bread** slice!
Serving Suggestions for Your Breakfast Bread
Now that you have achieved the **Best Ever Banana Bread Moist** and it’s cooled just enough that you won’t burn your fingers, the real decision begins: how are you going to eat it? Me? I rarely wait for it to cool completely. A slice of this warm, incredibly soft **Breakfast Bread** is truly one of life’s simple pleasures. The warmth brings out the fragrance of the brown sugar and makes the texture feel even softer against your tongue.
The beauty of using oil instead of butter is that the flavor profile lends itself really well to salty toppings. A generous smear of salted butter is mandatory on that first slice, of course, but I also love serving this with a dollop of vanilla bean Greek yogurt on the side instead of a heavy glaze. It cuts through the richness beautifully while still keeping things feeling like a balanced morning treat.
I’ve got whole categories dedicated to morning inspiration over on the site, so if you’re looking for more ideas to serve alongside this loaf, check out my general breakfast boards!
Flavor Variations: Try Cinnamon Banana Bread
While this recipe is flawless as is, I know some of you like to sneak in a little extra warmth! If you want to transform this into a lovely **Cinnamon Banana Bread**, it requires zero fuss. Simply add about one teaspoon of ground cinnamon directly to your dry ingredients—the flour, baking soda, and salt—when you whisk them together.
You might also consider a tiny pinch of ground nutmeg or even half a teaspoon of allspice if you want that deeper, richer spice profile that feels extra cozy on a chilly morning. These additions pair wonderfully with the natural sweetness of the bananas without disrupting the moisture balance we worked so hard to lock in.
If you’re feeling extra adventurous, you could use a mix of half brown sugar and half maple syrup for the sweetener—just make sure you reduce the milk by about two tablespoons since maple syrup adds extra liquid volume!
Storage and Reheating Instructions for Extra Moist Banana Bread
The best part about this recipe is that it’s designed to stay moist! Because we used oil instead of butter, this **Extra Moist Banana Bread** is incredibly forgiving and stays fresh longer than most loaves you’ve made before. But we still need a battle plan for saving those leftovers, because no one wants stale banana bread by Wednesday, right?
First things first: cooling is crucial before you wrap anything up. Let it cool completely on the rack, just like I mentioned before. If you wrap it while it’s even slightly warm, you’re trapping steam, and that steam turns into condensation which creates gummy spots. Nobody wants a gummy banana loaf!
For short-term storage, room temperature is actually your friend here. Wrap that cooled loaf tightly in plastic wrap—I mean really seal the deal, maybe even a layer of foil over the top of the plastic. This keeps the air out. It should be perfectly fine sitting on the counter in a sealed container for three to four days. Because of the oil, it doesn’t dry out nearly as fast as cakes relying solely on creaming.
If you need to keep it longer, freezing is the way to go. Slice the loaf first—this is so much easier than trying to cut a frozen block! Wrap each individual slice tightly in plastic wrap, then tuck those wrapped slices into a freezer bag. You can keep it frozen for up to three months. For tips on how to freeze *any* moist baked good successfully, check out my guide on preventing disaster over here: how to prevent pumpkin bread from drying out. It applies perfectly here too!
When you are ready to eat a frozen slice, don’t just leave it on the counter! You’ll lose that beautiful soft texture. Pop that wrapped slice straight into the microwave for just 15 to 20 seconds on medium power. It thaws completely and comes back to that just-baked tenderness in seconds. Enjoy!
Frequently Asked Questions About Extra Moist Banana Bread
I know when you put this much effort into baking the **Best Banana Bread Recipe Moist**, you want to be sure about every step. I get tons of questions about tweaks and swaps, which makes total sense! You want this recipe to be yours while still keeping that incredible tenderness locked in. Don’t worry, I’ve compiled the most common queries I receive right here so you can bake with total confidence.
Can I make this a Healthy Banana Bread Recipe?
That’s a great question, and I appreciate you thinking about making it a **Healthy Banana Bread Recipe**! You can certainly make swaps, but you have to understand the trade-offs, especially when chasing moisture. If you start replacing the oil with applesauce, for example—you’re replacing fat with water, which changes the structure dramatically.
You might get a nice rise, but the texture will become more like a light sponge cake rather than that dense, moist crumb we developed here. I suggest starting small: try cutting the sugar down by just 25 grams (about two tablespoons) first. That preserves most of the moisture retention from the sugar itself while cutting a little sweet kick. For more complex discussions on fat replacement, you can check out my thoughts on keeping bread moist.
How do I know if my bananas are ripe enough for the Best Ever Banana Bread?
This is probably the single most important question for achieving that title of **Best Ever Banana Bread**! If you are standing in front of your fruit bowl hesitating because the bananas look a little too brown, STOP HESITATING—they aren’t brown enough yet!
I cannot stress this enough: for this recipe, we need bananas whose skins are heavily speckled to almost entirely black. When they look like that, they are at their peak for moisture and sweetness. Yellow means starch; black means pure, concentrated banana sugar and water content. If you use anything less than totally black, your loaf will be fine, but it won’t hit that “extra moist” level we’re guaranteeing here. If you’re looking at store-bought options, check out what brands like AllRecipes suggest for ripeness cues too, but trust me, go black!
Share Your Extra Moist Banana Bread Experience
I’ve shared all my secrets now—the oil swap, the extremely black bananas, the gentle stirring—and honestly, the absolute best part of this whole process is hearing from you all!
Did this finally cure your dry banana bread blues? Did you find it lives up to the promise of being the **Extra Moist Banana Bread** I made it out to be? I sincerely hope so!
Please don’t be shy. Come back here and leave a rating right below this section so others know what to expect from the recipe. Even better, tell me about your experience in the comments! Did you sneak in some chocolate chips? Did you try the cinnamon variation? I love seeing how everyone adapts their bakes.
If you managed to capture the perfect slice—that tender crumb that looked so good in my photos—I’d be thrilled if you shared it on social media. Tag me in your posts so I can admire your work! If you have any lingering questions that I didn’t cover in the FAQ, just send them over through my contact page, and I promise I’ll look into it. Happy baking, friends!
Extra Moist Banana Bread
Equipment
- Loaf pan
- Mixing Bowls
Ingredients
- 4 very ripe bananas
- 120 ml vegetable oil
- 150 g brown sugar
- 2 eggs
- 1 tsp vanilla
- 200 g flour
- 1 tsp baking soda
- 1/2 tsp salt
- 60 ml milk
Instructions
- Mash bananas until very smooth.
- Whisk in oil, sugar, eggs, vanilla, and milk.
- Add flour, baking soda, and salt.
- Mix until just combined.
- Pour batter into loaf pan.
- Bake at 175°C for 55 minutes.