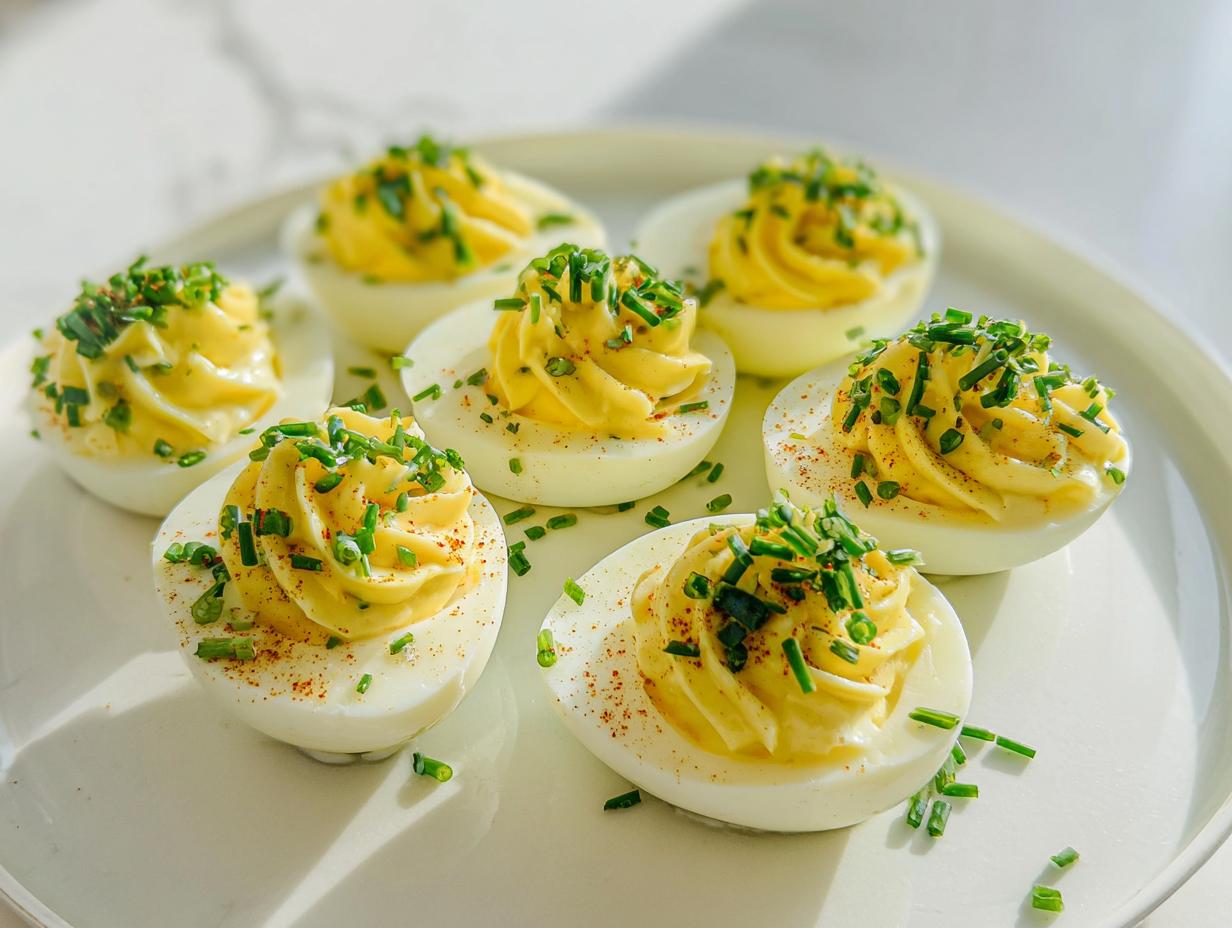
When I’m planning a party or I just want a super quick, satisfying snack that feels a little fancy, my mind always goes straight to the classics. But let’s be honest, plain deviled eggs can sometimes feel a bit flat, right? That’s why I absolutely swear by adding fresh herbs. These Deviled Eggs with Chives are my total go-to for gatherings because they take maybe ten minutes total if your eggs are already boiled! The chives bring this incredible—almost oniony—freshness that cuts right through the richness of the yolk and mayo. Seriously, it elevates the whole thing without adding any real effort. They’re so simple, yet everyone always asks for the recipe. You can’t beat these for an easy, crowd-pleasing appetizer!
Why You Will Love These Deviled Eggs with Chives
Honestly, these are the best little bites you can make when time is tight. Why am I so obsessed? Well, they hit all the right notes for quick party food!
- They use ingredients you almost certainly already have in the fridge.
- The prep time is truly under ten minutes—it’s unbelievable!
- The pop of green from the chives makes these Deviled Eggs with Chives look so professional.
- They are the ultimate finger food appetizer that never disappoints the crowd.
If you’ve ever needed a truly fantastic, no-fuss snack, try swapping out paprika for fresh herbs. You won’t regret ditching the classic version once you try how bright these taste. Ever considered a version without mayo? Check out this neat little deviled egg recipe without mayo sometime!
Equipment Needed for Perfect Deviled Eggs with Chives
You don’t need fancy gadgets for this recipe, which is what I love about it! Since we aren’t baking anything, this is truly just about assembly. Pull out just two things, and you are ready to go.
Here’s what you’ll need lurking in your kitchen drawer:
- A sharp knife. You need this for carefully halving those eggs and getting those chives nice and fine.
- A small bowl and a fork or whisk. I personally prefer a simple sturdy fork when mashing the yolks—it really helps break everything down smoothly, faster than a whisk sometimes!
That’s it! Ten minutes, two tools, and you’re serving up the freshest tasting eggs on the block.
Ingredients for Fresh Deviled Eggs with Chives
When you are looking for simple party snacks finger foods, the ingredients need to be spot-on, especially for something relying so heavily on that fresh flavor! For these perfect Deviled Eggs with Chives, we are sticking to the absolute essentials. There’s no room for filler here; every single item pulls its weight to deliver that classic taste with a green, herbaceous twist.
I’ve listed out exactly what you need below. Remember, quality matters here, especially with your eggs and your chives!
- 6 hard-boiled eggs: You need these to be completely cooled down before you start cutting.
- 3 tbsp mayonnaise: Use your favorite! Full-fat definitely gives the creamiest filling, which is what we want for these appetizers easy finger food.
- 1 tsp mustard: Yellow mustard is traditional, but honestly, Dijon works wonders if you want a little extra tang.
- 2 tbsp fresh chives, finely chopped: This is the star! Make sure they are very finely chopped so they distribute nicely in the filling. Don’t skimp on these!
- Salt and pepper, to taste: Start light—you can always add more seasoning later once everything is mixed.
If you’re curious about what the standard recipe entails without the custom additions, I found a great breakdown of what the ingredients of deviled eggs usually are. But trust me, stirring in those glorious chives makes all the difference for these specific appetizers for dinner!
Step-by-Step Instructions for Deviled Eggs with Chives
Okay, let’s get these beauties assembled! Since we are just mixing and filling, you can whip up a batch of these Deviled Eggs with Chives in about 10 minutes of active time. Seriously fast! If your eggs are still warm, you’ll want to let them cool just a bit so you don’t burn your fingers when you’re cutting them open. Let’s dive into the process!
Preparing the Egg Whites
First things first, take your cooled, hard-boiled eggs. Slice them cleanly right down the middle, lengthwise. You want nice even halves. Gently scoop all those pretty yellow yolks right out of the whites. Pop the empty egg white boats onto your serving platter, or a plate lined with parchment if you’re worried about any messy filling mishaps later. Set those whites aside!
Creating the Creamy Yolk Filling for Deviled Eggs with Chives
Now for the fun part—the filling! Take all those yolks you scooped out and place them in that small mixing bowl we talked about. Get your mayonnaise and mustard in there too. My absolute expert tip here is to use a sturdy fork for the mashing. Seriously, ditch the whisk! A fork lets you press those lumps right out against the side of the bowl. Keep working it until you have a beautifully smooth, creamy paste. This smooth texture is key for the best Deviled Eggs with Chives.
Mixing in the Freshness
You’re so close! Once that base is silky smooth, go ahead and stir in the finely chopped fresh chives. That’s where the magic happens visually and flavor-wise. Taste a tiny bit—and I mean tiny!—and then season it lightly with salt and pepper. Remember, you can always add more salt at the end, but you can’t take it out once it’s in there. Just a gentle stir until everything looks evenly distributed and beautifully speckled with green.
Filling and Garnishing
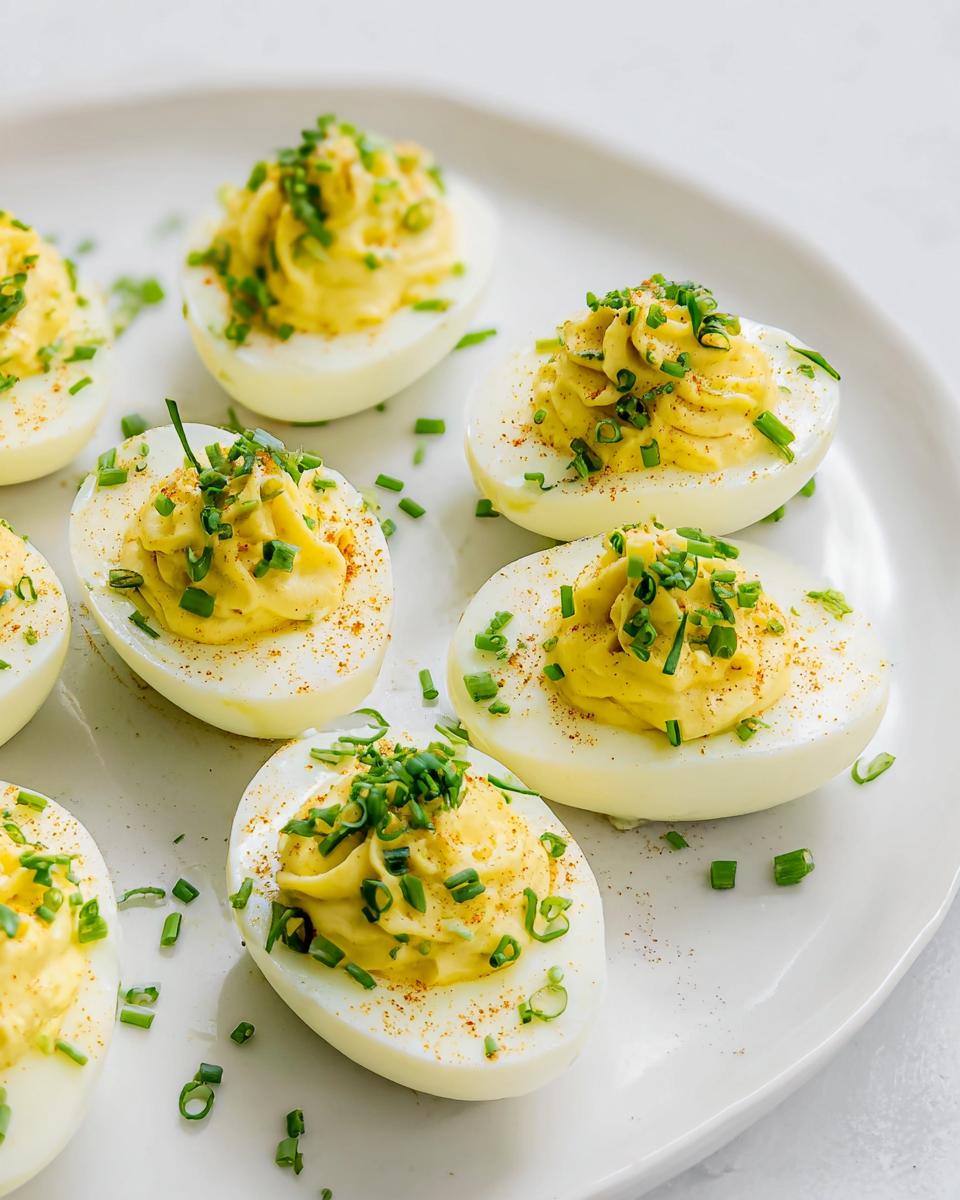
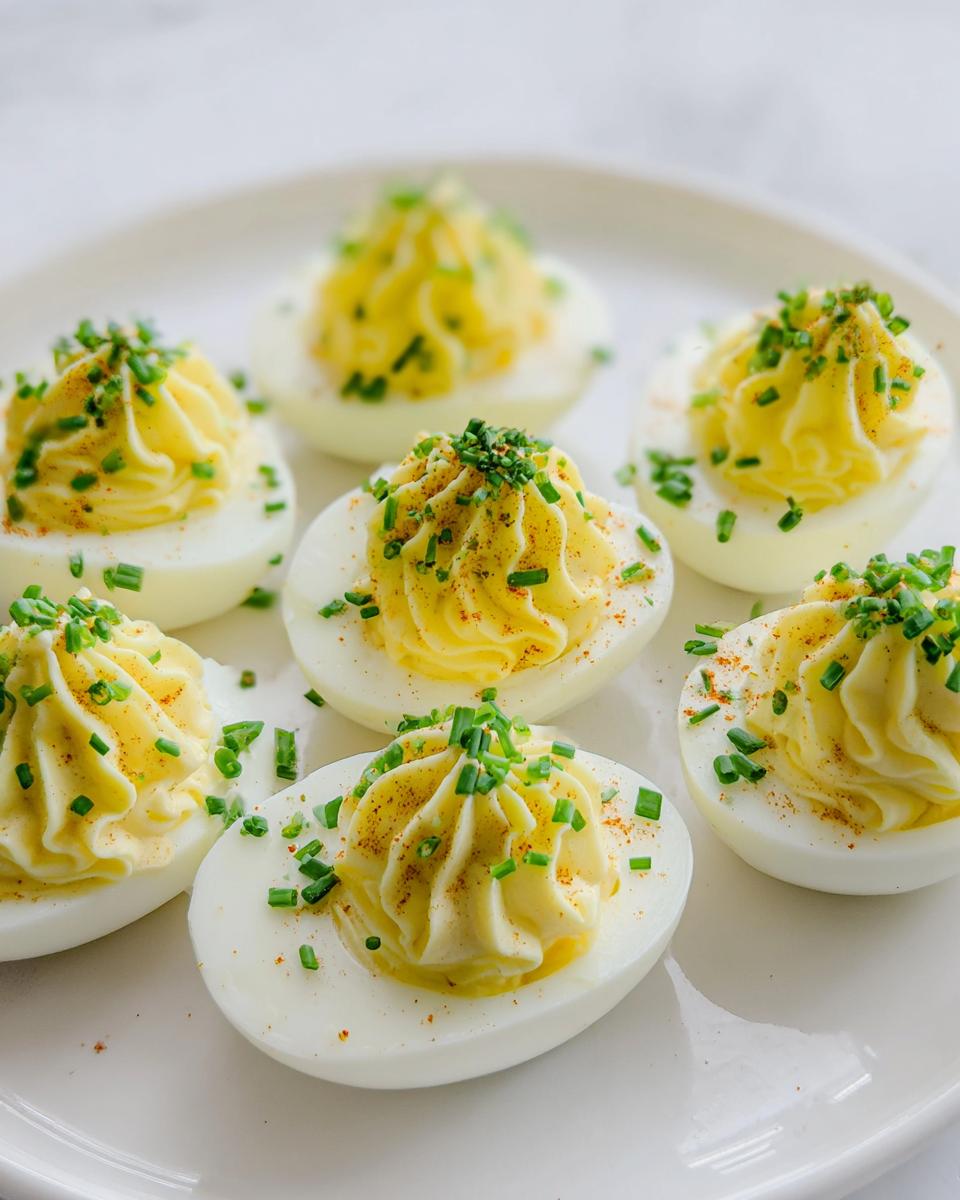
It’s time to put it all back together. You can carefully spoon the mixture back into those egg white cups, or, if you want to make them look really impressive—and trust me, you do if you’re looking for amazing Quick Finger Foods For Party—use a piping bag or even a Ziploc bag with one corner snipped off! Pipe a nice swirl of the yolk mixture back into each white half. Finally, sprinkle just a few extra tiny bits of those fresh chives right on top of each mound for the final presentation. Serve them immediately! For more classic tips on this dish, take a peek at Simply Recipes.
Tips for Making the Best Deviled Eggs with Chives
Even though this recipe is super easy, there are just a couple of little secrets I’ve picked up over the years that take your Deviled Eggs with Chives from good to knock-your-socks-off amazing. These aren’t just about flavor; they’re about presentation and making your life easier. Trust me, mastering these small details makes all the difference when you’re serving up appetizers!
Here are the absolute must-know tips to nail that perfect texture and look every single time:
- The Perfect Peel: Honestly, mushy or shredded egg whites ruin everything! For incredibly easy peeling, I always make sure my eggs are slightly older—not farm-fresh—and I start them in boiling water, not cold. Once they are done, they go straight into an ice bath right away. That shock makes the shell contract just enough to slide right off.
- Piping is Prettier: Sure, you can spoon the filling in, and nobody will complain, but if you want those beautiful restaurant-style swirly tops, you have to pipe! Put the filling in a Ziploc bag, snip a generous corner off, and squeeze. It looks so much nicer when they are ready for the party.
- Chill Your Whites: This is a neat trick specific to the Deviled Eggs with Chives. Once you halve the eggs and remove the yolks, pop the empty whites into the fridge for about fifteen minutes uncovered. They firm up slightly! This helps them hold their shape better when you try to scoop or pipe that rich filling back in.
If you are looking for more ways to spin this classic, BBC Good Food has some interesting takes on spicing up the traditional recipe. And if you want a really beautiful platter presentation, check out the advice over at Love & Lemons—they always make food look like art!
Making Deviled Eggs with Chives for Any Gathering
The beauty of these Deviled Eggs with Chives is that they fit into absolutely any spread. Whether you are hosting a massive game day bash or just need some Appetizers For Dinner paired with a salad, these work perfectly. They aren’t heavy, they look great sitting out, and honestly, they disappear first!
Because they are so fast, they make fantastic Quick Finger Foods For Party if you realize you forgot to make an appetizer at the last minute. Seriously, I’ve made these while the kettle was boiling for tea! They are the definition of Appetizers Easy Finger Food.
Now, while I think the chive version is the absolute best representation of fresh, Healthy Appetizers, you can easily swap things up if you have a specific mixer who loves something different. If you’re making these for a bigger crowd and want variety, try dividing your yolks:
- Keep one third as our classic Deviled Eggs with Chives recipe.
- For a second third, ditch the chives and add a tiny splash (maybe 1/4 teaspoon) of white vinegar for a slightly sharper kick.
- For the final third, sprinkle on some smoked paprika or even a dash of hot sauce if you want to turn these into fun Party Snacks Finger Foods.
See? You can customize them so easily! They are hearty because of the protein, making them satisfying enough that they can totally work in a pinch if you’re trying to throw together one of those nights I like to call Lazy Dinners. You can even look at other great party staples like my famous taco dip here if you need a bigger platter for your guests!
Storage and Reheating Instructions for Deviled Eggs with Chives
Okay, this is important, so listen up! Deviled eggs are the ultimate make-ahead snack, but you have to treat them right if you want them to taste great the next day. Because we are using mayonnaise and those gorgeous fresh chives, freshness is key for our Deviled Eggs with Chives.
The main rule here is: Serve them cold, and never, ever reheat them. Seriously, don’t even try! Reheating eggs with mayonnaise is just asking for a liquidy, separated, gross mess. They are meant to be enjoyed chilled or just slightly cool after sitting out for a short while at a party.
When you have leftovers from the party, seal them up tight! I use a plastic container with a lid, but you have to make sure they are lying flat so the filling doesn’t shift or fall out. Pop them into the coldest part of your fridge. They really are best eaten within 24 hours. You can push it to 48 hours, but honestly, the texture starts to degrade a little bit after that first day.
For the absolute best results and that perfect creamy bite in your Deviled Eggs with Chives, I always plan to make them the morning of the party, or the night before at the latest. If you’re storing them, just keep them covered and watch the clock! If you want to read up on classic preparation methods that emphasize serving temperature, Food & Wine has a great article on how to handle these delicious appetizers.
Frequently Asked Questions About Deviled Eggs with Chives
Whenever I share this recipe, people always have questions about timing and swaps, which is totally understandable! Deviled eggs are so simple, but those little details make all the difference between a good egg and a *great* egg. Here are some of the things I hear most often about making these perfect little bites.
Can I make the filling for Deviled Eggs with Chives ahead of time?
Yes! This is my favorite time-saver for big events. You can absolutely mix up that creamy yolk filling—the one with the mayo, mustard, and chives—up to a full day ahead of time. Keep it covered TIGHTLY in the fridge! However, and this is crucial, do not fill your egg whites until right before you plan to serve them. Why? Because the whites can start to weep or dry out, and the chives might lose some of their snappy brightness if they sit in the filling for too long. Seriously, take that extra five minutes to fill them just before the guests arrive!
Are these considered Healthy Appetizers?
That’s a fair question, especially since traditional deviled eggs use a decent amount of mayonnaise. When we look at these as Healthy Appetizers, they definitely deliver! You’re getting wonderful protein from the eggs, and the chives add flavor without adding any fat or load. The richness comes from the yolk and the mayo, which you can control by using less! I wouldn’t label them a “light” snack like a cucumber slice, but they are packed with nutrients your body needs. They are certainly better than grabbing chips when you need quick finger foods for party!
What can I use instead of mayonnaise for a lighter filling?
Oh, I love experimenting with lighter versions! If you want to cut down on mayo, you have a couple of fantastic options. My favorite swap, especially if you want that slight tang, is using **plain Greek yogurt**. It keeps things creamy but adds a little protein boost. The texture will be slightly less rich, maybe a bit more fluffy. Another great option that makes them super creamy is using a ripe, mashed avocado instead of the mayo. If you go the avocado route, you might need an extra little squeeze of lemon juice to keep that vibrant green color from browning!
If you’re wondering about variations on classic egg dishes in general, I read a fascinating article breaking down the difference between angel eggs and deviled eggs recently, which might give you even more ideas!
Estimated Nutritional Information for Deviled Eggs with Chives
When we talk about easy finger foods for a party, we usually aren’t thinking about counting calories, but I appreciate everyone who wants to know what they are putting out for their guests! Since these Deviled Eggs with Chives are made from simple, whole ingredients, they actually stack up pretty well, especially compared to fried party snacks. Just remember, every single brand of mayo is different, so these numbers are a good baseline estimate per egg half (which is one serving size here).
Based on the 6 eggs, 3 tablespoons of mayo, and the other standard ingredients, here is what you can generally expect for one serving (one half of an egg):
- Calories: Around 70-80 kcal
- Total Fat: Approximately 6 grams (this is where the mayo contributes!)
- Protein: Just over 3 grams
- Carbohydrates: Less than 1 gram
Because they are so low carb and high protein, these truly are some of the best Healthy Appetizers you can keep on a platter when you’re serving up heavier snacks or richer Appetizers For Dinner alongside them. They’re simple, lightens up the plate, and keeps people satisfied!

Deviled Eggs with Chives
Equipment
- Knife
- Fork or whisk
Ingredients
- 6 hard-boiled eggs
- 3 tbsp mayonnaise
- 1 tsp mustard
- 2 tbsp fresh chives finely chopped
- Salt and pepper to taste
Instructions
- Halve the eggs and remove the yolks.
- Mash the yolks with mayonnaise and mustard until the mixture is creamy.
- Stir the chopped chives into the yolk mixture.
- Season the mixture lightly with salt and pepper.
- Fill the egg white halves with the yolk mixture and garnish with extra chives.