Oh my goodness, if you love that classic black and white cookie duo, you’re going to flip for these! Seriously, who doesn’t want a bite of that creamy, crunchy flavor packed into a perfect little ball? These Cookies & Cream Cake Pops are the easiest, cutest little things you can bring to any party. They look fancy, but trust me, they are total show-offs when it comes to simplicity.
I spent ages testing the ratio—it’s so easy for the cookie bits to clump up or sink to the bottom, which just ruins the whole vibe! I finally nailed it down so every single pop has that perfect, even distribution of cookie crunch. It’s the best kind of batch baking, and they disappear faster than you can make them!
Why You Will Make These Cookies & Cream Cake Pops Often
I’m telling you, these turn heads every single time, but they barely take any effort. That’s the magic combo, right? If you’re looking for something that screams “WOW” but whispers “I made this in 30 minutes,” look no further. These are just fantastic for when you need Easy Desserts For A Crowd.
- They are honestly one of the best Easy Treats because you start with a fully baked cake—no extra oven time needed for the balls themselves!
- That classic cookies and cream flavor is universally loved. You can’t go wrong pleasing picky eaters with this combination.
- They hold their shape beautifully once chilled, making them perfect for transport to picnics or parties.
- Since we use a baked cake base and frosting as a binder, these are surprisingly sturdy and easy to handle, unlike messy cupcakes.
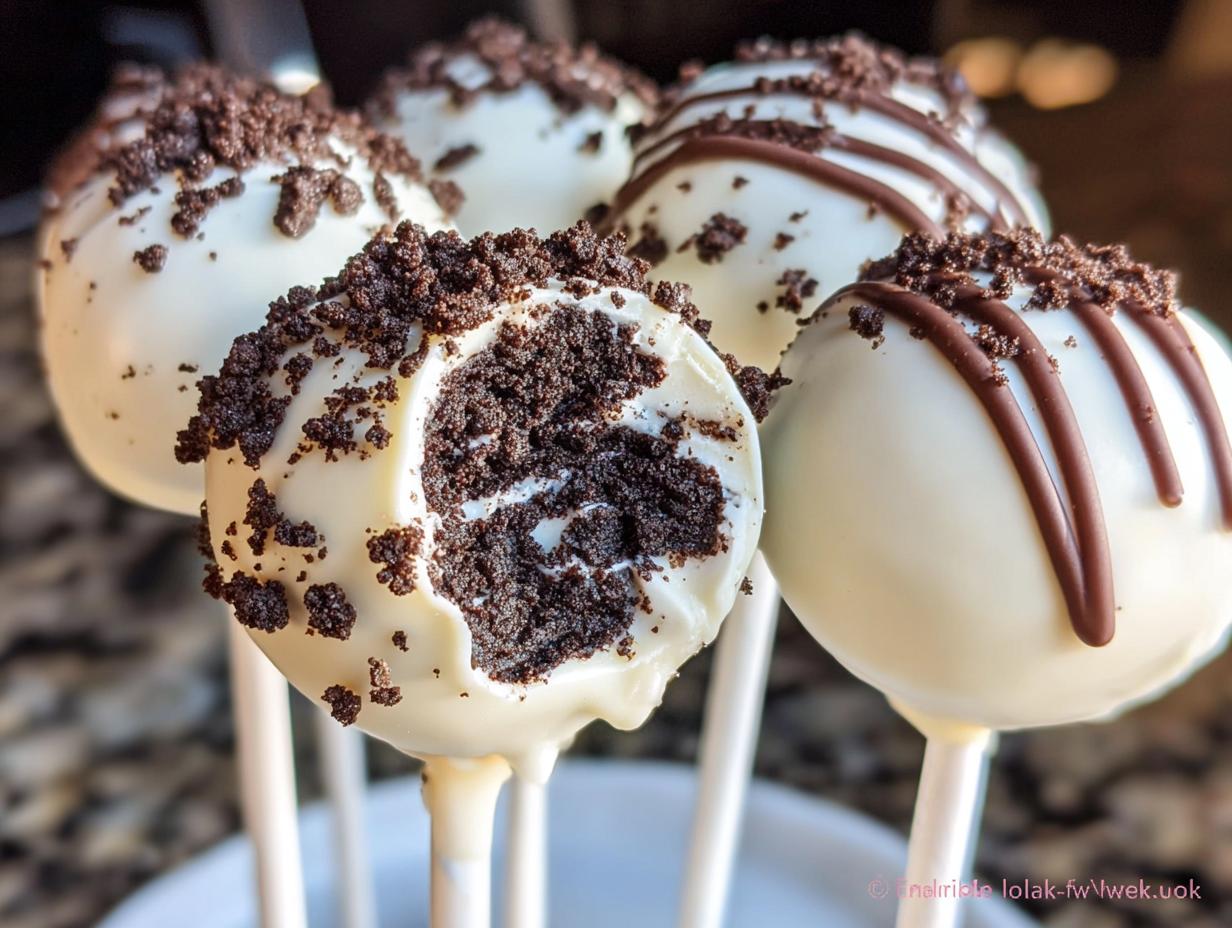
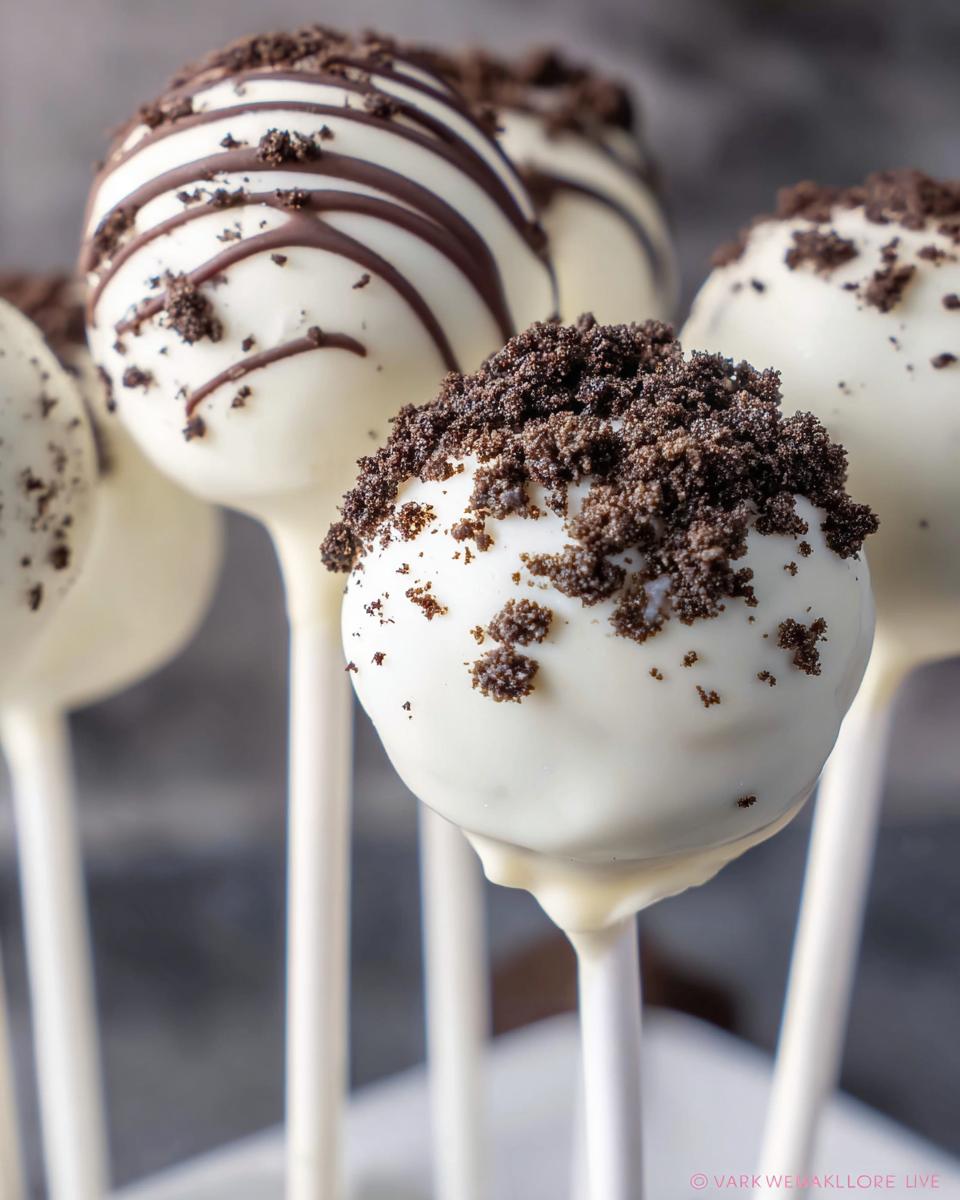
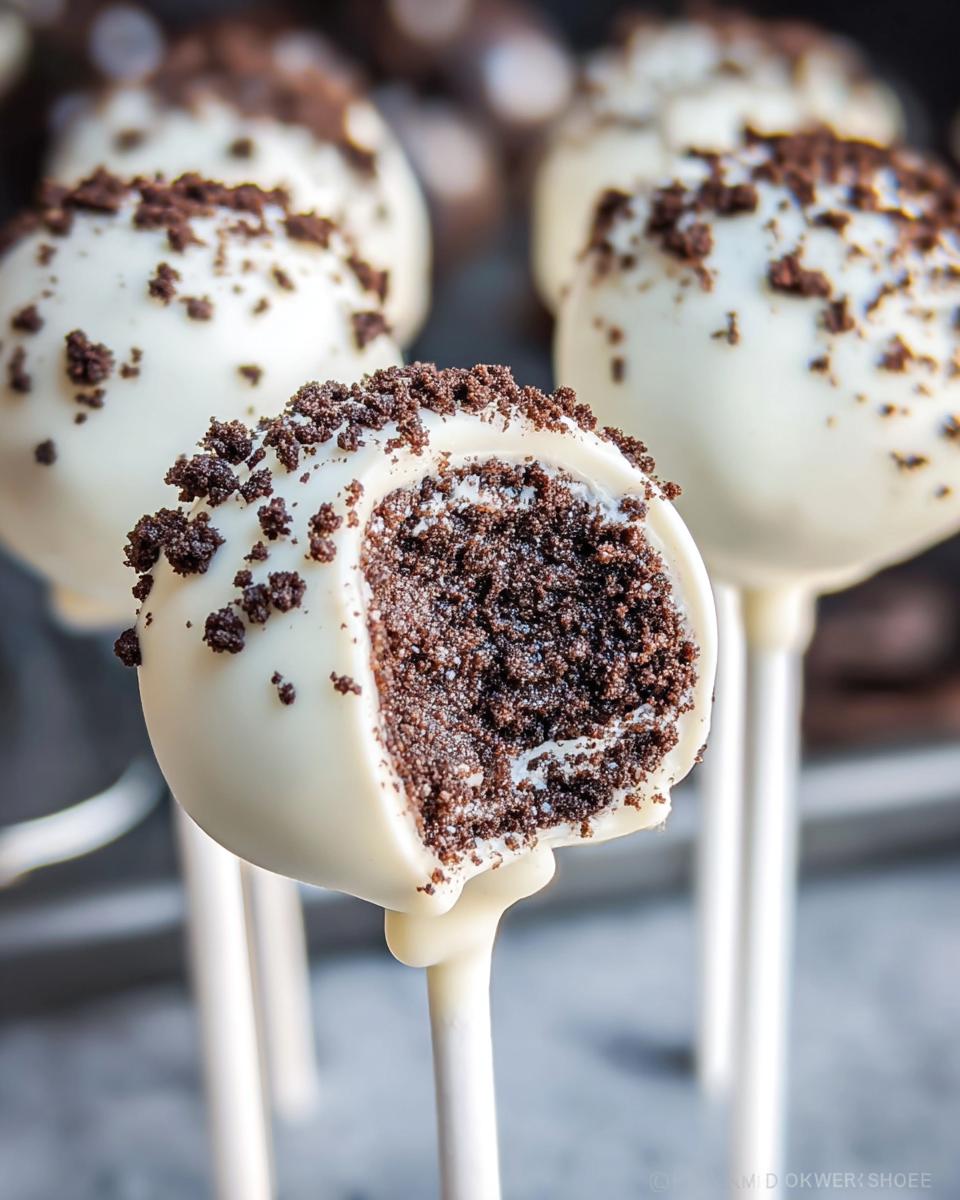
- They look amazing! The white chocolate shell speckled with dark cookie crumbs gives them a fun, professional flair with hardly any decorating skill required.
- They truly fit the description of Easy Desserts With Few Ingredients, which means less shopping hassle!
Plus, they look amazing. Seriously, these look like something you spent hours crafting in a fancy studio, but they are really just a few simple steps. Once you make one batch, you’ll already be thinking about the next time you need a quick, impressive dessert.
Essential Equipment for Perfect Cookies & Cream Cake Pops
I always say that the right tools make all the difference, especially when you’re skipping the oven time for the actual ‘popping’ step! If you don’t have the right bowl or container, mixing that cake and frosting becomes a total wrestling match, and nobody wants that. Trust me, gather these things first, and the rest of the process just flows so smoothly.
This isn’t a complicated recipe at all, but having these few basics ready means you won’t stop halfway through to hunt for something you forgot, which could mess up the chilling time!
Necessary Tools for Making Cookies & Cream Cake Pops
Here are the bare minimum items I use every single time for these Easy Treats. They are so simple, it’s almost silly, but they are crucial for getting that perfect structure before dipping.
- You absolutely need a sturdy mixing bowl. I prefer one with a wide base so I can really fold the ingredients together without everything flying out.
- A standard baking sheet is essential for rolling out and holding the little balls while they chill nicely in the fridge.
- Don’t forget the cake pop sticks! They are the whole point, right? Get the standard size, they handle the weight of the denser cake mixture perfectly.
- I also always keep a small rubber spatula handy, even though it wasn’t listed as primary equipment. It’s the best for scraping down the sides of the bowl when you’re mixing the frosting in!
Gathering Ingredients for Your Cookies & Cream Cake Pops
See? I told you these were simple, which is why they are some of my favorite Easy Desserts With Few Ingredients to throw together on a whim! When everything is already baked or pre-made, half the battle is done. We are relying on quality ingredients here to make up for the short ingredient list, so pay attention to those notes!
Look at what you need—it’s seriously just five core items to make the *best* Homemade Desserts without putting in hours of effort. You’ll want to have everything measured out before you roll your first ball, trust me on this one.
Cake Base and Binder Ingredients
This section is where the *Cookies & Cream* magic starts. You need something sturdy to build on, and we are using the simplest foundation possible!
- 1 vanilla cake, baked and cooled (Yes, I just use a box mix—don’t tell my mom!)
- 120 g vanilla frosting or cream cheese (I like frosting for a sweeter pop, but cream cheese gives a nice tang!)
- 10 chocolate sandwich cookies, finely crushed (Make sure they are truly crushed, not just broken—we want that sandy texture for binding!)
Coating and Decoration Ingredients for Cookies & Cream Cake Pops
This is the fun part where we turn a cake ball into a beautiful, dipped treat. Having your white chocolate ready is non-negotiable before you even think about bringing the chilled balls out!
- 300 g white chocolate, melted until perfectly smooth (This is crucial for coating thickness!)
- Cake pop sticks (Have these standing by near your dipping station!)
Step-by-Step Instructions for Cookies & Cream Cake Pops
Alright, deep breath! This is where all that prep finally pays off. Once you get the hang of this, these Cookies & Cream Cake Pops become one of my absolute favorite Baking Ideas because they move so fast. Just remember that the quality of your chill time directly impacts how well they hold up to dipping.
Mixing the Cake and Frosting Base
First, you need to crumble that cooled vanilla cake right into your mixing bowl. Don’t be shy—get it fine! It should look like coarse sand. Next, add in your vanilla frosting or cream cheese binder. Now, here’s the trick: you need to mix this until it just comes together. I use my hands for this part because it lets me feel when it’s perfectly combined, sort of like playdough. Stop mixing right when there are no dry cake spots left. Overmixing here makes them dense and sad!
Forming and Chilling Your Cookies & Cream Cake Pops Mixture
Once the mixture is uniform, it’s time for shaping. Scoop out small amounts—I usually aim for about a tablespoon—and roll them firmly between your palms into neat little balls. They need to be tight little spheres! Place all your shaped balls onto that baking sheet. Now comes the most important waiting game: get them into the refrigerator for a full 60 minutes. This chilling time is non-negotiable. If they aren’t super firm, they will just crumble when you try to coat them in that melted chocolate.
Preparing Sticks and First Dip
While those pops are getting nice and cold, make sure your white chocolate is fully melted and smooth. You want it completely liquid, not gloppy. Take one chilled cake ball and just dip the very tip of your cake pop stick about a quarter-inch into the melted chocolate. Then, gently push that dipped tip into the center of the cake ball. Let that tiny bit of chocolate set for just a second—this acts like glue so the stick doesn’t slide out when you dip the whole thing!
Coating the Cake Pops Completely
Now for the messy, fun part! Hold the stick and dip the entire cake ball into the smooth white chocolate. You need to swirl it gently to ensure every speck is covered. Carefully lift it out, tilting your wrist so the excess chocolate drips right back into your bowl. You can gently tap the stick against the side of the bowl once or twice to help those drips along. Don’t worry about perfection yet; we fix that in the very next step!

Finishing Touches: Adding Cookie Crumbles to Your Cookies & Cream Cake Pops
This has to happen immediately—right before the white chocolate coating starts to look dull! Take your reserved crushed chocolate sandwich cookies and sprinkle them liberally over the wet coating of your Cookies & Cream Cake Pops. I like to gently roll the pop in a small pile of crumbs if I need extra coverage. Once they are coated in crumbs, stand them upright in a designated holder or even a styrofoam block. Let them sit undisturbed until that white chocolate shell is completely hard and set. That’s it! You’ve made the perfect treat.
Expert Tip: If your white chocolate ever seems too thick while dipping, just stir in half a teaspoon of coconut oil. It thins it right out without ruining the set! If you’re struggling to get the crumbs to stick, try letting the chocolate dry for about 30 seconds after the first dip, then re-dip that specific spot quickly before sprinkling.
Want more fun ideas? Check out my favorite unique cookie recipes or browse all my best baking ideas once you’re done making these beauties!
Tips for Success with Homemade Desserts Like These Cookies & Cream Cake Pops
Even though these are wonderfully easy, like most great Homemade Desserts, there are a few sneaky things that can trip you up. Don’t worry, I’ve made all the newbie mistakes so you don’t have to! Follow these little secrets, and your cake pops will come out looking picture-perfect every single time.
The biggest disaster point is usually the chocolate coating. If it’s too thick or cracks later, it means something went wrong during the melting or cooling phase. Here are my little gathered bits of wisdom from testing batches until my kitchen looked like a confectionary explosion!
Here are the three things I absolutely insist you pay attention to:
Keep Your Chocolate Temperature Happy
If your white chocolate is too hot, it will melt the firm cake ball instantly, and you’ll just end up with sticky, sad mush dripping off the stick. Too cool, and it’s so thick you can’t get an even coat. You want it smooth and barely warm to the touch. I melt mine slowly in short bursts in the microwave, stirring really well between each 20-second session. If it gets too stiff while you’re working, pop it back in for just 10 seconds. Never add water to thin it—that makes it seize up instantly!
The Stick-Glue Trick Is Mandatory
I know I mentioned this, but I have to say it again because people skip it! Dipping the tip of the stick in chocolate first and sticking it into the ball acts like cement. If you skip this, the entire cake ball will slide right off the stick and into your bowl of melted chocolate, leaving you with a broken stick and a huge mess. Seriously, take 3 seconds to set the stick properly before the full dip.
Managing Cracks After Cooling
Sometimes, especially if the cake balls weren’t cold enough, you’ll pull your beautiful pop out, and a tiny crack forms hours later as it warms up slightly. This is usually due to temperature shock or the cake ball being too moist. To help prevent this, make absolutely sure those cake balls are rock solid when they go into the chocolate. And remember how I said to let the dipped pop sit perfectly upright? Air bubbles trapped underneath can also cause cracks, so ensure that excess chocolate drips off completely before you let it stand!
For more ways to make your Homemade Desserts foolproof, check out my guide on secrets to perfect scones—it has great tips on temperature control that apply everywhere in the kitchen!
Storage and Serving Suggestions for Your Cookies & Cream Cake Pops
I know these are usually gone in minutes when I take them to a gathering, but if you happen to have any leftovers—congratulations, you have excellent portion control! The key to keeping these Easy Treats looking great is respecting the chocolate shell and the chilled interior.
Since these are essentially cake and frosting bound together and then coated in chocolate, they need a little more care than a regular cookie. You definitely can’t just leave them on the counter for days on end, especially if your kitchen runs warm!
Keeping Them Fresh in the Fridge
The refrigerator is your best friend for storage. Place the finished cake pops in an airtight container, but here’s a little trick: don’t let them stack up and touch! If they are touching, the chocolate coating can scratch off or stick to each other once they get cold. I find that lining the container with a sheet of parchment paper, placing the pops in a single layer, and then perhaps adding another sheet of parchment before the next layer works wonders.
They will keep beautifully in the fridge for about a week. If you used cream cheese in your binder instead of frosting, you definitely need to keep them chilled!
The Best Way to Serve Cookies & Cream Pops
This is where most people run into trouble! If you serve these straight out of the fridge, they are rock hard, and you can’t really taste the cake and cookie filling properly. The chocolate shell might even be brittle, causing it to crack when you bite into it.
So, my big recommendation is to always take them out about 20 to 30 minutes before you plan on serving them. That little bit of time allows the interior to soften up just enough so that it’s creamy and melts in your mouth with the crunch of the cookie. They are definitely best served at nice, cool room temperature, not ice-cold.

Thinking about other easy bites? I have a whole section dedicated to easy treats that are just as simple to store and serve!
Frequently Asked Questions About Cookies & Cream Cake Pops
I know sometimes when you try new Easy Dessert Ideas, you run into little questions that a recipe just can’t cover. Don’t worry, I’ve answered the most common things people ask me when they first try making these little wonders. If you have a question, chances are someone else does too!
Can I use a different cake flavor besides vanilla for these?
Absolutely! The beauty of these being such Simple Desserts is their flexibility. While the recipe calls for vanilla cake to let the chocolate sandwich cookies really shine, you could totally use chocolate cake for a super decadent, all-chocolate pop. Or, if you want to get fun, a red velvet cake would look stunning under that white chocolate coating! Just make sure whatever cake you use is fully cooled before crumbling.
My white chocolate seized up and got thick! How do I keep it smooth?
Oh, the dreaded chocolate seize! This almost always happens because a tiny drop of water or steam got into the melted chocolate. Next time, make sure your bowl and spatula are bone dry. If it happens mid-dip, don’t panic. You can try stirring in a teaspoon of coconut oil or vegetable shortening—this often helps loosen it back up enough to finish the batch, saving you from wasting all that coating!
Do I really have to chill the cake balls for a full hour?
Yes, please, please, please listen to this! While I try to include shortcuts in all my Easy Dessert Ideas, chilling the cake balls isn’t a shortcut; it’s a necessity for success. If you rush that 60 minutes, the balls will be too soft. When you dip them into the warm melted chocolate, they’ll disintegrate or slide right off the stick. A rock-hard ball is your best defense against a dipping disaster!
How do I make sure the cookie crumbs stick evenly?
The trick here is timing and texture! You need to make sure your chocolate coating is still wet when you apply the crumbs. If you wait even one minute too long, the crumbs won’t adhere, and they’ll just slide off later. Also, make sure your cookies are crushed fine—we want small, sandy textured specks, not big chunks. Big chunks tend to fall off in clumps once the chocolate sets. I usually sprinkle them right over the top while the pop is still slightly dripping!
Can I make the cake base ahead of time?
Oh, definitely! That’s one of the best things about these being such great Easy Dessert Ideas. You can bake your cake a day ahead of time and even crumble and mix it with the frosting. Just roll those balls, chill them well, and keep them covered tightly in the fridge overnight. Then, the next day, all you have left is the fun dipping part!
Nutritional Estimates for Cookies & Cream Cake Pops
Okay, look, these delightfully simple desserts aren’t exactly health food, are they? We’re dealing with cake, frosting, and chocolate coating, so we know they are a total treat! But since everyone always asks for the breakdown, I did run the numbers based on the standard ingredients I listed above—using a basic box vanilla cake mix and standard white chocolate melting wafers.
Please remember that these numbers are just estimates based on using 12 pops as the serving size. If you make them smaller or use richer cream cheese instead of frosting, the numbers will shift! These are just ballpark figures for when you need to know roughly what you’re dealing with when indulging in these great little Easy Treats.
Here is the approximate breakdown per one Cookies & Cream Cake Pop:
- Calories: Roughly 220 – 250 kcal
- Total Fat: Around 11 – 13g (This varies a lot based on the chocolate coating!)
- Protein: Approximately 2g
- Carbohydrates: About 30 – 35g
They are meant to be enjoyed, not analyzed too closely! These are fantastic homemade desserts for parties where everyone is grabbing just one or two, so don’t stress too much about these estimates. Enjoy the cookies and cream goodness!
Share Your Experience Making These Cookies & Cream Cake Pops
Now that you have the secrets to making the creamiest, crunchiest little spheres, I absolutely need to hear how they turned out for you! Don’t just disappear with that tasty batch—come back and tell me everything!
Did you find that chilling time was the real lifesaver, just like I did? Did you try dunking them in dark chocolate instead of white? I’m always looking for new Baking Ideas to try next time I whip up a batch for a crowd. I want to know what little tweaks worked for your kitchen!
- Did the cookie crumbs stick perfectly, or did you have to work fast? Tell me how many you managed to make before they all disappeared!
- Please leave a star rating below so other bakers know how much you loved these Simple Desserts.
- If you snapped a photo of your beautiful platter of cake pops, I would love to see them! You can always send them over using the contact form—I love seeing your creations!
Happy baking, everyone! I hope these become a staple treat in your house, just like they are in mine. Come back soon!
By Emily Mitchell, Efficiency & Testing Coordinator at Recipes by Betty.

Cookies & Cream Cake Pops
Equipment
- Mixing Bowl
- Baking Sheet
- Cake pop sticks
Ingredients
- 1 vanilla cake baked and cooled
- 120 g vanilla frosting or cream cheese
- 10 chocolate sandwich cookies crushed
- 300 g white chocolate melted
- Cake pop sticks
Instructions
- Crumble the cooled cake into a bowl. Mix the crumbled cake with the vanilla frosting or cream cheese until combined.
- Shape the mixture into balls. Place the balls on a baking sheet and chill them in the refrigerator until firm.
- Dip the tip of a cake pop stick into the melted white chocolate. Insert the stick into the bottom of a chilled cake ball. Repeat for all pops.
- Dip each cake pop entirely into the remaining melted white chocolate, allowing excess chocolate to drip off.
- Immediately sprinkle the wet chocolate coating with the crushed chocolate sandwich cookies before the chocolate sets. Place the finished pops upright to set completely.