
When you’re trying to get a meal on the table fast, reliability is everything, right? We all have those kitchen moments where we just need something that *works* every single time, without fail. That’s why I want to talk about what seems simple but trips up so many folks: making Classic Hard Boiled Eggs.
Trust me, I spent years peeling stubborn shells and wrestling with green yolks before I landed on this method. The magic isn’t in complicated ingredients; it’s purely in the timing. Those few extra seconds when the heat is off but the water is hot? That small detail makes all the difference between easy-peel perfection and a frustrating mess. Stick with me, and you’ll nail that consistently perfect, creamy yolk every time—great for grabbing as a snack or adding to your Easy Food Recipes arsenal!
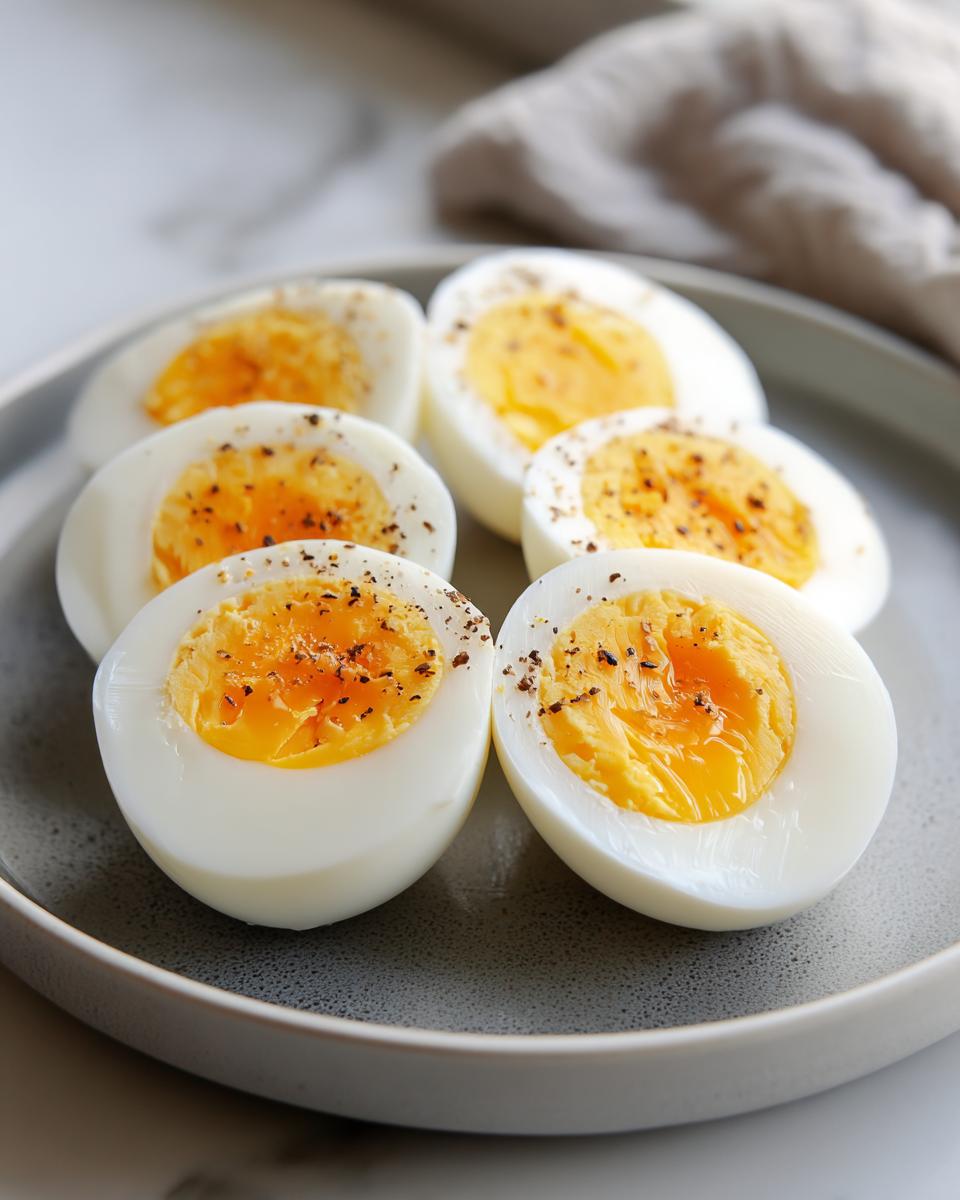
Why You’ll Love These Classic Hard Boiled Eggs
Honestly, these aren’t just eggs; they are foundational cooking security! I swear by this method because I know exactly what I’m going to get. If you’re doing some serious batch cooking or just tired of fighting with the shell, these are your new go-to.
- They are incredibly consistent! You get a perfectly set, bright yellow yolk without that ugly green ring around it, which means you save yourself cleanup fuss.
- Peeling is shockingly simple. Thanks to the ice bath timing we do later, the membrane just slips right off—a real win when you’re making deviled eggs for a crowd!
- They are the perfect building block for tons of Lazy Dinners or quick lunches while you are working on your meal prep snack boxes.
- Zero active cooking time once you cover the pan. You set the timer and go do something else, maybe start prepping veggies for your next meal.
- These are amazing for packing lunches for the kids. They stay good in the fridge for days, making them a prime candidate for Dinner Ideas Easy additions we rely on.
Equipment Needed for Perfect Classic Hard Boiled Eggs
You don’t need fancy gadgets for this! Seriously, this is one of the most budget-friendly things you can make. I keep my equipment super simple, and that’s usually all you need to get those perfect Classic Hard Boiled Eggs. The biggest secret here is making sure you have the right setup for the cooling phase.
Here’s what I pull out of the cabinets every time:
- A good, sturdy saucepan. It needs to be deep enough so that when you put the water in, the eggs are completely submerged, even after the water starts boiling.
- A slotted spoon or tongs. You don’t want to try scooping 12 eggs out of hot water with a ladle; it’s just asking for trouble and maybe a burn!
- A large bowl. This isn’t for mixing; this is for the mandatory ice bath. Make sure it’s big enough to hold all the eggs once they come out of the hot water.
The ice bath is non-negotiable, folks. It stops the cooking process instantly so you don’t end up with those gross, sulfurous green yolks. Grab some ice, dump it in that big bowl, and fill it halfway with cold tap water. That’s your finishing line!
Ingredients for Classic Hard Boiled Eggs
When we talk about simple Easy Food Recipes, this is ground zero. We are talking two things, and that’s it! No weird additives or spices here—we want pure, beautiful egg flavor. I know some folks like adding salt, maybe like a dash of kosher salt—which, if you are curious about salt types, you can read my thoughts on kosher salt vs. sea salt—but I found it wasn’t necessary for this specific timing method.
The two things you absolutely must focus on are the quality of the eggs and the quantity of water. Because we aren’t doing a slow simmer, we need enough water mass to hold onto the required heat after we pull the pot off the stove.
For the best results when making your Classic Hard Boiled Eggs, here is exactly what you need:
- 12 Large eggs: Make sure they are large! Medium eggs throw the timing way off, and we want consistency here.
- Cold water: You need enough cold water to cover those eggs completely by one full inch above the tops. This is where people get lazy, but don’t be! If you don’t have an inch of water covering them, they heat unevenly.
That’s the whole list! See? This is the perfect recipe for those nights when you are looking for genuine Supper Ideas but don’t want to start from scratch. Just boil water and wait!
Step-by-Step Instructions to Make Classic Hard Boiled Eggs
This is where the rubber meets the road! Getting your timing on these Classic Hard Boiled Eggs exactly right means you’ll never have that grey-green film showing up again. The method relies on taking the heat away right when the water hits its peak. Don’t worry if your eggs aren’t room temperature; we start them cold, which is the easiest way to go when you’re looking for Easy Dinner Recipes For Family options.
Preparing the Eggs and Water
First things first, gentle handling is key. Place all 12 of your large eggs into a saucepan. I always aim for a single layer; stacking them up just isn’t fair to the bottom eggs! Next, grab that cold water. You need to cover the eggs with about one full inch of water sitting right on top of the eggshells. If they aren’t covered by an inch, the top layer will cook slower, and you might end up with uneven whites.
The Boiling and Resting Phase for Classic Hard Boiled Eggs
Now, put the pot on the stove over medium-high heat. We want the water to come up to a full, rolling boil—you know, lots of big bubbles everywhere. Once that water is rocking, do this immediately: kill the heat source completely and cover the pan tightly with a lid. Don’t peek!
This is the moment of truth. Let the eggs sit right there in the hot water for 10 minutes for perfect hard yolks, or push it to 12 minutes if you like them rock solid. That still heat does all the work for you, saving you energy and oven time. See? So much easier than staring at a timer while boiling!
Cooling and Peeling
Once your 10 or 12 minutes are up, you have to stop the cooking process, or those yolks will overcook! Use your slotted spoon to immediately transfer every single egg from the hot water bath right into that waiting ice bath. They need to chill out for a full five minutes. This rapid temperature drop shocks the egg and helps the interior pull away from the inner membrane, making peeling a dream.
After the ice bath, you can peel them right away, which is what I do if I’m making something like egg salad or putting them into deviled eggs. Or, if you’re meal prepping, just put them in the fridge unpeeled. Ready to learn more about handling these beauties? Check out great tips here: How to make perfect hard boiled eggs.
Tips for Success with Classic Hard Hard Boiled Eggs
I know the biggest fear with any egg recipe is opening it up to find a grey-green ring around that once-perfect yolk. Don’t you worry! That sully color is just sulfur reacting slightly with iron, and it only happens when the egg gets overcooked, even by just a minute or two. My method above—boil then rest off-heat—prevents that 99% of the time because we control the residual heat with that cold ice bath.
But beyond timing, there are a couple of little chef secrets I’ve picked up. These bits of knowledge are what separate a good egg experience from a great one, especially if you’re planning on turning these into deviled eggs with Dijon mustard later on!
Preventing Green Rings: The Critical Ice Bath
I can’t stress this enough: the ice bath is your emergency shut-off switch! If the eggs sit even five minutes too long in the hot water, they start cooking more. When you pull them, dropping them *immediately* into icy water shocks them into stopping that chemical reaction that causes the greening. It works like magic, I promise!
If you forget for a minute and they sat a little hot, give them the full five minutes in the ice bath. That sudden cold tightens the egg white and pulls it away from the shell membrane. You can even check out some other techniques here if you want to read up on keeping those yolks bright: Martha Stewart’s take on perfect hard-boiled eggs.
The Secret to Easy Peeling: Age Matters!
This is the tip that really blew my mind when I learned it. Super fresh eggs—like, straight from the farm carton—are notoriously hard to peel. Why? Because the egg white clings tightly to the inner membrane when they are fresh. As the egg ages a little bit, the pH balance changes, making the shell easier to separate.
So, if you’re making these for a big batch next week, don’t use the eggs you bought yesterday! Eggs that are about a week or two old are the absolute best for peeling easily. You’ll find that when you crack them after the ice bath, the shell just kind of pops right off in big pieces instead of flaking everywhere.
Adding Salt or Vinegar to the Water
You might see recipes suggesting you add salt or vinegar to the boiling water. I tried that for years when I was trying to learn the secret to Classic Hard Boiled Eggs, and here’s my take: for *this* specific off-heat steaming method, it doesn’t make a lick of difference in peeling or cooking! The timing handles the cooking, and the ice bath handles the separation.
However, if you happen to crack an egg while dropping it in, a splash of vinegar *will* help that escaped white solidify quickly so it doesn’t run out into the water. So, it’s a safety net, but not a peeling necessity for this method, which keeps things so much simpler!
Storage and Reheating Instructions for Classic Hard Boiled Eggs
Okay, you’ve mastered the boil and the peel—now what? Storage is where the meal prepper in you shines! Storing these Classic Hard Boiled Eggs correctly keeps them fresh for snacks all week long. The absolute biggest difference in storage comes down to one simple thing: whether you peel them now or later.
Storing Unpeeled Eggs
If you aren’t planning on eating them right away, I highly recommend leaving the shells on! Think of the shell like nature’s perfect little protective packaging. Keep the unpeeled eggs in the main part of your refrigerator—not tucked away in the door, where the temperature swings!
Believe it or not, when stored properly in the shell, hard-boiled eggs stay fresh and safe to eat for up to one week. I usually aim to use them up by day six, just to be safe, because I hate wasting food, especially when I’ve gone to all the trouble of getting the timing right!
Storing Peeled Eggs
If you’ve done the hard work and peeled them, you need to treat them a little differently because the exposed white can dry out or absorb odors from your fridge. When I peel mine immediately after that ice bath, I pop them into an airtight container.
If you want them to stay super soft for your next batch of low-carb chicken meal prep, toss a few slightly damp paper towels into the container with them. This keeps ambient moisture around the whites. Peeled eggs should still be eaten within about 5 to 7 days, but honestly, they usually disappear before then around here!
Do You Need to Reheat Hard Boiled Eggs?
Here’s a silly little secret: you really don’t! Hard-boiled eggs are meant to be eaten cold or at room temperature. If you try to reheat them in the microwave, or even boil them again, you are just asking for that dreaded rubbery texture and potentially turning that yolk back to that awful grey-green color we worked so hard to avoid.
So unless you are making a dish that requires gently warmed eggs, just grab them straight from the fridge. They are perfect for slicing right onto a salad or eating as a quick protein-packed snack!
Using Your Classic Hard Boiled Eggs in Other Easy Dinner Recipes For Family
It feels almost criminal to just peel a perfect batch of Classic Hard Boiled Eggs and eat them plain—though I certainly do that when I’m starving! But these little protein powerhouses are fantastic starting points for really easy meals. If you’re looking for fast Supper Ideas that don’t require stirring a pot for an hour, you’ve got to remember what these eggs can become!
This is where simplicity meets strategy. You’ve got your reliable eggs ready to go, which means dinner is already halfway done. It’s perfect for those times when you need Easy Dinner Recipes For Family but only have about 20 minutes of actual cooking time left.
Elevating Simple Salads and Greens
Forget buying those pricey, pre-made salads. Slice up a few of these gorgeous hard-boiled eggs and you instantly boost the protein and richness of any simple green salad. They are fantastic chopped coarsely and tossed into a Caesar, or just cut in half and placed atop some mixed greens with a drizzle of good olive oil. They make a simple side dish feel like a real centerpiece.

If you’re looking for something creamier, you can mash a few eggs right into my famous Avocado Chicken Salad base instead of using mayo! It keeps things fresh and bright, and it’s just as good stuffed into a tomato or served with crackers.
Making Quick ‘Lazy Dinners’ with Your Eggs
When I say Lazy Dinners, I mean meals that require almost no active input from me. Hard-boiled eggs are perfect for assembling things on the fly. For example, have some leftover cooked rice or pasta? Toss the hot grains with some soy sauce, sesame oil, some scallions, and top generously with sliced eggs. Boom—Asian-inspired noodle bowl in five minutes!
Even something as simple as toast counts when you add an egg. Don’t just do avocado toast; try spreading some cream cheese on rye bread, topping it with sliced eggs, some everything-bagel seasoning, and maybe a little paprika. It’s a substantial, satisfying meal that takes literally three minutes.
Incorporating Them into Ethnic Flavors
Don’t box these eggs into just American cuisine! They work beautifully in many dishes that might typically call for poached or fried eggs. If you are looking at Mexican Food Recipes for inspiration, think about shredding a few eggs and mixing them into leftover seasoned ground beef or beans to bulk up taco filling. It stretches the meat and adds great texture. For other great tips on timing your eggs, you can check out what the folks at Love & Lemons recommend!
For other Dinner Ideas Easy options, you can use them in savory quick soups. If you have a fast broth base—maybe something similar to what you’d use in a simple vegetable broth—gently drop in the sliced eggs right at the end. They warm up immediately, and it turns that broth into something much more filling. For more dinner inspiration in general, feel free to browse all my dinner category recipes!
Frequently Asked Questions About Classic Hard Boiled Eggs
It’s funny how something basic can cause so many questions! People always want to know if they can shave off a minute here or there, or what they did wrong when the shell wouldn’t budge. These Classic Hard Boiled Eggs are so reliable when you follow the no-boil method, but I get that sometimes you need to pivot, especially when you’re looking for quick options that fit into your rotation of Easy Food Recipes.
I’ve pulled together the most common things folks ask me about timing and technique. Hopefully, this clears up any lingering confusion so you can stop stressing over dinner prep!
How long should I boil eggs for a runny yolk?
Oh, you’re going for that jammy or fully runny yolk? That means you need to adjust that resting time we discussed! For perfectly set hard yolks in this method, we use 10 to 12 minutes off the heat. If you want a nice, soft, slightly jammy yolk—the kind that’s amazing on toast—you should reduce that resting time to about 8 minutes.
If you’re craving that super-runny yolk like you’d get from a poached egg, honestly, I’d actually recommend poaching or soft-boiling those fresh. For this specific method, anything less than 7 minutes off the heat usually results in whites that are just barely set. We aim for a solid, satisfying texture here, which is why we stick to the 10-minute minimum!
What is the best way to peel a hard-boiled egg quickly?
The best way is absolutely to make sure they hit that ice bath for the full five minutes! That temperature shocking is 90% of the peeling battle. Once they are chilled, I always roll the egg gently on the counter or press it against a hard surface just until you hear and feel the shell crack all over, kind of like a spiderweb pattern.
Then, run it under cool, gently running water while you start peeling. The water helps sneak in between the membrane and the white, lubricating the process. You’ll find that the shell just slides off in big sheets instead of peeling off in tiny, frustrating flakes. It makes a world of difference when you’re rushing through your kitchen tasks!
Can I make these as part of my Lazy Dinners prep?
You absolutely can, and honestly, that’s what I do most often! Making a dozen of these on Sunday afternoon is the secret sauce to feeling prepared for the whole week. They require zero active effort once they are in the hot water, making them perfect for your Lazy Dinners strategy.
Once they are ready, you can pair them with super simple sides to make them a full meal. Think about slicing them up over some pre-washed lettuce with a simple vinaigrette, or grabbing some easy family dinner recipes like a side of steamed broccoli or even some roasted baked onions whole! Having these cooked eggs just makes assembling dinner so much faster when you’re tired.
Estimated Nutritional Data for Classic Hard Boiled Eggs
Since this recipe uses just one core ingredient—a large egg—the nutritional data is pretty standardized, which helps when you are planning out your weekly meals. Remember that the nutrition really depends on the size of the egg you start with, but these estimates represent a standard, large, Grade A egg cooked this way.
I find it helpful to keep these basic numbers tucked away, especially when using them as a protein source for quick lunches. Here’s a quick rundown of what you’re looking at per egg:
- Calories: Around 78 kcal
- Protein: A solid 6.3 grams! Great for staying full.
- Fat: About 5.3 grams, most of which is healthy fat found in the yolk.
- Carbohydrates: Barely anything, just 0.6 grams!
You also get a nice little boost of key vitamins like Vitamin A. Just keep in mind that this data is an estimate, but it gives you a solid baseline for including these in your balanced diet. If you’re tracking macros, these are a wonderful, clean source of protein!
Estimated Nutritional Data for Classic Hard Boiled Eggs
Since this recipe uses just one core ingredient—a large egg—the nutritional data is pretty standardized, which helps when you are planning out your weekly meals. Remember that the nutrition really depends on the size of the egg you start with, but these estimates represent a standard, large, Grade A egg cooked this way.
I find it helpful to keep these basic numbers tucked away, especially when using them as a protein source for quick lunches. If you ever need to reach out with questions about substitutions or storage, you can always visit my contact page! Here’s a quick rundown of what you’re looking at per egg:
- Calories: Around 78 kcal
- Protein: A solid 6.3 grams! Great for staying full.
- Fat: About 5.3 grams, most of which is healthy fat found in the yolk.
- Carbohydrates: Barely anything, just 0.6 grams!
You also get a nice little boost of key vitamins like Vitamin A. Just keep in mind that this data is an estimate, but it gives you a solid baseline for including these in your balanced diet. If you’re tracking macros, these are a wonderful, clean source of protein!

Classic Hard Boiled Eggs
Equipment
- Saucepan
Ingredients
- 12 Large eggs
- 1 inch Cold water Enough to cover eggs by 1 inch
Instructions
- Place eggs in a saucepan in a single layer.
- Cover eggs with cold water by about 1 inch.
- Bring water to a full boil over medium-high heat.
- Once boiling, cover the pan and remove it from the heat source.
- Let the eggs sit in the hot water for 10 to 12 minutes.
- Transfer the eggs to an ice bath for 5 minutes.
- Peel the eggs immediately or store them refrigerated.