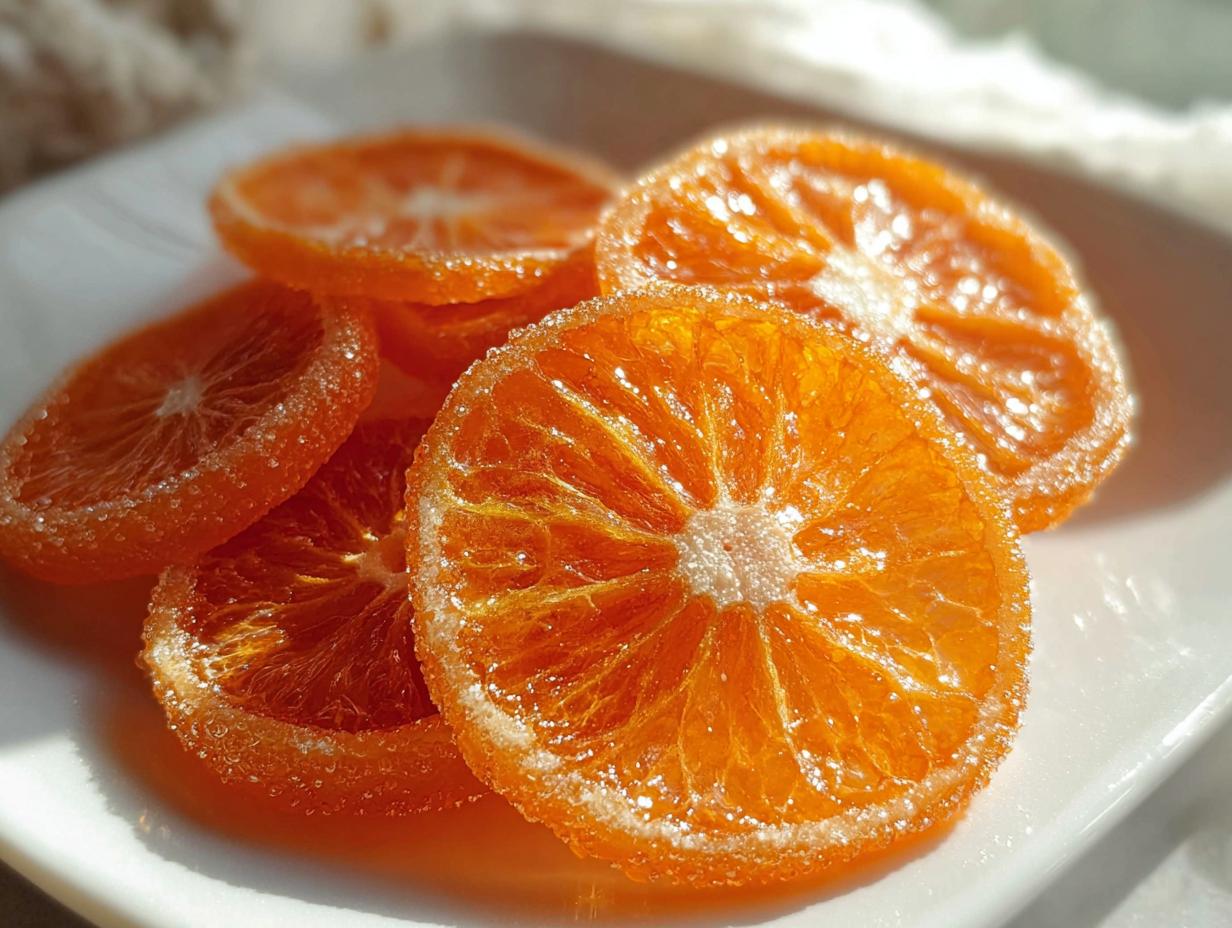
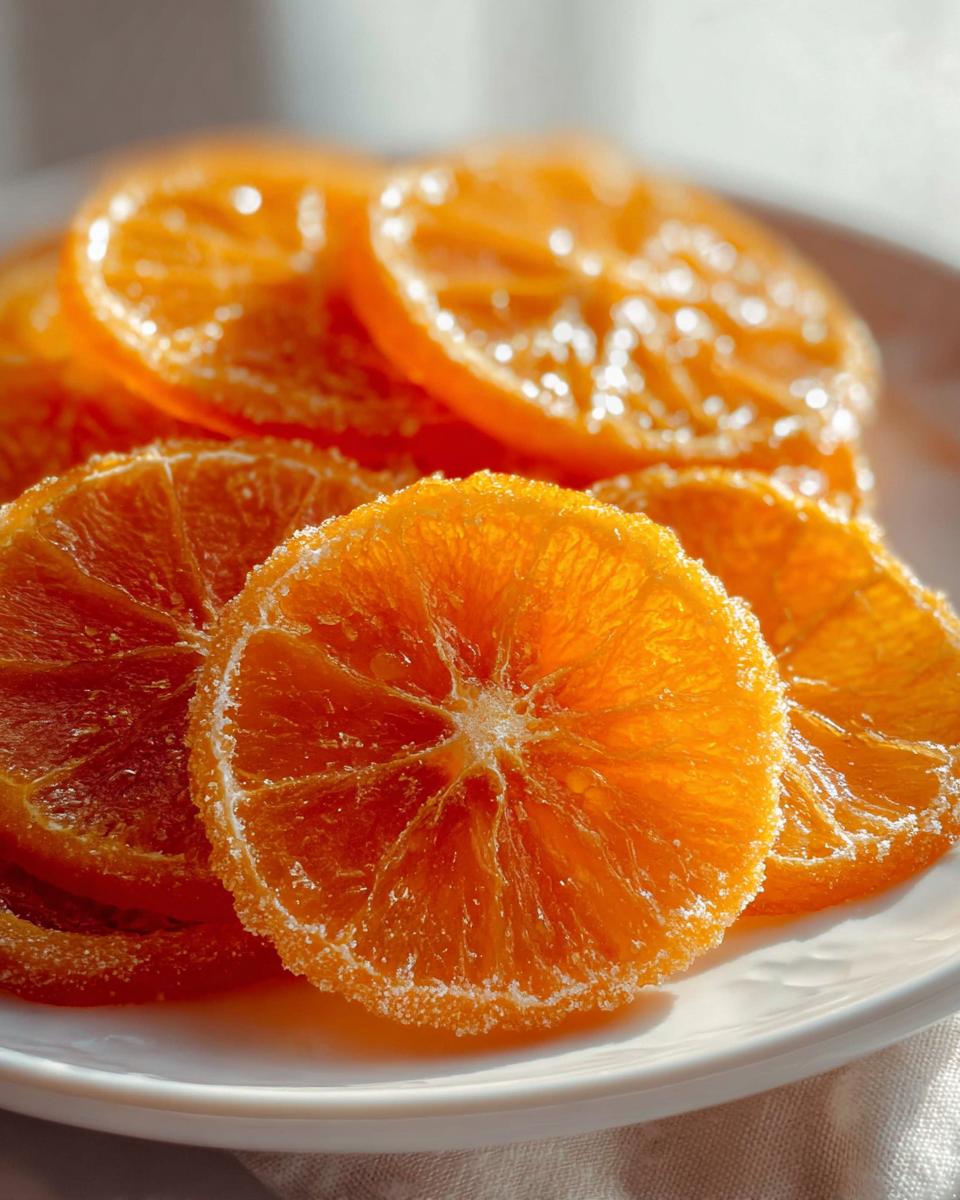
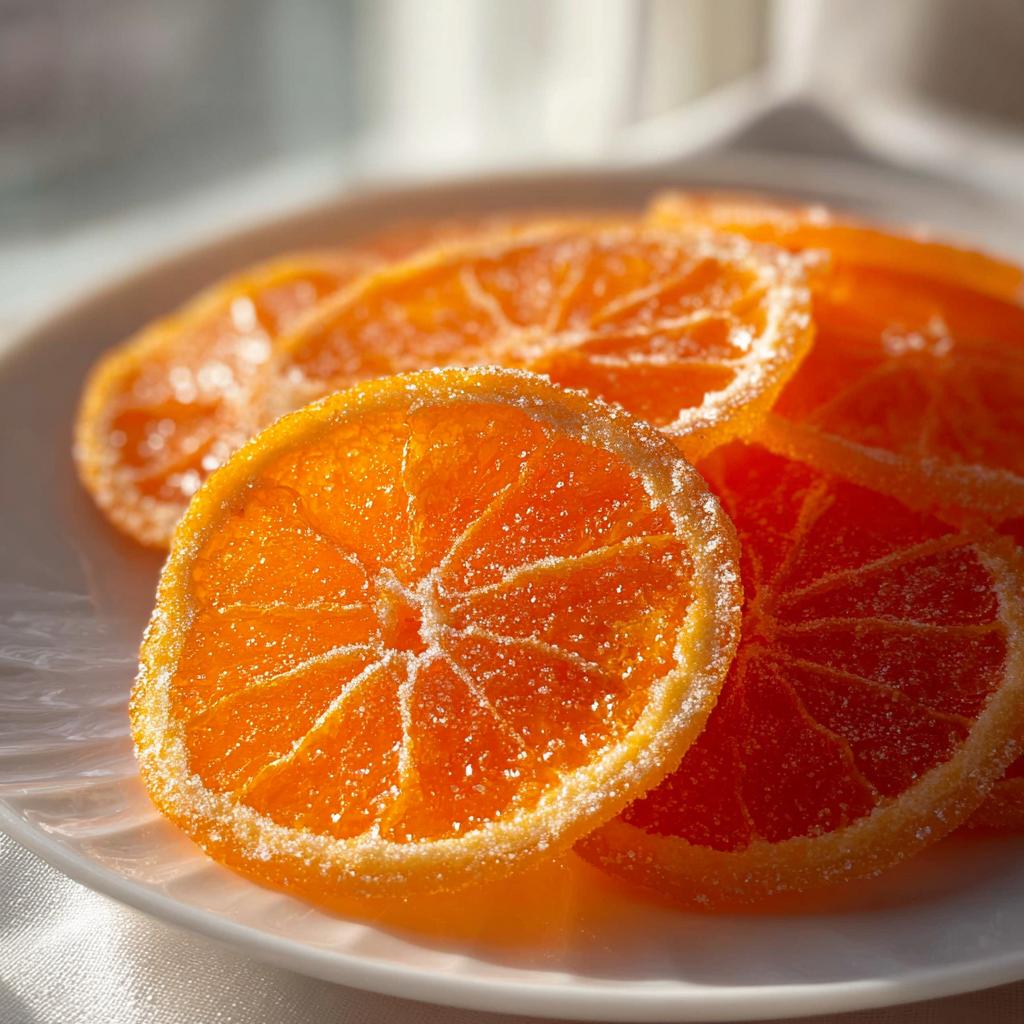
There’s just something magical about citrus that’s been transformed by sugar, isn’t there? They look like little jewels lined up on the counter, catching all the light from the window. I love how these slices catch the light—the translucent orange makes them feel instantly festive and nostalgic. We’re skipping all the weird shortcuts here. This Classic Candied Orange Slices recipe uses the old-school, traditional method, which is the only way to guarantee those beautiful, perfectly translucent, chewy little pieces of sunshine. Trust me, mastering this technique will make you feel like you’ve unlocked a secret piece of confectionery history right in your own kitchen.
Why You Will Love Making Classic Candied Orange Slices
Seriously, once you see these finished, you’ll be hooked. They feel way more complicated than they actually are! Making these Classic Candied Orange Slices is so rewarding. Here’s what you gain:
- The texture is unbeatable: delightfully chewy, never sticky or overly firm.
- They look elegant! Perfect for garnishing cakes or just setting out for guests.
- Amazing versatility—they taste great plain or dipped in dark chocolate.
- You finally know what to do with orange peels instead of tossing them!
Essential Equipment for Classic Candied Orange Slices
You don’t need a million gadgets for this recipe, thank goodness. Sometimes the simplest things work the absolute best when you are dealing with sugar and syrup. When I first started making these, I tried using a Dutch oven, but that was just too big and clumsy for simmering the slices evenly.
You only need three main things to get started on this classic treat:
- A good, sturdy **Pot**—big enough to cover the orange slices completely when they go into the blanching water.
- A deep **Saucepan**. This is where the magic happens when you make the syrup and simmer the fruit. Make sure it’s one that can handle a gentle, low heat for almost an hour.
- A **Parchment-lined rack**. This is non-negotiable! If you try to dry these directly on a plate, they turn into one giant, sugary orange frisbee. The rack lets the air circulate all around, which is key for proper drying later on.
See? Nothing fancy at all. Just the basics you probably already have floating around the kitchen.
Ingredients Needed for Perfect Classic Candied Orange Slices
I’ve found that when you are dealing with simple ingredients like these, the quality truly matters. Since there are only three things in this recipe, you want them to be top-notch! Don’t even think about getting fancy with things like specialty salts here—we’re sticking to the basics for this one. If you ever need to know the difference between various salts for other recipes, you can check out my notes on kosher salt vs sea salt, but for this candy, regular granulated sugar is the way to go.
Here is exactly what you need to gather before you start slicing and simmering your Orange Rolls Homemade later, because once you master this, you’ll want to bake everything!
- 2 large oranges: Make sure these are nice, heavy ones! We want juicy fruit, not dry lumps.
- 2 cups granulated sugar: This is the workhorse here, obviously, but using plain white sugar keeps the syrup clear so we can see the beautiful orange color underneath.
- 2 cups water: Simple tap water is perfect for the syrup base.
That’s it! I know it seems too easy, which is why people might overcomplicate it. But when you’re making something this elegant, keeping the ingredient list short and sweet lets the fresh orange flavor really shine through.
Step-by-Step Instructions for Classic Candied Orange Slices
Okay, this is where we turn a regular piece of citrus into something spectacular. Don’t rush this part! The beauty of these Classic Candied Orange Slices comes from taking your sweet time. I always put on some old records while I do this because it takes a little while, but the payoff is totally worth the effort. Just follow my lead, and you can’t mess it up.
Preparing the Orange Rounds
First things first, wash those gorgeous oranges really well. You want them super clean because we are using the whole thing! Slice them into rounds, and this is important: aim for about 5 millimeters thick. If they are too thick, they won’t absorb the syrup right. If they are too thin, they just disintegrate.
Next, we have to get rid of that bitter pith. Bring a big pot of water to a rolling boil—and I mean boiling! Drop those orange slices right into the boiling water and blanch them for exactly two minutes. Drain them immediately, rinse them thoroughly under cold water, and that nasty bitterness is mostly gone! Whew!
Creating the Candying Syrup and Simmering
Now for the good stuff. Grab that saucepan and combine your 2 cups of sugar and 2 cups of water. Heat this mixture only until the sugar dissolves and it just starts to gently simmer. You don’t want a raging boil here; a calm simmer is what we are aiming for.
Carefully lay the blanched, rinsed orange slices into that hot syrup. Try to overlap them as little as possible so they cook evenly. Then, you need to turn your heat way down. We are going to gently simmer these for a good 45 to 50 minutes. This long, slow introduction to the sugar liquid is what makes them translucent; it slowly replaces the water inside the fruit cells with sugar. They are ready when they look almost see-through and feel wonderfully tender. This is the defining moment for incredible Mandarin Orange Recipes variations, too!
Drying the Finished Classic Candied Orange Slices
Once they hit that translucent stage, use tongs or a slotted spoon to take them out super carefully. They are delicate! Place them single file on that parchment-lined rack you prepared earlier. Don’t stack them up—they are way too sticky right now.
This is the hardest part: waiting. You have to let these dry completely. Seriously, walk away. They need several hours at room temperature, but I find they are absolute perfection if you just let them sit overnight. That’s about 8 hours or 480 minutes of drying time. This long, slow dry ensures they are perfectly chewy and not gooey when you finally go to eat them or use them in one of your Fresh Orange Recipes.
Tips for Making the Best Classic Candied Orange Slices
People often ask me where things go wrong when they try making these at home, and honestly, it nearly always comes down to rushing one of two steps: slicing or simmering. These aren’t the kind of treats you can rush, no matter how much you want to try that quick stovetop method for pumpkin bread or something else!
To elevate your Classic Candied Orange Slices from good to ‘Oh My Gosh, you made these?’, you need to focus on these three things:
First, go back and check your thickness. I mentioned 5mm, but really look at them. If you’re free-handing it, you’ll definitely have thicker bits that stay firm and chewy, and thinner bits that dissolve into sweet slush. A mandolin slicer is a baker’s best friend for consistency here, I’m telling you. Uniformity equals perfection!
Second, monitor that simmer like it’s your newborn child! If that syrup starts bubbling too vigorously while the oranges are in there, the sugar will crystallize too fast, and you’ll end up with candy that’s hard and grainy, not chewy and clear. Keep that heat low—just the occasional lazy bubble should break the surface. Patience is truly the secret spice in making Orange Desserts Easy!
Finally, don’t judge doneness by time alone; judge it by sight. You’re done simmering when you can easily see the pattern of the rack through the orange slice when you hold it up to the light. They should look almost stained glass! If you pull them out too soon, they’ll be sticky forever, and if you cook them too long, they start to break apart when you try to move them. It’s a delicate dance, but once you get that translucency right, you’ve mastered it.

Creative Ways to Use Your Candied Orange Slices
Once you have these gorgeous, sunshine-bright slices dried completely, you’ll find yourself hoarding them! They look amazing just sitting in a pretty jar, but honestly, why stop there? We definitely don’t want to waste the experience of making what to do with orange peels pay off, so let’s get creative with these sweet treasures.
My favorite next step, and one that seems obvious but tastes incredible, is taking them to the next level by making Chocolate Covered Candied Orange Peels. You just need a good quality dark chocolate—melt it gently, dip the cooled, dried slices halfway, and let them set on fresh parchment paper. That bittersweet snap against the chewy orange is heaven. It takes them from a nice treat to a high-end confection!
But if chocolate isn’t your thing, they are fantastic additions to holiday baking. Throw them into your favorite scone dough or use them to jazz up a simple tea cake. If you’re looking for orange desserts easy to decorate, just chop them up finely. They add color and a concentrated burst of sweetness that you just can’t mimic with zest alone. They are also absolutely lovely scattered over a simple yogurt bowl—way better than sugary granola, in my opinion.
Honestly, once you know effective orange peels uses, you’ll be making double batches just to have enough to decorate everything. They are little edible decorations that taste like pure holiday magic!
Storage and Shelf Life for Classic Candied Orange Slices
Storing these beauties correctly is almost as important as the candying process itself! If you skipped the long drying time, I’m warning you now: they will stick together into one giant fruit brick inside whatever container you put them in. Seriously, don’t skimp on that drying step!
Once you are absolutely certain your Classic Candied Orange Slices are dry to the touch—not tacky, not moist, but dry—it’s time to seal them up. You want an airtight container, of course. Glass jars look classic, but honestly, a sturdy food storage container works wonders as long as the lid seals tight.
Keep that container somewhere cool and dry. That means no setting them right next to the stove or on a sunny windowsill. Heat and humidity are the enemies here, as they’ll just make the sugar start drawing moisture back out of the air, leading to stickiness again. If you’ve done everything right, these keep fantastically well!
I’ve kept my Classic Candied Orange Slices in the pantry for well over a month, and they taste just as vibrant as the day they came off the rack. Some people swear they are even better after a week or two when the flavor has fully settled into that sweet, chewy texture. They are so resilient, which makes them a perfect non-perishable gift for friends or neighbors!
Frequently Asked Questions About Candied Citrus
I get so many lovely notes from folks who are trying this recipe, which is just wonderful! It’s neat to see everyone getting into making their own treats, far beyond just making some simple Orange Rolls Homemade. Candied citrus can be a little tricky if you haven’t done it before, so let me clear up the most common things people ask me about their batches.
Why are my orange slices still bitter after candying?
Oh, that little lingering bitterness can be frustrating! The whole point of the blanching step—that quick dip in boiling water we do at the very beginning—is to coax out most of that sharp essential oil found in the pith and peel. If your slices are still bitter, nine times out of ten it’s because you either didn’t rinse them well enough after the first boil, or your slices were just too thick.
If the slice is too thick, the sugar syrup simply can’t penetrate the bitter white layer deep enough to counteract it. For the next batch, really focus on getting those slices paper-thin, okay? And give them a good, cold rinse after blanching. That usually solves the issue right up!
Can I use this method for other citrus fruits like lemons or grapefruit?
Yes, absolutely you can! This whole technique is fantastic for other citrus, and it’s a wonderful expansion of general Recipes Using Oranges knowledge. Lemons, limes, and even grapefruits work beautifully in this syrup. The texture goal—that perfect, translucent chewiness—is the same for all of them.
The main thing to remember, especially when you branch out past oranges, is that the cooking time will change based on how thick the rind is. Grapefruit rinds are usually much thicker than an orange rind, so they might need a bit longer simmering time to fully candy through. Taste test in that last ten minutes to see if they are tender! This same method is great if you decide to try making Canning Mandarin Oranges syrups later on, too.
Also, if you are curious about keeping your data safe while you are busy baking and enjoying your treats, feel free to check out my thoughts on the privacy policy here at Recipes by Betty, just so you know we keep things buttoned up tight!
Nutritional Estimates for Classic Candied Orange Slices
Now, let’s talk about the reality check, shall we? These Classic Candied Orange Slices are truly a confection, meant for enjoying occasionally, not for snacking like an apple! Because we are talking about fruit that has been submerged and simmered in pure sugar, the nutrition reflects that. These aren’t low-carb, that’s for sure! But hey, at least we know we are using real fruit, which is more than you can say for a lot of store-bought candies.
The estimates below are based on 24 servings—one slice—and I always encourage people to remember these are just guidelines. Every orange is slightly different in size, and how much syrup actually clings to the final product totally changes the count. So please, take this as a fun suggestion, not a doctor’s orders thing, especially if you’re tracking macros for Orange Rolls Homemade later in the week!
Here’s a rough idea of what one lovely, translucent slice runs:
- Calories: Approximately 75-85 kcal
- Total Fat: Less than 0.5g (Really, it’s just the tiny oil from the peel!)
- Protein: Virtually 0g
- Total Carbohydrates: Around 20-22g (This is almost entirely natural fruit sugars plus the added sugar)
Keep in mind that if you decide to dunk these in chocolate later—and gosh, you should!—you’ll need to add the nutritional info for whatever chocolate you choose. The main takeaway is that these Classic Candied Orange Slices are pure, sweet joy, and they are best enjoyed in moderation alongside a cup of coffee or tea. That’s my philosophy on any good baked item!
Share Your Classic Candied Orange Slices Creations
You know, seeing what you all make in your kitchens is honestly my very favorite part of running this site. It’s what keeps me coming back, experimenting, and trying to perfect these old family techniques. I spent so much time getting the blanching just right on these Classic Candied Orange Slices, and I really want to see your results once they get that gorgeous crystalline shine!
When you finish drying yours—after patiently waiting those 8 hours or whenever you finally pull them off the rack—please, please come back here and let me know how they turned out. Did you manage to get that perfect translucency? Did they stay chewy? Drop a comment below and give the recipe five stars if you loved it! It helps other bakers find these classic recipes.
And don’t just keep this beauty to yourself! Take a snap of your finished candied slices—especially if you dipped them in chocolate or used them as a garnish on a cake—and share it on social media. Tag me so I can cheer you on! If you have any burning questions after reading everything, or if you just want to share a victory, you can always reach out directly through the contact form, too.
Happy baking, everyone! Remember, these treasures are made with love, just like they were made in my kitchen for years. Created with care by me, Clara Bennett, Lead Plate Designer here at Recipes by Betty.
Classic Candied Orange Slices
Equipment
- Pot
- Saucepan
- Parchment-lined rack
Ingredients
- 2 large oranges
- 2 cups granulated sugar
- 2 cups water
Instructions
- Wash oranges well and slice them into thin rounds, about 5 mm thick.
- Bring a pot of water to a boil and blanch the orange slices for 2 minutes.
- Drain the slices and rinse them under cold water.
- In a saucepan, combine the sugar and water and bring to a gentle simmer.
- Add the orange slices in a single layer to the simmering syrup.
- Simmer gently for 45 to 50 minutes until the slices become translucent.
- Remove the slices carefully and place them on a parchment-lined rack.
- Let the slices dry at room temperature for several hours or overnight before serving or storing.