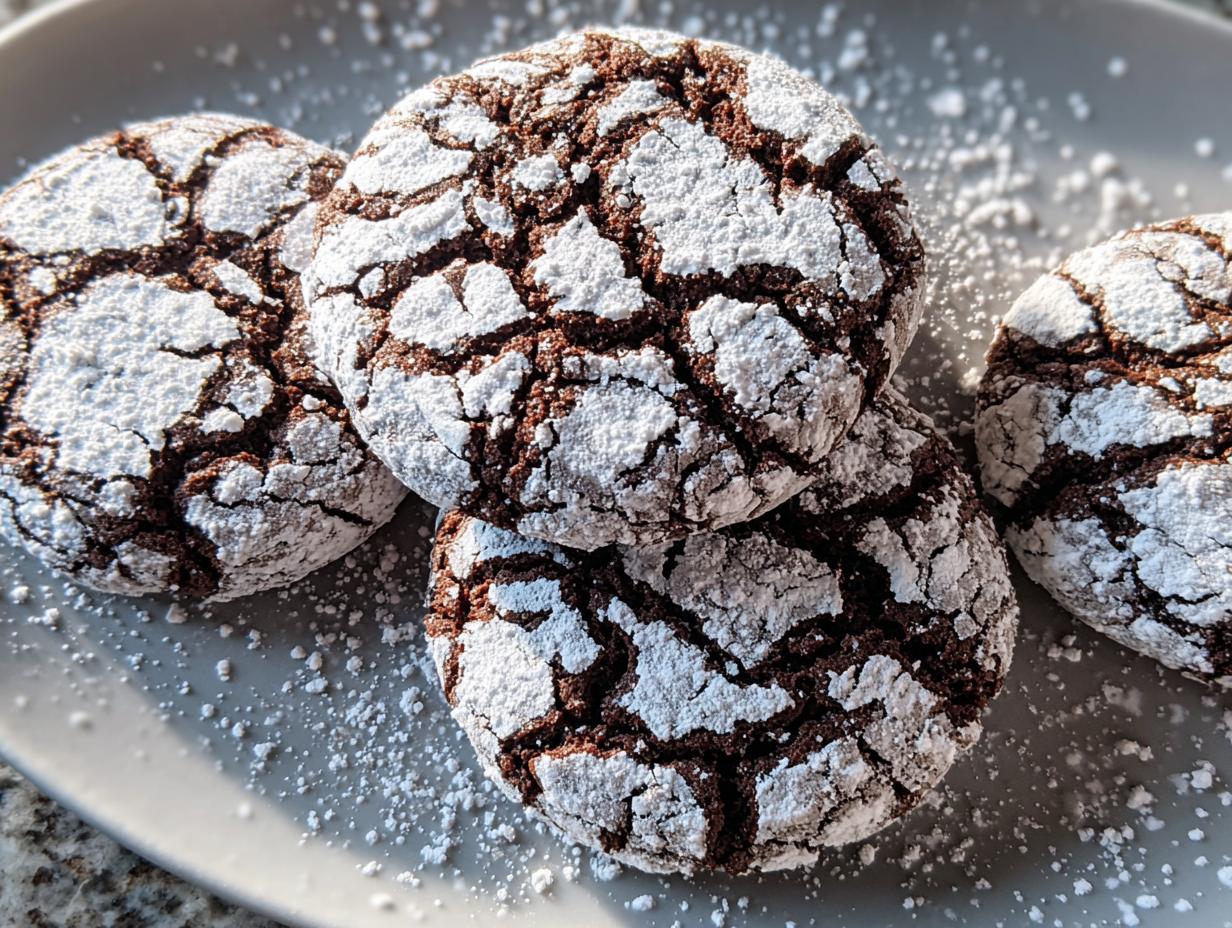
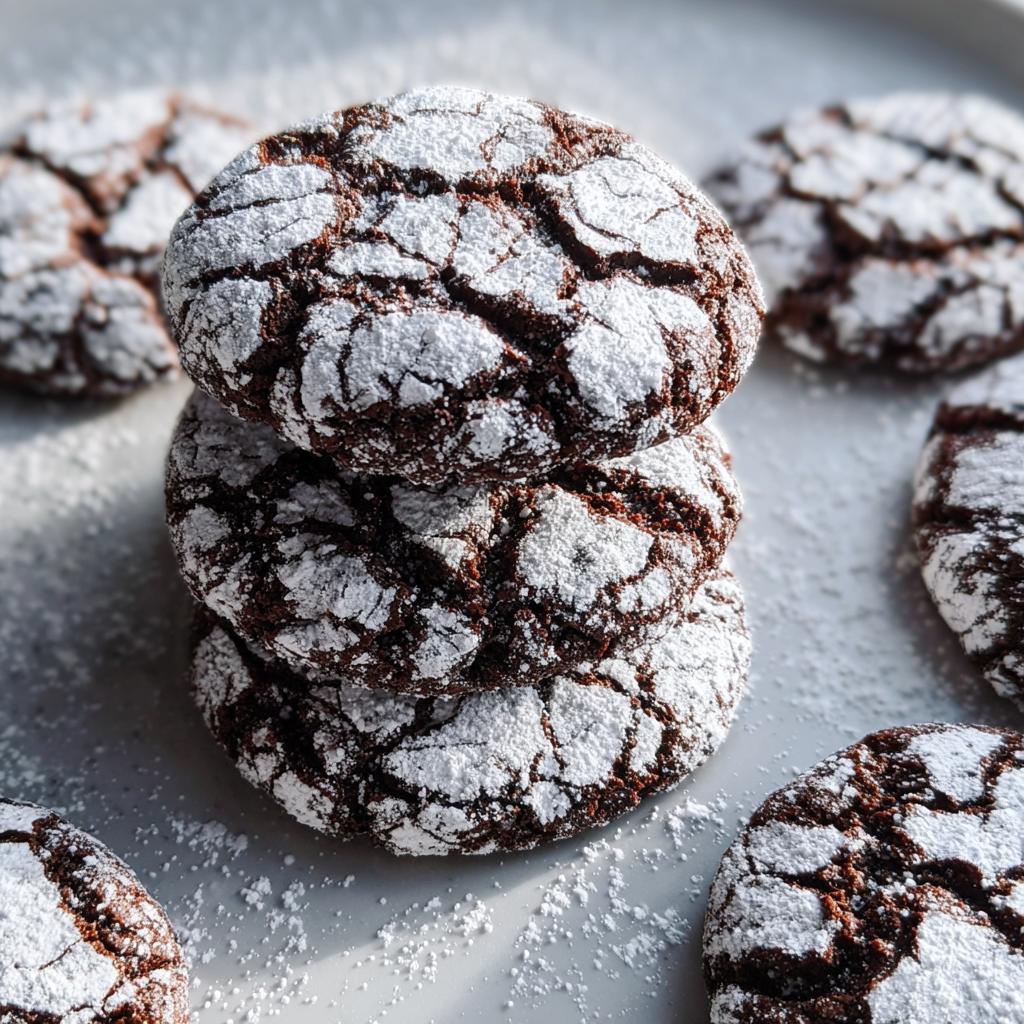
If you want a cookie that looks like it took hours of complicated decorating but actually comes together like a dream, stop what you’re doing and make these Chocolate Crinkle Cookies right now! Seriously, these are the best. They are intensely fudgy inside—almost brownie-like—and then they get this dazzling, snowy white crackle finish on the outside. Wow! It looks so fancy, but the secret is that they are one of the most straightforward recipes you’ll ever try.
I remember making these with my mom every December—the way the dough rolled in sugar felt like magic to me as a child. Even today, the smell instantly brings back those kitchen memories from when we were getting ready for the holidays. This recipe is such a classic because it proves that simple desserts can be the most memorable. You just mix, chill, roll, and bake. That’s it! You’re going to get the most beautiful, soft, fudgy cookies with almost no fuss. Trust me, these will be in your annual baking rotation forever.
Why These Chocolate Crinkle Cookies Are Essential Baking Ideas
Honestly, these Chocolate Crinkle Cookies are a staple for me precisely because they tick all the boxes for fantastic simple desserts. They’re rich, they’re deeply chocolatey, and that snowy crackle top makes them feel so special—like they belong on a fancy dessert platter. I appreciate how this recipe lands squarely in the category of unique cookie recipes that don’t actually require any complicated techniques. They are just naturally impressive looking!
Perfect for Easy Treats and Large Crowds
When I need a quick batch of something delicious, these are my go-to easy treats. Because the ingredient list is so short and you really only need standard mixing bowls and baking sheets, there’s no heavy setup required. That’s why they’re brilliant for making easy desserts for a crowd. You can prep the dough, chill it, and then you’re ready to roll them out quickly when people are coming over. If you like these but maybe want to try a different color, check out my guide on patriotic crinkle cookies—it uses the same fantastic base!
Equipment Needed for Perfect Chocolate Crinkle Cookies
You don’t need a ton of fancy gadgets for these cookies, which is another reason I love them so much! They are truly one of the easiest recipes to whip up, which means less cleaning later. You likely have everything you need sitting around your kitchen right now.
Here’s the short list of tools that will help you get those perfect fudgy centers and beautiful cracks:
- Two sturdy Mixing Bowls—one for the wet stuff and one for the dry, before you mix them. No need to dirty every single dish you own!
- Your trusty Baking Sheets. Make sure they are lined for easy cleanup, trust me on this one.
- Measuring cups and spoons are crucial here for getting the ratios just right.
- A small scoop or a spoon for portioning the dough into uniform balls.
- Parchment paper. I always line my baking sheets with this. It prevents sticking and makes sliding those warm cookies off the sheet a breeze when they come out of the oven.
See? Not scary at all! Grab your bowls, and let’s get ready for the next step where we handle the glorious chocolatey ingredients.
Ingredients for Fudgy Chocolate Crinkle Cookies
Getting the right ingredient balance is what transforms a good cookie into one of those unforgettable homemade desserts. This list is short, which is fantastic for keeping things simple, but every single item plays a huge role in that perfect fudgy texture and that iconic cracked look. We’re using basic pantry staples, but handling them correctly makes all the difference—like ensuring your cocoa powder is fresh!
If you’re looking for tips on salt choices, I wrote a whole piece about [kosher salt vs sea salt], but for this recipe, standard salt works just fine. You can also see a slightly different take on these cookies over at King Arthur Baking, though I think my addition of chilling time really locks in the fudginess. Here is everything you need:
- 200g Sugar
- 80ml Vegetable Oil (Don’t skimp here—the oil keeps them incredibly moist!)
- 2 Eggs
- 60g Cocoa Powder (Good quality makes a difference!)
- 200g Flour
- 1 tsp Baking Powder
Ingredients for Rolling the Chocolate Crinkle Cookies
This next step is non-negotiable if you want that true crinkle effect! Having plenty of this ready is key to success. You need enough powdered sugar that you can roll the dough balls and really work it into the surface. Make sure the coating is absolutely thorough; this is what expands and cracks to create that beautiful white shell around your dark, fudgy center. It’s pure magic to watch happen in the oven!
- As needed Powdered sugar (For rolling)
Step-by-Step Instructions for Easy Chocolate Crinkle Cookies
Okay, here is where the fun begins! Don’t let the word ‘instructions’ intimidate you; this is really straightforward cooking here. If you’ve struggled with complicated holiday baking before, these are your new best friends. We’re going to start by getting all the chocolate flavor incorporated right at the beginning. If you want more pointers on getting your mixing technique down for baked goods in general, check out my tips on [secrets to perfect scones]; the creaming part is kinda similar!
Mixing the Dough for Your Chocolate Crinkle Cookies
First things first, grab your sugar, your vegetable oil, and those two eggs. Get those mixed together in your bowl until they look like they’re starting to combine smoothly. Next, we introduce the rich cocoa powder. Mix that in until the wet stuff looks like thick, dark chocolate sauce. Now, gently fold in the flour and the baking powder. You want to mix this only until you see that dough just starting to come together. Seriously, stop stirring once the dry stuff is incorporated! Overmixing at this stage is how you get tough cookies, and we want fudgy ones!
Chilling and Rolling the Chocolate Crinkle Cookies Dough
This is the step everyone wants to skip, but please don’t! The dough needs to chill in your refrigerator for a full hour. This step is crucial because it firms up the fats, which prevents the cookies from spreading into sad, flat discs when they bake. Once chilled, scoop out small, uniform balls—about tablespoon size is perfect. Then, you need to coat them generously. Roll each ball completely, making sure every bit of chocolate dough is smothered in powdered sugar. Don’t be shy! You need that thick sugar layer to cause the dramatic cracks we love. See other great recipes like this one at Taste of Home.
Baking and Cooling Your Chocolate Crinkle Cookies
Get your oven ready! We are baking these beauties at 175°C (350°F). Place your heavily coated dough balls onto your prepared baking sheets, leaving a couple of inches between them because they will puff up a little. Slide them in and bake them for just 10 to 12 minutes. They should look set, but if you gently press on the edge, they should still feel slightly soft. Pull them out and let them cool on the pan for about five minutes before moving them to a wire rack to cool completely. That little bit of resting time lets the centers firm up just enough!
Tips for Perfect Chocolate Crinkle Cookies Every Time
Even though this is a super simple recipe, there are a few little secrets I’ve learned over the years that stop these cookies from turning into sad, flat chocolate hockey pucks instead of beautiful crinkles. Honestly, following the chilling and coating steps perfectly is half the battle. We want fudgy, not flaky!
My biggest piece of advice centers around temperature. When the dough is too warm, no amount of powdered sugar will save you from spreading catastrophe. If your kitchen is warm, you might even need to chill the dough for longer than the hour recommended. Keep it cold!
For more advanced tips on managing moisture in baked goods—which often ruins cookies and breads alike—you can check out my notes on [how to prevent pumpkin bread from drying out]; the principles of temperature are surprisingly similar.
Here are the three things folks mess up most often:
- Don’t Skip the Chill Time: Seriously, put the dough away for 60 minutes. If you try to roll warm dough, it will stick to your fingers, and it will melt on the baking sheet before it even hits the oven.
- Double Coat for Maximum Crinkle: For the absolute best visual effect, roll the dough ball in powdered sugar once, let it sit for five minutes, and then roll it a second time very thoroughly. This thick layer is what separates into those lovely white lines during baking. If you’re curious about how others handle the cracks, Allrecipes has a few variations you can look at.
- Mind Your Oven Temperature: These cookies bake fast! If your oven runs hot, they will dry out before the outside has a chance to set up and crack properly. Consider using an oven thermometer if you aren’t sure your temperature is accurate. We want chewy centers, not crispy edges!
Follow those tips, and I guarantee you’ll end up with the most stunning, delicious Chocolate Crinkle Cookies that look like you bought them from a professional bakery!
Ingredient Substitutions for Chocolate Crinkle Cookies
I get asked all the time about substitutions, which is totally normal when you’re looking for easy dessert ideas that fit what you have on hand. While this recipe is famous for using oil, which keeps the texture super soft and fudgy (you simply cannot beat it!), there are a few swaps you can try if you absolutely must skip an ingredient. Just know that every change affects that perfect crinkle or that dense center, so proceed with caution!
If you’re aiming for a slightly less sweet cookie, cutting down on the amount of powdered sugar you use for rolling is the easiest place to start. However, be warned: too little sugar and you won’t get the dramatic cracking we all love! For a different perspective on how to adjust ingredients in simple chocolate cookies, check out the tips listed over at Simply Recipes.
Here are the swaps I’ve cautiously experimented with:
Oil Alternatives
The vegetable oil is there for moisture and tenderness. It stays liquid at room temperature better than butter, helping keep the cookie soft. If you absolutely need to switch it out, melted coconut oil or even unsweetened applesauce could work in a pinch, but you might lose a little of that structural integrity. If you use applesauce, I would recommend adding an extra tablespoon of flour just to firm things up a bit, because applesauce adds a lot of water.
Flour Considerations
This recipe relies on all-purpose flour to balance the richness of the cocoa and oil. I haven’t had great luck swapping this out for gluten-free flour blends because the texture of Crinkle Cookies is so delicate—you really need the structure of regular flour. If you try a 1:1 GF blend, you’ll definitely need to drop the chilling time down to ensure they don’t turn crumbly.
Making it Dairy-Free (If Possible)
Since this recipe uses oil instead of butter, it’s almost dairy-free already! The eggs are the only sticking point unless you have a good flax egg substitute in mind, but I really think the texture depends on using real eggs for binding here. For the rolling sugar, standard powdered sugar is usually fine, but always double-check labels if you have serious allergies, just in case any anti-caking agent includes dairy.
Storing and Gifting Your Homemade Desserts (Chocolate Crinkle Cookies)
One of the best parts about having a batch of these incredible Chocolate Crinkle Cookies is knowing you have a stash of fudgy goodness waiting for you! Since these are so soft and moist, storage is important if you want to keep that perfect texture. You never want to keep these sitting out too long unprotected, or they’ll dry out faster than you’d like.
For keeping them fresh for snacking around the house, the key is an airtight container. Store them at room temperature, but make sure you separate the layers if you stack them! You don’t want all that powdered sugar getting smeared off during the night. Placing a small piece of wax paper or parchment between the layers works miracles. Stored this way, my family can make these last almost a week, though honestly, they usually vanish within three days!
Keeping Them Fudgy for Later
If you are planning ahead—which is great, because this is one of the best homemade desserts to prep early—you can actually freeze them! Once they are completely cooled, place the cookies on a baking sheet and freeze them until they are rock solid. Then, transfer them into a heavy-duty freezer bag. They’ll stay perfect for about two months. When you want one, just let it thaw on the counter for about 20 minutes. They taste like they just came out of the oven.
Packing Up These Sweet Treats for Sharing
These cookies are built for giving! You can’t ship them easily since the sugar coating tends to rub off in transit, but for local gifting, they are a huge hit. When you’re packaging them up, treat them delicately. I like using small bakery boxes or cute tins. Layer them with soft wax paper—don’t use plastic wrap directly on the sugar, as it tends to make it soggy later.
If you’re making these for a holiday party or dropping them off for neighbors, they look beautiful stacked next to something festive, like my recipe for a Christmas Punch Mocktail. The visual contrast between the snowy cookies and a bright red beverage is stunning. Just remember, they are better gifted—and eaten—within a few days of baking for the very best texture!
Frequently Asked Questions About Chocolate Crinkle Cookies
When baking up any recipe, especially great simple desserts like these, people always have questions! Don’t worry if you run into a little hiccup; usually, a small tweak is all you need for perfect results next time. We’re covering the most common issues I hear about when people try to master the art of the crinkle. These little bits of advice are my best baking tips for success!
Why aren’t my Chocolate Crinkle Cookies cracking?
Oh, the dreaded flat, non-cracked cookie! This is usually one of two things, and it’s often related to temperature or coating confusion. First, was your dough cold enough? If the dough is too warm when it hits the oven, it just melts and spreads before the sugar coating has a chance to set and crack. Make sure you chill it for that full hour!
Second, were the balls coated thoroughly enough? You really need a thick, generous blanket of powdered sugar on every single side before baking. If the dough peeks through, it won’t crackle there. I sometimes even do a double roll—coat it once, wait five minutes, and coat it again. That extra layer is what creates those gorgeous fissures when they bake!
Can I make this recipe ahead of time?
Yes, absolutely! I love making the dough ahead because it just means less work when I need cookies fast. Once you finish mixing the dough (before chilling), stash it in an airtight container in the fridge for up to three days. That extra time in the cold can actually make them even fudgier. When you’re ready to bake, let the dough warm up just slightly on the counter—maybe 15 minutes—so it’s rollable, but keep it cool! If you’re looking for more great make-ahead tips related to meals, you might want to browse my section on [easy dinner recipes]!
Are these considered Easy Desserts With Few Ingredients?
They certainly are! That’s one of the biggest selling points for these Chocolate Crinkle Cookies. When you look at the list, we are dealing mostly with pantry staples: sugar, oil, eggs, cocoa, flour, and baking powder, plus the rolling sugar. It’s a very short list, which is why I often recommend these when someone asks for easy desserts with few ingredients. You don’t need any fancy extracts, nuts, or specialized chocolate bars to make them taste phenomenal!
Estimated Nutritional Information for Chocolate Crinkle Cookies
I know sometimes we baker types are curious about what we are actually putting into our bodies when we reach for these fudgy treats! While my focus is always on flavor and texture, I did run a standard calculation based on the ingredient weights provided above. Remember, this is just an estimate, and where you get your ingredients (especially the sugar content in the powdered rolling coat) can change these numbers slightly.
I always use standard databases for my estimates, so consider this a good starting point for tracking macros, rather than a precise lab reading. Because this recipe is simple and uses oil instead of butter, the fat content is managed well, but we can’t hide that glorious sugar!
Here is the approximate breakdown per cookie, assuming the recipe yields the standard 1 batch size:
- Calories: Approximately 180-200 kcal
- Total Fat: Around 8-10g (This is mostly from the vegetable oil)
- Protein: About 2g
- Total Carbohydrates: Roughly 25-30g
- Dietary Fiber: About 1-2g
- Total Sugars: Approximately 18-22g (This is where most of the weight comes from, thanks to the dough sugar and the heavy rolling sugar coat!)
So, while they are definitely a sweet treat, they are reasonably portioned for a quick indulgence. These aren’t meant to be low-cal, they are meant to be perfectly fudgy and delicious! Just enjoy one or two with a big glass of milk, and don’t forget that they are best enjoyed fresh!
Share Your Chocolate Crinkle Cookies Creations
Now it’s your turn! I’ve told you all my family secrets and the best tips I have for getting those picture-perfect, snowy cracked tops. But honestly, the best part of sharing a recipe like these Chocolate Crinkle Cookies is seeing how they turn out in *your* kitchens!
I truly love hearing back from folks who tried this recipe. Did you make a double coating of sugar? Did they disappear as fast in your house as they do in mine? Please take a moment to leave a rating below—it helps other bakers know that this recipe is worth their time. And if you managed to get a beautiful photo of your fudgy results, I’d be thrilled if you shared it!
You can always reach out directly to me or the team at Recipes by Betty using our contact page if you have any super specific questions that didn’t get answered above. I check those messages regularly, and nothing makes me happier than troubleshooting a baking issue!
Baking is about sharing love, and these cookies are packed full of it. Thank you for trying out this wonderful, nostalgic recipe. Happy baking, and enjoy those rich, dark, crinkly bites! Remember, these are from my kitchen to yours, shared with love by Grace Williams, Contributor at Recipes by Betty.
Chocolate Crinkle Cookies
Equipment
- Mixing Bowls
- Baking sheets
Ingredients
- 200 g sugar
- 80 ml vegetable oil
- 2 eggs
- 60 g cocoa powder
- 200 g flour
- 1 tsp baking powder
For Rolling
- As needed Powdered sugar For rolling
Instructions
- Mix the sugar, oil, and eggs together in a bowl.
- Add the cocoa powder to the wet ingredients and mix until combined.
- Stir in the flour and baking powder until you form a dough.
- Chill the dough in the refrigerator for 1 hour.
- Roll the chilled dough into small balls and then roll each ball thoroughly in powdered sugar.
- Bake the cookies at 175°C (350°F) for 10 to 12 minutes.