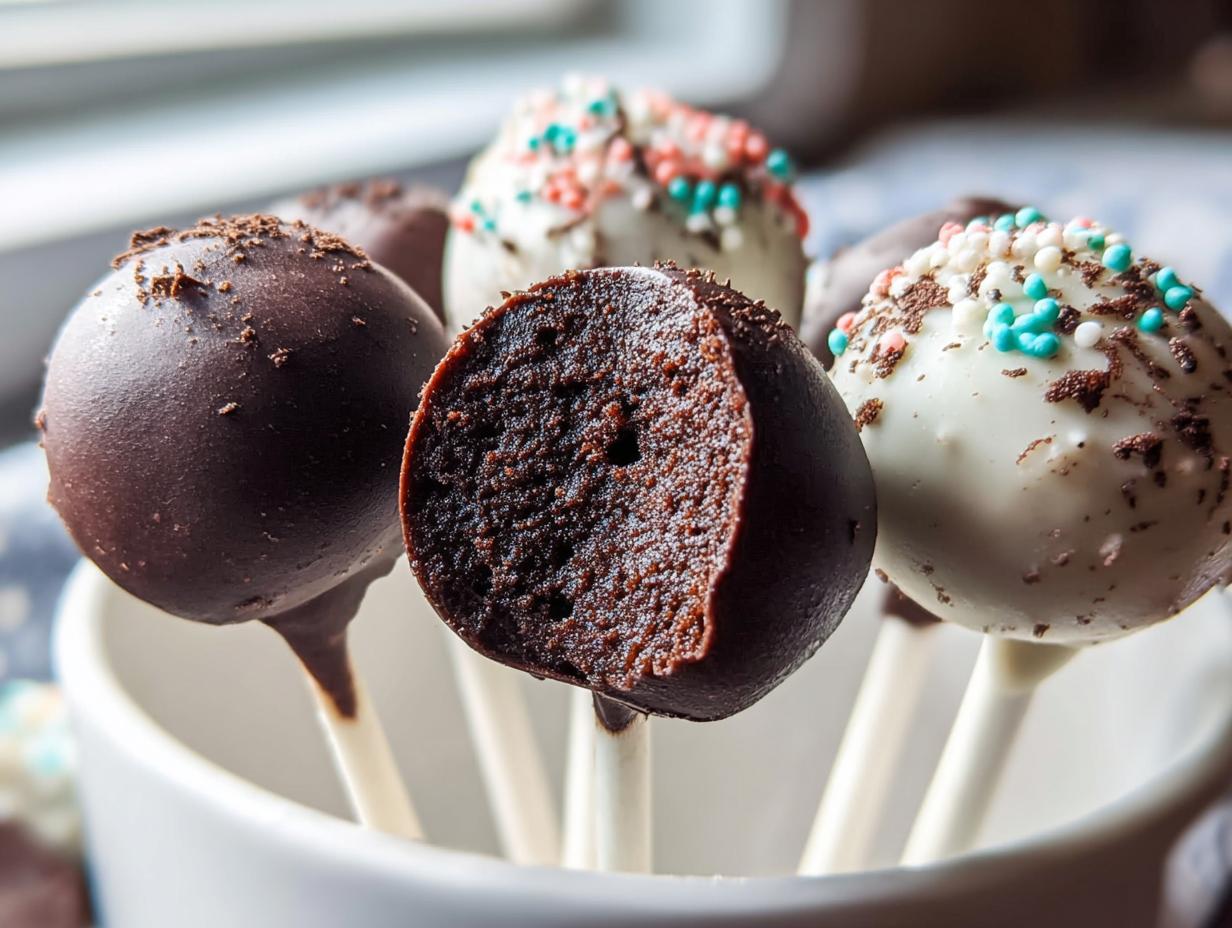
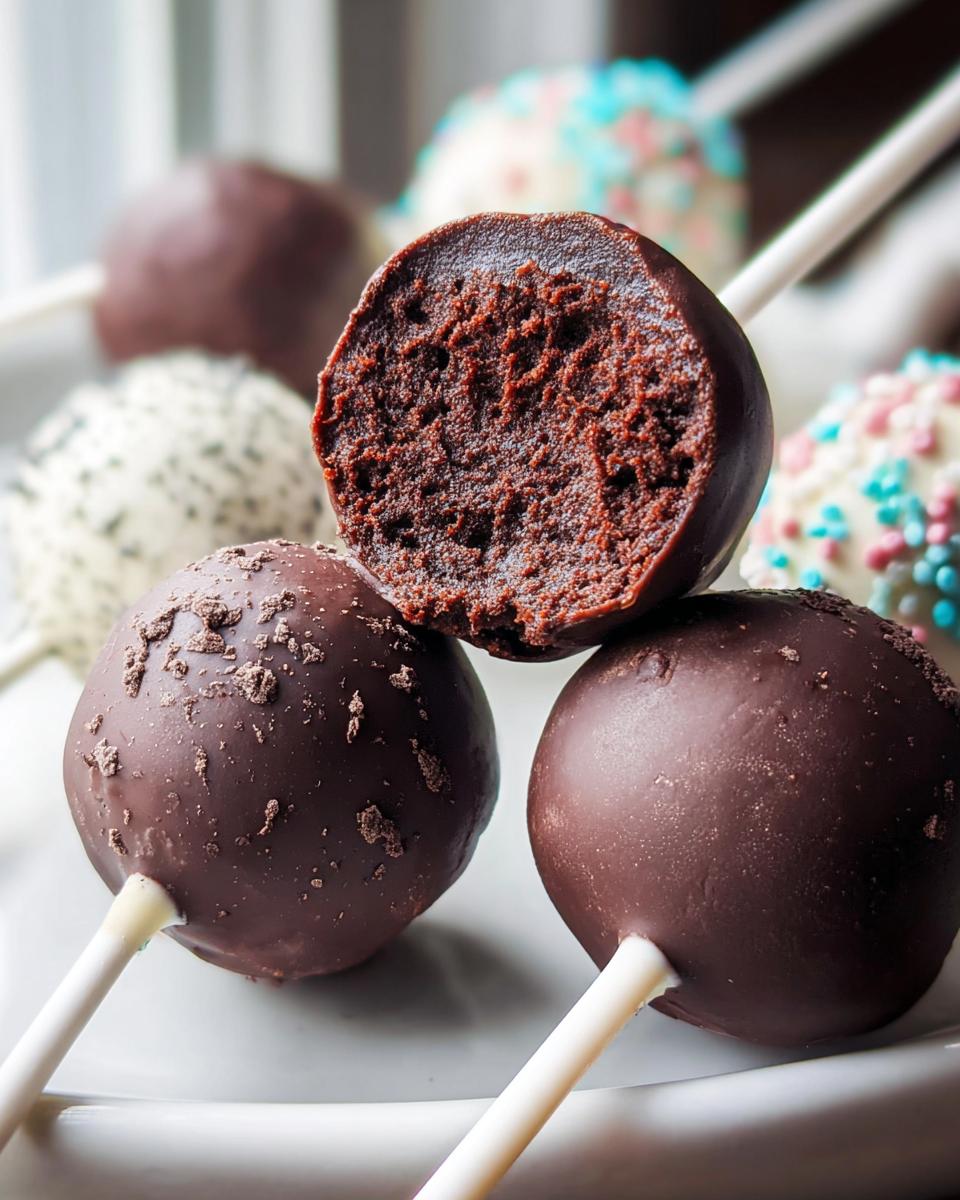
Oh my gosh, if you are looking for that *deep*, almost sinful chocolate flavor that just hugs your soul, stopped right here! We are talking about the ultimate comfort food on a stick: Chocolate Cake Pops. Seriously, these things are reliable winners every single time. I spent ages fiddling with the ratio of cake to frosting because I wanted that perfect, dense texture without any hint of greasiness that sometimes pops up. Once it finally clicked, wow! These became one of my most dependable desserts to serve when I need something easy that looks totally impressive. Trust me, you are going to love how simple these homemade delights are to pull together.
Why These Chocolate Cake Pops Are Easy Desserts With Few Ingredients
I adore recipes that need barely anything from the pantry, and these cake pops fit that bill perfectly. They truly shine as one of the best Easy Dessert Ideas you can try when you’re short on time or ingredients. Since the main component is already baked cake—which you can even use leftovers for!—we skip all the messy mixing and baking steps that slow you down. That means fewer dishes, less fuss, and more time enjoying the chocolate!
We only need three core things to make this magic happen, making them perfect candidates for no-bake treat nights. You end up with something that looks super fancy but requires almost zero effort.
Key Benefits of Making Chocolate Cake Pops
- They handle extremely well for large gatherings, which is why I always recommend them for parties—Easy Desserts For A Crowd, indeed!
- Minimal ingredient list means less grocery shopping and less room for error.
- The rich, deep chocolate flavor means they always feel indulgent, never cheap.
- Assembly is straightforward once you get the chilling time right!
Gathering Ingredients for Perfect Chocolate Cake Pops
When you’re making something this wonderfully rich, you don’t need a huge shopping list, thankfully. We rely on just a few fantastic components here. I like to think of this as one of those great chocolate lovers’ desserts where quality ingredients really make the magic happen. Since this is a cake pop recipe, we’re skipping the ‘baking from scratch’ part, which keeps our ingredient count delightfully low!
Ingredient Breakdown for Rich Chocolate Cake Pops
Here’s the short list you’ll need to gather up. Read those notes carefully, especially about letting the cake cool down completely—it makes everything so much easier when mixing!
- One whole batch of chocolate cake. Remember, this needs to be baked and completely cooled down before we even think about touching it!
- About 120 grams of rich chocolate frosting. This is the binder that holds our little balls together.
- Roughly 300 grams of dark or milk chocolate for the outer coating. Make sure this is ready to be melted down and lovely smooth.
Essential Equipment for Your Chocolate Cake Pops
You don’t need a whole bakery setup for these, thank goodness! Because we’re skipping the actual cake baking, our equipment list stays refreshingly short. We are focusing just on the assembly and dipping parts, which makes this one of those truly simple desserts.
Based on the recipe, you absolutely must have a sturdy mixing bowl and a baking sheet ready to go. The mixing bowl is where the crumb-and-frosting magic happens, and the baking sheet is crucial for supporting those little balls while they chill out!
Beyond those two, I always recommend having these extras on hand. Trust me, they save you so much headache!
- Parchment or Wax Paper: You need something cheap to line that baking sheet. It stops the molded balls from sticking while they firm up—a lifesaver!
- A Small Dipping Tool or Fork: You need something thin, like a lollipop stick or a sturdy cocktail fork, to anchor the stick and dip the ball. If you are using traditional sticks, make sure they are clean and food-safe.
- Small Glass or Mason Jar: This is my secret for dipping! Pouring the melted chocolate into a tall, narrow container makes dipping much easier because you get a fuller, smoother coat on the first try.
Step-by-Step Instructions to Make Chocolate Cake Pops
Alright, these instructions look simple on paper, but the technique here is everything, especially when it comes to getting that dense, non-crumbling center. Remember to move deliberately but gently through these stages. We want smooth sailing all the way to the final chocolate shell!
Mixing the Cake Base
First things first: you need to take that completely cooled cake and just crumble it! Get it as fine as you possibly can in your mixing bowl. Think of fine sand, not big chunks. Then, you introduce the frosting. Start stirring that frosting into the crumbs. You need to work it with your hands or a sturdy spoon until it all comes together like thick, slightly sticky dough. This step is absolutely key—if the mixture is too dry or crumbly, your pops will fall apart when you try to roll them, so just keep working it until it holds its shape when squeezed. That moldable consistency is pure gold!
Shaping and Chilling the Cake Balls
Now for the fun part! Use a small scoop or just teaspoons to measure out uniform portions of your cake mixture. Roll each portion firmly between your palms to create smooth, tight little balls. Uniformity helps them dip evenly later on. Once you have them all rolled, line them up neatly on that parchment-lined baking sheet. Here’s the most important non-baking step: they need to chill! Pop the whole tray into the fridge for at least 30 minutes. This resting period firms them up so much that they won’t fall apart when we dip them in warm chocolate. Don’t skip this chilling time; I learned that the hard way!
Dipping and Setting the Chocolate Coating for Chocolate Cake Pops
While the balls are getting cold, melt down your coating chocolate gently. Once chilled, this is where we secure the stick. Dip just the tip of your stick maybe a quarter of an inch into the melted chocolate and then push it carefully into the center of a cake ball—just enough to stick, not so much that it pokes the other side! Let that tiny dab set for a minute. That little chocolate anchor is what keeps your stick firmly inside. Then, swirl the whole pop through the rest of the melted chocolate until it’s completely coated. Gently tap off any big drips and stand them upright (I use Styrofoam blocks or jars) to let the coating set completely hard before you even think about serving these beauties, maybe check out some inspiration for fun dipped treats here: Monster Marshmallow Pops!
Tips for Success When Making Chocolate Cake Pops
Even though these are simple desserts, the structure relies heavily on the consistency of your cake/frosting mix. If you follow the steps, you’ll be fine, but I want you to be prepared just in case things go a little sideways. Nobody wants chocolate pops that look lovely but then immediately crumble when you try to lift them! I’ve been there, and it’s so frustrating when you’re looking for quick baking ideas.
Getting the right balance ensures your homemade desserts look professional. If you want all the deep-dive baking wisdom I’ve gathered from tweaking other people’s recipes—like my guide on perfecting scones—it all comes down to controlling moisture!
Troubleshooting Your Chocolate Cake Pops Mixture
Remember that cake texture can absolutely vary depending on the type of cake you started with. Sometimes your frosting might be really thin, or your crumbs might be drier than expected. This is where you need to step in and adjust!
- Mixture Is Too Dry or Crumbly: If you are rolling the balls and they are just refusing to stick together, don’t panic and throw it out! Just stir in an extra teaspoon, or maybe two, of your chocolate frosting. Work it in slowly until it grabs hold and forms a cohesive ball. You are looking for something that feels like playdough.
- Mixture Is Too Wet or Oily: This usually happens if your original cake was very moist or you used a cream-cheese based frosting. If the mixture is squishy and leaving greasy marks on your hand, it’s too soft. Pop the whole mixing bowl into the refrigerator for 15 minutes. That firm chill tightens everything up so you can roll it properly.
Also, a quick note on the dipping chocolate itself: if your melted chocolate suddenly looks dull, grainy, or thick—that’s seizing! It often happens if a tiny drop of water gets in there. If that happens, you can often save it by stirring in a teaspoon of vegetable oil or coconut oil to thin it back out. It might not be as shiny as you hoped, but it will still coat nicely!
Storage and Serving Suggestions for Your Easy Treats
Okay, once you’ve gone through the effort of coating those gorgeous Chocolate Cake Pops, the major victory is won! But how do you keep these Easy Treats looking perfect until party time? Storage is key here, especially since we are dealing with a chocolate shell holding a moist interior.
My absolute number one rule is to always keep them cool. Chocolate pops do so much better when stored in the refrigerator. You want to place them upright, maybe in a tall glass or a ceramic container, making sure they aren’t touching each other during storage. If they bump around, the chocolate coating can crack or chip, and nobody wants a sad, chipped Pop!
They will keep perfectly fine in an airtight container in the fridge for up to a week. If you’re planning way ahead for a big celebration, you can actually freeze them perfectly! Just make sure they are fully hardened first. Pop them in a freezer-safe bag without squishing them. They thaw beautifully on the counter for about an hour before you want to serve them. Isn’t it great that these Chocolate Cake Pops are also great for prepping?
When it comes to serving, keep it simple! Because they are self-contained, they are the ultimate appetizer-style sweet. You can skip plates entirely. Just offer up a stand filled with them—it looks fantastic immediately. If you’re hosting a big event, check out some of my favorite seasonal ideas over at holiday party recipes for inspiration on presentation!
For a little extra flair when serving, you can always dip the bottom third of the hardened chocolate in some colorful sprinkles or finely chopped nuts right after the initial dip, just before the chocolate sets rock hard. It instantly elevates them from simple treat to showstopper!
Frequently Asked Questions About Chocolate Cake Pops
I get so many questions about these little bites of heaven, which totally makes sense because even though they are easy, people want them to be absolutely perfect for their parties or just for a great weekend baking project. Since these are one of the best easy family dinner dessert ideas, I figure I should spill all the remaining secrets right here!
Can I use store-bought cake for these Chocolate Cake Pops?
Oh, absolutely, you definitely can—and honestly, that’s how most people make these! This recipe is fantastic because it welcomes a pre-baked cake, whether purchased from a bakery or even a box mix you whipped up yesterday. That’s what makes them such wonderful Simple Desserts! The only real rule is that the cake has to be completely cooled, no matter what. If it’s even slightly warm, it’ll just fight the frosting and turn into cake soup instead of that perfect, moldable dough we need.
What is the best chocolate to use for dipping?
This is where people sometimes run into trouble, so pay attention! You have two main paths here. You can use good quality dark or milk chocolate (like the recipe calls for), BUT you often have to add a little oil or shortening to thin it just right so it dips smoothly. If you want my cheat code for the easiest time, grab high-quality melting wafers or candy coating. They are formulated to melt down smoothly, set up hard and glossy quickly, and frankly, they rarely seize up on you. It might cost a tiny bit more than a regular bar, but trust me when I say the smooth, perfect shell is worth skipping the headache!
How do I make these Easy Desserts For A Crowd ahead of time?
This is the biggest win for planners! You can absolutely make these ahead of time. The best way to manage it is to prepare and chill the cake balls first—get them rolled nice and firm—and store those un-dipped balls in an airtight container in the fridge for up to three days. Honestly, they might even get firmer and better while chilling solo! Then, a day before your event, melt your chocolate and dip them all at once. Once the chocolate coating is completely set, they are ready to go. This breaks the recipe into two fun, manageable sessions instead of being stuck in the kitchen the whole day of the party!
Estimated Nutritional Profile for Chocolate Cake Pops
Now, look, I’m a cook, not a certified nutritionist, so please take these numbers with a huge grain of salt! Since we are dealing with fudgy cake, frosting, and thick chocolate coating, these aren’t exactly diet food, but they are totally worth the indulgence. These figures are estimates based on using standard chocolate cake mix, milk chocolate coating, and basic store-bought frosting.
The final count really depends on how big you roll your balls—mine tend to be a little chunky, I won’t lie! If you’re watching what you eat, maybe skip the frosting and switch to a lighter ganache, but for the recipe as written, here is what you can roughly expect per cake pop, assuming the batch yields 24 pieces:
- Calories: Estimated between 210–250 kcal
- Total Fat: Around 10g–14g (Mostly from the chocolate coating)
- Protein: Approximately 2g–3g
- Total Carbohydrates: Roughly 28g–34g
These numbers fluctuate wildly based on whether you use dark chocolate or sweeter milk chocolate coating, and how much frosting sneaks its way in there. Treat this more as general guidance than strict nutritional fact, because honestly, the joy they bring far outweighs any calorie counting!
Share Your Homemade Desserts Experience
Well, that’s it! We’ve gone from a simple, pre-baked cake to these absolutely decadent, deeply chocolatey Chocolate Cake Pops. I hope you found this recipe to be one of the best Easy Treats you’ve tried recently. There’s just something so satisfying about taking humble ingredients and turning them into something incredible for a crowd, right?
Now that you’ve tried putting these together, I truly want to hear about it! Were they a hit at your party? Did you stick with my recommendation for dark chocolate, or did you decide to experiment with white chocolate for a fun twist? These Homemade Desserts are meant to be shared, so don’t be shy!
If you followed along and made these, please, please leave me a rating! Five stars means I can brag to my family that my balancing act with the frosting was perfect! And if you took a picture of your finished, glossy pops, I would be thrilled if you shared it with me. You can drop your reviews, photos, or any little tips you discovered down below, or even send a picture directly through the contact page. Happy dipping, friend!

Chocolate Cake Pops
Equipment
- Mixing Bowl
- Baking Sheet
Ingredients
- 1 chocolate cake baked & cooled
- 120 g chocolate frosting
- 300 g dark or milk chocolate melted
Instructions
- Crumble the chocolate cake into fine crumbs.
- Mix the cake crumbs with the frosting until the mixture is moldable.
- Roll the mixture into balls and place them on a baking sheet. Chill the balls.
- Dip the ends of the sticks into a small amount of melted chocolate, then insert them into the chilled cake balls.
- Coat each cake pop fully in the remaining melted chocolate.
- Let the chocolate coating set completely before you serve the cake pops.