Oh, getting outside when the weather’s perfect is just the best, isn’t it? But hauling elaborate meals just ruins the vibe before you even get the blanket unfolded. That’s why I am obsessed with simple, sturdy food that tastes amazing cold. I’ve been perfecting this recipe forever because I swear, every other picnic sandwich turns into a soggy mess by the time you find the perfect spot.
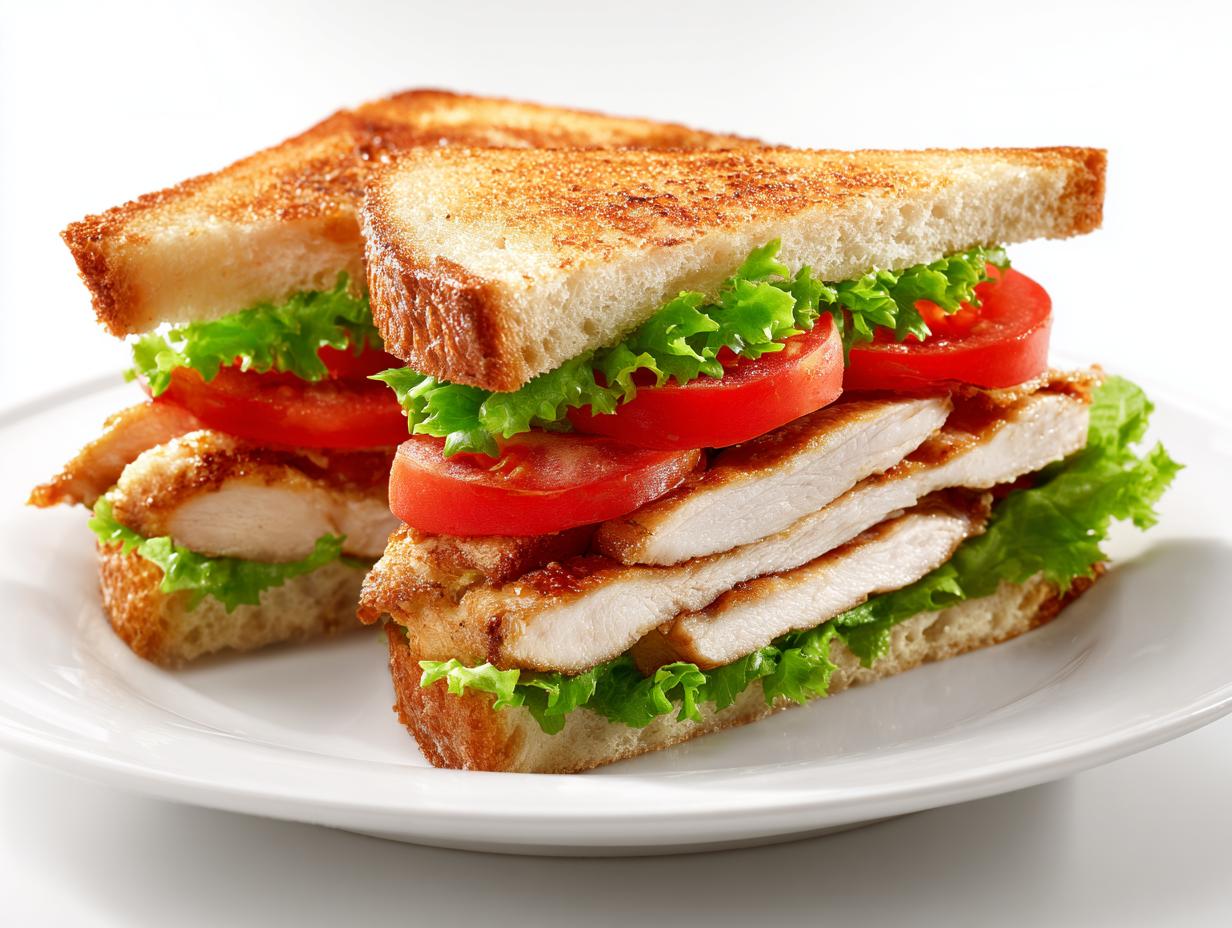
Trust me, this is the ultimate no-fuss **Chicken Sandwich Picnic** recipe that stays fresh! I remember one disastrous trip where the ham and cheese dripped everywhere? Never again. My goal was creating something where the bread held up and the fillings felt satisfying, not squishy, even if it sat in the basket for an hour or two. These sandwiches actually stay crisp and easy to carry for picnics, which is everything when you’re trying to relax!
Why This Chicken Sandwich Picnic Recipe Works for Outdoor Meals
Honestly, the best part of any outdoor meal is getting there and actually relaxing, right? We aren’t hauling coolers full of complicated dishes when we go out. This recipe is designed for maximum portability. It’s sturdy, it’s delicious cold, and it requires almost zero attention once it’s assembled.
If you’re packing for a hike or just heading to the local park, you need food that travels well. That’s where this recipe shines—it’s genuinely the ultimate easy picnic sandwich. It holds its shape! You don’t want to deal with ingredients sliding out halfway up the trail, that’s just frustrating.
Quick Prep Time for Your Chicken Sandwich Picnic
Who has time to be stuck in the kitchen for an hour when the sun is shining? That’s the beauty here. We are looking at about five minutes, total, from grab-and-go to done. Think about that! You spend less time prepping and more time planning your route to the perfect shady tree. This speed means you can whip these up last minute before running out the door.
Essential Components for the Perfect Chicken Sandwich Picnic
Okay, since this recipe is so simple, we have to talk about why these few ingredients make such a difference. When you only have five things in your sandwich, quality really matters, especially if you want a truly satisfying **chicken sandwich picnic** experience. We aren’t hiding anything under piles of fancy cheese or sauces here; it’s all about the fundamentals.
The cold temperature is the key to success for this lunch, so make sure your chicken is beautifully chilled before you start layering. And because we built this to be sturdy, checking your ingredients list against mine is important—it helps you trust the final result won’t fall apart on your blanket. If you’re curious about using different proteins in cold sandwiches, check out my thoughts over on that avocado chicken salad post; it uses similar principles!
Ingredient Clarity for Your Picnic Chicken Sandwich
Let’s lay out exactly what you need. Remember, being precise with simple recipes is how we achieve that professional, reliable outcome every single time. This isn’t the place to eyeball measurements!
- 2 slices of bread (sturdy white or whole wheat works best)
- 1 grilled chicken breast, sliced thinly
- 1 crisp lettuce leaf (Romaine is great because it won’t wilt fast!)
- 2 bright red tomato slices
- 1 tbsp mayonnaise or yogurt sauce (Whatever creamy spread you prefer!)
See? That’s it! Prep only involves slicing that pre-cooked chicken breast. Having everything ready to go makes assembly lightning fast for your **picnic chicken sandwich**!
Step-by-Step Assembly of Your Chicken Sandwich Picnic
Now we get to the fun part: putting it all together! Getting the layers right is the secret to making sure this **Chicken Sandwich Picnic** travels well without sliding into a sad pile inside your container. We’re keeping this moving fast here since it only takes five minutes from start to finish. Remember, every step you take now equals more relaxation time later!
Since we need structure for any good outdoor meal, we are treating this like we are building a tiny, delicious fortress. Read through these steps once, and you’ll have your lunch ready to pack in no time. For more ideas on wrapping protein-packed lunches, take a peek at my chicken wrap recipe!
Prepping the Bread and Spreads
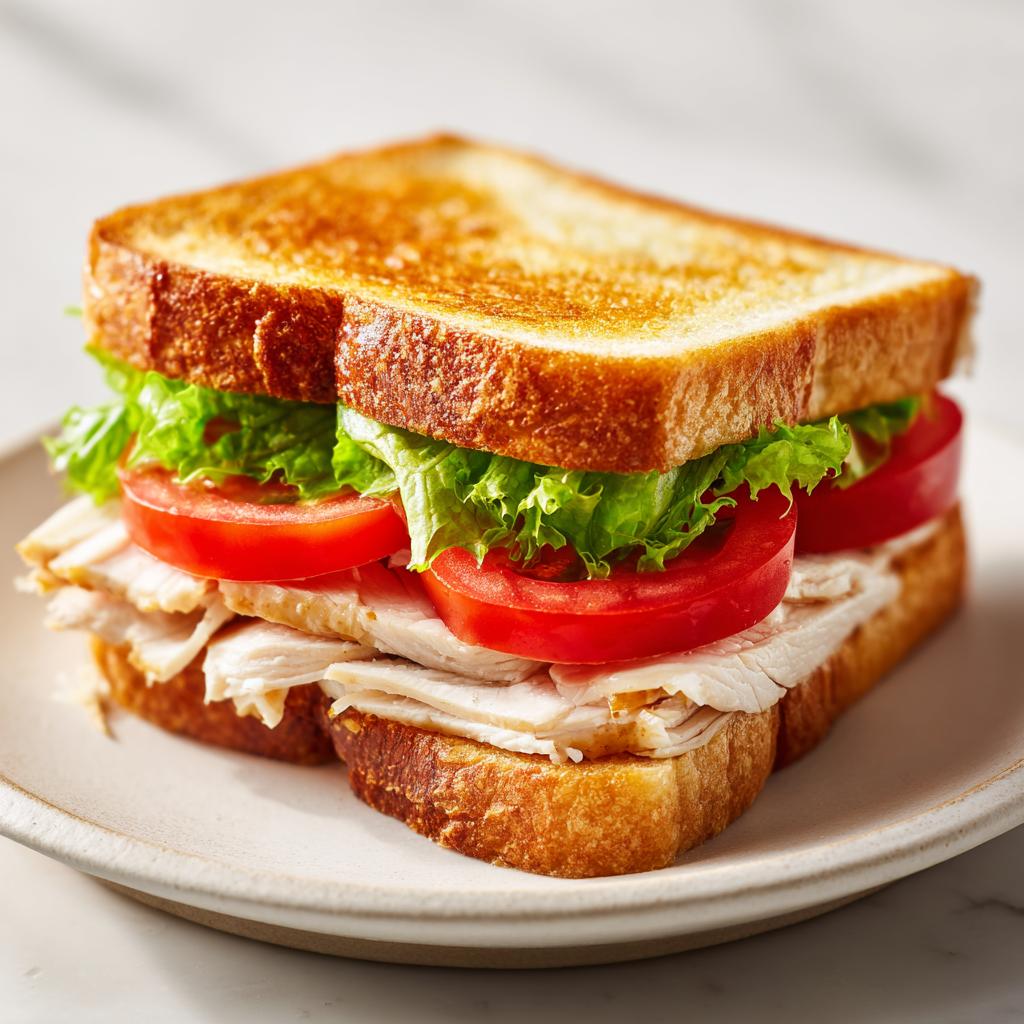
First things first: grab those two slices of bread. You definitely want to toast them, and I mean *lightly*! Don’t turn them into crackers; we just need to dry the surface a tiny bit. This light toasting is crucial because it puts up a tiny barrier against moisture from the fillings. Think of it as giving your bread a little suit of armor.
Once they have cooled for just a second—we don’t want the spread to melt off—immediately spread that tablespoon of mayonnaise or yogurt sauce evenly across both slices. Make sure you get right to the edges! This creamy layer acts as the next sealing agent.
Layering for Maximum Picnic Flavor
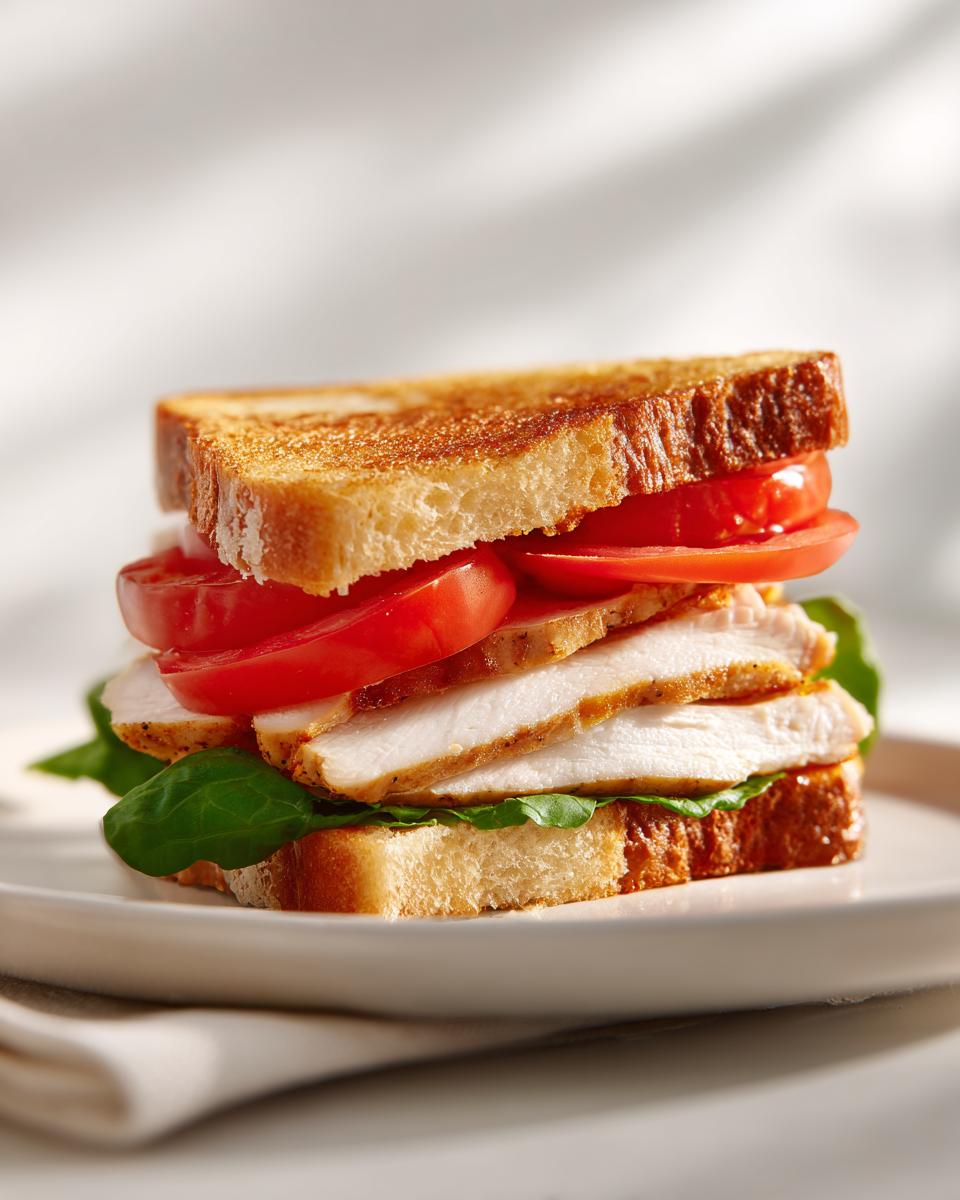
Time to build! I suggest putting the chicken down first on the bottom slice. Even though we toasted the bread, keeping the wetter items—the lettuce and tomato—off the direct bread surface as much as possible helps immensely. So, lay down your thinly sliced grilled chicken breast across the entire base.
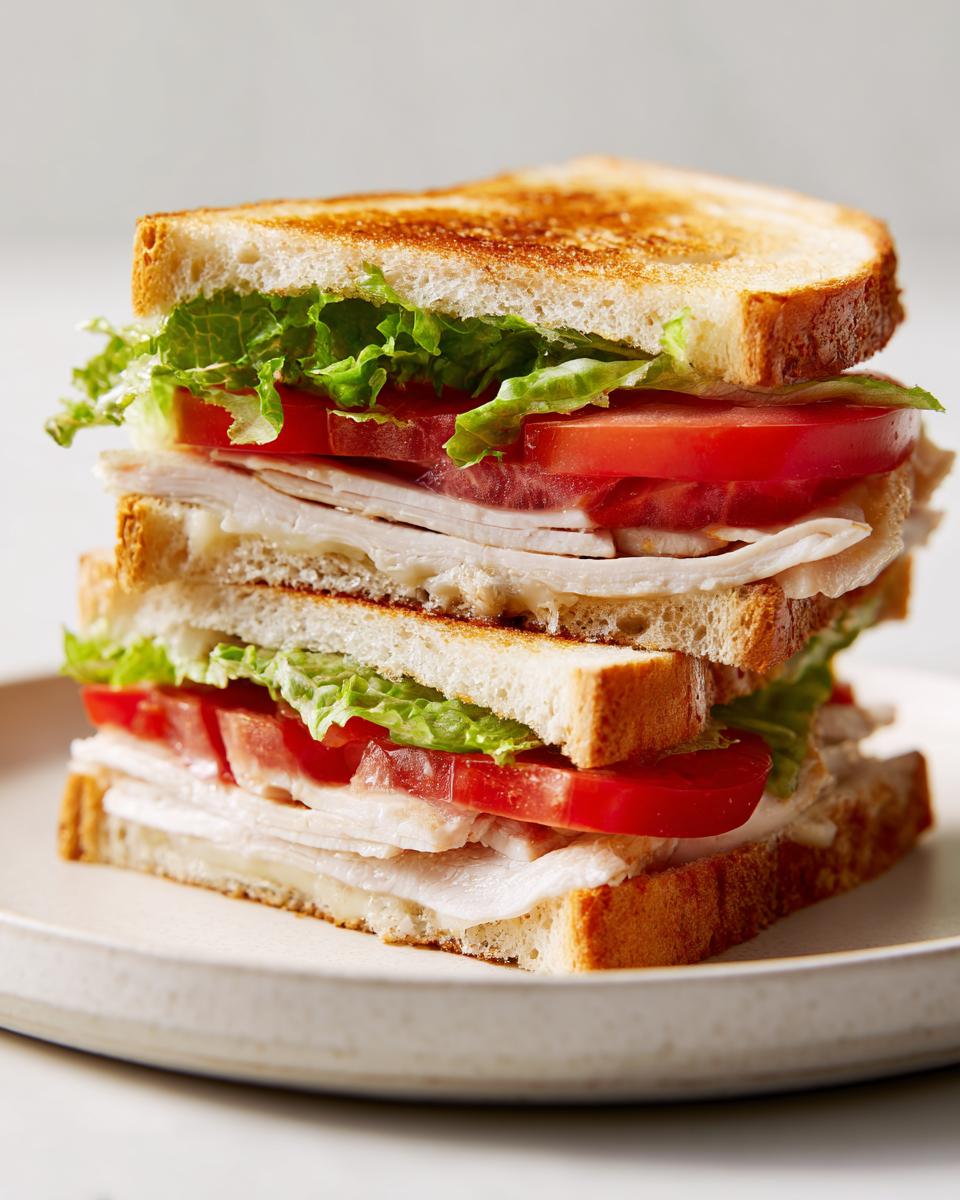
Next up is the lettuce leaf. Try to fold it or tear it so it covers the chicken uniformly. Then, place your two slices of tomato right on top of the lettuce. Finally, gently cap it with the top piece of bread. Don’t press down too hard yet! Close the sandwich, and then you can slice that beauty diagonally. Triangles just look better on a picnic blanket, doesn’t that seem right?
Expert Tips for the Best Chicken Sandwich Picnic Experience
Okay, assembling the sandwich in five minutes is great, but keeping it perfect until lunchtime is the real trick to a successful outdoor meal. We worked hard to get that light toast, so we can’t let the humidity ruin our perfect **Chicken Sandwich Picnic** right before we eat!
Since we are aiming for that effortless vibe, smart packing is the key to transport success. Nobody wants a squished sandwich when they open the basket. These little pointers I’ve learned over the years are what separate a good packed lunch from a great one. For more insights on keeping baked goods happy on the go, you can check out my expert baking tips!
Making Your Chicken Sandwich Picnic Presentation Ready
This tip is pure showmanship, but it genuinely helps keep things tidy! Once you’ve cut your sandwich diagonally, don’t just toss it in a plastic bag. Wrap each one individually, tightly, in parchment paper. I love the look when it’s folded neatly. It keeps little bits of lettuce from sneaking out the sides.
Then, for the final touch that screams ‘picnic chic,’ take a piece of kitchen twine and tie a simple bow around the entire paper-wrapped sandwich. It looks totally adorable, keeps everything secure, and signals to everyone that you packed this beauty with care. It’s practical magic!
Ingredient Notes and Substitutions for this Easy Picnic Sandwich
You know, the best part about simple recipes for your **easy picnic sandwich** is that they are also wildly adaptable once you understand the roles the ingredients play. I gave you my favorite way to build this **chicken sandwich picnic**, but life happens, and pantries look different from house to house!
Don’t sweat it if you don’t have exactly what I listed; just follow the structural logic! We need a sturdy carb base, a protein, a tender green, a bit of moisture/acidity, and that creamy binder. If you want to see how I approach swapping out key elements in other recipes, check out my thoughts on substitutions when making salmon patties; the strategy is similar!
If you are short on one component, think about what job it does. Can another ingredient step up? Absolutely!
Swapping Out the Creamy Binder
I listed mayonnaise or a yogurt sauce because they provide that necessary moisture and tang without adding too much liquid that will soak into the bread. If you skip the mayo, you need a replacement that does the same job. Plain Greek yogurt works beautifully if you want something a little lighter. Some people also swear by a thin smear of Dijon mustard—it gives a lovely little kick.
If you’re trying to keep things dairy-free or just feeling a bit adventurous, try hummus! A thin layer of roasted red pepper hummus also seals the bread nicely and adds a deep flavor that pairs surprisingly well with grilled chicken. Just make sure whatever you use is spread thinly so you don’t compromise the structure of your perfectly toasted bread.
Bread Choices for Sturdiness
White sandwich bread is my go-to because it toasts just right—it gets crisp but never hard. But if you are heading out on a longer trip, you might want something tougher. A good sourdough loaf holds up like a champ, though you might want to use room-temperature chicken instead of chilled to prevent the sour notes from being too harsh when cold.
Skip anything that is super soft or has tons of holes, like focaccia, because those air pockets will become traps for soggy spots. We need density for this travel-friendly **picnic chicken sandwich**! Honestly, if your bread is slightly stale, just forget the toasting step—it might be sturdy enough on its own, but I always recommend that quick trip to the toaster!
Serving Suggestions for Your Outdoor Meal
A great sandwich deserves a great sidekick, but when you’re packing a lunch to eat outside, convenience is king. We aren’t dealing with anything that needs to stay piping hot or anything that wilts if you look at it wrong. I like to keep my accompaniments simple, fresh, and easy to eat with just a plastic fork or, even better, your fingers!
Packing a few vibrant items makes the meal feel so much more special than just eating a dry sandwich alone. Think color and crunch! Since this is a hearty chicken sandwich, you want sides that cleanse the palate a little bit. My go-to basket fillers are usually simple starches and fresh fruit.
Travel-Friendly Sides That Go Perfectly
For something satisfying that won’t need reheating, nothing beats a classic cold side. I always preach about making a big batch of my classic recipe because it tastes even better the next day!
- Potato Salad: You absolutely cannot go wrong with a great, tangy potato salad. It feels classic and holds up beautifully in a sealed container. Check out my recipe for the classic American potato salad—it’s creamy but stays firm!
- Crunchy Veggie Sticks: Forget limp carrot sticks. Pack carrots, celery, and bell peppers cut thick so they stay crisp. Bring a small container of ranch dressing for dipping if you want to feel fancy, but the crispness is the main event.
- Hard-Boiled Eggs: These are pure protein power and require zero fuss. Peel them before you leave home so you don’t have to deal with shells at the park.
Sweetness to Balance the Savory
You need something sweet to finish the meal off, and fruit packed ahead of time is always the winner for me. It hydrates you and satisfies that post-sandwich craving.
Grapes—still on the vine—are fantastic because they’re naturally portioned and easy to grab. I also love bringing along sturdy berries like blueberries or blackberries in a rigid container so they don’t get crushed under your blanket. If you prefer a pre-cut option, bring a crisp apple that you’ve tossed lightly in lemon juice so it stays looking nice and fresh until you’re ready to eat!
Storage and Reheating Instructions
Now, this is critical because we want this **Chicken Sandwich Picnic** to stay safe and delicious, not sketchy. Since this whole recipe is built around using pre-cooked chicken and serving it cold, storage is actually really straightforward—which is another win for us picnickers!
The primary concern when you are outside eating is temperature control. Because we used a creamy element (that mayo or yogurt sauce), we absolutely must respect food safety, especially on warmer days. If you’re heading out for a quick lunch, it’s tough, but aim to keep the sandwich cool until you sit down to eat.
Keeping it Cool Until Lunchtime
When you’re packing up your basket, don’t just toss the wrapped sandwiches in. You need cold insulation! Place your parchment-wrapped sandwiches directly into a small, sealed container or a zip-top bag. This protects them from moisture transfer, which ruins our lovely toasted bread layer.
Then, stick that container right next to your ice packs or frozen water bottles in your cooler bag. You want the ambient temperature of the sandwich to stay below 40°F (4°C) as long as possible. If you know you’ll be sitting out for hours in direct sun, maybe pack the components separately so you only assemble right before eating—though honestly, I find wrapping it tight does the job well enough for a couple of hours!
What About Leftovers?
If you are lucky enough to have any of this **easy picnic sandwich** left over—which I doubt, knowing how good they are!—you can safely store them. Because they were wrapped well and kept cold, they should be fine in the fridge for up to two days. I think they are best eaten the very next day, though.
As for reheating? Don’t even bother! This is strictly a cold sandwich. If you try to heat it up, that light toast will get chewy, the lettuce will wilt immediately, and you’ll lose all the refreshing qualities this recipe was built around. Seriously, just pack it, chill it, and eat it cold!
Frequently Asked Questions About Picnic Sandwiches
I get so many questions when people try to adapt recipes for outdoor meals. It makes total sense! Packing is a science, and you want to make sure your food survives the journey looking as good as it did leaving your kitchen counter. Here are a few things I always hear folks ask when planning their **picnic chicken sandwich**.
If you’re interested in the nutritional side of things, especially if you often use chicken salad instead of sliced breast, you might find my thoughts on health benefits of my avocado chicken salad interesting! But for now, let’s stick to the logistics of sandwich building.
Can I make this picnic chicken sandwich the night before?
You absolutely can prep everything the night before, but here’s my crucial advice: DO NOT assemble it completely! If you follow the assembly steps last night, you’ll wake up to a wet mess that nobody wants. The secret to keeping this lunch perfect is separating the dry bread from the wet layers.
So, the night before, slice your chicken, wash and dry your lettuce thoroughly, and slice your tomato. Store all those fillings in airtight containers in the fridge. That light toast on the bread is the key, so only toast it right before you start layering everything in the morning. That little bit of heat protection you add right before leaving makes all the difference!
What is the best bread for an easy picnic sandwich?
For an **easy picnic sandwich**, you need something that balances softness with structure. If the bread is too soft, it’ll compress the second you put it in the basket. If it’s too hard, it becomes impossible to bite through once it chills in the cooler.
My favorite is a firm, classic white bread or a hearty whole wheat because they take toasting so well. Sourdough is also a fantastic choice if you like a little tang! Definitely avoid breads that are high in moisture already, like brioche or very airy ciabatta. Those are lovely for indoor meals, but they weep when they meet the cold fillings on a long trek outdoors.
How do I stop the tomato from making my chicken sandwich picnic soggy?
Tomatoes are beautiful, but they are little water balloons threatening your bread structure! The layered approach helps a lot here. If you look back at the assembly steps, I put the lettuce leaf directly between the tomato and the chicken/bread layer. That dried lettuce acts like a tiny green sponge, absorbing any initial juices.
Also, slice your tomatoes thinner than you think you should! Thinner slices release less water overall compared to one thick, juicy slab. If it’s a really hot day, you can even try blotting the tomato slices gently with a paper towel after slicing before you layer them in. It seems extreme, but it works wonders for an all-day picnic!
Recipe Notes and Author Credit
Whew! That’s how you pack a lunch that travels beautifully and tastes like sunshine when you finally unwrap it. I hope this easy **Chicken Sandwich Picnic** becomes a staple for all your outdoor adventures this season. Honestly, when you make something this simple taste this good, you want to shout it from the rooftops!
If you tried this recipe out on your recent adventure and it was a huge hit—or if you tweaked the sauce and found a revolutionary new combination—please, PLEASE let me know! Leaving a rating or a quick comment below helps other hungry picnickers find this reliable recipe. It means the world to me when I hear how much your family enjoyed the meal!
If you have suggestions for pairings, or if you just generally need to tell me what you thought of my packing tips, you can always reach out through the comments or head over to the contact page here: Send a message to the kitchen.
Happy Picnicking!
By Clara Bennett, Lead Plate Designer at Recipes by Betty.
Chicken Sandwich Picnic
Equipment
- Toaster
Ingredients
- 2 slices bread
- 1 grilled chicken breast sliced
- 1 lettuce leaf
- 2 tomato slices
- 1 tbsp mayonnaise or yogurt sauce
Instructions
- Toast the bread lightly.
- Spread the sauce on the bread slices.
- Layer the chicken, lettuce, and tomato on one slice.
- Close the sandwich and cut it diagonally.