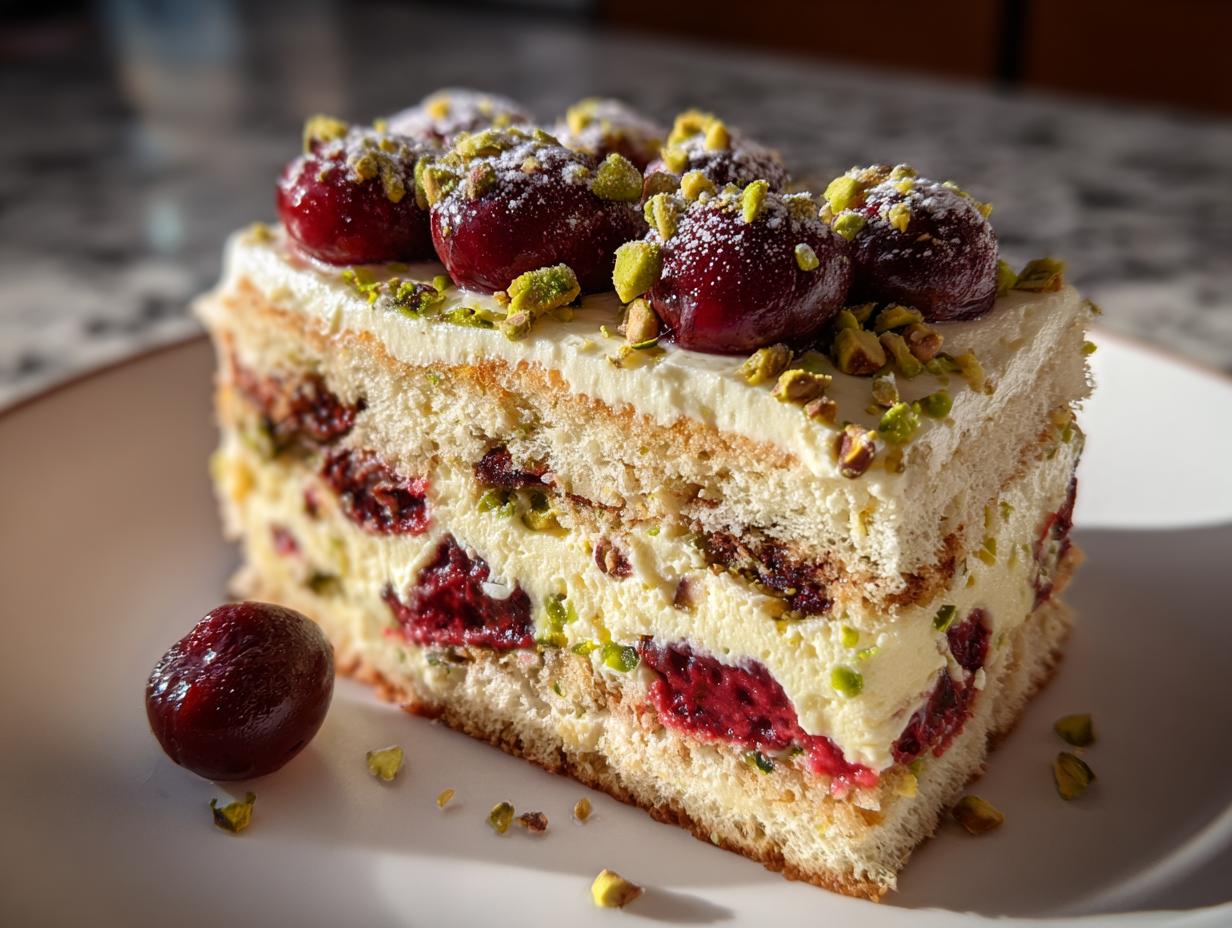
There’s just something captivating about Italian desserts, isn’t there? They always manage to feel incredibly fancy but rarely require you to be in the kitchen for days. That’s why I had to share this showstopper: my easy Cherry Pistachio Tiramisu. Trust me, ditch the boring cocoa powder for a moment.
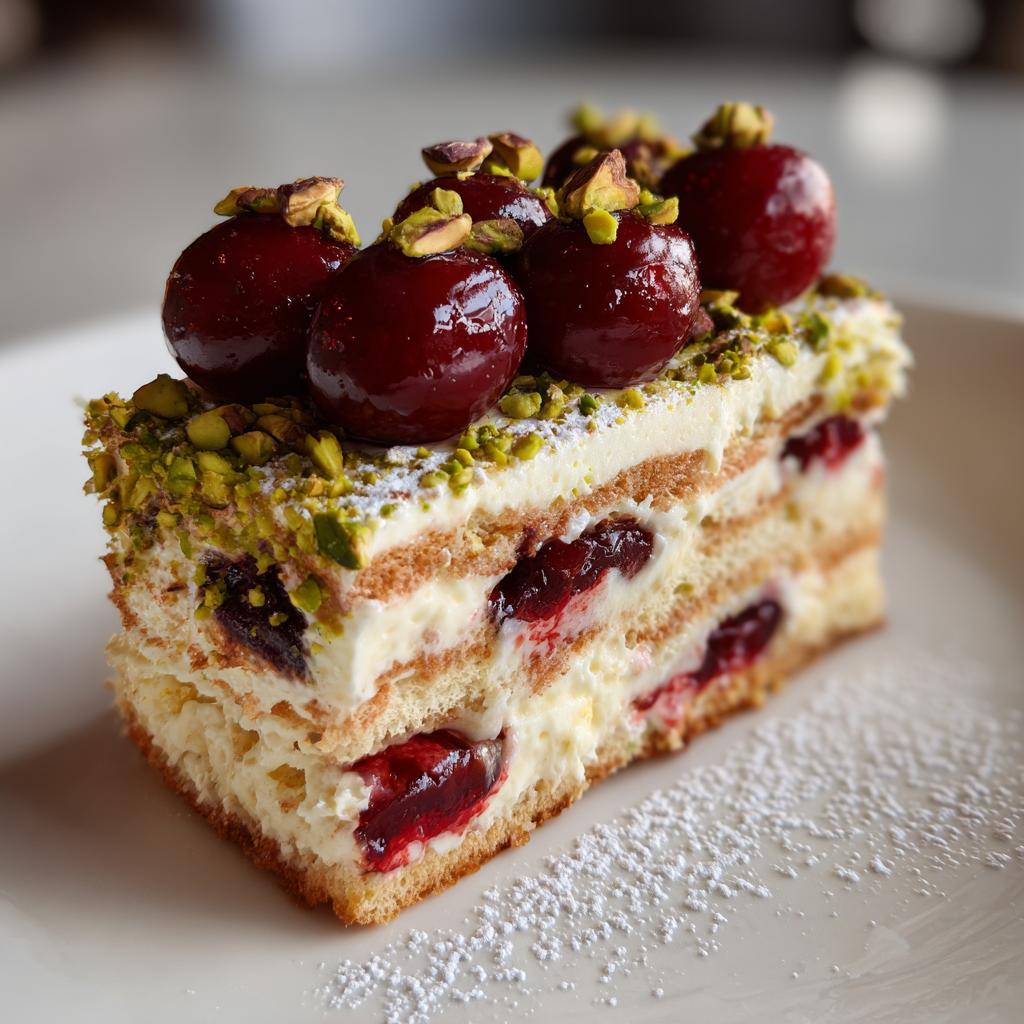
The moment you layer in those bright green pistachios against the deep red cherries, you know this isn’t your standard coffee dip. That nutty crunch gives the whole thing a beautiful contrast that just makes this dessert feel so special. It’s layered elegance, and honestly, you won’t believe how little time you spend working on it!
Why This Cherry Pistachio Tiramisu Stands Out
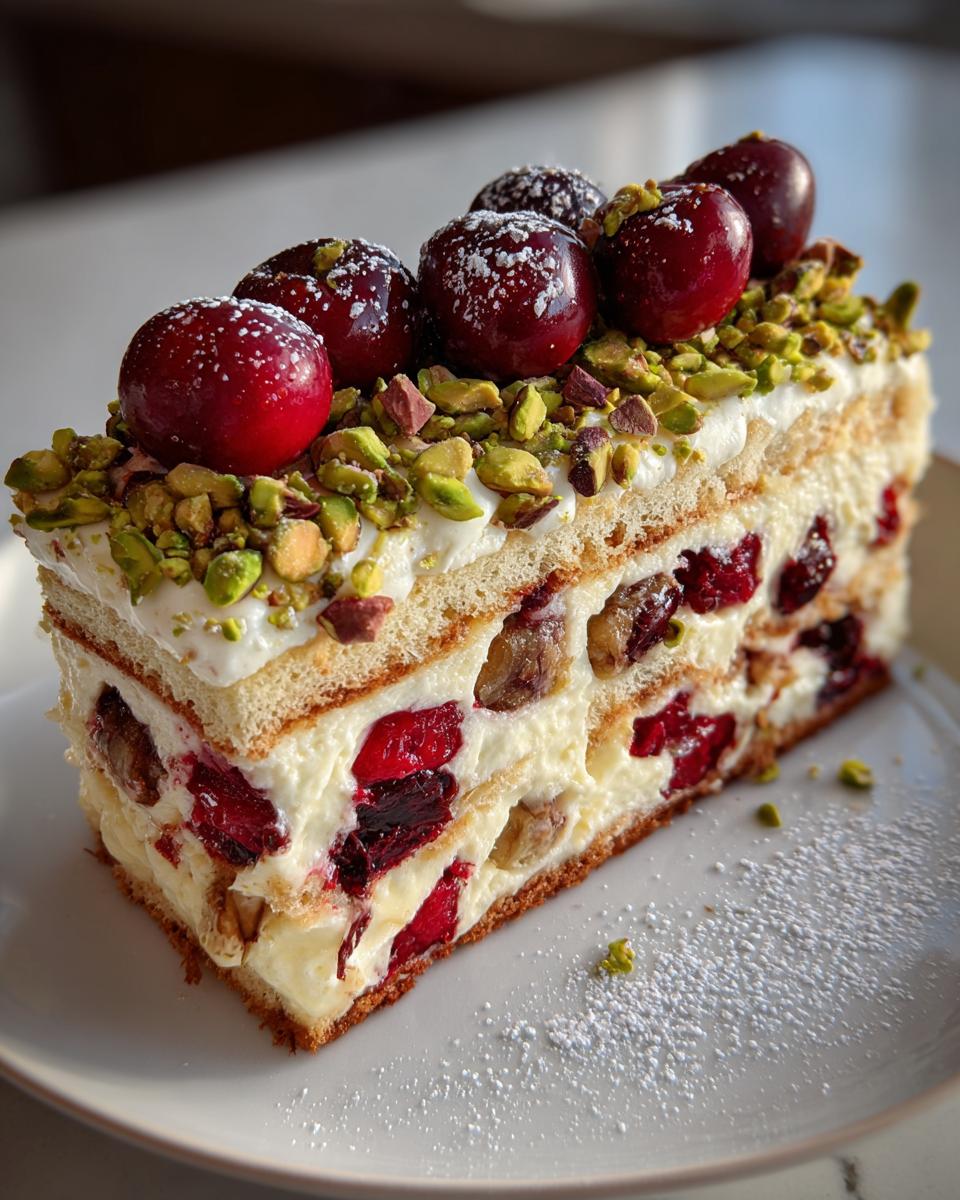
When you look at classic Italian desserts, they’re usually about simplicity, right? But this Cherry Pistachio Tiramisu takes that simplicity and gives it a serious glow-up. It’s that unexpected combination that gets everyone asking for the recipe. I just adore how the colors look when you cut into a slice!
Flavor Profile of the Cherry Pistachio Tiramisu
Okay, let’s talk taste. The mascarpone cream is light and fluffy, the perfect backdrop. Then you get the sweet burst from whatever cherries you choose, which is immediately balanced out by the slightly savory, earthy crunch of those beautiful pistachios. It’s sophisticated!
Perfect for Special Occasions
This dessert screams ‘I made an effort,’ even though we know the secret is out it’s actually pretty straightforward. It looks stunning layered in a glass dish, making it perfect when you have company over. It’s definitely my go-to swap when I’m making a special Cherry Dessert Recipes collection.
Gathering Ingredients for Your Cherry Pistachio Tiramisu
Alright, the ingredients list for this Cherry Pistachio Tiramisu is short, which I love! We’re keeping it focused, which is key to making sure the *good stuff*—the cherries and the nuts—really shines through. You’ll need the basics for the cream and the biscuits, of course, but pay attention to those specific notes.
We’re using eight ounces of mascarpone, which is just lovely and rich, and a full cup of heavy cream, which we’ll whip up until it’s beautiful and stiff. Quick tip: make sure your cream has been sitting in the fridge for ages; cold handles much better than room temperature stuff!
Ingredient Clarity: Cherries and Pistachios
Now for the stars! You’ll need one cup of chopped cherries. Whether you use fresh, super sweet ones or grab a can of Canned Cherry Recipes juice for dipping, make sure you have that cherry flavor strong! For the pistachios, don’t skimp here. We need a full half-cup, chopped. I usually buy shelled ones, and if they are *lightly* salted, that tiny bit of saltiness adds an amazing depth against the sweet cream. Chop them yourself—the pre-chopped stuff never releases the right flavor!
Don’t forget that package of ladyfingers. We want them sturdy enough for a quick dip in that cherry liquid, but not so dense that they turn into mush after chilling. I have a whole post about baking best practices that applies here, even though we aren’t baking!
Essential Equipment for Making Cherry Pistachio Tiramisu
Because this is a no-bake dream, you don’t need a million specialized gadgets, which is fantastic! Getting your tools ready first makes assembly feel like a breeze, especially when you’re trying to layer quickly before the mascarpone starts softening up.
You’ll need a couple of simple things to make this Cherry Pistachio Tiramisu come together perfectly. Have these ready to go!
- A good-sized mixing bowl. You need room to whip that cream without covering your kitchen in white fluffy stuff!
- Either a sturdy whisk or, if your arm gets tired easily like mine, an electric mixer. This saves you time when whipping the heavy cream.
- Your serving dish. I prefer a clear, rectangular glass dish so everyone can see those gorgeous layers as they chill.
That’s honestly it! No fancy springform pans or complex piping tips needed here. Just clean bowls and a bit of patience while chilling!
Step-by-Step Instructions for the Cherry Pistachio Tiramisu
Okay, time to put it all together! This is where the magic happens, and I promise, it goes faster than you think. The key here, especially for this Cherry Pistachio Tiramisu, is treating those air bubbles you just whipped in gently. We don’t want that lovely volume to disappear! For classic techniques and reliability, I always look at trusted sources like classic Tiramisu recipes before I start layering.
Preparing the Mascarpone Cream Base
First things first, grab that heavy cream and the sugar. Whip them together until you see soft peaks forming. You want it light but still holding its shape. Then, take your mascarpone—it should be soft but not warm—and gently fold it into the whipped cream. I mean *gently*! Use a spatula and large sweeping motions. If you beat it hard, you deflate all that air we just worked to create, and then your tiramisu will be dense, not dreamy.
Assembling the Layers of Cherry Pistachio Tiramisu
Now, dipping station time! Pour your cherry juice into a shallow bowl. Take your ladyfingers and dip them *quickly*—one light second on each side in the juice. If you soak them too long, your whole dessert turns watery, and nobody wants that! I learned this the hard way once!
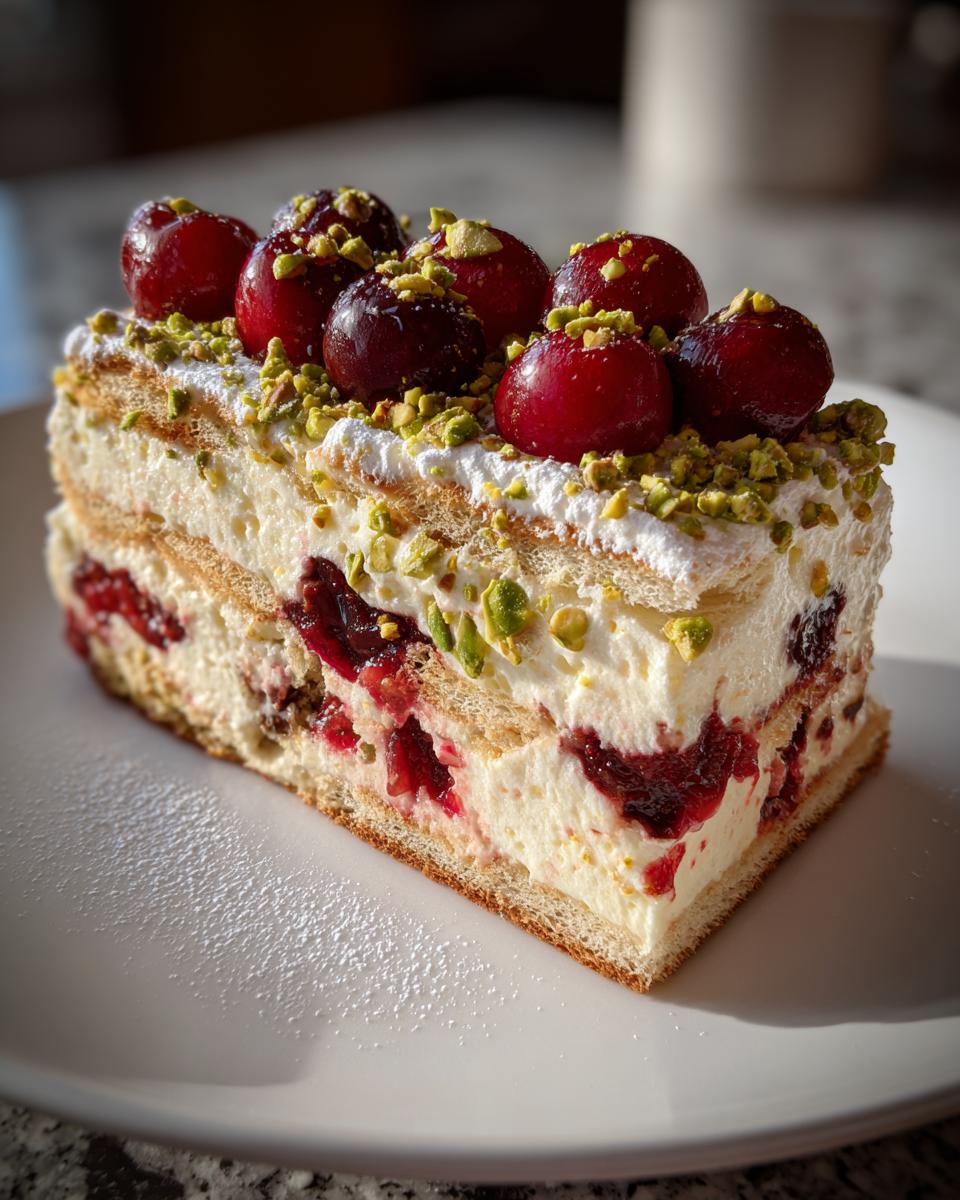
Now, layer! Start with a base of your dipped biscuits. Top that with half of your gorgeous mascarpone cream. Sprinkle on half of your chopped cherries and half of those vibrant pistachios. Repeat the layers: biscuits, the rest of the cream, and then the remaining cherries and nuts sprinkled all over the top for presentation. See? Easy peasy elegance!
Don’t forget, you have to let this chill. We need at least four hours, but honestly, overnight is best so those flavors really get to know each other. If you want to check out how I approach layering other things, like cookies in a parfait, take a peep at my thoughts on baking comparisons!
Tips for Perfect Cherry Pistachio Tiramisu Results
Even though making this Cherry Pistachio Tiramisu is fun, there are a few little secrets I’ve picked up over the years that make the difference between a *good* result and a total showstopper. We want firm cream and biscuits that aren’t swimming in juice! Pay attention to the temperature of your ingredients, and you’ll be fine.
When I’m working with high-quality, fresh fruit, like for my favorite Sweet Cherry Recipes, I always make sure the cherries are perfectly dry before chopping them for this tiramisu. Excess water is the enemy of a set cream layer!
Achieving the Right Cream Consistency
This is the biggest pitfall I see people run into! Your mascarpone cheese and your heavy cream absolutely must be cold—I mean, fridge-cold, right out of the container cold. If your mascarpone is too warm or soft, it won’t fold into the whipped cream properly, and you end up with this sad, soupy layer instead of that cloud-like texture we want.
Also, when you’re whipping the heavy cream, stop when you hit soft peaks, not stiff peaks, before you add the mascarpone. The folding process will firm it up beautifully later. If you whip it too hard beforehand, you risk separating the fat when you fold in the cheese, which gives you that grainy texture. It’s all about being gentle during that final fold, just blending the layers together so you don’t squash all the air. For more on gentle mixing and why it matters, check out my tips on baking precision.
The Importance of Chilling Time
Honestly, resisting the urge to dig in after just an hour is torture, but it is *essential* for this Cherry Pistachio Tiramisu! That minimum chilling time of four hours isn’t just a suggestion; it’s structural engineering for your dessert, folks. During chilling, the ladyfingers fully absorb the cherry juice in a controlled way, and the cream thickens up perfectly around them.
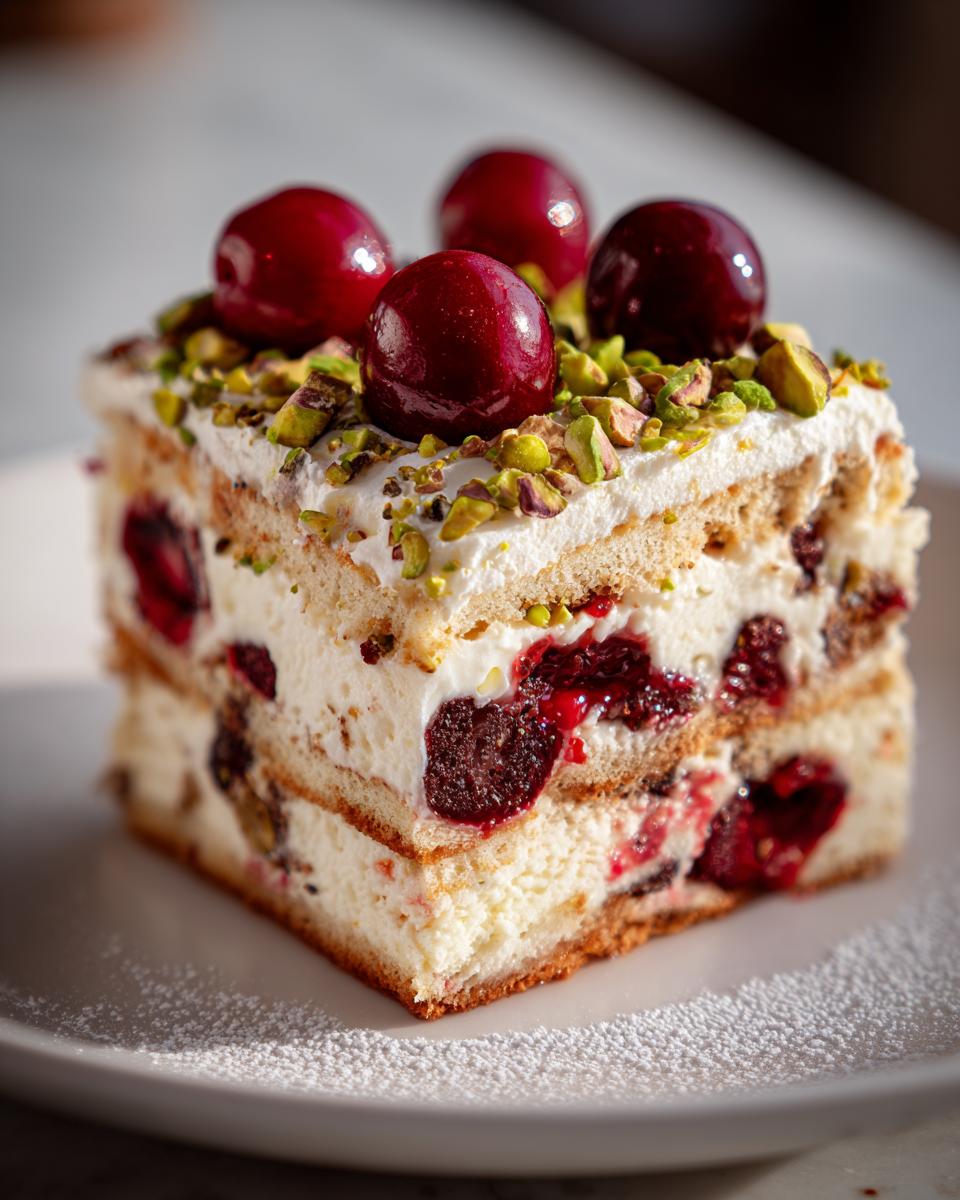
If you cut it too soon, you’re going to end up with layers that slide around, and the mascarpone will seem loose. Overnight is truly the sweet spot. When you let it rest that long, the flavors meld beautifully—the nutty pistachio starts marrying the sourness of the cherry, and everything sets up into that perfect sliceable block. Patience truly pays off here!
Storage and Reheating Instructions for Your Cherry Pistachio Tiramisu
Since this incredible Cherry Pistachio Tiramisu doesn’t get baked, storing it properly is the key to keeping those ladyfingers just right—softened by the cream, but not soggy from sitting around!
The absolute best place for this dessert is the refrigerator. Because we’re using dairy like mascarpone and heavy cream, we have to keep it chilled until you’re ready to serve. You want to cover the dish tightly with plastic wrap before it goes in. I usually press a piece of plastic wrap right down onto the surface of the tiramisu itself before covering the whole dish. This stops any weird fridge smells from migrating in and keeps the top layer of pistachios from drying out.
How long does it last? Honestly, it’s best eaten within the first two days. You can absolutely push it to three or maybe even four days, but that cream really sets up beautifully on days one and two. I actually think the flavor peaks on day two because the cherry juice has had time to fully soak into all those biscuits. If you want to see my other favorite no-bake treats that last well in the fridge, check out my collection!
Now, can you freeze it? Technically, yes, but I usually advise against it for the best texture. Freezing and thawing can sometimes break the dairy structure in the mascarpone cream, making it a little grainy or watery when it thaws. If you absolutely have to, make sure you wrap it super well, skip the very top layer of nuts until after thawing, and thaw it slowly in the fridge overnight before serving.
Variations on the Classic Cherry Pistachio Tiramisu
One of the best things about a layered dessert like this Cherry Pistachio Tiramisu is how easily you can change things up to suit what you have on hand or what flavor you’re craving next week. While I’m obsessed with the cherry-pistachio combo, it’s totally adaptable. It’s really a fabulous template for almost any fruit combination, which means you never have to be bored!
If fresh cherries are out of season or maybe a little too pricey this week, don’t stress! You can absolutely use beautiful, tart preserved cherries. In fact, sometimes those Canned Cherry Recipes give you a deep, concentrated flavor that really sings against the rich mascarpone. Don’t feel like you have to stick to only one type of fruit, either, if you are looking for different ideas!
Substituting the Cherry Component
So, what if you wanted to try something completely different? You could swap the cherry juice for something more tart, maybe a strong brewed black tea with a splash of almond extract. That would really make the pistachios pop! Or, you could try using berries instead of cherries entirely.
If you’re digging the sweet-tart combo, you could look at some Cranberry Recipes and use a cranberry juice blend for dipping. That creates a sharper flavor profile, giving you a more vibrant, less sweet dessert overall. If you used Sour Cherry Recipes instead of sweet ones, you’d get a bit of that tartness, too! Just remember to adjust the sugar in your cream slightly if your fruit substitution is very tart. It’s all about balancing that sweet, creamy layer!
Frequently Asked Questions About Cherry Pistachio Tiramisu
I get so many great questions about this dessert once people try making it. It’s such a fun recipe, but sometimes you need those little nudges to ensure it sets up right. People often ask me about timing and fruit sourcing for this Cherry Pistachio Tiramisu.
Can I make this Cherry Pistachio Tiramisu ahead of time?
Oh, please do! This is actually one of those desserts that *demands* you make it ahead. While you must chill it for at least four hours to get it to set, I truly think the flavor peaks if you prepare it the day before you plan to serve it. That extra time lets the mascarpone cream fully permeate the ladyfingers, making every bite perfectly tender. It’s the ultimate make-ahead centerpiece!
What is the best way to use fresh cherries in this dessert?
When using fresh fruit for one of your Fresh Cherry Desserts, you need to pit and chop them, just like the recipe says. One little trick I use, especially if the cherries seem really juicy, is to toss the chopped cherries with just a tiny sprinkle of sugar and let them sit in a separate little bowl for about 15 minutes. If they release a lot of juice, drain some of that liquid off before layering. We want the cherry flavor, but we don’t want our cream to thin out!
If you find yourself with leftover fruit scraps, you could even try a little Cherry Salad on the side, though I doubt you’ll have much left over after making this!
Nutritional Estimates for This Cherry Pistachio Tiramisu
Now, I know some of you are watching macros, and I totally respect that! Remember, since this Cherry Pistachio Tiramisu uses heavy cream and rich mascarpone, it’s certainly more of an indulgence than, say, one of my light Healthy Cherry Recipes. But hey, life is about balance, right?
Because everyone uses slightly different brands of mascarpone—and whether you use sweetened or unsweetened pistachios makes a difference—I can’t give you exact numbers that will lock into your app perfectly. These values are just estimates based on the core ingredients we used.
Keep in mind these figures are calculated per serving (we got six lovely servings out of this batch):
- Calories: Expect somewhere in the mid-to-high 300s range.
- Fat: There will be a good bit here, coming from the cream and cheese, probably around 20-25 grams.
- Carbohydrates: Mostly coming from the sugar and those ladyfingers!
- Protein: A decent boost from the dairy ingredients.
The main takeaway? This is a rich, creamy dessert. Enjoy every single bite of that pistachio crunch and cherry sweetness! If you’re looking for something lighter, maybe skip the optional glaze next time, or perhaps look at my lighter no-bake treats!
Share Your Experience with This Cherry Pistachio Tiramisu
Now that you’ve created this beautiful, layered Italian dream, I really, really want to hear about it! Making this Cherry Pistachio Tiramisu is only half the fun; seeing how it turns out on *your* dining table is the best part for me.
Did you make it for a special birthday, or did you just need a little midweek luxury? Seriously, drop me a comment below and let me know! Did you stick to sweet cherries, or did you try that sour cherry variation we talked about?
If you made it and snapped a picture—and I truly hope you did, because those green and red layers are so photogenic—please tag me when you share it on social media! It absolutely makes my day to see you enjoying these family-style recipes. I always love seeing your creations!
If you have any lingering questions or just want to say thank you for the recipe, don’t be shy—you can always reach out directly through the contact page. Happy layering, everyone!
By Grace Williams, contributor at Recipes by Betty.
Cherry Pistachio Tiramisu
Equipment
- Mixing Bowl
- Whisk or electric mixer
- Serving dish
Ingredients
For the Tiramisu
- 1 cup cherries chopped
- 8 oz mascarpone cheese
- 1 cup heavy cream
- 1/3 cup sugar
- 1/2 cup pistachios chopped
- 1 package Ladyfinger biscuits
- Cherry juice for dipping
Instructions
- Whip the heavy cream with the sugar until soft peaks form.
- Gently fold the mascarpone cheese into the whipped cream mixture.
- Dip the ladyfingers quickly into the cherry juice.
- Layer the dipped ladyfingers, the cream mixture, chopped cherries, and chopped pistachios in your serving dish.
- Repeat the layers. Chill the tiramisu for at least 4 hours before serving.
- Serve the Cherry Pistachio Tiramisu cold.