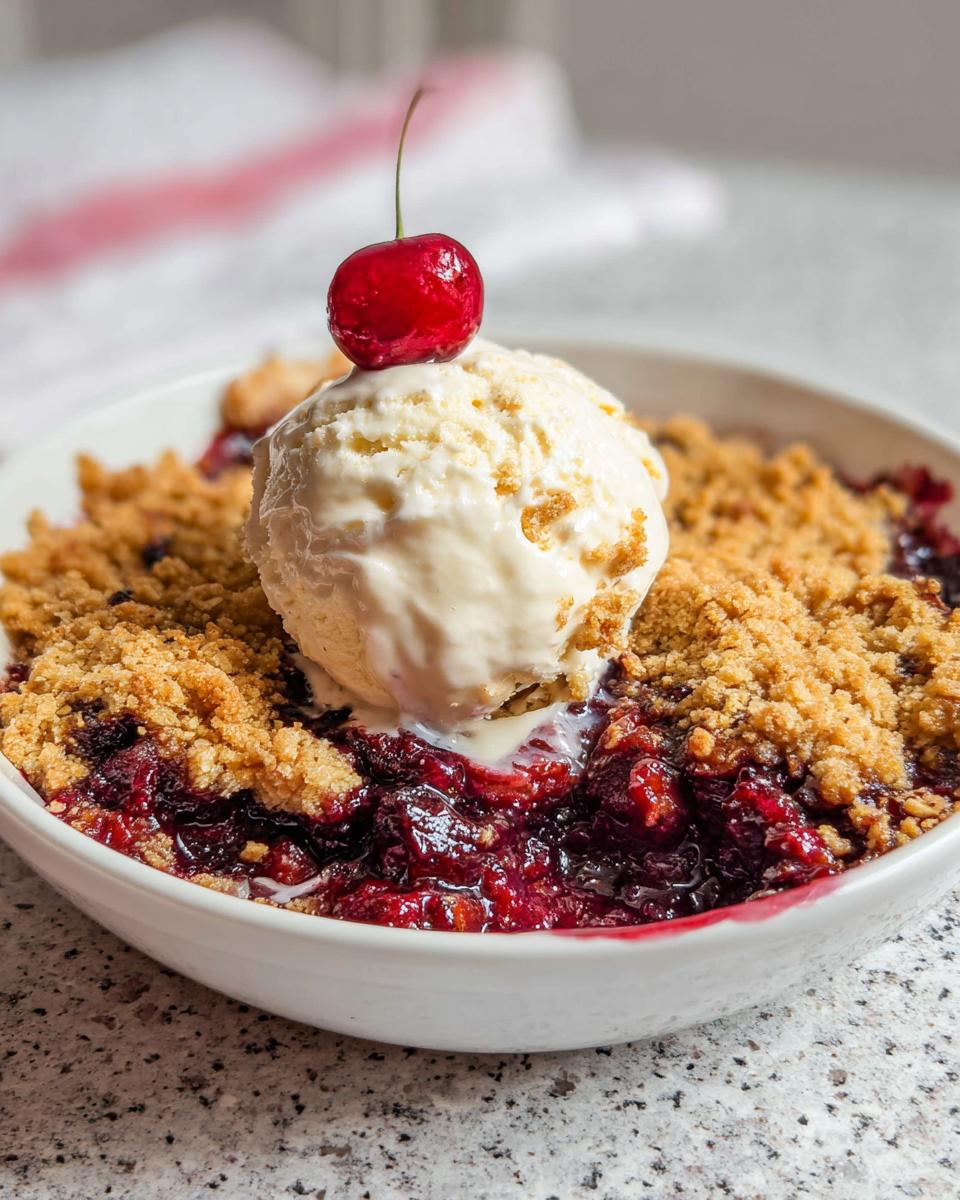
When the weather gets chilly, or honestly, even when it’s perfectly sunny, nothing beats the comfort of a bubbling, deeply flavorful fruit dessert, right? That’s what I always seek in my kitchen. And let me tell you, I have finally perfected the ultimate fruit bake: the Cherry Hazelnut Crumble. Adding those toasted nuts changes everything!
Hazelnuts added a rich crunch that elevated this crumble beyond the classic version. It has that beautiful, slightly tart fruit filling underneath a golden, textural blanket. It’s simple yet feels wonderfully indulgent. I’m Hanna Foster, and I’ve adapted this recipe over many winters to make sure it’s pure perfection every single time we bake it.
This recipe is a fantastic starting point for all your favorite dessert creations; trust me, you’ll never look back!
Why This Cherry Hazelnut Crumble Recipe Works (E-E-A-T)
This isn’t just your grandma’s standard apple crumble, although those are wonderful too! When we talk about the Cherry Hazelnut Crumble, we’re talking about a superior textural journey. I worked hard to get this just right because the difference between good and gasp-worthy is often texture.
- It uses just the right amount of cornstarch to thicken the filling perfectly without making it gluey.
- The hazelnuts truly make the topping snap, offering a nutty depth that complements the fruit beautifully.
- It’s flexible! You can lean into tartness or sweetness depending on what you have on hand.
Perfect Texture Balance in Every Cherry Hazelnut Crumble
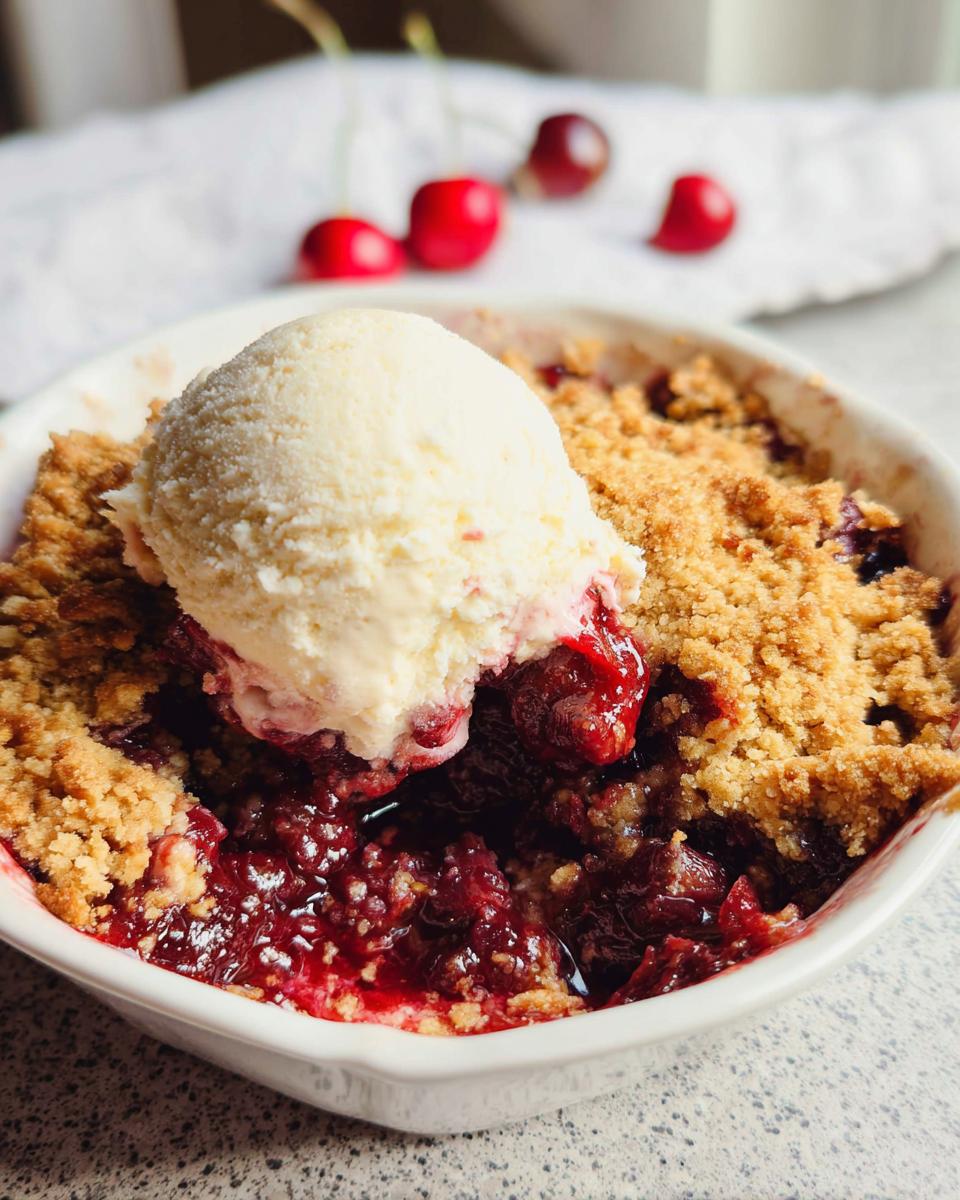
Honestly, the best part of this crumble is that first bite where the soft, warm cherry base hits that crisp, buttery hazelnut crust. If you’re using wonderfully tart fruit, perhaps some lovely Sour Cherry Recipes favorites, the sweetness of the brown sugar in the topping is necessary to balance that zing. If you use naturally Sweet Cherry Recipes, you might add just a tiny splash of lemon juice in the base.
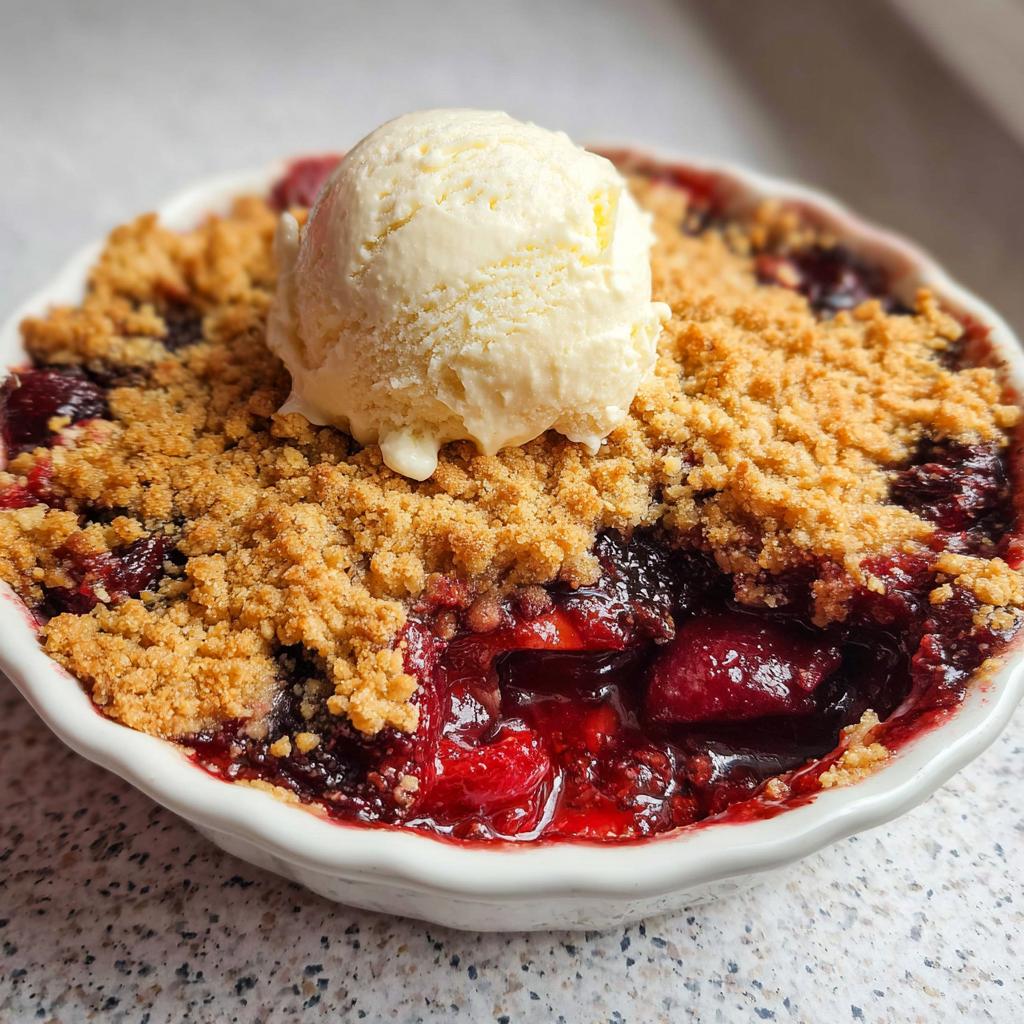
The ground hazelnuts toast up slightly in the oven, giving you that satisfying crunch every time. No soggy bottoms here, I promise!
Ingredients for Your Cherry Hazelnut Crumble
Alright, let’s talk about what you need to pull this masterpiece together. Don’t get intimidated by the two sections here; it’s just keeping the fruit base separate from the gorgeous topping. Trust me, using the right ingredients here is half the battle won for a perfect Cherry Hazelnut Crumble.
We want structure in the base and crunch on top. If you’re using cherries straight from a can, make sure they are well-drained—we need that cornstarch to do its job! This recipe is wonderful for making the most of Canned Cherry Recipes when fresh ones aren’t in season. And speaking of seasoning, when you’re measuring out your sugar or spices, remember that even small adjustments matter, much like knowing the difference between kosher salt versus sea salt in savory dishes.
For the Cherry Base Filling
- 3 cups cherries, pitted
- 1/2 cup sugar
- 1 tbsp cornstarch
- 1/2 tsp vanilla extract
For the Hazelnut Crumble Topping
This is where the magic happens! Pay close attention to the butter here. It needs to be ice cold and cubed. If it melts before it hits the dry stuff, you end up with a paste instead of a crumble, and we simply can’t have that!
- 1/2 cup ground hazelnuts
- 1/2 cup all-purpose flour
- 1/3 cup brown sugar
- 1/4 tsp cinnamon
- 1/4 cup cold butter, cubed
Step-by-Step Instructions for the Cherry Hazelnut Crumble
You’ve got your ingredients ready, which is fantastic! Now we move fast because we want that butter to stay cold for the topping secret. Don’t worry if you’ve made crumbles before; the hazelnut addition just takes standard timing and makes the payoff richer. Remember those oven instructions! We’re aiming for golden perfection here.
Baking is where precision really helps, kind of like when I figured out how to get the perfect crumb on my favorite scones. Follow these moves exactly, and you’ll have the best Cherry Hazelnut Crumble ever.
Preparing the Cherry Base
First things first, get your oven fired up to 375°F (190°C). That needs time to get hot! While it’s preheating, grab your pitted cherries. We’re going to mix them gently with the sugar, the cornstarch—that’s what makes the filling thick and glossy—and just a splash of vanilla extract. Don’t mash them; just toss gently until they look coated.
Once that’s done, just spread that beautiful cherry mixture evenly into your prepared baking dish. Easy peasy!
Making the Hazelnut Crumble Topping
This is the structural part! In a separate bowl, combine your ground hazelnuts, flour, brown sugar, and that crucial dash of cinnamon. Now, take your cold, cubed butter and drop it right in there. You have two options here, but I prefer using my fingertips.
Rub the butter into the dry ingredients until the whole thing starts looking like coarse sand with some pea-sized clumps left. Those clumps are where the best crunch comes from! If you absolutely hate touching dough, use a pastry blender, but make sure you get that coarse, recognizable crumble texture before moving on.
Baking and Resting the Cherry Hazelnut Crumble
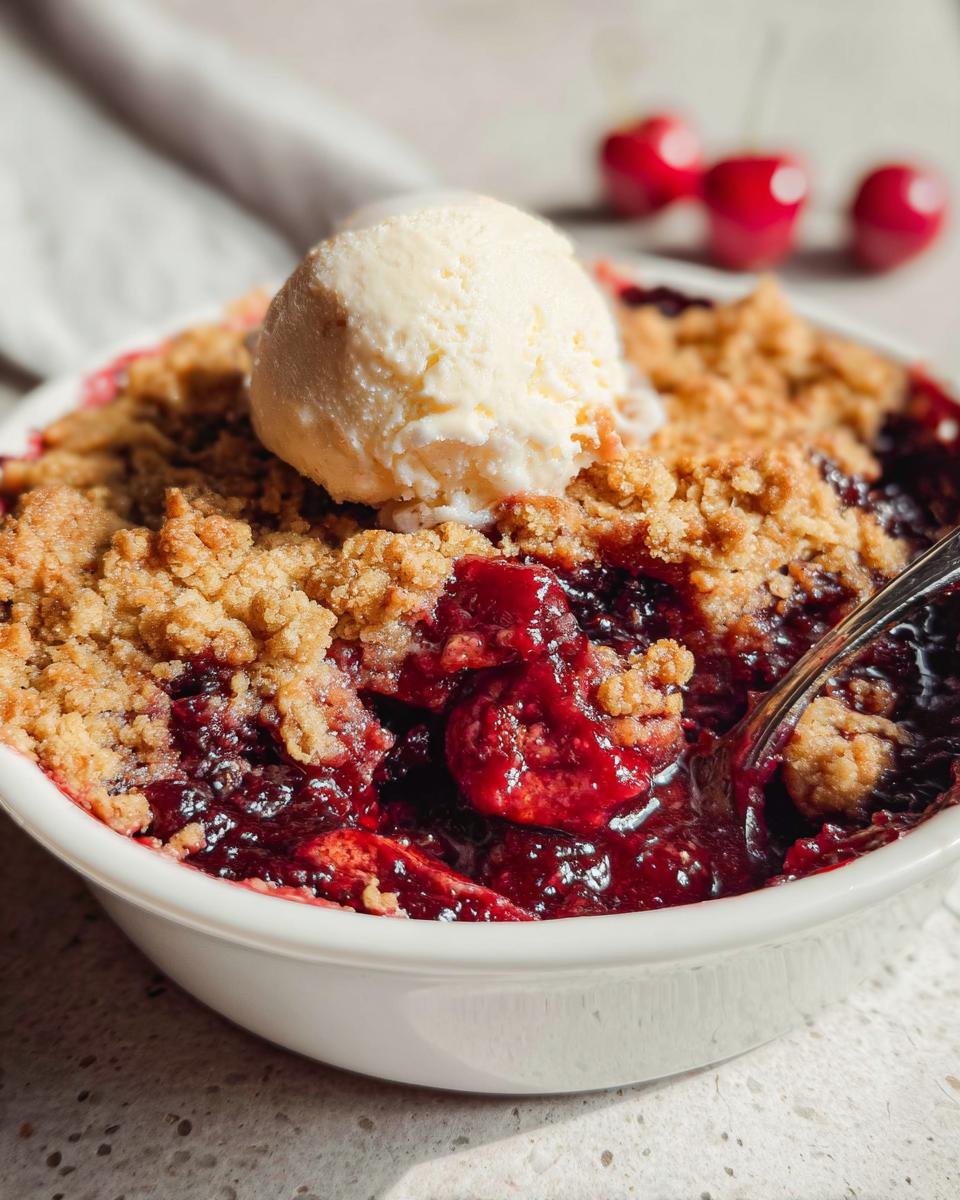
Sprinkle that wonderful hazelnut mix evenly right over the top of the cherries. Don’t press it down! We need air pockets for crispness. Pop the dish into that 375°F oven for about 35 to 40 minutes. You’ll know it’s done when the topping is deep golden brown, and you can see the cherry filling bubbling furiously around the edges—make sure it’s really bubbling!
Here’s a tip many people skip: let it rest for 10 minutes after it comes out. This short resting time lets the filling settle down so it doesn’t run everywhere when you serve it. You can check out another great fruit bake idea over at Taste of Home’s recipe while you wait!
Tips for the Best Cherry Hazelnut Crumble
You’ve made it this far, and you’re nearly eating success! But just a couple of quick pointers can take this Cherry Hazelnut Crumble from great to absolutely legendary. Baking is truly about paying attention to the small details, and I’ve learned these tricks through trial and—well, a few slightly runny crumbles that needed a few extra minutes in the oven!
First, let’s talk about those cherries. If you are using Fresh Cherry Desserts favorites, make sure they are perfectly ripe but still slightly firm. If you must use frozen cherries—and look, sometimes we have to—do *not* thaw them first! Just add them straight from the freezer into your filling mix. They release more liquid, so add an extra half tablespoon of cornstarch just to be safe. This keeps the base from becoming soup.
My biggest tip, though, relates back to the topping texture. That cold butter? It needs to be *cold*. If your kitchen is warm, or if you are rubbing the butter in with your hands for too long, that butter starts melting into the flour before it even hits the oven. That’s how you lose that wonderful, distinct crumble texture. If you feel your dough getting warm, pop the bowl into the freezer for five minutes before you sprinkle it over the fruit. A few minutes chilling goes a long way in keeping the topping crisp!
Also, don’t skimp on the toasting of the hazelnuts if you’re starting with raw ones. To get that deep nutty flavor that makes this crumble so special, toss your raw hazelnuts on a baking sheet and toast them at 350°F for about 7-10 minutes before grinding them. This small step really brings out their essential oils. Honestly, learning to manage ingredient temperature was a game-changer for me, much like when mastering the mixing method for perfect scones.
Finally, remember that bubbling hot filling is the sign of success, but resist the urge to dig in right away! Those 10 minutes of rest time I always talk about really let the cornstarch set up. It makes serving neat slices so much easier!
Ingredient Notes and Substitutions for Cherry Dessert Recipes
One of the best things about a simple fruit bake like this Cherry Hazelnut Crumble is how forgiving it can be with minor tweaks. I preach sticking to the recipe because those ground hazelnuts give you such a unique, deep flavor, but I totally get it—sometimes you’re missing an ingredient or trying to adapt for dietary reasons. I’ve tinkered around with this base recipe many times, trying everything from Cranberry Recipes combinations to different nut flours!
If you absolutely cannot find hazelnuts, I would suggest using evenly ground almonds or pecans. They won’t give you that exact rich, almost earthy flavor the hazelnuts provide, but they’ll certainly keep the crunch factor alive. Just know my heart belongs to the hazelnut version!
Now, let’s talk about making this a bit friendlier if you are looking into Healthy Cherry Recipes. The biggest ingredient swap you can make without ruining the structure is swapping out the sugars. You can usually substitute the granulated sugar in the base with coconut sugar, though it might slightly darken the filling color. For the brown sugar in the topping, maple sugar works beautifully! If you’re looking to reduce the flour, reducing it by about 1/4 cup and replacing it with more ground hazelnuts actually makes the topping richer and gives it a better gluten-free potential.
Remember, when dealing with these swaps, you might need to adjust other elements slightly. If you cut the flour back a lot, the topping might stay a little softer, so you might need a few extra minutes of baking time to ensure it browns properly. Always trust your eyes over the timer when making substitutions!
If you ever need advice on swapping things out in other recipes, like what you can use in place of breadcrumbs in something more savory, I’ve put together a little guide on substitutions in baking and cooking that might come in handy!
Storage and Reheating Your Cherry Hazelnut Crumble
Don’t worry if you have leftovers! This Cherry Hazelnut Crumble tastes just as amazing the next day, maybe even better because those spices have more time to meld together. However, we have to be smart about storage, especially to keep that beautiful hazelnut topping from getting soggy.
I always let the crumble cool completely to room temperature before I even think about covering it. If you cover it while it’s warm, you trap steam, and steam equals mushy topping. Once it’s fully cool, cover the baking dish tightly with plastic wrap or foil and pop it in the fridge. You should easily get a good four to five days out of it stored this way. It’s perfect for quick weeknight desserts!
Bringing Back the Crunch
Reheating is the key to success here. If you just microwave a slice, you’ll end up with hot fruit and a chewy, sad topping, and we’ve worked too hard for that! Nope! We are aiming to bring back that lovely snap to the hazelnuts.
- Transfer your serving size onto a sheet pan.
- Bake it in an oven preheated to about 350°F (175°C).
- Give it about 10 to 12 minutes. This dries out any residual moisture in the crust while warming the cherry base through beautifully.
If you’re eating it straight from the fridge and want it slightly warmer but don’t mind a little less crunch, you can microwave an individual portion for about 30 seconds—but honestly, the oven method is non-negotiable if you want that true crumble experience!
Alternative Uses for Leftover Crumble
Sometimes I end up with a little bit leftover at the bottom of the dish that has just gotten too soft to bother reheating properly. Don’t toss it! That fruit will still taste incredible. I stir the leftover gooey base into yogurt for breakfast the next morning, or, if I’m feeling indulgent, I’ll spoon it right over a scoop of vanilla ice cream where the texture difference doesn’t matter as much.
It’s just as handy as having a batch of Cranberry Desserts chilling around for an unexpected sweet craving!
Serving Suggestions for This Cherry Hazelnut Crumble
Oh, serving this gorgeous Cherry Hazelnut Crumble is almost as fun as baking it! I mean, you’ve created this stunning, bubbling, nutty masterpiece, and now you have to decide how to dress it up. Honestly, it’s phenomenal all by itself, still warm from the oven, but I can never resist adding just one more layer of flavor or texture.
The secret to a great dessert presentation—even a rustic one like a crumble—is contrast. Because the crumble is warm, tangy-sweet, and crunchy, the best partners are usually cold, creamy, or both!
The Absolute Classics
You simply cannot go wrong with vanilla. A generous scoop of high-quality vanilla bean ice cream is my first choice, hands down. As the ice cream starts to melt over that hot fruit and nuts, it creates its own light, creamy sauce. It’s perfection in a bowl!
If ice cream feels too heavy, fresh, unsweetened whipped cream is a lovely counterpoint. It cools down that intense warmth and brightens up the cherry flavor. Make sure your cream is freshly whipped; the store-bought stuff just doesn’t have the same airy texture that complements the dense crumble topping.
Elevating the Experience with Drizzles and Dips
If you want to take this all the way up to “showstopper” status, you have to consider adding a contrasting sauce or drizzle on top of the ice cream.
I sometimes like to drizzle a little homemade caramel sauce over everything—that saltiness just pulls out the earthy flavor of the hazelnuts so well. For a really special treat, especially if I’m serving this for guests, I’ll set out a small pot of melted chocolate fondue to dip our spoons into after we’ve finished the crumble. You can find some great inspiration for that on my fondue page, and trust me, dipping those crunchy hazelnut pieces between bites of warm cherry pie is an experience!
Remember, whether you keep it simple with a shower of powdered sugar or go all out with toppings, the focus should always be on enjoying that wonderful mix of baked fruit and nutty crunch. Don’t overthink it too much; just serve it warm and enjoy the smiles!
Frequently Asked Questions About Cherry Hazelnut Crumble
I get so many questions after people try this Cherry Hazelnut Crumble! It’s just so much better than the usual fruit bakes, so I think folks are really intrigued by the hazelnut twist. Here are some of the most common things readers ask me when they are whipping up this recipe.
Can I make this Cherry Hazelnut Crumble using other fruits like apples?
That’s a great question about swapping fruit! While this recipe is perfectly balanced for cherries—whether you use tart or sweet varieties, keeping within the spirit of Cherry Dessert Recipes—you absolutely can swap them out. If you decide to use apples, you’ll want to use a tart variety like Granny Smith. Apples don’t release as much juice as cherries, so you might want to cut back the cornstarch by half a teaspoon, or maybe try adding in some dried cranberries for extra flavor if you are thinking about other Cranberry Recipes!
However, remember that the rich, dark flavor of the hazelnut truly sings with cherry—make sure to try the original first!
How do I ensure the hazelnut topping stays crunchy?
This is my favorite bit to talk about because a soggy crumble topping is just heartbreaking! The absolute biggest key is temperature control. Make sure your butter is straight-up cold, cubed, and kept cold during mixing. You want the butter to coat the flour and ground hazelnuts, creating little fat pockets, not melting into a liquid mess before it goes into the oven.
Once it’s baked, the second key is storage—don’t cover it until it’s totally cool, as I mentioned earlier. If you want an extra crunchy assurance, you can try toasting your hazelnuts slightly more before grinding them, which helps them hold up better against the fruit steam. For more general baking wisdom on moisture control, you might find my tips on preventing dry baked goods helpful, as controlling moisture is similar in both!
What’s the difference between using fresh vs. canned cherries here?
You can certainly reach for those jars! If you are using a good quality sour cherry filling, you might want to reduce the added sugar by about two tablespoons, as canned fillings are often pre-sweetened. If you’re using plain Canned Cherry Recipes fruit packed in water, make sure you drain them really well first! If you want the very best flavor and texture, though, Fresh Cherry Desserts are always king, especially when the cherries are perfectly in season.
Can I use pecans instead of hazelnuts?
You can, yes, and pecans are delicious! Pecans offer a slightly different profile—they are sweeter and often have a softer texture than hazelnuts. If you use pecans, I suggest giving them a quick toast in a dry pan for about five minutes before you grind them. That small extra step deepens their flavor so they aren’t lost under the sweetness of the brown sugar in the topping.
My apples are getting soft too fast when I bake them. What gives?
If you’re experimenting with Apples Recipes instead of cherries, softer apples like McIntosh cook down too fast. For a firmer bake that holds its shape better under that crumble, switch to something like Honeycrisp or Gala. If you must use a softer apple, slice it much thicker than you think necessary, and maybe let the base sit for just five extra minutes before topping it—that gives the apple structure a head start cooking before the cold topping hits it!
Nutritional Estimates for Cherry Hazelnut Crumble
Now, let’s be real for a second. This is a decadent, buttery, nutty dessert, right? So, while it tastes like heaven, it’s not exactly a health food salad! I always like to share a little estimated breakdown just so you know exactly what you’re sinking your fork into when you make this delicious Cherry Hazelnut Crumble.
Please remember this is based strictly on the recipe as written, using standard measurements for flour and butter. If you substitute with Greek yogurt instead of butter for the topping (don’t do it, you’ll ruin the texture, but if you *must* try!), your numbers will look wildly different!
These estimates are calculated assuming the recipe yields 6 generous servings:
- Calories: Approximately 410–450 per serving
- Total Fat: Around 20g–24g (Thank you, hazelnuts and butter!)
- Protein: About 6g–8g (Mostly from the nuts and flour)
- Total Carbohydrates: Roughly 55g–60g (This includes natural sugars from the fruit and added sugars)
These figures are just a guideline for what I use when planning our treats. If you’re looking to make this lighter, focus on those ingredient swaps we talked about earlier, like reducing the brown sugar or swapping some of the flour for oat flour. No matter what, every bite of this Cherry Hazelnut Crumble is worth it!
Cherry Hazelnut Crumble
Equipment
- Baking dish
- Oven
Ingredients
Cherry Base
- 3 cups cherries pitted
- 1/2 cup sugar
- 1 tbsp cornstarch
- 1/2 tsp vanilla extract
Hazelnut Crumble
- 1/2 cup ground hazelnuts
- 1/2 cup all-purpose flour
- 1/3 cup brown sugar
- 1/4 tsp cinnamon
- 1/4 cup cold butter cubed
Instructions
- Preheat your oven to 375°F (190°C).
- Toss the cherries with sugar, cornstarch, and vanilla extract.
- Spread the cherry mixture into a baking dish.
- Mix the ground hazelnuts, flour, brown sugar, cinnamon, and cold butter until the mixture resembles coarse crumbs.
- Sprinkle the hazelnut topping evenly over the cherries.
- Bake for 35 to 40 minutes, or until the topping is golden brown and the filling is bubbling.
- Let the crumble rest for 10 minutes before you serve it.