
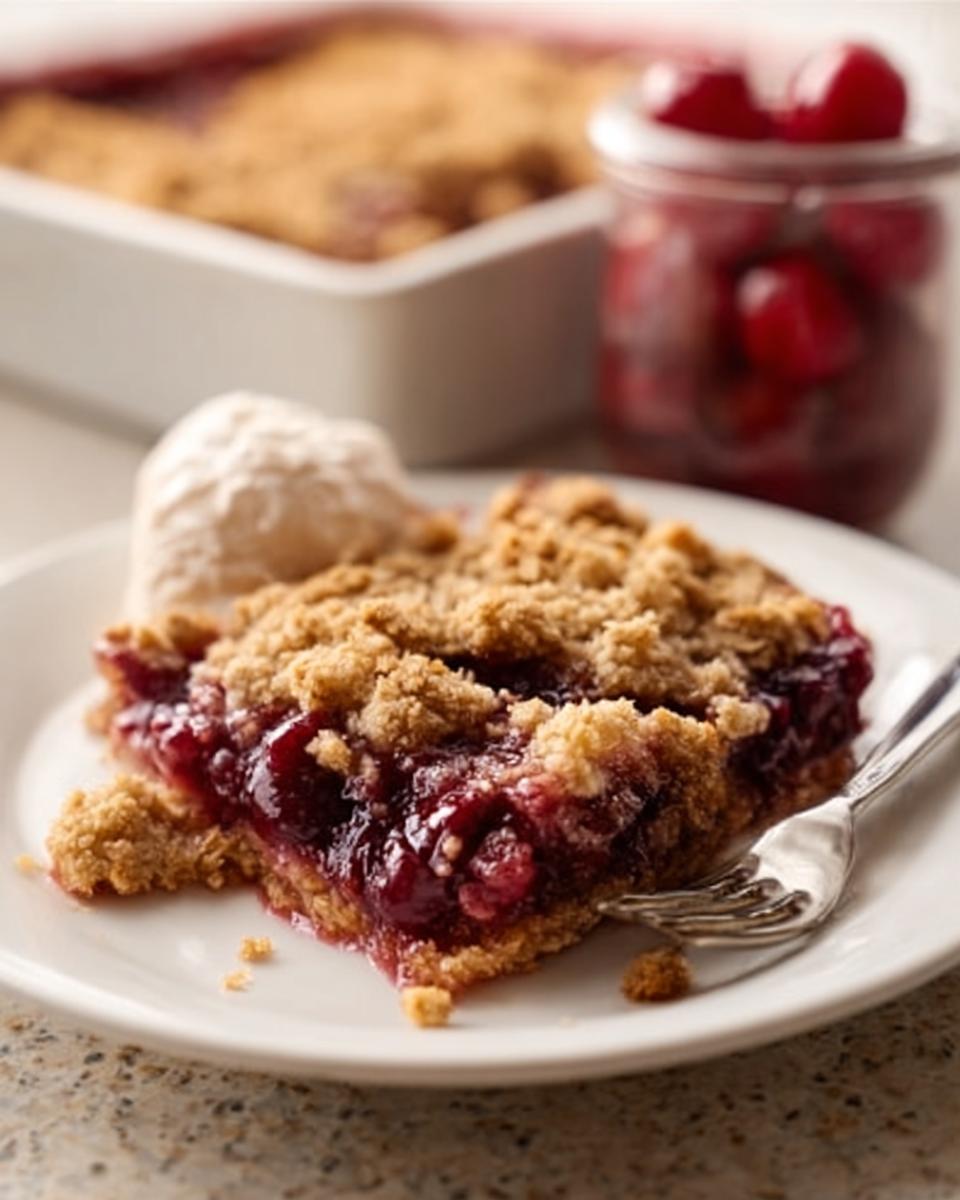
Sometimes you just need a dessert that feels like a warm hug, right? Forget fussy layers or complicated steps. I live for those simple fruit bakes that come together faster than you think but taste absolutely spectacular. That’s exactly what this Cherry Coconut Crumble delivers!
My favorite part, seriously, is that textural contrast. You get that beautiful, tart cherry base that just melts in your mouth, and then BAM—you hit that wonderfully crunchy, sweet coconut crumble topping. It’s the perfect balance, trust me.
This recipe is my go-to when guests show up unexpectedly, or honestly, when I just need a Tuesday night treat. It’s incredibly reliable. I promise, once you try this baked cherry crumble, it’ll live permanently in your rotation. We’re making magic with basic ingredients here!
If you want to see another beautiful take on this bake, check out this inspiration from Donna Hay: cherry and coconut crumble.
Why You Will Love This Cherry Coconut Crumble
I know you have a million dessert recipes bookmarked, so let me tell you why this one beats the rest for weeknight baking wins. It’s fast, it’s comforting, and it always steals the show!
- It’s lightning fast to put together. Seriously, you’ll have the fruit in the dish and the topping mixed in less than 15 minutes of active time. It’s perfect for when you need a quick baked cherry crumble fix!
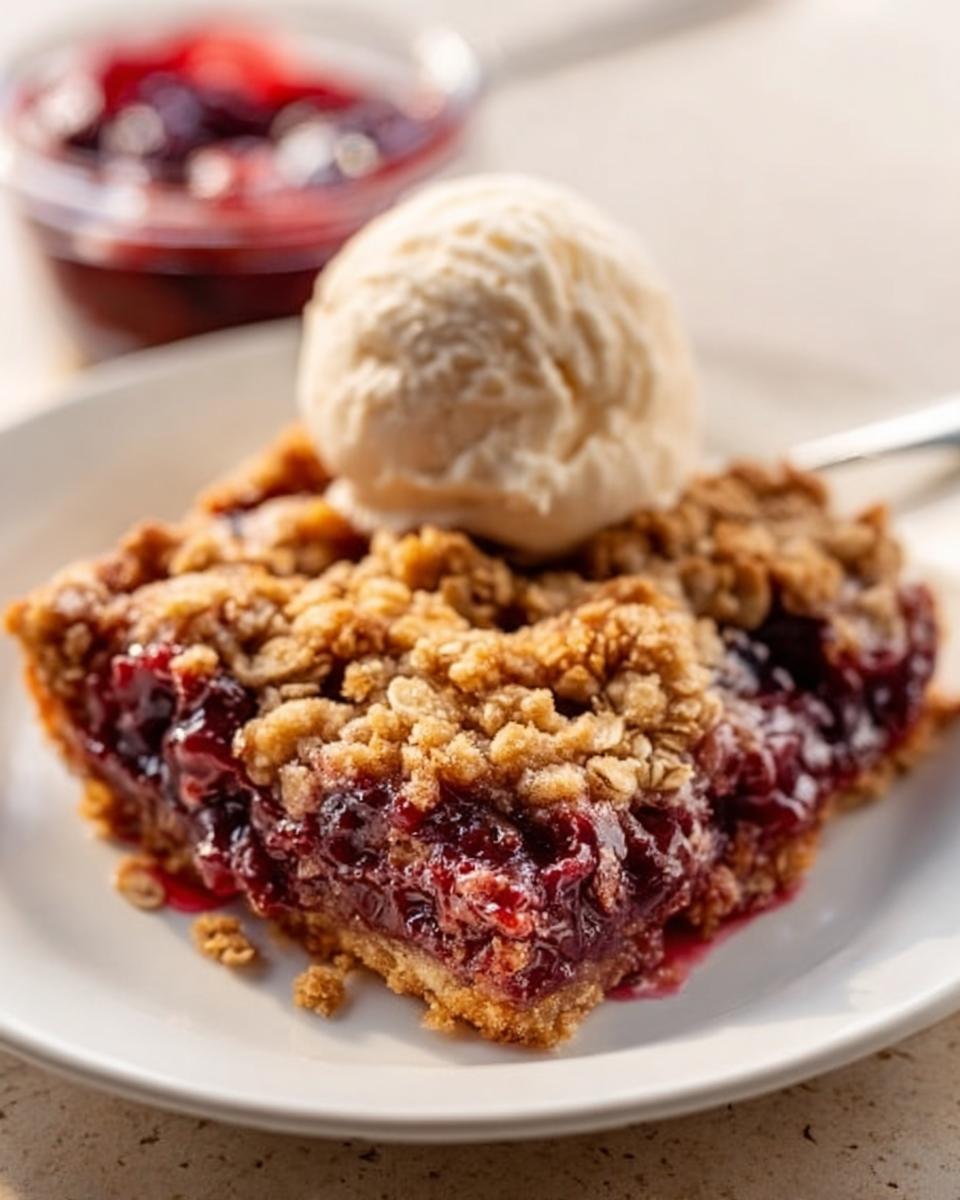
- That texture contrast is everything! The soft, warm fruit against that slightly chewy, golden coconut topping is just divine. It’s not a mushy dessert, that’s for sure.
- It uses pantry staples. No exotic ingredients here! We’re talking oats, flour, butter, and cherries—items most of us always have on hand, meaning you can whip this up right now if you want to!
- The flavor hits just right. It’s sweet but not overwhelmingly so, thanks to the little punch of acidity from the lemon juice cutting through the cherries.
- It travels beautifully! If you’re bringing a dessert to a potluck or a friend’s house, this holds up wonderfully on the counter until serving time.
Essential Equipment for Your Cherry Coconut Crumble
Okay, so this recipe is super forgiving, which I love. You don’t need twenty specialized gadgets! In fact, keeping the equipment simple keeps the cleanup simple, too. That’s half the battle won right there, isn’t it?
Here’s what you need to have ready before you even think about peeling the wrapper off that butter:
- A Standard Baking Dish: You’ll want something about 8×8 inches or similar, or perhaps a 9-inch pie plate. It doesn’t have to be fancy glass—any oven-safe dish will do the trick for this casual coconut dessert.
- A Good Mixing Bowl: You need one adequate space to toss those cherries around for the base, and then another decent-sized bowl ready for making the crumble topping. No need for a stand mixer here; your hands (or a sturdy wooden spoon) work perfectly well!
- Measuring Cups and Spoons: Standard baking stuff, of course. Because we’re working with ratios, especially in the topping, getting your dry ingredients right is important!
Ingredients Needed for the Perfect Cherry Coconut Crumble
This is where the magic really starts to happen! I always lay all my ingredients out first—it saves so much stress later when you’re rushing to mix the topping before the oven gets too hot. Clarity in measuring is key here, especially for that topping!
Remember how I talked about using good quality salt? If you want to check out my thoughts on salt choices, I wrote a little piece about kosher salt versus sea salt. For this recipe, just use whatever you normally keep on hand!
Fruit Filling Ingredients
This base just needs a little boost from sugar and acid to make those sour notes sing. Don’t add too much! We want the cherry flavor to be the star.
- 4 cups of cherries: Whether you’re using fresh or frozen (see my notes later!), you need four full cups ready to go.
- 1/2 cup sugar: Plain white granulated sugar works beautifully here to create that lovely syrupy juice.
- 1 tablespoon lemon juice: This is non-negotiable for me! It keeps the sweetness balanced so the finished coconut dessert isn’t cloying.
Crumble Topping Ingredients
This topping is what truly makes this dish unique compared to a standard apple crisp. You need everything cold here, folks. Keep that butter chilled!
- 1 cup oats: Use standard rolled oats, not the quick-cooking ones, for the best texture.
- 1/2 cup flour: All-purpose flour is perfect for binding everything together just enough.
- 1/2 cup shredded coconut: Make sure this is unsweetened if you can find it, unless you like your crumble really sweet!
- 1/2 cup brown sugar: I always measure this packed into the cup so you get the perfect amount of molasses richness.
- 1/2 cup butter: This must be **cold and cubed**. Literally, take it out of the fridge and chop it right before you start cutting it into the dry mix. Cold butter creates those perfect little pockets of crispiness when it bakes!
Step-by-Step Instructions to Make Baked Cherry Crumble
Alright, let’s get baking! Watching these steps come together is so satisfying. You don’t need a fancy recipe card for this; it’s all about rhythm. I always think about how the heat gets into the pan first. If you want the best result, read through all the steps before you touch an ingredient. For more general baking wisdom, you might want to check out my tips on perfecting scones—the technique about cold fat applies here, too!
Preparing the Oven and Fruit Base
First things first: we need heat! You will need to preheat your oven to 180°C right off the bat. Don’t wait until you’re mixing the topping, or things will get messy later. Once the oven is warming up, grab your baking dish.
Now for the cherries. You’re going to toss those 4 cups of cherries gently with the 1/2 cup of sugar and 1 tablespoon of lemon juice right there in the dish. Make sure you’re using a big spoon or spatula to get everything coated evenly across the fruit. It should look glossy and ready to bubble!
Creating the Signature Coconut Crumble Topping
This is the step that defines our coconut dessert! Grab a separate, medium-sized bowl. You need to combine all your dry topping ingredients first: the oats, flour, shredded coconut, and that brown sugar. Give those a quick whisk just to make sure they are totally mixed.
Here’s the important part: take that cold, cubed butter and start working it into the dry mix. You can use your fingers, two knives, or a pastry blender if you have one. The goal here is speed! You want to rub or cut the butter in until you get coarse crumbs—some bits should look like peas, and some should be smaller dust, but absolutely *do not* overmix it until it looks like wet sand. We need those cold lumps to create crispness!
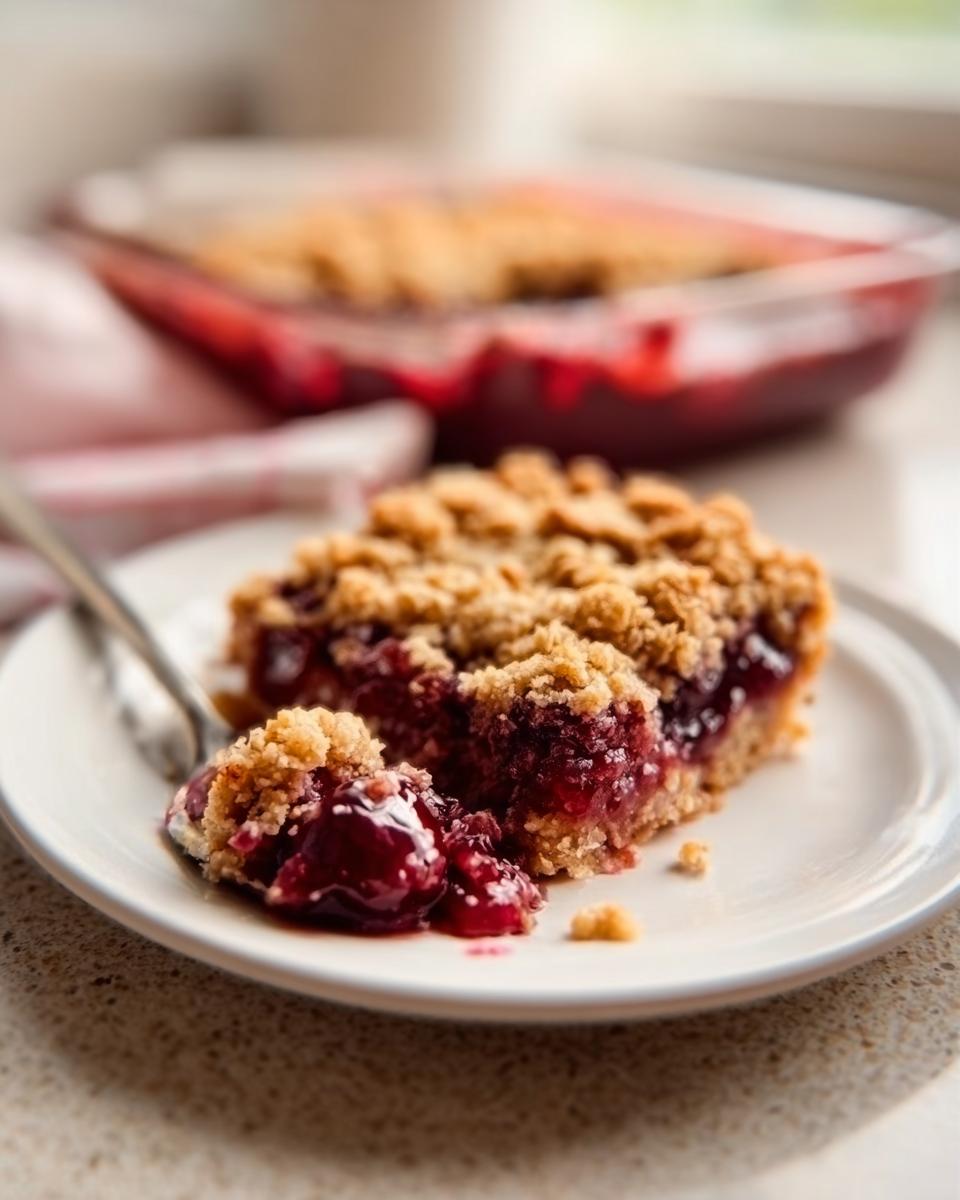
Baking and Finishing the Cherry Coconut Crumble
Once your topping looks perfectly craggy, sprinkle it evenly over the fruit mixture in the baking dish. Try to cover the cherries completely, but don’t press it down; keep it loose and airy for maximum crunch.
Slide that dish into your preheated oven. You’ll bake this for about 30 to 35 minutes. How do you know when it’s done? Simple! Look for the filling underneath bubbling up thickly around the edges, and the topping should be beautifully golden brown, maybe even catching some darker edges on the coconut bits. That’s when you pull it out!
Tips for Success When Making Cherry Coconut Crumble
Even in a simple recipe like this amazing Cherry Coconut Crumble, a couple of little tricks can take it from good to absolutely show-stopping. I’ve learned these the hard way, trust me. You don’t want a soggy bottom, and you definitely don’t want the topping to burn before the fruit is hot!
To get that fantastic texture that keeps everyone asking for the recipe, pay close attention to the temperature of your fat and your pan choice. For more thoughts on getting that topping just right, I found some great advice in my post about the perfect cookie crumble—the principles are the same!
- Keep That Butter Frigid: I can’t stress this enough for the topping! If your butter melts even a little before it hits the dry mix, you end up with a dense, hard layer instead of a light, crumbly one. If your kitchen is warm, stick the dry mix and the cubed butter in the freezer for about ten minutes before you combine them. You want it to be almost icy when you rub it together.
- Don’t Skip the Lemon Juice: It seems small, but the acid is crucial here. Cherries are naturally quite sweet, and without that little bit of brightness from the lemon juice, the whole dish can taste flat or too candy-like. It really helps bring the fruit flavor forward!
- Use the Right Dish for Even Baking: If you’re using a very shallow, wide metal pan, the fruit will cook much faster, which can lead to the topping getting too dark before the center is bubbly. I prefer a slightly deeper 8×8 glass or ceramic dish. They hold heat nicely and conduct it evenly, giving the fruit base a little more time to thicken up while the topping browns perfectly.
- Layer Gently, Don’t Pack: When you sprinkle that glorious topping over the cherries, just let it fall where it may. Do not press it down or smooth it out! If you pack it tightly, it acts like a lid and steams the fruit, leading to that dreaded soggy bottom. Keep it loose so the air can circulate and everything bakes up crisp.
Ingredient Notes and Substitutions for This Coconut Dessert
One of the best things about a rustic bake like this Cherry Coconut Crumble is how forgiving it is if you’re missing one tiny thing. I always try to keep a backup plan ready because having a craving for a warm coconut dessert means waiting for a supermarket run just isn’t an option!
If you’re staring at that ingredient list and thinking, “But I don’t have X,” don’t panic! I’ve worked through these substitutions dozens of times, usually when I’m baking late at night and too lazy to go to the store.
Fresh vs. Frozen Cherries
This is the biggest question I get! Can you use frozen cherries instead of fresh ones? Absolutely, yes, you can! Frozen cherries work fantastically well in crumbles because they release a lot of liquid anyway. When you use frozen cherries, you might want to skip adding any extra liquid to the fruit mix entirely, of course.
Here’s my secret tip for frozen fruit: Don’t thaw them first! Toss them straight from the freezer into the bowl with the sugar and lemon juice. They’ll take a few extra minutes to heat up and start bubbling in the oven, maybe 5 to 7 minutes longer than fresh ones. But honestly, the result is the same beautiful, tart base underneath that crunchy topping!
Flour Choices for the Crumble
For the binding in the crumble topping, all-purpose white flour is my standard. It gives the perfect balance of structure without getting too tough.
If you want to make this a little more whole-grain friendly, you can swap out half of the all-purpose flour for whole wheat flour. I wouldn’t recommend going 100% whole wheat, though, because that extra density can sometimes make the topping feel heavy rather than light and crumbly. If you’re going gluten-free, almond flour is tricky here because it’s so much heavier and oily; you’d probably need a dedicated gluten-free blend to keep the right texture. For this specific recipe, sticking close to the white flour keeps that light crumble intact.
Sweetener Swaps (If You Must!)
We use white sugar for the fruit and brown sugar for the topping, and I like that contrast. If you’re strictly out of brown sugar for the topping, you can use more white sugar, but make sure you add an extra 1/2 teaspoon of molasses if you have it lying around—that’s where the depth comes from!
If you’re out of granulated white sugar for the fruit, honey or maple syrup will work in a pinch, but you must reduce the amount drastically because they are much sweeter and wetter than sugar. Maybe start with 1/3 cup of honey instead of 1/2 cup of sugar, and you might need to reduce the lemon juice slightly, too.
Storing and Reheating Your Baked Cherry Crumble
One of the biggest blessings of a good crumble is that it often tastes even better the next day, even though the topping has softened a bit. I love making a big batch of this Cherry Coconut Crumble because it means I have a ready-made dessert for lunches or a quick snack later in the week!
The way you store it depends on how long you plan on keeping it. Since we are dealing with fruit, we need to be a tiny bit careful, though the sugar content helps preserve it!
Short-Term Storage (The Next Day)
If you know you’ll be eating the rest of this baked cherry crumble within 24 hours, leaving it on the counter works just fine. Just make sure you cover it well! Use the baking dish itself and pop some plastic wrap tightly over the top, or carefully transfer any leftovers to an airtight container.
I usually wait until it’s cooled completely to room temperature before covering it. If you cover it while it’s still warm, you’ll trap steam, and that’s the fastest way to guarantee a soggy topping!
Long-Term Storage (Fridge and Freezer)
If you made a double batch (which you totally should have!), or if your kitchen is just too hot and humid to leave it out, the fridge is your friend. Store the cooled crumble in an airtight container in the refrigerator for up to four days. It will hold up beautifully, though expect the topping to be softer when cold.
Can you freeze it? Yes! If you’re planning ahead, I actually recommend freezing it before you bake it. Bake it the first time, let it cool completely, and then freeze portions in freezer-safe containers. When you want a serving later, that’s when you reheat it!
How to Bring Back the Crunch!
This is the most important part of storing any crumble. A soft topping just doesn’t hit the same way! Never microwave a slice if you want that crispy coconut texture back; the microwave just makes the topping gummy.
To restore that glorious crispness, you need dry heat. Reheat individual servings in a toaster oven or a regular oven set to about 175°C (350°F) for about 5 to 8 minutes. Honestly, throwing it in the oven is my preferred method for leftovers. It warms the fruit through perfectly while crisping up the oats and coconut again. If you’re reheating a whole pan, you might need closer to 15 minutes.
If you want ideas for other desserts you can reheat beautifully later, you might enjoy my post on apple crumble cheesecake—it reheats surprisingly well!
Serving Suggestions for Cherry Coconut Crumble
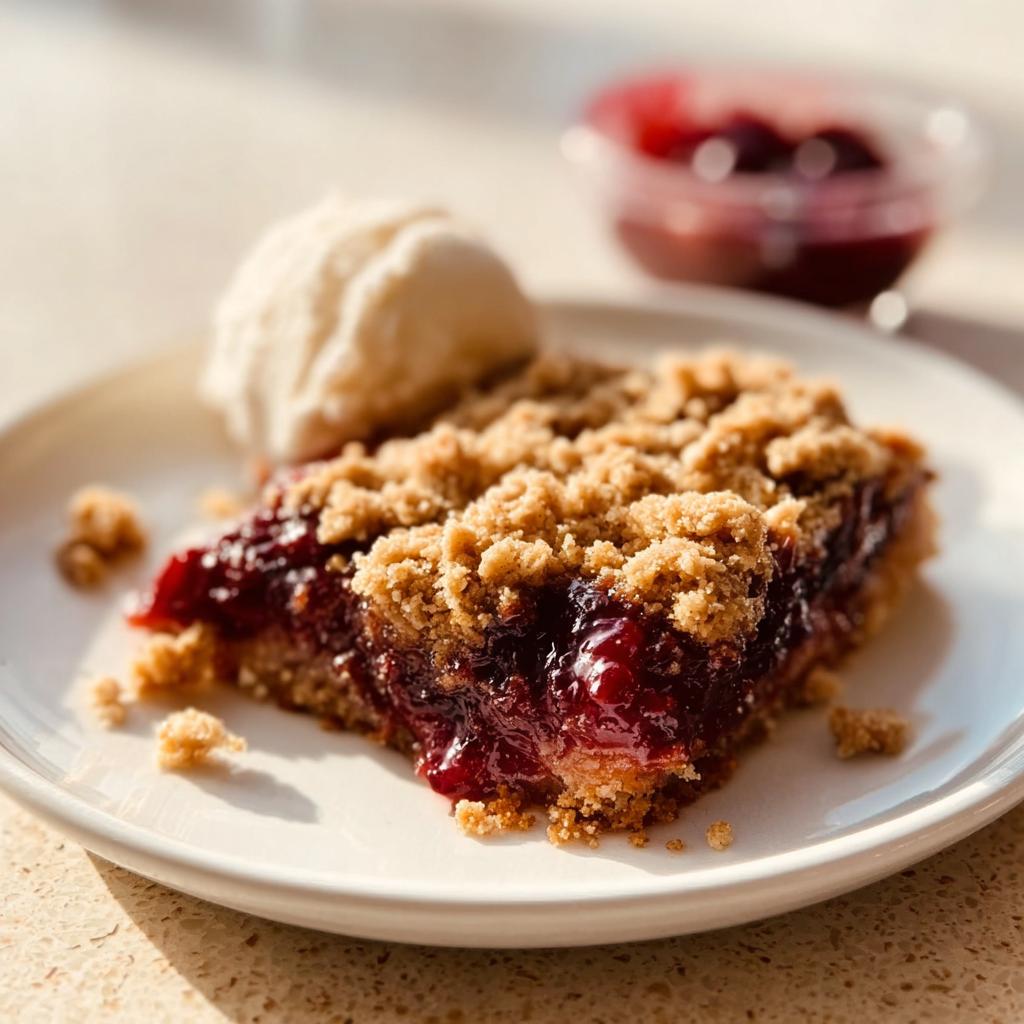
Now that you’ve pulled out that perfectly bubbly, golden-brown Cherry Coconut Crumble, the only question left is: what are we serving it with?! This dessert is fantastic just the way it is, warm right out of the oven, but a little something extra on the side takes it from a humble bake to an absolute show-stopper dessert.
Honestly, the contrast of something cold and creamy against the hot, tart fruit and crunchy topping is what I live for. It’s that temperature play that makes eating dessert so much fun!
If you’re looking for other sweet dippers, I have a great recipe for chocolate fondue with heavy cream that works surprisingly well if you just dip the crisp topping edge in—don’t knock it ’til you try it!
The Classic Scoop of Vanilla Ice Cream
You simply cannot go wrong here. A big, generous scoop of good quality vanilla bean ice cream is my number one choice. As the ice cream melts—and trust me, it melts fast against that hot fruit filling—it creates this amazing, creamy sauce that mingles with the cherry juices.
The cold temperature is key. It cools down the heat so you can eat more of it faster, and the richness of the vanilla cuts through the tartness of the cherries beautifully. It turns this simple dessert into something truly decadent.
A Dollop of Freshly Whipped Cream
If ice cream feels like too much, whipped cream is the lighter, fluffier option, and it’s so easy to make yourself! Just whip heavy cream until soft peaks form and add just a teaspoon of powdered sugar and a tiny splash of vanilla. Done.
I love topping the crumble with a big, airy dollop of homemade whipped cream right before serving. It looks elegant, but it takes two minutes to make! It adds a lovely airy texture, which contrasts nicely with the denser coconut bake underneath.
Tangy Crème Fraîche or Greek Yogurt
For those days when you want the dessert to feel slightly less heavy—maybe you ate too much dinner, we’ve all been there—a tangy dairy element is the answer. Crème fraîche is glorious; it’s richer than sour cream but has that perfect little sour bite!
If you don’t have crème fraîche readily available, thick, full-fat Greek yogurt is a fantastic substitute. It brings the brightness back to the heavy sweetness of the brown sugar in the topping. Just make sure it’s very cold, and layer it on right before everyone digs in!
Frequently Asked Questions About Cherry Coconut Crumble
I get so many emails and comments about this recipe, which just tells me how much everyone loves a good fruit bake! I’ve gathered up some of the most common things people ask when tackling this recipe, especially around timing and preventing that dreaded soggy bottom. Let’s dive into those FAQs!
If you’re looking for a slightly different take on a fruit and oat bake, I have a lovely cherry oat crumble recipe that uses a slightly different ratio if you want to compare notes!
Can I make this cherry coconut crumble ahead of time?
Oh, yes, you absolutely can! This is great for entertaining because you can do most of the work in the morning or even the night before. For the fruit base, go ahead and toss the cherries with the sugar and lemon juice and get them settled in the baking dish. Cover that tightly and stick it in the fridge.
The trick, though, is the topping. For the absolute best texture, you should hold off on sprinkling the topping until just before you want to bake it. If you put the butter-heavy topping on too soon, especially if it sits in the fridge for hours, that cold butter starts to bond to the fruit juices, and you lose that lovely sandy crumble texture. Assemble it fully right before popping it in the oven—it only takes two minutes to sprinkle!
What is the best way to prevent a soggy bottom on my baked cherry crumble?
Soggy bottoms in fruit crumbles are the worst! They ruin all the hard work we put into that beautiful, crisp topping. My main advice here, which I touched on earlier, is keeping that topping butter extremely cold. Cold butter melts slower in the oven, allowing the flour and oats to toast up nicely on top before the steam from the fruit has a chance to sink down and soak everything.
If you are using really juicy, fresh fruit, especially if you let the fruit/sugar mix sit out for a while, you can try this little insurance policy: Pop the fruit base (just the cherries, sugar, and lemon juice) into the oven by itself for about 10 minutes at 180°C first. Let it get nicely hot and slightly thickened. Then, pull it out, sprinkle the cold topping evenly over the top, and return it to bake as directed. That pre-bake step helps cook off some of the initial moisture!
What other fruits work well in this coconut dessert recipe?
This template is seriously versatile! If you’re not feeling cherries or you’re making this in the wrong season, you have so many great options for this easy coconut dessert. The key is that the fruit needs a little help from sugar and lemon juice to keep it tart and juicy.
I find that blueberries are a spectacular substitute. They are similar in size and acidity to cherries, and they pair beautifully with coconut. Just use about 4 cups of frozen or fresh blueberries and treat them exactly the same way.
Another favorite of mine is sliced firm peaches or nectarines. If you use peaches, slice them thinly, about 1/4 inch thick. Because they are a bit larger than cherries, you might want to increase the lemon juice by just a tiny splash to make sure the flavor stays bright against the sweet topping.
Share Your Cherry Coconut Crumble Experience
Now that you have baked the most glorious Cherry Coconut Crumble, I truly want to hear all about it! Baking is always better when you can share the results, isn’t it? If you followed my notes on keeping that butter cold or managing your frozen fruit, I’m dying to know if those little tips worked for you!
Did you stick with the classic vanilla scoop, or did you get creative with your serving suggestion? Did your topping get that perfect golden-brown crunch we aimed for?
Please, leave me a rating right here on the page! Even better, drop a comment below telling me how it went. I read every single one, and I absolutely love seeing your adaptations and successes. When you share your photos or spread the word, could you give a little shout-out to Hanna Foster? That’s me, the writer, and I’m always thrilled when my adaptations make it into your kitchen!
If you have specific questions that your comments don’t cover, or if you want to send me a picture of your beautiful baked cherry crumble, feel free to head over to my contact page here: Ask Hanna Foster a Question. Can’t wait to see what you created!
Cherry Coconut Crumble
Equipment
- Baking dish
- Mixing Bowl
Ingredients
Fruit Filling
- 4 cups cherries
- 1/2 cup sugar
- 1 tbsp lemon juice
Crumble Topping
- 1 cup oats
- 1/2 cup flour
- 1/2 cup shredded coconut
- 1/2 cup brown sugar
- 1/2 cup butter cold, cubed
Instructions
- Preheat your oven to 180°C.
- Toss the cherries with sugar and lemon juice in a baking dish.
- In a bowl, mix the oats, flour, coconut, brown sugar, and cold butter until the mixture is crumbly.
- Sprinkle the topping evenly over the fruit mixture.
- Bake for 30 to 35 minutes, or until the topping is golden brown and the filling is bubbly.