If you love the crispy satisfaction of Japanese comfort food but dread the thought of deep-frying on a Tuesday night, I totally get it! Sometimes we just want authentic flavor without making the kitchen smell like an oil slick for three days. That’s why I’m so excited about this Baked Chicken Katsu Bowl. Seriously, baking the chicken kept things relaxed in the kitchen while still delivering that amazing katsu feel.
We’re talking about getting a gorgeous, crunchy coating on tender chicken breasts, all made on one simple sheet pan. It’s my go-to answer for quick Japanese Food Recipes when the week feels a bit too hectic. This recipe proves you don’t need a fryer to get that satisfying crunch. Trust me, this will be hitting your dinner rotation weekly!
Why This Baked Chicken Katsu Bowl is Your New Favorite Japanese Meal
The best part about taking the deep-fryer out of this equation is how much extra time you suddenly have! Cleanup is a dream—seriously, just toss that parchment paper. You get that beautiful, golden-brown texture that screams katsu, but without drowning the chicken in oil. It’s a real game-changer for those nights you want authentic Asian Cuisine Recipes without the fuss.
This is one of those fantastic Baked Chicken Katsu Bowl recipes that truly delivers on flavor while keeping the process incredibly streamlined. It’s fast, it’s comforting, and it makes for the most satisfying quick Japanese Meals you can pull together after a long workday. You get all the texture you crave, but baked right on the sheet pan!
Quick Prep for Easy Asian Food
Listen, ten minutes of prep time is practically nothing! That’s just enough time to get organized without rushing the important steps, like making sure that panko sticks well. This speed makes it a staple in our rotation when we need Easy Asian Food on the table fast. You barely even need a second bowl; just set up your dredging station and you’re good to go. It’s so wonderfully simple!
Gathering Ingredients for Your Baked Chicken Katsu Bowl
Okay, gathering supplies for this is half the fun because it’s so straightforward. You don’t need a huge cart full of specialty items, which is why this still feels like one of those great Asian Food Recipes that actually works during the week. Laying everything out nice and tidy before you start dredging really helps keep the process smooth—trust me on having that little bit of organization!
Chicken and Breading Components for Baked Chicken Katsu Bowl
You’ll need two nice chicken breasts, but here’s the key: you must flatten them a bit first. I just place mine between two sheets of plastic wrap and gently tap them until they are an even thickness. That way, they cook evenly, which is vital for a successful bake.
- Flour, egg, and panko: We need the classic three steps here. Use about a half cup of flour and one beaten egg. For the outside crunch, forget regular breadcrumbs; you absolutely must get the coarser, flaky panko kind. They catch the oven heat way better and give you that authentic snap. Make sure you press that panko onto the chicken firmly!
Assembly Ingredients for the Baked Chicken Katsu Bowl
Once the star—the chicken—is ready, we need the bowl structure. This recipe is designed around serving it over fluffy, cooked white rice. That warms up in the microwave while the chicken is finishing, which is so convenient when following these Asian Recipes Authentic.
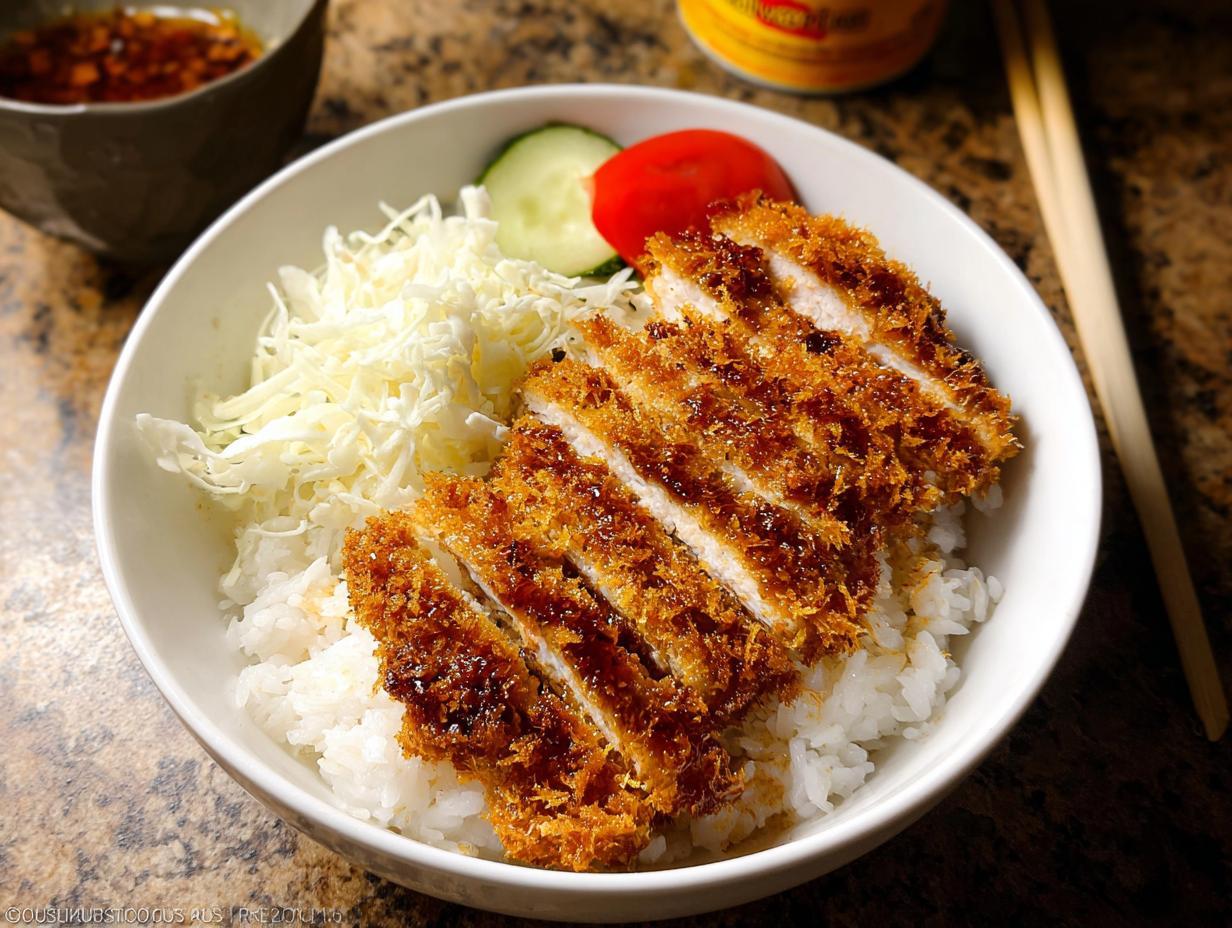
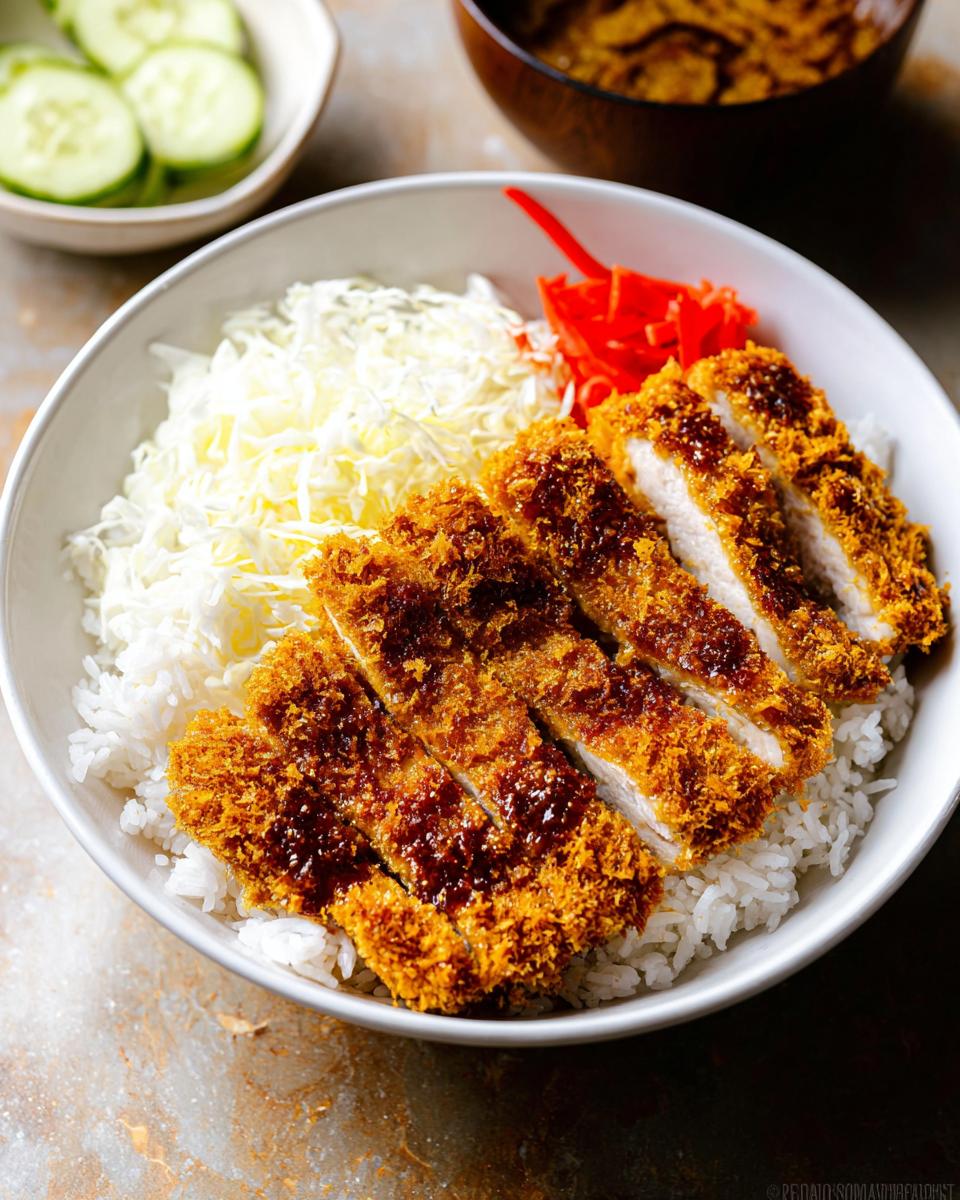
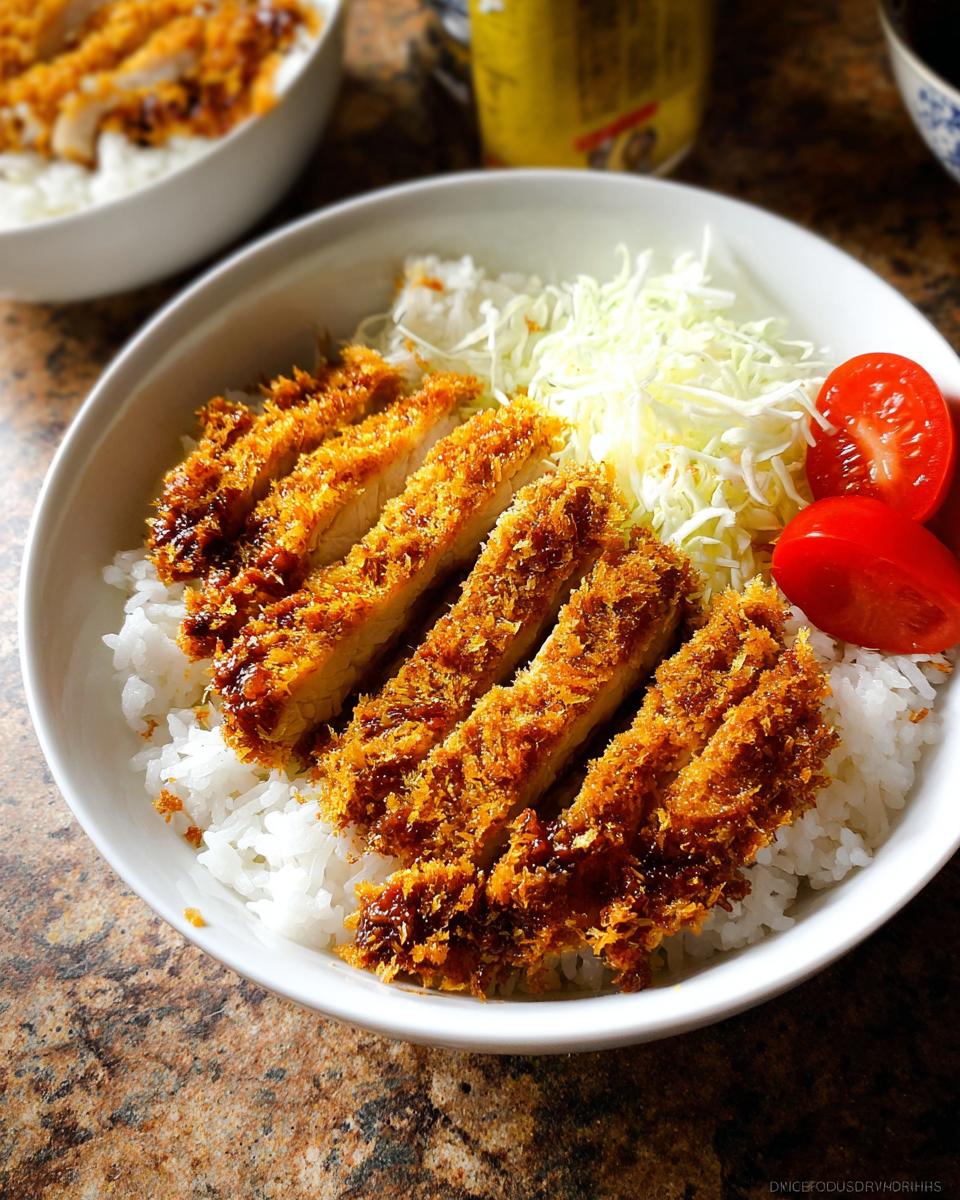
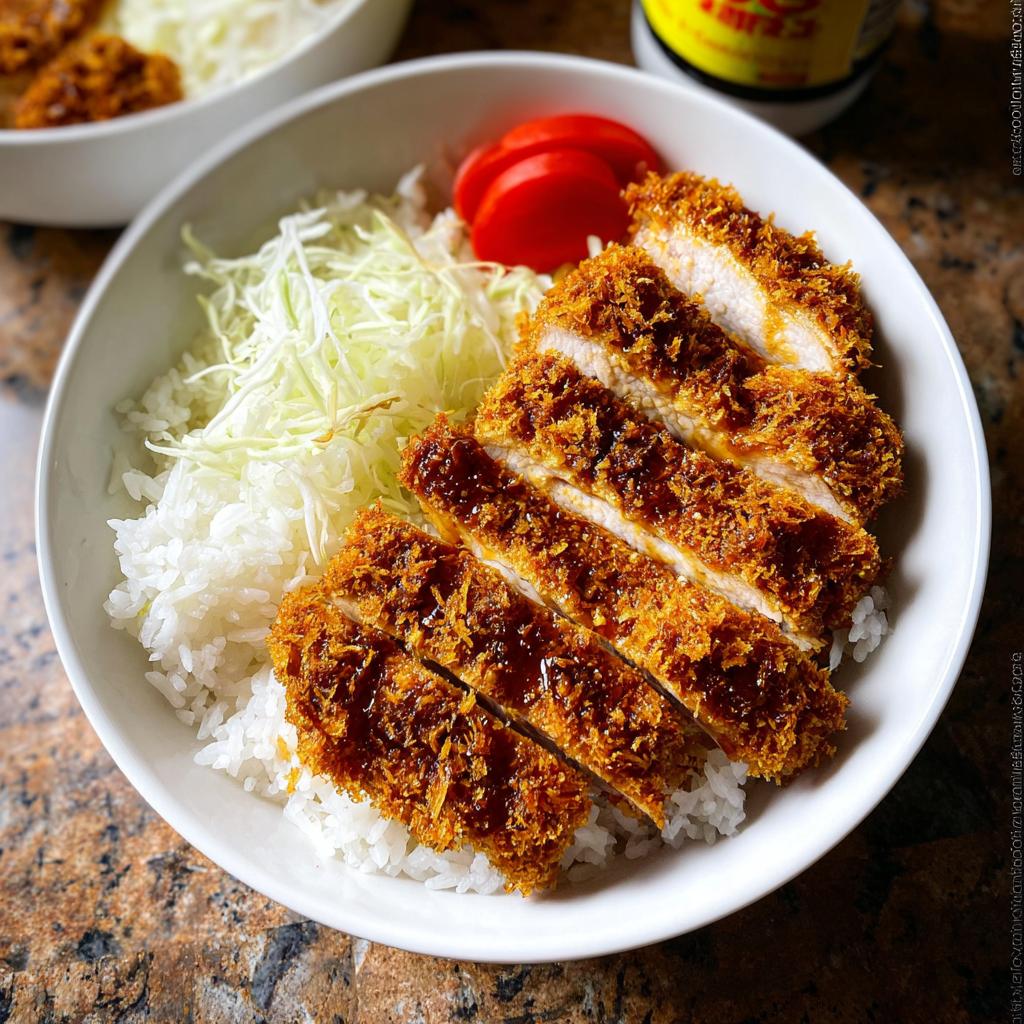
- We also need a little bit of shredded cabbage or lettuce for that fresh crunch right underneath the katsu. And don’t forget the olive oil spray; we use this sparingly to help that panko toast up golden brown in the oven!
Step-by-Step Guide to Perfect Baked Chicken Katsu Bowl
This is where the magic happens! Since we aren’t frying, the oven does all the hard work for us, but we still need to treat our chicken right. You’ll want to set up your dredging station right next to your prepped baking sheet. It really helps keep the mess contained and ensures every piece of chicken gets a beautiful coating for our Baked Chicken Katsu Bowl.
Preparing the Oven and Chicken for the Baked Chicken Katsu Bowl
First things first, turn your oven up to 400°F (200°C). A good hot oven helps crisp up that panko before the chicken dries out. Grab your baking sheet and line it with parchment paper—this is non-negotiable for easy release later! While that warms up, take your flattened chicken breasts and season them generously, on both sides, with salt and pepper. Don’t be shy here; seasoning before breading makes such a difference in the final taste of these Asian Recipes Authentic.
The Breading Process for Authentic Asian Recipes Authentic Texture
Now we set up the three stations: flour, egg, and panko. Dust the chicken lightly in the flour first, shaking off any excess—we only want a thin layer. Next, give it a quick dip in the beaten egg, letting the extra drip off. Finally, press that chicken firmly into the panko breadcrumbs. I mean *really* press it in there, making sure every surface is covered. You want a tight seal so that crust stays on while baking!
Baking and Assembling Your Baked Chicken Katsu Bowl
Place the breaded chicken onto your prepared sheet and give it a light spray of olive oil—this is the trick to oven crispness! Pop it into that hot oven for about 22 to 25 minutes. You must flip the chicken halfway through cooking. Once it’s deeply golden and fully cooked inside, take it out, slice it against the grain into nice strips, and then you can begin to build your bowl. Spoon that hot, cooked rice into the bottom of your serving bowl first, then layer on your fresh cabbage, and finally, arrange those beautiful, crunchy slices of katsu right on top!
Tips for Success with Oven-Baked Chicken Katsu
The biggest fear when baking katsu is getting that soggy bottom crust, right? We want crunch, not chew! To avoid disaster, make sure your oven is truly hot when the chicken goes in—preheating for at least 15 minutes is key. Also, don’t skip that light oil spray over the breadcrumbs; that’s what mimics frying and helps the panko toast up perfectly for your Baked Chicken Katsu Bowl.
Another major secret for achieving the best texture is using metal racks, if you have one. If you have a wire rack that fits inside your baking sheet, place the chicken on that instead of directly on the parchment. Lifting the chicken allows air to circulate underneath, making sure all sides of your katsu get kissed by the heat. Try this tip for your next Japanese Food Recipes attempt; I learned about circulation from my big batch scone baking adventures, which taught me so much about dry heat, believe it or not, and you can read more about my baking experiments here!
Ingredient Notes and Simple Substitutions for Asian Food Ideas
Sometimes pantry staples run low, and that’s just life, isn’t it? You don’t have to panic if you’re missing one tiny thing; we can usually pivot! This recipe is flexible enough to still deliver great results when assembling your Asian Food Ideas for dinner.
If you’re dealing with a gluten allergy or just trying to use what you have, you can swap regular panko for gluten-free panko breadcrumbs. They work almost identically, but make sure you still press them on hard so they stick!
Now, about the chicken: if you only have thighs, go for it! Chicken thighs will be juicier, which is great, but they might take a couple of extra minutes in the oven to reach that safe temperature, so keep an eye on them. For more substitution ideas, check out what I use when I run out of crumbs for things like my salmon patties; I have a great post on that right here.
Serving Suggestions for Your Easy Asian Dishes
Once you’ve got that perfectly baked chicken sitting atop your rice and cabbage, the real fun begins: dressing it up! This is what turns a simple recipe into one of those gorgeous, satisfying Easy Asian Dishes you see online. The absolute essential companion here is tonkatsu sauce. You can buy bottles of it easily, but if you want to try making your own delicious version sometime, let me know!
If you prefer something brighter to cut through the richness of the chicken coating, try adding a sprinkle of very thinly shredded raw carrots on top for extra color and crunch. For a totally brighter side that complements the whole meal, I sometimes whip up a quick, simple salad. My favorite recipe for a light, fresh side is this simple veggie delight. It just lifts the whole meal!
Storing Leftovers of Your Baked Chicken Katsu Bowl
Even though this Baked Chicken Katsu Bowl is so good you’ll probably eat it all in one sitting, sometimes we make extra, right? If you’re prepping ahead, please promise me you won’t store the assembled bowl together! The rice will make the crispy chicken sad and soggy overnight.
Keep the sliced chicken and the rice/cabbage stored separately in airtight containers. This is one of the best tips I learned from my general meal prep adventures.
To reheat the chicken? Skip the microwave! Pop the crunchy pieces back onto a parchment-lined sheet and warm them at about 350°F for just 5–8 minutes. That brings back that wonderful, crackly crust you worked so hard to achieve.
Frequently Asked Questions About Baked Chicken Katsu Bowl
It’s funny, even with such simple Japanese Meals, folks always have the best questions about getting that perfect texture! Since we’re leaning on the oven instead of oil, a few little details make all the difference. I’ve gathered the most common things people ask me when they are making their first Baked Chicken Katsu Bowl.
Can I use chicken thighs instead of breasts for this Baked Chicken Katsu Bowl?
Oh yes, absolutely! Thigh meat is naturally a bit fattier, so it stays wonderfully juicy, even in the oven. The only thing you have to watch for is that they might take 2–5 minutes longer to cook through completely than the flattened breasts. Just use a meat thermometer for the best results if you switch cuts!
How do I keep the panko crust from falling off during baking?
This is the secret sauce of oven-fried texture! You need three things working together perfectly. First, make sure your chicken is patted totally dry before you start the dredging process. Second, use an egg wash that is well incorporated—no dry white bits allowed! Third, and most important: firmly press the panko onto the chicken in the final step. Really jam it on there; it creates a stronger bond that holds up beautifully to the dry heat.
Is this recipe considered one of the best Japanese Food Recipes for beginners?
I truly think so, yes! Because this Baked Chicken Katsu Bowl relies on the consistency of the oven rather than the tricky temperature management involved with deep frying, it’s incredibly forgiving. You get the satisfying result of classic Asian Cuisine Recipes without needing special equipment. It’s a fantastic way to introduce yourself to Japanese Food Recipes!
Estimated Nutritional Data for the Baked Chicken Katsu Bowl
Now, I always tell people that exact numbers are tricky when you’re talking about homemade meals, especially when we don’t weigh every single pinch of salt! These figures are just my best guess based on the ingredients listed, assuming standard chicken breast size and no heavy sauces added, but they certainly show you this is a solid dinner choice.
Think of this as a great anchor for your meal planning as you explore more Asian Food Recipes!
- Calories: Roughly 450-500 per serving (This depends heavily on how much rice you pile on, of course!).
- Protein: High! We’re looking at about 40-45 grams, thanks to that lean chicken breast.
- Fat: Relatively low for a katsu dish since we are baking it—maybe 10-12 grams, mostly from the oil spray.
- Carbohydrates: About 45-50 grams, heavily driven by the rice base.
If you want to see some truly amazing, authentic Japanese meal ideas and how they break down nutrition-wise, check out this great resource on Japanese staples here. It’s fascinating how simple ingredients create fantastic texture, just like with our baked method!
Baked Chicken Katsu Bowl
Equipment
- Baking Sheet
- Parchment paper
Ingredients
- 2 chicken breasts, flattened
- Salt and black pepper
- 1/2 cup all-purpose flour
- 1 large egg, beaten
- 1 cup breadcrumbs (panko-style)
- Olive oil spray
- Cooked white rice
- Shredded cabbage or lettuce (optional)
Instructions
- Preheat oven to 400°F (200°C). Line a baking sheet with parchment.
- Season chicken with salt and pepper.
- Dredge chicken in flour, dip in egg, then coat with breadcrumbs.
- Place on baking sheet and lightly spray with oil.
- Bake 22–25 minutes, flipping once, until golden and cooked through.
- Slice chicken.
- Serve over rice with cabbage if desired.