Listen, I get it. Sometimes you crave that deep-fried, satisfying crunch of classic Japanese food, but you just don’t have an hour, or maybe you’re just trying to keep things a little lighter after a big weekend. That’s exactly how I felt when I developed this Air Fryer Chicken Katsu Bowl recipe. Honestly, the air fryer has changed my life for weeknight dinners!
I won’t lie, I worried the crunch factor would disappear when I started testing this in the air fryer for our family dinners. But wow, was I wrong! The air fryer made this dish feel way more doable for those unbelievably busy evenings without sacrificing that crucial crispiness we all love.
This recipe takes that amazing katsu flavor profile—tender chicken beneath a golden crust—and makes it accessible in under 20 minutes total. It’s quickly become one of my go-to Asian cuisine recipes when I need a win fast.
Why This Air Fryer Chicken Katsu Bowl Recipe Works for Families
When you’re balancing school runs and evening activities, who has time for messy deep frying? Mealtimes should bring comfort, not stress. That’s why I’m so excited about how this recipe fits into our busy routine. It’s truly one of those Easy Asian Dishes that feels like a treat but is actually super fast. If you’re looking for Easy Asian Food that everyone will actually eat, keep reading!
We’ve modernized this classic to fit perfectly into modern family life. I often look at other traditional Katsu recipes and know they involve too much fuss for a Tuesday night. But this one? It’s a winner.
- We’re skipping the oil splatter and keeping guilt low!
- This is perfect for my category of easy family dinner recipes because the cleanup is minimal.
Quick Prep and Cook Times for Weeknights
You seriously cannot beat the clock on this one. We are only talking 5 minutes of prep—that’s just enough time to get the kids set up with homework or pour myself a quick cup of tea. Then, the actual air frying takes just 15 minutes. Total time: 20 minutes! See? Almost instant satisfaction.
Lighter Crunch Without Deep Frying
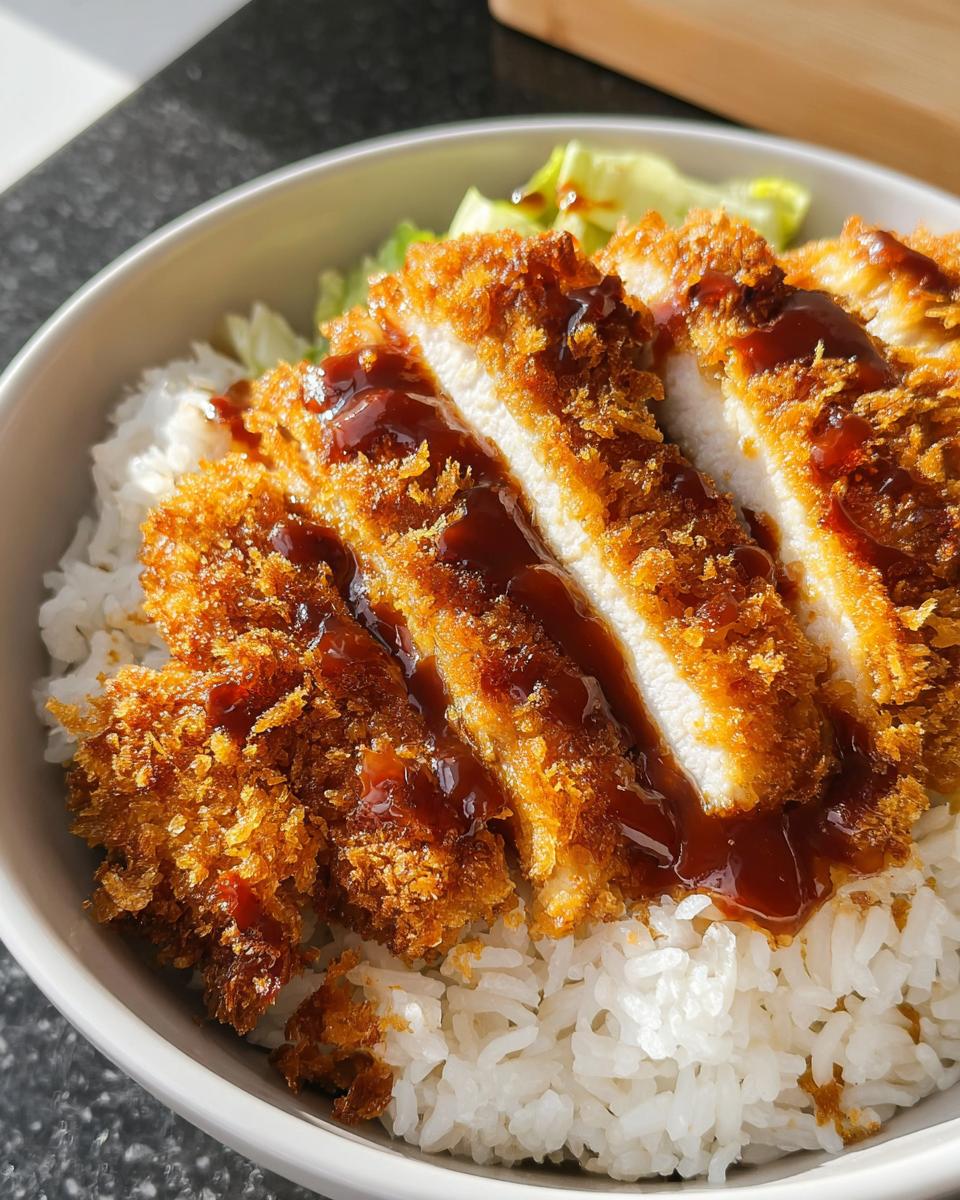
The best part about using the air fryer for this Air Fryer Chicken Katsu Bowl is the texture. You get that beautiful, crackly exterior that makes Katsu so special, but without submerging the chicken in oil. It’s just less heavy, which is a huge win for a dinner you want to eat regularly.
Essential Ingredients for Your Air Fryer Chicken Katsu Bowl
Okay, let’s talk ingredients. Since this is a simpler version of a classic, we absolutely need quality ingredients where it counts. Don’t skimp on the breading, because that’s where all the magic happens for this Air Fryer Chicken Katsu Bowl. I always try to shop smart when I’m making these quicker Asian chicken dinners so I keep my grocery list short and sweet!
We are using simple components here, relying on technique rather than five different sauces to make it taste authentic. Trust me, you probably have most of this stuff in your pantry right now.
For the Chicken Katsu Coating
This is the protective layer that’s going to get impossibly crispy in the air fryer. You need a quick little dredging station set up!
- Two good-sized boneless, skinless chicken breasts. Make sure they aren’t too thick, or they won’t cook evenly in the air fryer basket.
- One large egg, beaten up really well. This is our glue!
- About half a cup of breadcrumbs. Now, listen up—Panko breadcrumbs are your best friend here! They are fluffier and create that superior crunch we are aiming for in Japanese food recipes.
- Just a little sprinkle of salt and fresh black pepper for seasoning the actual chicken before we coat it.
For Assembling the Air Fryer Chicken Katsu Bowl
Since this is a *bowl* recipe, you need a solid base for your crispy topping. These items are what turn the fried chicken into a full, satisfying meal.
- Perfectly cooked white rice. You can use short-grain if you want it more traditional, or whatever rice you prefer!
- Optional, but I highly recommend it: shredded cabbage or a light sprinkle of sesame seeds for garnish.
Step-by-Step Instructions for the Air Fryer Chicken Katsu Bowl
This is the easy part, but precision here is what gets you that beautiful golden crunch without needing a giant pot of oil. You’re going to move fast once you start the breading process, so have your plates ready! If you’re looking for more amazing tips on keeping chicken cooking safe while maximizing flavor, I have a great keto chicken recipe that talks a lot about meat temperatures.
Preparing and Breading the Chicken
First things first, let’s season! Take your two chicken breasts and sprinkle both sides evenly with your salt and pepper. This simple step adds so much flavor right into the meat, which is important since this is such a straightforward recipe. Don’t skip it!
Next, we need our dipping stations. Have your beaten egg in one shallow bowl, and your breadcrumbs in another. Dip each seasoned chicken breast first into the egg—make sure it’s completely coated, nice and sloppy! Then, transfer it directly into the breadcrumbs. Here’s the trick: press that breadcrumb layer on firmly with your hands until the chicken is completely encased. You want zero bare spots!
Air Frying for Maximum Crispness
I always preheat my air fryer for about 3 minutes to 375°F (190°C). I find it helps kickstart that crisp factor immediately! Once it’s hot, carefully place your breaded chicken into the air fryer basket. Don’t crowd them at all; they need space to breathe for proper airflow. If you have a smaller basket, you might need to cook these in two batches. For a look at how others handle this delicious type of traditional Katsu, check out this external guide!
Once they are settled in, set the timer for 14 to 16 minutes at 375°F (190°C). About halfway through—maybe around the 7-minute mark—you need to pause, pull out the basket, and flip those cutlets over. This ensures both sides get that sun-kissed, crispy texture. My pro tip, especially when cooking poultry: always double-check that the internal temperature hits 165°F (74°C) using a meat thermometer right in the thickest part. Safety first!
Assembling Your Japanese Meals
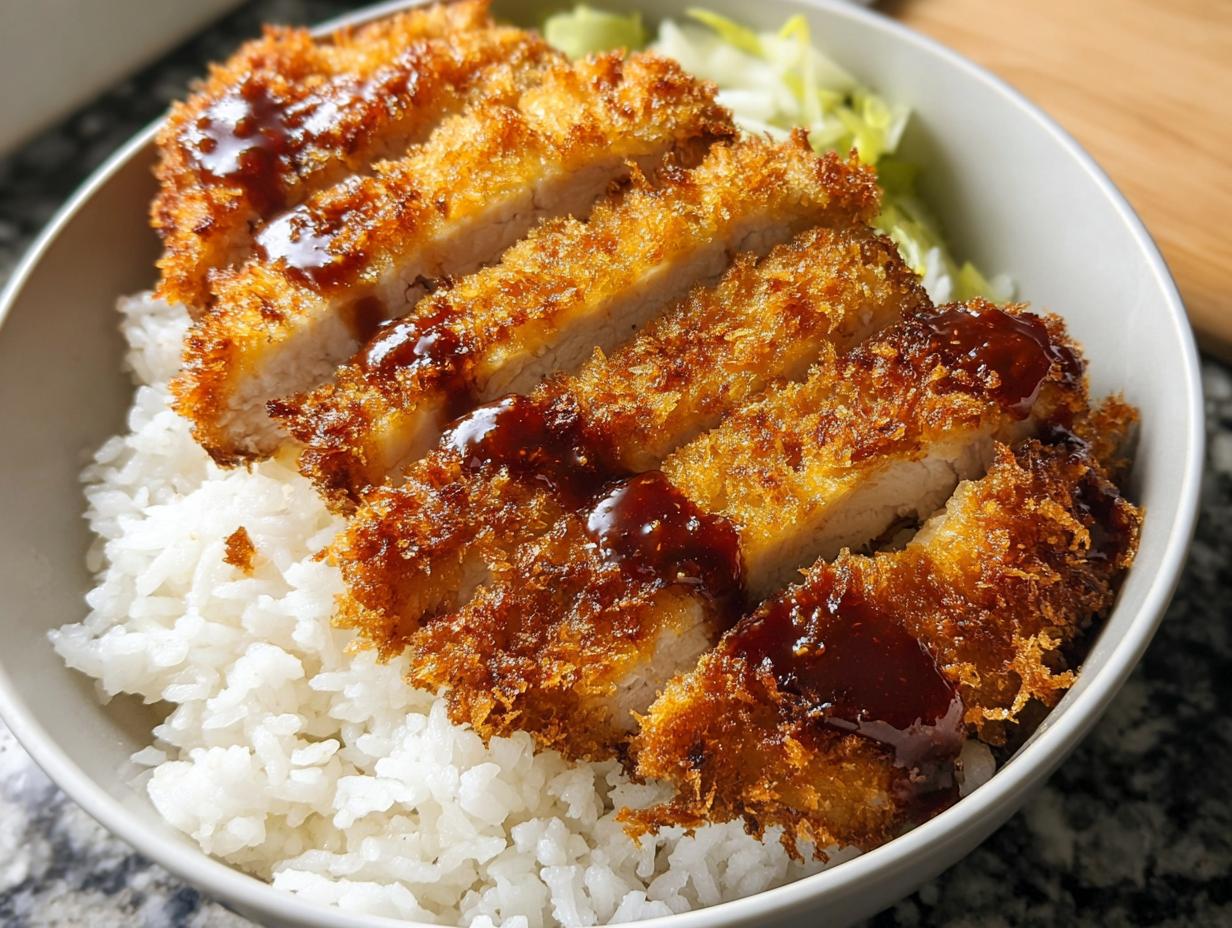
Once that timer dings and your katsu looks perfectly golden, pull them out and let them rest for just a minute or two. This lets the juices settle, keeping the chicken tender. Then, grab a sharp knife and slice the katsu cutlets into thick, bite-sized strips. That pre-slicing makes them perfect for eating!
To finish your bowl, simply spoon out your warm, cooked rice into serving bowls. Lay those lovely sliced katsu pieces right on top of the rice. This is where your quick and satisfying Japanese Meals come together beautifully. See how easy that was? It’s a whole dinner on the table in minutes!
Tips for Perfect Air Fryer Chicken Katsu Bowl Results
Getting that amazing crunch in the air fryer is all about a few small rules I learned the hard way—mostly involving me pulling burnt chicken out because I ignored these steps! Once you master the breading and the loading, you’re golden on these Asian Food Ideas.
- Make sure your breadcrumbs are really pressed onto the chicken. If you just gently sprinkle them on, they’ll blow off in the air fryer and leave you with sad, naked chicken meat!
- Never, ever overlap the cutlets in the basket. Air needs to circulate all around the surface area, or you end up with steamed, soggy spots instead of that crispy exterior. Cook in batches if you have to!
- Try tossing your breadcrumbs with just a tiny spray of cooking oil before coating the chicken. It helps them brown up beautifully, mimicking that little bit of fat from frying. It’s a great trick for low-carb chicken meal prep too, when you want maximum crunch.
Ingredient Notes and Substitutions for Asian Recipes Authentic Flavor
When we are aiming for those super crisp, restaurant-quality textures in our Air Fryer Chicken Katsu Bowl, the specific ingredients we choose make a massive difference. This recipe is all about honoring the flavor profile, so let’s look at where you can make smart choices for your Katsu curry fans!
My absolute expert tip—and this is non-negotiable if you want superior crunch—is using Panko breadcrumbs. Regular breadcrumbs just don’t absorb air the same way! They make for a heavier coat. Panko stays light and shatteringly crisp. These are the key to Asian Recipes Authentic flavor!
Now, what if you run out of eggs or have an allergy? Don’t panic! You can easily substitute the egg wash. Try mixing about 2 tablespoons of milk or even a splash of water with a teaspoon of Dijon mustard for a binder that still sticks nicely. You can always find other tasty ideas when you check out this salad recipe for a fresh side.
Remember, even small ingredient tweaks can elevate these quick Asian Food Ideas!
Serving Suggestions for Your Air Fryer Chicken Katsu Bowl
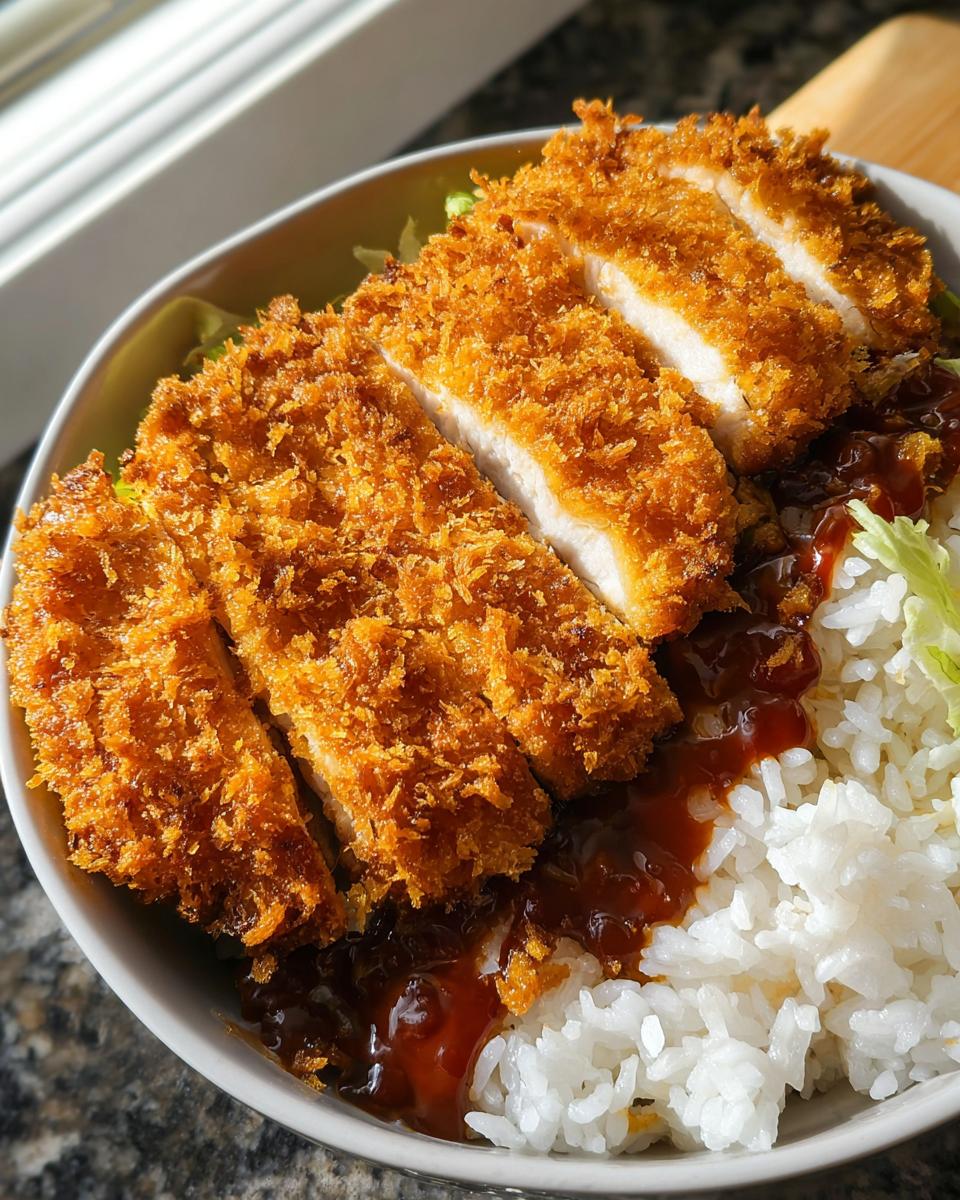
So you’ve got your perfectly crispy chicken ready to go. Now we have to transform it from just crispy meat into a proper, satisfying Air Fryer Chicken Katsu Bowl! These Asian Cuisine Recipes are all about balance, so you need something fresh and tangy to cut through that richness.
I love keeping it simple. A pile of that warm rice is the base, of course, but you definitely need a drizzle of Tonkatsu sauce—it’s traditional for a reason! If you don’t have that on hand, even a simple mix of soy sauce, a little sugar, and rice vinegar works in a pinch.
For extra veggies, throw down a handful of shredded green cabbage. It adds a nice coolness and crunch. Sometimes, I’ll even whip up a quick side salad using the dressing from my avocado chickpea bowl for a fresh side. That’s how you make dinner feel like an event!
Storage and Reheating Instructions for Leftover Air Fryer Chicken Katsu Bowl
The best part about making this **Air Fryer Chicken Katsu Bowl**? Leftovers! But you have to treat the components right, or you end up with soggy disappointments the next day. Definitely store your cooked rice and the crispy chicken separately. If you pack them together, the steam from the rice will sabotage your hard work!
When you are ready for round two, skip the microwave entirely. The air fryer is your secret weapon for reheating! Pop the leftover katsu pieces back into the air fryer basket, maybe for just 3 or 4 minutes at 350°F (175°C). This brings back that glorious crunch in no time flat. It’s one of the best benefits of making these meal prep snack boxes—quick reheating!
The cooked rice can just be zapped in the microwave for a minute. Try to eat the leftovers within two days for the best results!
Frequently Asked Questions About Making an Air Fryer Chicken Katsu Bowl
I know you’re probably excited to try this, but sometimes questions pop up when you try a new cooking method for a classic dish. Don’t worry! I’ve pulled together the questions I get most often about making these Japanese Food Recipes perfectly in the air fryer. These answers will help ensure your **Air Fryer Chicken Katsu Bowl** turns out amazing right away.
Can I use chicken thighs instead of breasts in this Air Fryer Chicken Katsu Bowl?
Oh absolutely! Chicken thighs are actually delicious here because they stay super juicy. Since they have a bit more fat, they can handle a touch longer in the basket, maybe an extra minute or two, but stick to that 375°F temperature. It’s a great way to switch things up on your next batch of Easy Asian Food!
What is the best sauce to pair with this Japanese Food Recipes dish?
You really need that tangy, slightly sweet kick to balance the richness of the crispy chicken, right? The absolute best choice is Tonkatsu sauce. You can usually find it bottled in the international aisle if you don’t want to make it from scratch. If you’re in a real pinch, a quick homemade mix of soy sauce, brown sugar, and rice vinegar stirred together works wonders!
How do I prevent the breading from falling off?
This is the most common issue with breading anything, but air frying emphasizes it because of the intense heat and airflow! My biggest advice is to be thorough with your egg wash—make sure every single millimeter of that chicken breast is covered. Then, when you put it into the breadcrumbs, really use your hands to press that coating on firmly, almost like you are physically smoothing it into the meat. Don’t just let it fall off; press it on!
If you have any other burning questions about making this the best of all your bowl recipes, drop a comment below!
Estimated Nutritional Data for the Air Fryer Chicken Katsu Bowl
Okay, folks, here’s where I like to keep things honest upfront. Because this recipe is so flexible—you might use thicker chicken, or maybe you double the rice for growing teens—the nutritional estimates are just that: estimates! They’re helpful, sure, but use them as a guideline for comparison rather than gospel.
For the numbers below, these calculations are based on two standard servings using average boneless, skinless chicken breasts and standard white rice, with no heavy sauces added. If you’re like me and love piling on the Tonkatsu sauce (which is delicious but adds sugar!), remember that will change the final tally!
We use the air fryer specifically to keep things lighter, which you can see reflected here, but remember, these charts are just a starting point for your own tracking. For more high-protein options that might fit into your dietary goals, check out my high-protein chicken wrap guide!
- Estimated Calories: Approximately 550-600 per serving
- Fat: Lower than deep-fried versions, likely around 12g-15g
- Protein: High! Around 45g per serving, thanks to the chicken.
- Carbohydrates: Varies widely based on how much rice you pile in!
Always remember that these figures rely on standard ingredient measurements, and your kitchen results might vary slightly based on the exact size of your chicken pieces. It’s a fantastic lighter take on classic Asian food recipes, though!
Share Your Air Fryer Chicken Katsu Bowl Creations
I absolutely live for hearing about your cooking adventures! Have you made this quick **Air Fryer Chicken Katsu Bowl**? Did you try adding a little drizzle of sesame oil over the rice before topping it with the crispy chicken? Or maybe you found a killer substitute for the breadcrumbs?
Please, please, please come back here and let me know how it went! Leave me a rating below—five stars if it saved your dinner plans! Your honest feedback helps others feel confident about trying these lighter Asian Food Ideas.
If you have any specific questions or want to share pictures of your bowl creations, you can always shoot me a message directly through my contact page. I love seeing them!
About the Author: Grace Williams
By Grace Williams, Contributor at Recipes by Betty.
Air Fryer Chicken Katsu Bowl
Equipment
- Air Fryer
Ingredients
- 2 chicken breasts
- 1/2 cup breadcrumbs
- 1 egg
- Salt and pepper
- Cooked rice
Instructions
- Season the chicken breasts with salt and pepper.
- Dip the seasoned chicken into the egg, then coat completely with breadcrumbs.
- Place the coated chicken in the air fryer basket.
- Cook at 375°F (190°C) for 14 to 16 minutes, flipping the chicken once halfway through cooking.
- Slice the cooked chicken and serve it over cooked rice.