Oh my goodness, if you love sushi but hate dealing with seaweed mats or getting rice everywhere, I have the perfect little fix for you! These tuna sushi balls are honestly genius when you need sushi flavor without all the fuss of rolling delicate rolls. They are so neat, they pack up perfectly, and they seriously make for the best quick lunch.
Seriously, this Tuna Sushi Ball Recipe is my secret weapon. These tuna sushi balls became my go-to when I wanted sushi flavor without the mess—they are easy, neat, and satisfying. They ditch the rolling mat entirely and deliver all that creamy, salty goodness in one perfect bite. You won’t believe how fast these come together!
Why This Tuna Sushi Ball Recipe Works for Quick Lunches
I keep making these because they solve so many weekday problems! If you are scrambling for Quick Lunch Ideas or need fantastic Easy Lunches For Work that don’t get soggy, these are your answer. They are practically foolproof, which is why I recommend them constantly.
The biggest win here is the simplicity. You don’t need any fancy rolling pads or specialized skills—just your hands get the job done! Trust me, packing these up is a breeze.
- No rolling mat required, which cuts down setup time massively.
- They are perfectly portable and stay neat in a lunch container.
- Prep happens in under 15 minutes before chilling!
- They are wonderful served cold, making them ideal for grab-and-go meals.
You can even make a batch and tuck them into your lunch box right alongside something like my veggie hummus lunch box, and you’re set for the week!
Ingredients for Your Tuna Sushi Ball Recipe
Okay, the ingredient list for this Tuna Sushi Ball Recipe is beautifully short. That’s the beauty of keeping things simple for your lunch, right? We are using basic pantry staples, but those flavor combinations are just fantastic together. We’ve broken them down into the filling and what you need to wrap them all up.
For the Tuna Filling
This is where all the flavor lives! Make sure that tuna is really well drained, otherwise your balls will be too wet to shape properly. We only need a touch of mayo and acid here to bring it all together.
- 1 can tuna in water, drained
- 1 tbsp mayonnaise
- 1 tsp lemon juice
- 1 pinch salt
For Assembly of the Tuna Sushi Ball Recipe
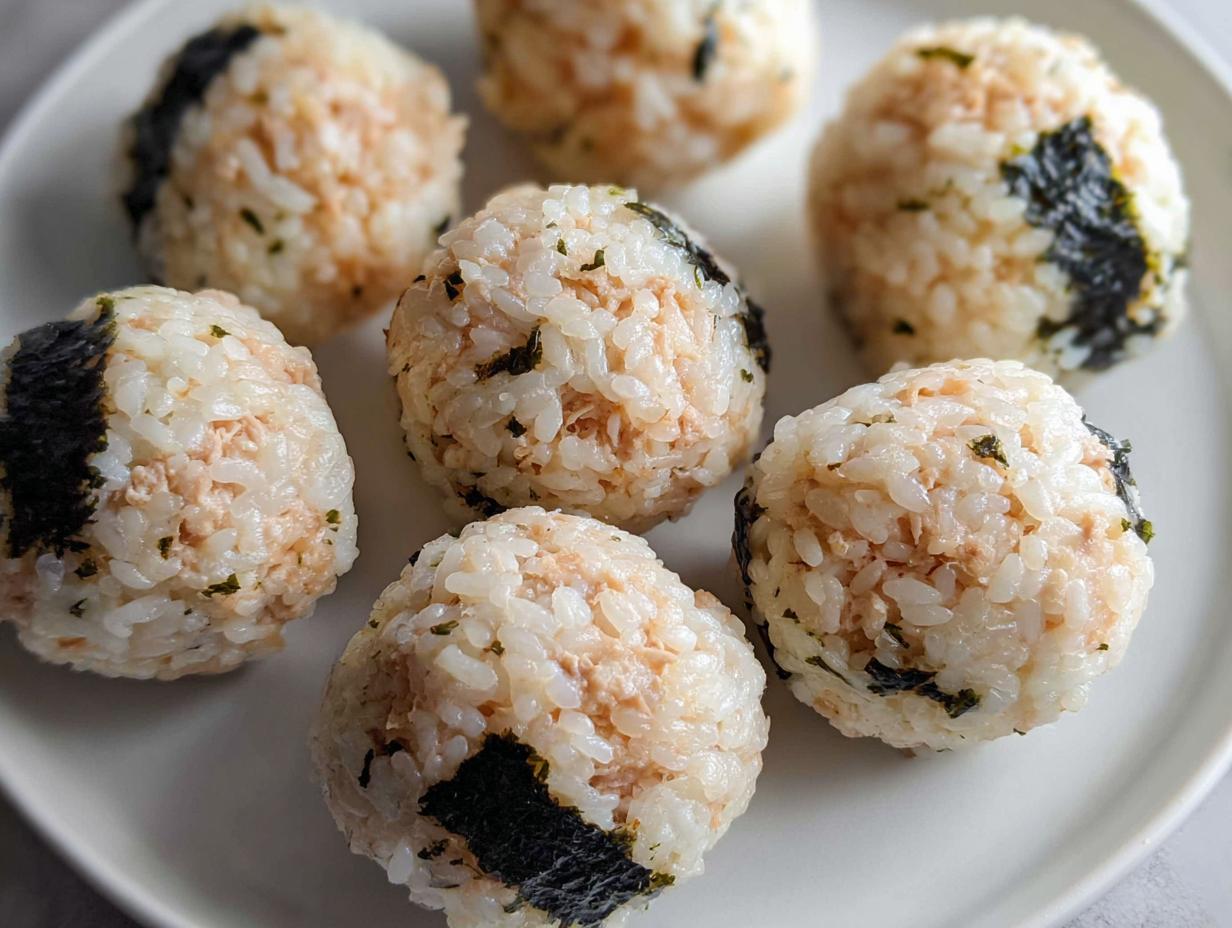
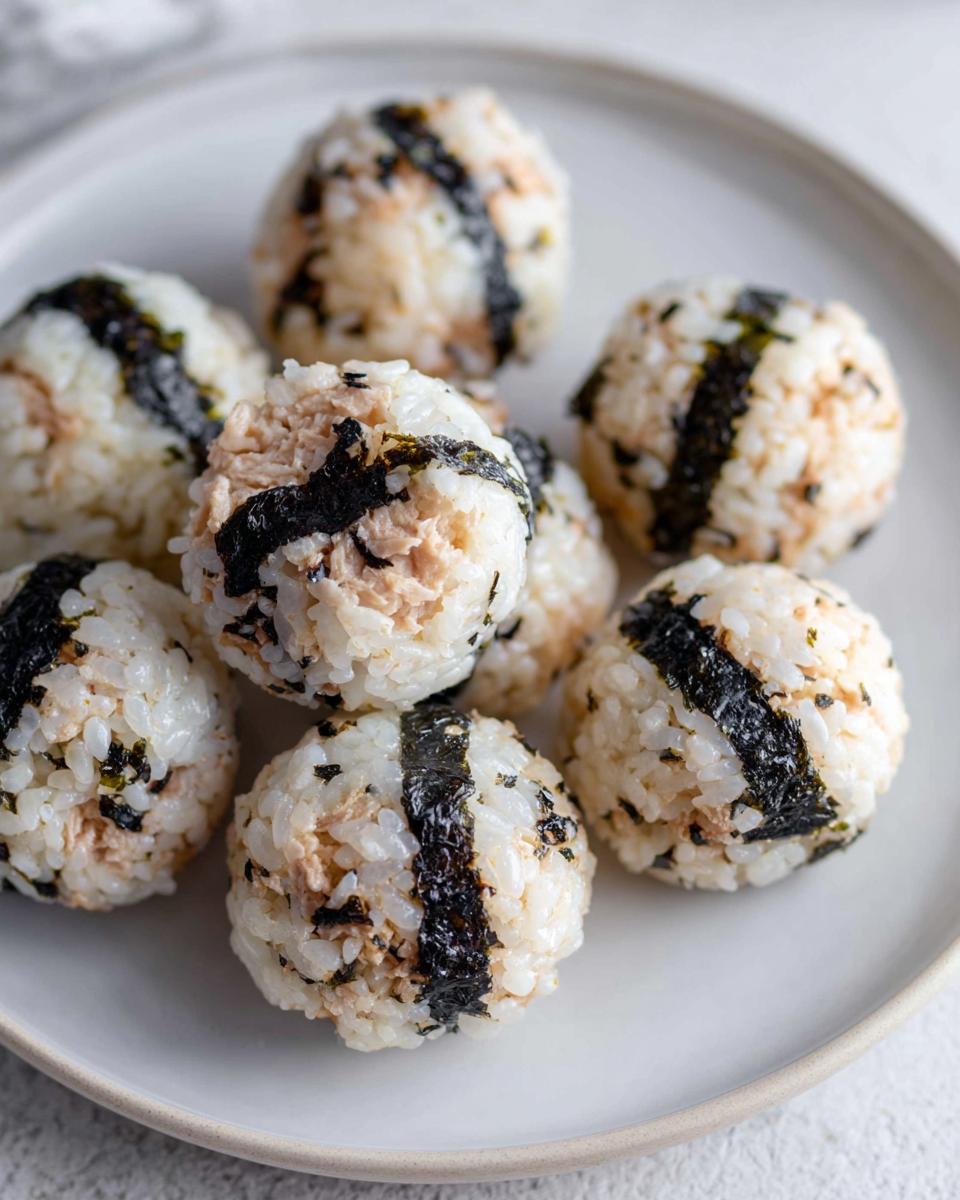
The rice has to be packed right, so make sure you’re using properly cooked sushi rice. The nori strips are just for a little decoration and to help you grab the ball, so cut those strips thin!
- 2 cups cooked sushi rice
- 1 sheet nori, cut into strips
Essential Equipment for This Tuna Sushi Ball Recipe
When we talk fuss-free, we mean *fuss-free*. You really don’t need a load of gadgets for these tuna sushi balls, which makes cleanup simple. You probably have everything you need sitting in your normal kitchen drawers right now.
The main things you need are just a standard mixing bowl and your clean hands, of course! We do call for one specific item to mix up the filling, though. Seriously, grab your small bowl—that’s where the magic starts before you get shaping!
How to Prepare the Tuna Sushi Ball Recipe Step-by-Step
This is where the assembly comes together. Honestly, if you can mix two things and roll a little ball, you can make this recipe perfectly. The secret to success, especially with sticky rice, is having a little water handy at all times. I always keep a small bowl of water right next to my cutting board just for this!
Mixing the Tuna Filling
First things first, we need to get that perfectly seasoned tuna mixture ready to go. Just toss the well-drained tuna, the mayonnaise—which gives it that creamy texture—the lemon juice for brightness, and a tiny pinch of salt right into your bowl. Mix that up until everything is combined nicely. That’s it for the filling; it’s so simple!
Forming the Tuna Sushi Ball Recipe
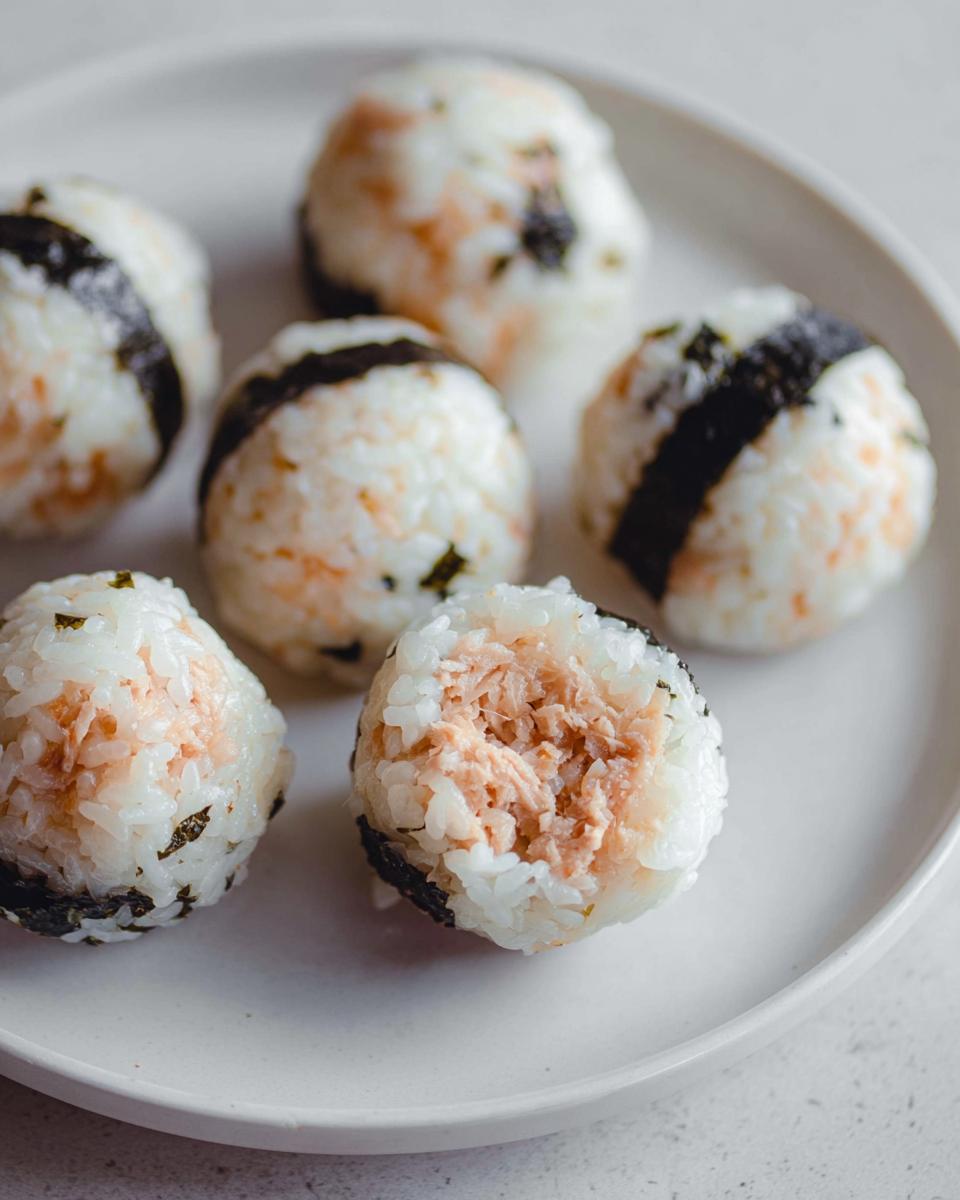
Now for the fun part! You absolutely must wet your hands before touching the rice. If you skip wetting them, the sticky rice will stick to you, and you’ll just get frustrated! Take a small amount of your cooked sushi rice—you can find a great guide for making perfect sushi rice here—and flatten it gently in your palm. Next, place just a tiny teaspoon of that tuna mixture right in the center there.
Carefully, wrap the rice around that little dollop of tuna filling. Gently squeeze and cup your hands around it until you’ve formed a nice, tight little ball. Don’t press too hard, or the rice might crack, but make sure it holds its shape. It only takes a few seconds per ball.
Finishing and Chilling the Tuna Sushi Ball Recipe
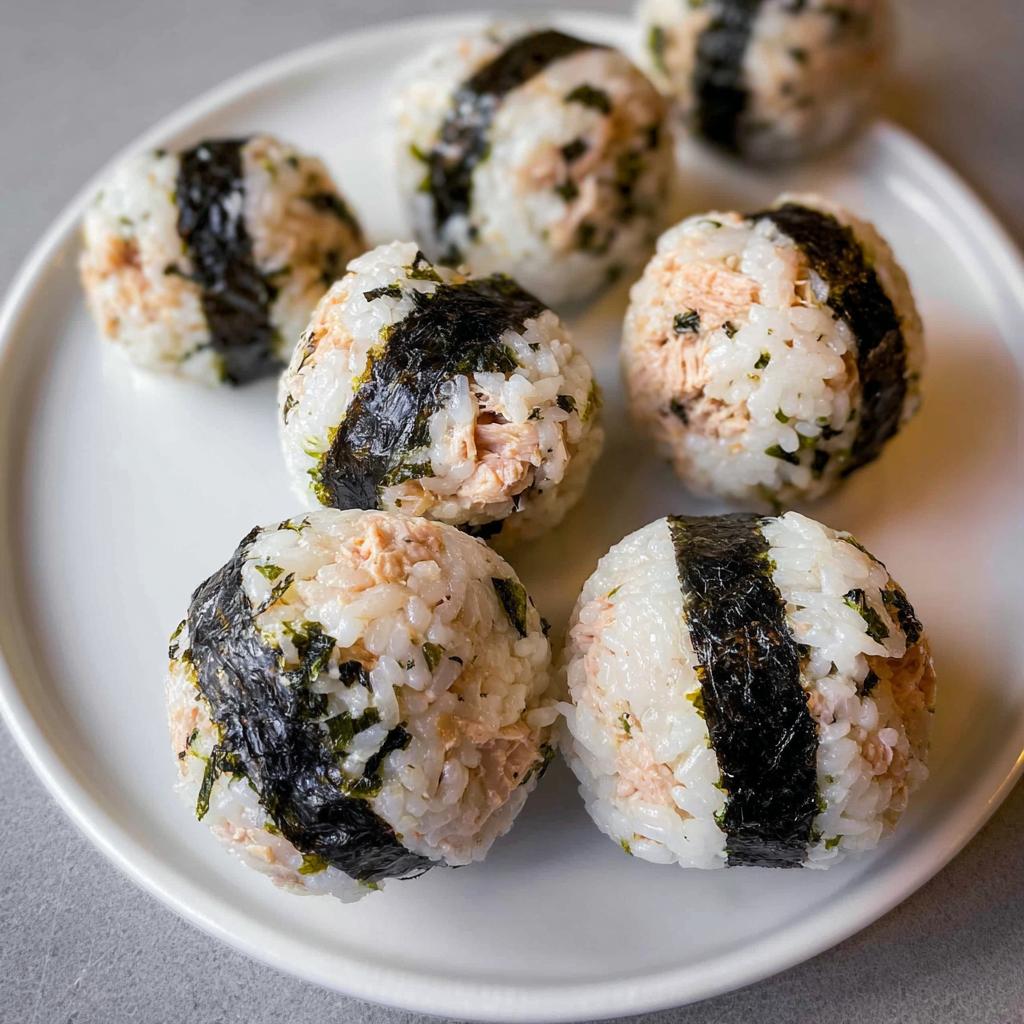
Once you have your perfect little balls, take one of those thin nori strips you cut earlier and stick it carefully to the outside of the ball. This looks nice and acts as a little handle, which is perfect for school lunches or dipping. Remember, this Tuna Sushi Ball Recipe needs a little rest time to set up properly.
Pop all the finished balls onto a plate or tray and chill them in the fridge for a solid 30 minutes. Honestly, this chilling time is non-negotiable! It firms everything up so the rice doesn’t fall apart when you pick it up later. You can check out more tips on Japanese food preparation if you want to check out the traditional context for handling rice.
Even though this Tuna Sushi Ball Recipe is super straightforward, a couple of little secrets make them go from good to absolutely unforgettable. The biggest enemy here is stickiness, but we can beat that easily.
If you find the rice is just clinging to your fingers no matter how much you wet them, try giving your hands a quick splash of rice vinegar water instead of plain water. It doesn’t change the flavor of the ball much but it seems to make the rice slicker.
For a healthier spin—because we all want those Healthy Lunch Ideas For Work to be guilt-free sometimes—swap out half or all of that mayo for plain Greek yogurt. It keeps the creaminess but cuts down on fat. You can find loads of seasoning inspiration on my favorite tuna seasoning post!
Also, don’t be afraid to peek at how the masters do it; these are similar to Temari sushi, and you can see great shaping techniques over here. But honestly, just remember: wet hands, rice firm, let it chill. That’s the key to success!
Variations for Your Tuna Sushi Ball Recipe
Just because this is an easy recipe doesn’t mean it has to be boring! Once you’ve mastered the basic Tuna Sushi Ball Recipe, you should totally start customizing the filling. We are making these for lunch or dinner, so mixing it up keeps things fun for those Lunch Dinner Ideas.
If you want a little kick, stir in just a tiny drizzle of Sriracha into the tuna mix. Wow, that wakes things right up! Feeling like adding some green crunch? Finely chopped scallions or chives are amazing in there too. It adds such a fresh bite.
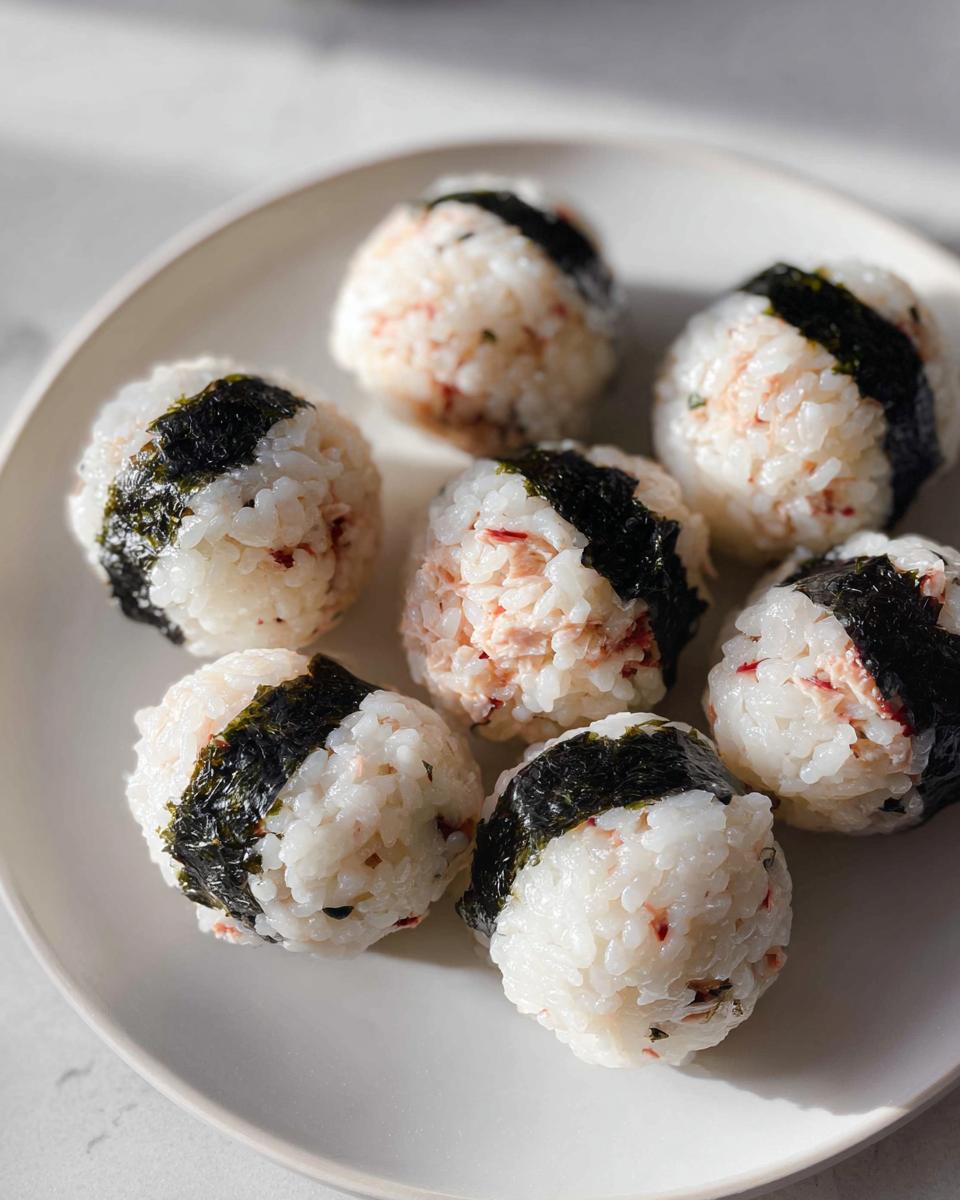
Don’t feel like you have to stick to tuna either! This works beautifully made with canned salmon instead. Or, if you want something totally different but still fish-based, try using canned smoked oysters if you’re feeling adventurous. For a slightly different creamy profile, you could even look at ideas like my avocado chicken salad as inspiration for swapping out the binder!
Serving Suggestions for This Easy Tuna Sushi Ball Recipe
These tuna sushi balls are fantastic on their own, but for a proper meal, especially if you’re making an Easy Healthy Dinner, you need a good sidekick! Since they are served cold, think light and crisp pairings. This keeps the whole experience fresh and easy!
For packed lunches, especially Kid Friendly Dinners or school meals, I love pairing them with a side of steamed and salted edamame. It’s a great protein boost and easy for little hands to manage.
If I’m having these for dinner, I’ll usually throw together a super quick cucumber salad with a splash of rice vinegar. Or, you can pack them alongside one of my favorite healthy plates, like the healthy snack plate, so everyone gets a little bit of everything!
Storage and Keeping Your Tuna Sushi Ball Recipe Fresh
Because these tuna sushi balls only use cooked ingredients and have that little bit of mayonnaise, storage is super important to keep them safe and tasty! You absolutely cannot reheat these, nope, not even a little bit. They are strictly meant to be eaten cold, making them perfect for those fuss-free Cold Lunch Ideas.
After you chill them for that initial 30 minutes, pop any leftovers into a proper airtight container. They stay really good for up to two days in the fridge. Don’t leave them sitting out on the counter for more than an hour or so, especially if it’s warm!
Frequently Asked Questions About the Tuna Sushi Ball Recipe
I know when you’re looking for Simple Lunch Ideas you have questions! It’s smart to check before you dive in. People ask me all the time how flexible these little tuna balls are, especially when trying to squeeze them into a busy schedule or make them healthier.
Can I make this Tuna Sushi Ball Recipe ahead of time?
You absolutely can make these ahead of time, which is why they are such a lifesaver for busy days! I recommend making them the night before or early in the morning. That 30-minute chill time is key, but an overnight chill locks in their shape even better. Just make sure they are sealed tight in an airtight container so the rice doesn’t dry out!
What is the best type of rice for this Tuna Sushi Ball Recipe?
You really, really need to use cooked sushi rice here. Don’t try to substitute regular white rice! Sushi rice has the perfect starch content so it gets sticky when it’s seasoned and cooled just right. That stickiness is what makes sure your ball actually stays a ball and doesn’t crumble when you pick it up. The texture totally depends on using the right rice, trust me on this one!
Are these Tuna Sushi Balls considered Healthy Dinner Ideas?
Yes, I definitely consider them great for Healthy Dinner Ideas! We are using lean protein from the tuna and only a couple of tablespoons of mayo for creaminess. If you swap the mayo for Greek yogurt, they become even better for you. They are light, satisfying, and full of protein without being heavy. If you like making small bites, these are kind of like my healthy energy bites, but savory!
If you try this recipe out, please let me know how they turn out for your lunches!
Your Thoughts on This Easy Tuna Sushi Ball Recipe
That’s it, my friends! We’ve packed up all the tips and tricks to make this incredibly snappy Tuna Sushi Ball Recipe a staple in your week. Seriously, once you taste how fresh and perfectly balanced these simple balls are, you’ll wonder why you hadn’t started making them sooner for those Cold Lunch Ideas.
Now comes the most important part: I want to hear from you! Did you add any secret spices to the tuna mix? How did your kids react to them as Lunch Ideas For School? Please pop down below, leave a star rating for the recipe, and tell me how this easy recipe fit into your busy week. I read every single comment!
If you want to know more about me or check out some other simple meals, you can always find my bio and other contributions over at Recipes by Betty.
By Grace Williams, Contributor at Recipes by Betty.
Tuna Sushi Ball Recipe
Equipment
- Small Bowl
Ingredients
For the Tuna Filling
- 1 can tuna in water drained
- 1 tbsp mayonnaise
- 1 tsp lemon juice
- 1 pinch salt
For Assembly
- 2 cups cooked sushi rice
- 1 sheet nori cut into strips
Instructions
- Mix the tuna, mayonnaise, lemon juice, and salt in a small bowl.
- Wet your hands and flatten a small amount of rice.
- Add 1 teaspoon of the tuna mixture into the center of the flattened rice.
- Wrap the rice around the filling and form it into a ball shape.
- Stick a small strip of nori onto the outside of each ball.
- Chill the sushi balls for 30 minutes before you serve them.