Forget those fussy, complicated pastries you see in the glass case! I live for the moment when something looks totally high-end but takes minimal effort, and let me tell you, these Strawberry Danish Bites are the definition of that. Seriously, I’ve spent years messing around with laminated dough, but sometimes you just need speed without sacrificing that amazing, flaky texture.
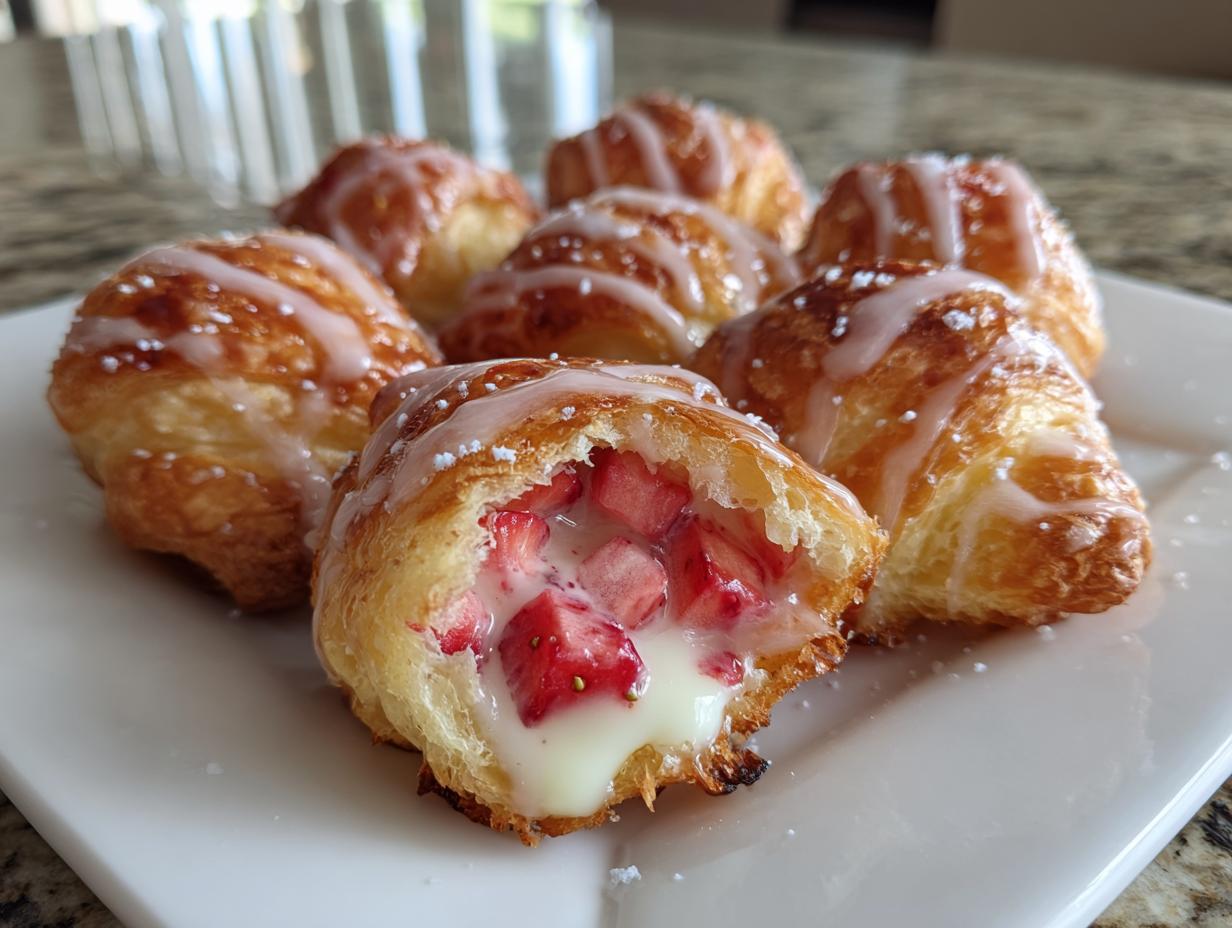
These little morsels are so wonderfully simple, using dough right from the tube, yet they achieve that light, slightly tangy aesthetic you crave. Having worked in test kitchens, I know presentation is half the battle. That’s why I love them; I enjoy styling these as a group on a platter—they instantly look like a bakery tray ready to share. You’re going to fall in love with this easy strawberry dessert!

Why You Will Master These Strawberry Danish Bites
If you thought making beautiful pastries meant complicated steps, think again! These are designed for maximum payoff with minimal effort. Honestly, you’ll feel like a pastry chef when you see how good they turn out.
- They rely on store-bought dough, cutting your prep time in half!
- The combination of tangy cream cheese and sweet berries is just divine.
- The final drizzle of glaze provides that professional, bakery-finished look instantly.
Essential Equipment for Perfect Strawberry Danish Bites
You don’t need a whole professional setup for these strawberry desserts recipes, which is the best part! Having the right tools just makes the assembly quick and tidy. Since we’re aiming for that signature bite size, precision helps.
You’ll want just these few basics on hand:
- A standard baking sheet, maybe two if you’re making a huge batch!
- A couple of simple mixing bowls for your filling and glaze.
- The MVP tool: A small round cookie cutter, about 2 inches across. This makes sure every single bite looks standardized and picture-perfect.
Gathering Ingredients for Your Strawberry Danish Bites
You know, the key to making sure these come out looking like they’re from a high-end patisserie is using exactly what the recipe calls for, especially when it comes to the cream cheese. Don’t try to eyeball the measurements here, because we want that perfect balance between the flaky dough and the creamy center. Having all your little bowls prepped means when it’s assembly time, you’re flying! If you’re interested in some other tricks for achieving perfect pastry structure, I laid out some of my absolute favorites over on my post about scone perfection!
For the Danish Dough Base
This is where the magic starts—honestly, using canned dough is perfectly acceptable for a fast, easy strawberry dessert recipe!
- 1 package Refrigerated crescent roll dough (Make sure you get the 8 count tubes!)
- 4 oz Cream cheese, making sure it is fully softened
- 1/4 cup Granulated sugar
- 1 tsp Vanilla extract
For the Filling and Glaze of Strawberry Danish Bites
Focus on those fresh strawberry recipes when you shop! The quality of the berry really shines through here.
- 1 cup Fresh strawberries, diced small
- 1 tbsp Cornstarch (This is our secret thickening agent!)
- 2 tbsp Water
- 1/2 cup Powdered sugar (reserved just for the glaze)
- 1 tsp Milk (just enough to get that glaze drizzling nicely)
Step-by-Step Instructions for Easy Strawberry Danish Bites
Okay, this is the fun part! Once your ingredients are prepped, putting these together is super fast. Trust me, you won’t believe how quickly you turn basic dough into something that looks this gorgeous. Seriously, using these simple strawberry desserts recipes takes the stress out of baking completely!
You don’t want to be scrambling later! Line a baking sheet now so you’re ready when the dough is cut. Having all your little bowls prepped means when it’s assembly time, you’re flying. I love seeing the beautiful results from minimal effort.
Preparing the Dough and Filling
First things first, get that oven warming up to 375 degrees F (190 degrees C). Next, unroll your crescent dough. Don’t stretch it; just use a small, 2-inch round cookie cutter to punch out about 12 neat circles. They don’t have to be perfect, but keep them similar in size.
In a separate little bowl, grab your softened cream cheese and beat it firmly with the sugar and vanilla until it’s totally smooth. That creamy base is essential for that rich center!
Assembling and Baking the Strawberry Danish Bites
Now for the berries! In yet another small bowl, gently mix your diced strawberries with the cornstarch and water. The cornstarch coating is super important because it keeps those fresh fruit juices from drowning your dough while baking. Spoon a tiny bit of the cream cheese filling onto the middle of each dough circle. Top that with just a few of your coated strawberries.
Here’s the assembly trick: gently fold the edges of the dough up around the filling, creating a little nest or open-faced tart shape. They should look rustic! Pop these onto your prepared sheet and bake them for about 12 to 15 minutes. You are looking for that lovely golden brown color on the dough edges. They should smell absolutely heavenly!

Glazing and Chilling for the Best Strawberry Danish Bites
Once they come out of the oven, let them cool on the baking sheet for just five minutes while you make the drizzle. Whisk together your powdered sugar and milk until you have a perfectly thin, pourable glaze. After the bites move to a wire rack, drizzle that shiny glaze all over them. While they taste great warm, you absolutely must resist eating them immediately!
The recipe calls for chilling them for about 30 minutes. This lets the glaze set up nicely and gives the center a wonderful firmness, which is key for presentation. I enjoy styling these as a group on a platter—they instantly look like a bakery tray ready to share. Seriously, these easy strawberry desserts taste best when they are slightly cool and the glaze is firm!

Tips for Achieving Perfect Strawberry Danish Bites Every Time
Nobody wants a sloppy danish, right? These tips are things I learned the hard way when I was trying to nail down the look of a classic Danish pastry without spending all weekend laminating dough. If you follow these three little secrets, your results will be stunning every single time.
Remember, even though we’re using crescent dough, we want that baked, flaky structure to hold up our lovely filling.
First, handle that crescent dough as little as possible. Seriously. As soon as you unroll it, cut your circles and go straight to the filling step. If the dough gets too warm, the butter inside melts a little, and when it bakes, you lose that lovely separation and flakiness. Keep your work area cool!
Second, pay attention to the strawberry-to-cornstarch ratio. If your berries are super juicy—maybe they were just washed or are especially ripe—you might need just a tiny extra sprinkle of cornstarch when you toss them. Nobody wants a puddle of pink liquid soaking into the bottom of your beautiful pastry. We need that slight thickening!
Finally, don’t drown them in glaze! The glaze needs to look like a drizzle, not a thick blanket. When whipping it up, remember you can always add another teaspoon of powdered sugar if it looks too thin, but it’s impossible to take sugar out once it’s in! It’s all about balance. For more baking secrets rooted in science, check out my guide on achieving perfect scone texture; those same principles work great here with the dough!
Ingredient Notes and Substitutions for Strawberry Danish Bites
I always get questions about tweaking recipes, and honestly, when it comes to these delightful little bites, most ingredients are pretty set in stone because we are trying to mimic that classic bakery flavor. However, I have a couple of ways you can adapt if you’re missing something or just want to try a slight variation on these fresh strawberry recipes.
The recipe notes mention that if you find your filling seems a little thin, you can bulk it up. I definitely recommend heeding that advice! If you’re worried about your cream cheese mixture not being quite enough to cover all twelve portions, go ahead and beat in an extra ounce of cream cheese. That extra richness is never a bad thing in a pastry like this, in my opinion.
Now, let’s talk about strawberries. What if you’re baking in January and the fresh ones just aren’t good? You can absolutely use frozen, but there’s a catch. If you use frozen strawberries, you must thaw them completely first and blot them very, very dry with paper towels before mixing them with the cornstarch and water. If you skip blotting, you’ll end up with too much liquid, and your crescent dough will get soggy really fast. Nobody wants dissolving dough!
For sweetness, if you were completely out of granulated sugar for the filling base, you could technically substitute an equal amount of maple syrup, but you must reduce the water in the strawberry slurry by about a quarter teaspoon, as maple syrup is thinner than pure sugar. It changes the flavor profile a bit, making it less traditional, but it still works in a pinch when you absolutely need those easy strawberry desserts!
Storage and Serving Suggestions for Strawberry Danish Bites
These little bites are best enjoyed fresh, right after they’ve cooled down enough for the glaze to set. They have a beautiful Strawberry Shortcake Aesthetic that just screams ‘summer picnic’ or brunch gathering!
Because we are using that delicious cream cheese filling, you absolutely cannot leave these sitting out on the counter overnight. They need proper handling to stay safe and delicious for leftovers. Don’t worry, they still taste amazing the next day!
Storing Your Leftover Danish Bites
When you have leftovers from your batch of Strawberry Danish Bites, pop them into an airtight container. They will keep quite happily in the refrigerator for up to three days. I find the texture holds up really well, though the crescent dough might soften ever so slightly after the first day—it’s still worth saving!
Do you need to reheat them? Honestly, I don’t usually bother, especially if I’m serving them cold as part of a dessert spread. But if you want to bring them closer to that ‘fresh-from-the-oven’ flavor, give them just a few seconds in the microwave—maybe 5 to 8 seconds per bite. Any longer and you risk melting that beautiful glaze right off!
Serving Ideas for a Stunning Display
If you’re looking to lean into that gorgeous, layered look often associated with Strawberry Shortcake Cake, try this presentation trick. Arrange your cooled, glazed Danish Bites on a tiered serving tray. Before serving, gently place one perfect, whole fresh strawberry right on top of each bite, next to the drizzle.
If you are presenting these as a proper dessert after dinner, maybe serve them alongside a small dollop of lightly sweetened whipped cream, just like you would with a traditional shortcake. That extra fluffiness contrasts beautifully with the denser, tangy filling inside. For more simple yet elegant desserts recipes like this, check out my recipe index!
Frequently Asked Questions About Strawberry Danish Bites
I always get questions whenever I share these little gems because people can’t believe how easy they are. This section covers all the things I used to wonder about when I was first testing out these easy strawberry desserts!
Can I use puff pastry instead of crescent roll dough?
That’s a common question, especially if you love that ultra-flaky texture! You absolutely can use puff pastry, but just be aware that it will bake up much higher and puffier than these traditional Strawberry Danish Bites. Puff pastry often needs a much longer chilling time before baking so it doesn’t puff up too fast and deflate. For this recipe, sticking to the refrigerated crescent dough keeps the structure flatter and more like a classic Danish where you can easily see the filling!
Are these meant to be a breakfast item or a dessert?
Oh, that’s the beauty of them! They fit perfectly in both categories. If you serve them warm with coffee, they feel like a lovely, slightly indulgent breakfast, fitting right in with many great breakfast options. However, once they are chilled and glazed, they look so polished on a dessert platter that they easily double as one of your favorite fresh strawberry desserts for the evening. They truly cover all the bases!
Can I make the strawberry filling ahead of time?
Yes, you certainly can, and I often do this when I know I’m short on time! I prepare the strawberry mixture—berries, cornstarch, and water—and keep it covered tightly in the fridge for up to two days. What I highly recommend, though, is prepping the cream cheese mixture and keeping that refrigerated, too. Then, when you’re ready to bake those Strawberry Danish Bites, all you need to do is assemble and bake. This saves you the 20 minutes of prep time!
What if I don’t like strawberries? Can I use other fruit?
Absolutely! While these are designed around the sweetness of fresh strawberry recipes, you can swap it out. Blueberries work wonderfully, and you might not even need as much cornstarch if they are small. If you use raspberries, be extra gentle mixing, as they break down very quickly. For a different flavor profile altogether, you could try mixing some chopped dried apricot with a touch of orange zest—it gives them a slightly different, but equally delicious, feel!
How long can I store the finished Strawberry Danish Bites?
Because the filling has cream cheese, they really need to stay chilled if you are keeping them longer than a few hours. Pop them in an airtight container in the fridge. They are great for about three days. If you served them as part of a big spread and they sat out warm, I’d toss any leftovers after about four hours, just to be safe! If you want more ideas for fruity desserts that are easy to manage, you must look at my recipe for strawberry mousse!
Estimated Nutritional Data for Strawberry Danish Bites
I know some of you are tracking macros, or maybe you just like knowing what you’re putting into your body, even when it’s something as delightful as these Strawberry Danish Bites. When I developed this recipe, I tried hard to keep things reasonable, but remember, we are using crescent roll dough and cream cheese, so they are definitely a treat!
The stats below are averages. I have to say this because I’m no registered dietitian! These numbers are calculated based on the specific ingredients and brands I generally use, and they’re a good snapshot for a single bite. For the most accurate information pertaining to your specific ingredients, please always refer to the package labels, and you can read more about my general approach on my ingredient transparency page here: ingredient transparency page.
Here’s the breakdown per bite (serves 12):
- Calories: Around 180
- Total Fat: 8g (with 4g saturated fat)
- Carbohydrates: 24g
- Protein: 3g
- Sugar: 12g (which is mostly from the fruit and glaze)
- Sodium: About 150mg
They aren’t super high in protein, which is typical for a pastry, but they offer a little something special because of the fresh fruit we included! Enjoy them without guilt!

Strawberry Danish Bites
Equipment
- Baking Sheet
- Mixing Bowls
- Small round cookie cutter
Ingredients
For the Danish Dough
- 1 package Refrigerated crescent roll dough 8 count tubes
- 4 oz Cream cheese Softened
- 1/4 cup Granulated sugar
- 1 tsp Vanilla extract
For the Filling and Topping
- 1 cup Fresh strawberries Diced
- 1 tbsp Cornstarch
- 2 tbsp Water
- 1/2 cup Powdered sugar For glaze
- 1 tsp Milk For glaze
Instructions
- Preheat your oven to 375 degrees F (190 degrees C). Line a baking sheet with parchment paper.
- Unroll the crescent roll dough. Use a small round cookie cutter (about 2 inches) to cut out circles from the dough. You should get about 12 circles.
- In a small bowl, mix the softened cream cheese, granulated sugar, and vanilla extract until smooth. This is your filling base.
- In a separate small bowl, mix the diced strawberries with cornstarch and water. Stir gently to coat the berries.
- Place about one teaspoon of the cream cheese mixture onto the center of each dough circle. Top the cream cheese with a few coated strawberries.
- Fold the edges of the dough up and over the filling slightly to create a small, open-faced bite shape. Place these on the prepared baking sheet.
- Bake for 12 to 15 minutes, or until the dough is golden brown. Let the bites cool on the sheet for 5 minutes before moving them to a wire rack.
- While the bites cool, whisk together the powdered sugar and milk to create a thin glaze. Drizzle the glaze over the cooled bites.
- Chill the finished bites for 30 minutes before serving. I enjoy styling these as a group on a platter; they instantly look like a bakery tray ready to share.