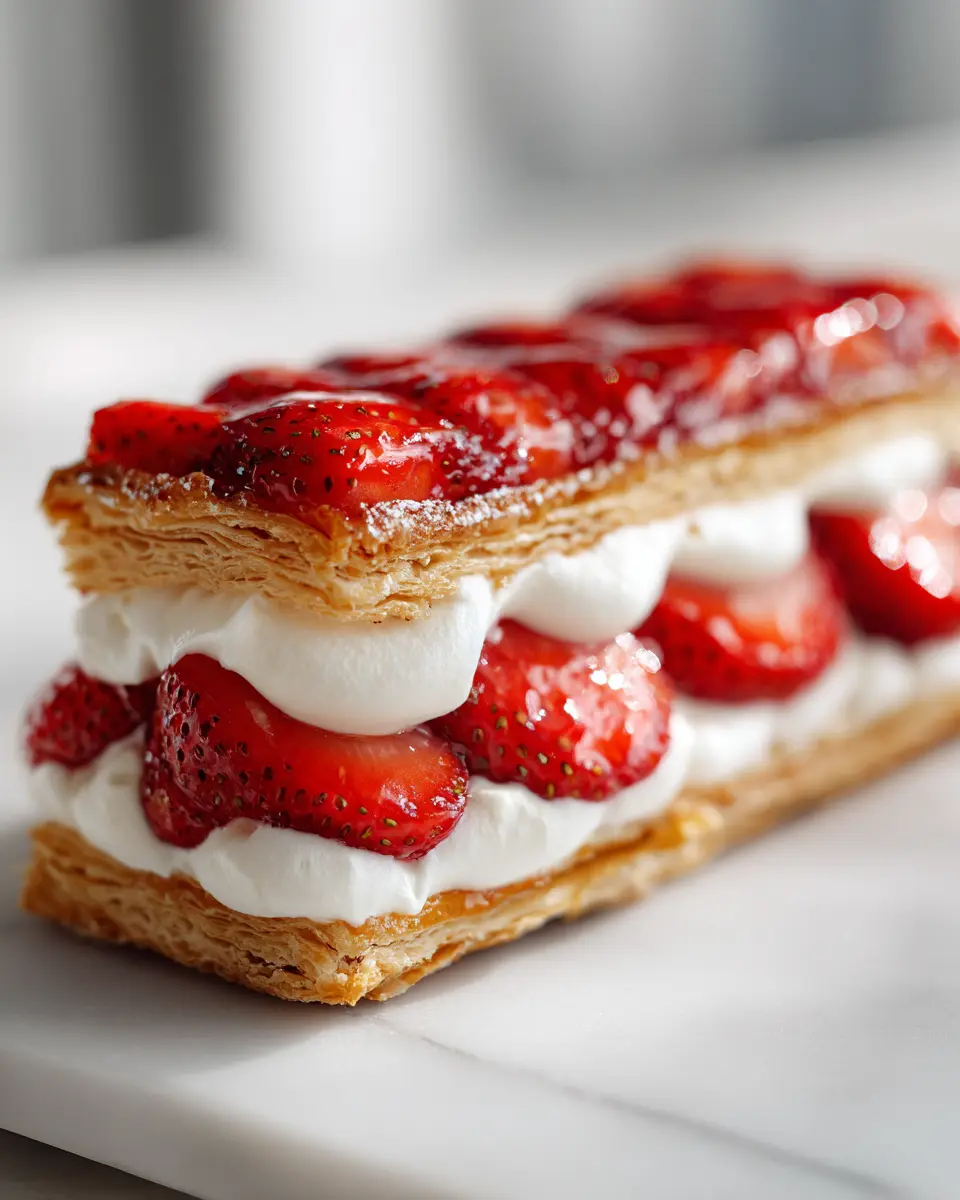
I have a confession: I used to think those perfect pastries you see displayed under glass at the fancy bakeries were completely out of reach for me. But trust me, mastering the **Strawberry Cream Pastry** at home is easier than wrestling with a tricky pie crust! This recipe finally cracked the code for both buttery, flaky layers and a cloud-soft cream filling that doesn’t collapse under the weight of fresh fruit.
Whenever I take an hour to focus on laminating the dough—just gently folding and rolling—it’s my favorite kind of quiet time. Watching it puff up in the oven to achieve that ideal shatteringly crisp exterior while keeping the inside tender is pure magic. If you’ve been chasing that impossible texture contrast, this is the breakthrough recipe you need. We’re making bakery-quality **Strawberry Cream Pastry** right here!
Why This Strawberry Cream Pastry Recipe Works
There’s a reason I keep this recipe in heavy rotation when I want something impressive but relatively straightforward. You get the gorgeous texture without spending days prepping dough. It’s all about technique, not difficulty!
- It delivers that crispy, flaky result instead of a flat, soggy base—that’s huge for **Strawberry Cream Pastry**!
- The filling is luscious but stable, so it doesn’t slide off when you serve it.
- We rely on that beautiful, bright flavor of the fresh strawberries.
Achieving Perfect Flaky Pastry Layers
Flakiness is 100% dependent on keeping your butter pieces small and, most importantly, keeping them COLD. When those cold bits hit the hot oven, they create steam, which separates the dough into those wonderful, light layers. Don’t overwork the dough, or you’ll just melt the butter right in!
The Light and Stable Cream Filling
We use a twofold approach here: softened cream cheese provides that necessary tang and body, which we then lighten up significantly by folding in perfectly whipped heavy cream. It holds its shape, making it ideal for these open-faced desserts. It’s way better than any plain old-fashioned whipped cream on its own.
Essential Equipment for Your Strawberry Cream Pastry
You don’t need a ton of fancy gear for this, which is awesome! But having the right tools absolutely makes the difference between a pastry that’s just okay and one that looks like it came right out of a display case. Make sure you have your basics ready.
You’ll definitely need a sturdy baking sheet, a couple of mixing bowls for your cream and dry ingredients, and that trusty rolling pin to get your dough nice and thin. Oh, and please grab a pastry brush—it’s essential for that final glossy finish!
Gathering Ingredients for the Ultimate Strawberry Cream Pastry
When it comes to making something truly special like these **Strawberry Cream Pastry** treats, the quality and preparation of your ingredients matter more than anything. I’ve broken everything down into three simple groups so you don’t miss a thing. Seriously, don’t skip noting whether the butter should be cold or soft—it’s the difference between layers and bricks!
These are the components that lead us to that gorgeous fruit-forward flavor profile that makes these a perfect choice for **Fresh Strawberry Recipes**.
Ingredients for the Pastry Base
This is where we build the architecture! Remember, we are aiming for maximum flakiness, so every element here needs to be aggressively cold. You’re going to need two cups of all-purpose flour, plus a little extra for dusting your surface when rolling out the dough.
- One full cup of cold unsalted butter, which you must cut down into small cubes before you even start.
- Just half a teaspoon of salt—you can check out my thoughts on why salt type matters here: salt comparison.
- Six tablespoons of ice water. I mean truly icy; I usually keep a glass of it ready.
Ingredients for the Cream Filling
The filling is creamy, tangy, and just sweet enough to balance the intense fresh strawberry flavor. This is much more decadent than a simple **Strawberry Pudding**, I promise!
- Eight ounces of cream cheese, and this one has to be softened—we need it smooth like velvet!
- Half a cup of powdered sugar for sweetness.
- One teaspoon of vanilla extract for that background warmth.
- And, importantly, one cup of heavy whipping cream, which absolutely must be cold to whip properly.
Ingredients for the Fresh Strawberry Topping
This is where we lean into that vibrant springtime flavor. If you’re looking for inspiration on presentation, think about the bright color palette of a classic shortcake. These strawberries really shine!
- Two cups of fresh strawberries, which you should slice evenly.
- Two tablespoons of apricot jam. The trick here is to warm this slightly so it brushes on smoothly and gives you that professional, glossy sheen.
Step-by-Step Instructions for Making Strawberry Cream Pastry
Okay, this is where the real baking happens! Don’t be intimidated by pastry; we’re taking it slow and making sure every layer is perfect. Remember, patience is key—especially in those first few steps to keep everything cool. If your kitchen is already toasty, work fast!
Preparing and Chilling the Pastry Dough
First thing: grab a big bowl. Mix your two cups of flour with the salt. Now, this is the messy but fun part! Toss in your cold, cubed butter. You need to use your fingertips or a pastry blender to work that butter in until it looks like coarse crumbs—you should still see some little pea-sized chunks of butter intact. That’s essential for those flaky layers!
Next, drizzle in the ice water a tablespoon at a time while mixing until the dough barely comes together. Form it into a flat disk, wrap it tight, and get it into the fridge for its mandatory 30 minutes of chilling time. Don’t skip that chill!
Shaping and Baking the Pastry Shells
Time to preheat! Get your oven cranked up to 400°F (200°C). Dust your counter lightly and roll that chilled dough out evenly until it’s about 1/8 of an inch thick. Cut that dough into exactly six equal rectangular shapes—these will become your individual pastries.
Place them on a parchment-lined baking sheet. This is crucial for presentation: use a small knife to gently score a border about half an inch in on each piece, but DO NOT cut all the way through. Then, prick the center areas multiple times with a fork—this stops the middle from puffing up too much. Bake these beauties for 18 to 20 minutes until they look gloriously golden brown. Once they’re out, let them cool completely on a rack. We need them stone cold before we add cream!
Creating the Smooth Cream Filling
While everything is cooling down, let’s make the clouds! First, in one bowl, beat your softened cream cheese with your powdered sugar and vanilla until it’s totally smooth—no lumps allowed! In a separate, very clean bowl, whip your cold heavy cream until you get nice, stiff peaks.
Now, take a deep breath and gently fold that whipped cream into the cream cheese mixture. Use a spatula and be careful! We want to keep all those lovely air bubbles in the cream, so just fold until it’s all combined. If you overmix, you lose the airy texture, and we don’t want that heavy filling!
Assembling Your Finished Strawberry Cream Pastry
Once your pastry shells are completely cool, gently press down the center area inside the score marks if they puffed up a little too much during baking. It gives you a nice little well for the filling!
Spoon or pipe a generous amount of that light, airy cream onto the center of each pastry shell. Now arrange your pre-sliced strawberries—this is where you can really practice your pretty arrangement skills for a real Strawberry Shortcake Aesthetic moment.
Finally, brush the tops lightly with your slightly warmed apricot jam. That little bit of glaze makes everything shine and locks in that fresh look. They are ready to eat immediately!
Tips for Perfect Strawberry Cream Pastry Results
Even with the best recipe, a few tiny techniques can take your **Strawberry Cream Pastry** from great to the kind of thing people rave about for weeks. I learned these the hard way, battling soggy bottoms and deflated cream, so you don’t have to!
For instance, if you worry about that base getting sodden, try this: after the pastry shells have cooled entirely, take a tiny bit of the cream filling and brush it over the inside bottom surface before adding the rest of the cream. It acts like a moisture barrier!
When it comes to handling the dough, remember my rule for all things laminated—whether it’s croissants or this pastry: work quickly and keep everything cold. If the butter starts to feel greasy while you’re rolling, just pop the whole slab back in the freezer for five minutes. Seriously, give it a rest!
We are focusing hard on **Strawberry Baking** here, which means the fruit needs to taste like summer. Slice your strawberries evenly, and if they look exceptionally wet, gently toss them with just a teaspoon of sugar and let them sit for ten minutes before draining off the excess liquid onto a paper towel. Too much water equals a sad, soupy pastry!
Also, don’t even think about substituting heavy cream with milk! For a filling this luscious, you need that high fat content in the cream to whip up stiff peaks. You can read more about the science behind choosing the right dairy for texture in my piece comparing heavy cream and buttermilk if you’re curious about dough dynamics!
Ingredient Notes and Substitutions for Strawberry Cream Pastry
I get so many questions about ingredient swaps, and I totally get it—not every pantry is stocked exactly alike! While I strongly recommend sticking totally close to this recipe for the best result, there are a few places where you can play around. After all, baking should be fun, not stressful!
If you are out of apricot jam, don’t panic! That jam is mostly there to provide shine and a tiny bit of extra preservation for the fruit. You can easily use warmed thinned-out honey or even a simple syrup brushed on top if you want to keep it very natural. This is one of those fantastic **Easy Strawberry Desserts** that lets you improvise a little at the end!
What about the cream cheese, though? That tang is really important for cutting through the sweetness of the pastry and strawberries. If you absolutely can’t use cream cheese, you could try making a slightly thicker version of strawberry mousse to pipe in instead, but know that it will have a lighter mouthfeel and won’t hold up quite as long.
Also, I’ve had people ask if they can use frozen strawberries. Please, please, please stick to fresh for this! Frozen fruit releases way too much water during thawing and will turn your beautiful crispy pastry shell into mush almost instantly. We fought hard for that flaky layer, so we have to respect the fresh fruit rule for this particular recipe for the best **Strawberry Desserts Recipes** experience.
Storing and Serving Your Fresh Strawberry Desserts
Now for the hard part: resisting eating all six pastries the moment they come out of the oven! Because we’ve used fresh strawberries and that light, dairy-heavy cream, these **Fresh Strawberry Desserts** are truly best eaten the day you make them. Seriously, make them the morning you plan to serve them—that’s when that pastry shell is at its absolute flakiest!
If you absolutely must prep ahead, bake the pastry shells completely and store them in an airtight container at cool room temperature for up to two days. Keep the cream filling covered in the fridge, too. But, and this is super important, you cannot assemble them until immediately before serving. If you put the cream and strawberries on too early, the pastry will get soggy, and that beautiful crunch we worked so hard for will disappear! Don’t risk it!
That said, these pastries transition beautifully from a dessert centerpiece to a stunning brunch item. Forget the maple syrup; these are elegant enough to bring out alongside coffee and juice for a weekend gathering. They look amazing next to some savory breakfast items. If you’re planning a full spread, you might want to check out some of my favorite ideas for making breakfast feel special over at my breakfast category!
When serving, I love to keep the glaze light, just as we did in the recipe. If you wanted to go for a slightly richer, perhaps more decadent, **Strawberry Shortcake Cake** aesthetic, you can always add a little drizzle of high-quality balsamic reduction right over the top of the strawberries before serving. It sounds crazy, but that acidic sweetness elevates the berry flavor tenfold!
Frequently Asked Questions About Strawberry Cream Pastry
I know you might have a few lingering questions because pastry can be tricky! Don’t hesitate to ask—that’s why I’m here. Getting these little details right is what separates a good attempt from a spectacular, bakery-worthy dessert. These questions come up a lot when folks try to achieve that delicate **Strawberry Cake Design**.
Can I make the pastry dough ahead of time for this Strawberry Cream Pastry?
You absolutely can, and I highly encourage it if you plan on making these for brunch! The dough needs that chill time anyway. You can wrap your disk of dough tightly in plastic wrap—squeeze out all the air—and keep it in the refrigerator for up to two full days. If it sits longer than that, the butter starts to get too incorporated, and you lose some of that desired flakiness. Just remember to let it warm up on the counter for about ten minutes before rolling it out!
What is the best way to slice strawberries for the best Strawberry Shortcake Aesthetic?
For the prettiest look, you want every strawberry piece to look vibrant and fresh on top of the cream. I recommend slicing them about 1/4 inch thick. If you slice them too thin, they look limp, and if they’re too thick, they tend to slide off the cream when you try to move the pastry! Try to get nice, uniform slices so your final presentation screams professional—that perfect **Strawberry Shortcake Aesthetic**!
Can I substitute the cream filling with something simpler, like Strawberry Pudding?
Oh, you could, but I really advise against it if you’re going for this specific texture! Regular store-bought **Strawberry Pudding** is often much looser and more liquid-based than our stabilized cream cheese filling. If you pipe pudding into a flaky pastry shell, especially one topped with fruit, you are asking for a soggy bottom in about 20 minutes. Our filling is stabilized with cream cheese and real whipped cream, which keeps the pastry dry and the texture light—that’s what makes it one of the best **Easy Strawberry Desserts**! If you wanted a completely different, lighter texture, you could look into making a specialized mousse, but for true cream pastry holding up to fruit, stick to the recipe!
Estimated Nutritional Information for Strawberry Cream Pastry
Okay, so we need to talk nutrition for a minute. I bake because I love feeding people, not because I’m counting every single calorie, but I know a lot of you want the ballpark figures, especially when you’re bringing something this decadent into a gathering. Remember, this is just an estimate based on all the standard ingredients we used.
It’s important to know that the final numbers will shift around depending on which brand of cream cheese you buy or exactly how much jam sticks to your pastry brush! For the full scoop on understanding these numbers on our site, take a look at the official nutrition disclaimer. We always aim for accuracy, but baking magic is inherently variable!
For one serving—that’s one glorious pastry—here’s what we’re looking at:
- Calories: Roughly 450 per pastry. Worth every single nibble, I promise!
- Fat: About 28 grams. Remember, that cold butter is what gives us the flaky layers, so we need the fat!
- Carbohydrates: Around 45 grams total.
- Protein: A modest 6 grams.
It’s certainly not a low-fat snack, but when you’re eating a **Strawberry Cream Pastry**, you are eating for pleasure, and this recipe delivers that big bakery flavor payoff!
Share Your Perfect Strawberry Cream Pastry Creations
Whew! You’ve made it through the chilling, the cutting, the folding, and the assembly. Now for the best part: enjoying the absolute beauty of your homemade **Strawberry Cream Pastry**! I really hope you loved watching those layers puff up. They are so much more rewarding when you bake them yourself.
I absolutely live to see how your baking turns out! Please take a moment after you’ve enjoyed your first bite—seriously, wait until you’ve tasted it—and come back here to drop a comment below. Let me know how the pastry base baked up for you, or if you added any fun little twists to the topping!
If you snap a picture of your beautifully arranged pastries—maybe they look just like a stunning example of **Strawberry Shortcake Cake**—I would be thrilled if you shared it on social media. Tag me so I can see your gorgeous **Fresh Strawberry Desserts**! Happy baking, and thank you so much for trusting me with this classic recipe!

Mini Strawberry Cream Puffs
Equipment
- Serrated Knife
- Piping Bag with Star Tip
- Mixing Bowl
- Spatula
- Serving Tray
Ingredients
Assembly Components
- 18 mini choux pastry shells pre-baked and fully cooled
- 1 cup heavy whipping cream whipped to stiff peaks with sugar to taste
- 1 cup fresh strawberries diced
Instructions
- Slice each choux pastry shell in half horizontally using a serrated knife. Set aside tops and bottoms.
- Fill a piping bag fitted with a star tip with sweetened whipped cream. Pipe a generous swirl onto the bottom half of each shell.
- Top the cream with a few diced strawberries, gently pressing them into the whipped cream.
- Place the top half of each shell over the filling to create a finished cream puff.
- Chill assembled puffs in the refrigerator for at least 30 minutes before serving.