There is nothing sadder in the kitchen than a beautiful egg that collapses into a watery mess when you try to peel it, or worse, one with a rock-hard yolk when you wanted something truly luxurious! Achieving that glorious, almost creamy, golden center seems like pure magic, doesn’t it? Well, it’s not magic, it’s just timing. Honestly, testing this recipe for the perfect Soft Boiled Eggs with Jammy Centers came down to seconds—the jammy center is absolutely worth it. I’m Emily Mitchell, and my job is making sure these times are reliable so you don’t waste a single egg trying to find that sweet spot.
If you’re looking for great ways to start your day, check out some of my favorite breakfast techniques here. You can see even more precise techniques over at BBC Good Food, but I promise you, our 7-minute window is the sweet spot for that creamy yolk texture!
Why You Will Make Soft Boiled Eggs with Jammy Centers Every Time
Once you nail this timing, you won’t go back to hard-boiled eggs for breakfast again, trust me! It takes minimal effort for maximum reward. These eggs are amazing on toast, or even added to salads for a quick lunch.
Perfect Texture Guarantee
We aren’t aiming for runny, and we certainly aren’t aiming for chalky. The jammy center is that perfect bridge—creamy, rich, and completely satisfying. Your toast needs this yolk!
Speed and Simplicity for Busy Mornings
We are aiming for under 10 minutes total time here. It’s one of those fantastic easy food recipes that fits right into a rushed schedule. It’s great for throwing together when you need easy dinner recipes for family or just a fast component for tonight’s supper ideas.
Essential Equipment for Soft Boiled Eggs with Jammy Centers
This recipe is amazing because you probably already own everything you need. There are no fancy gadgets involved, which keeps things simple, especially when you’re trying to make this for a larger batch of seafood boil side dishes or a simple chicken wing boil!
The Pan and Spoon Setup
You’ll need one medium saucepan—nothing too huge, just enough space for the eggs to sit in a single layer in the water. Then, you absolutely need a slotted spoon. You have to be able to lift those eggs out of the hot water quickly, and grabbing them carefully with the spoon is essential.
Preparing Your Ice Bath
Do not skip this step! The ice bath is the secret weapon that keeps the heat from continuing to work on your eggs after you pull them out. It’s non-negotiable for getting that perfect jammy texture inside. Just fill a medium bowl with cold tap water and lots of ice cubes before you even turn the stove on.
Ingredients for Perfect Soft Boiled Eggs with Jammy Centers
Because this recipe is so precision-based, we really only need two things: the eggs and the water. That’s it! Keep your ingredients simple so you can focus entirely on that cooking time.
For four servings, you’ll need exactly four large eggs. Make sure they haven’t been sitting on the counter for days; fresh eggs hold up a bit better during the boiling process, even if they are harder to peel later on.
Ingredient Clarity and Sourcing
For this timing, I am assuming you are pulling the eggs straight from your standard refrigerator temperature. If your eggs happen to be room temperature—maybe you collected them from your backyard hens earlier—you might shave about 15 to 30 seconds off the cook time. Don’t fuss too much, but always aim for that 6½ minute mark if your eggs are cold!
Step-by-Step Instructions for Soft Boiled Eggs with Jammy Centers
This is where the magic happens, and honestly, where precision really pays off! We aren’t tossing these eggs into quickly simmering water; we need a full, rolling agitation so the eggs don’t stick to the bottom of the pan. It takes the same focus as getting the right rise on a perfect scone, something I detailed over in my scone guide!
Achieving the Right Water Temperature
First things first, fill your saucepan with enough water so that the 4 eggs will be completely covered once they are gently lowered in. Get that water going over high heat until it hits a good, active boil. You want steady bubbles, not a weak simmer, because we need the temperature to stay high once those cold eggs go in. You can check out other great timing methods, like the one detailed by Epicurious on their jammy eggs.
The Critical Cooking Window
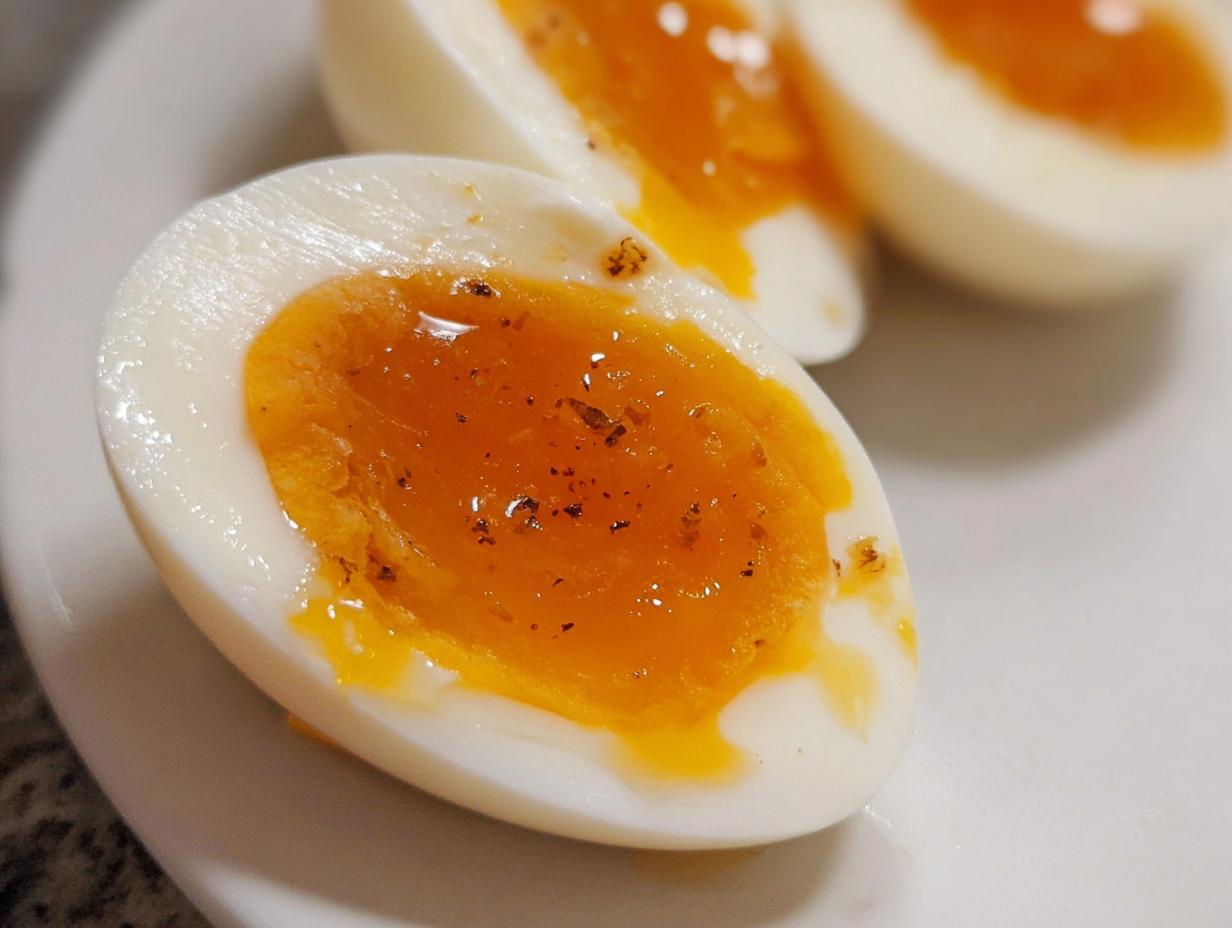
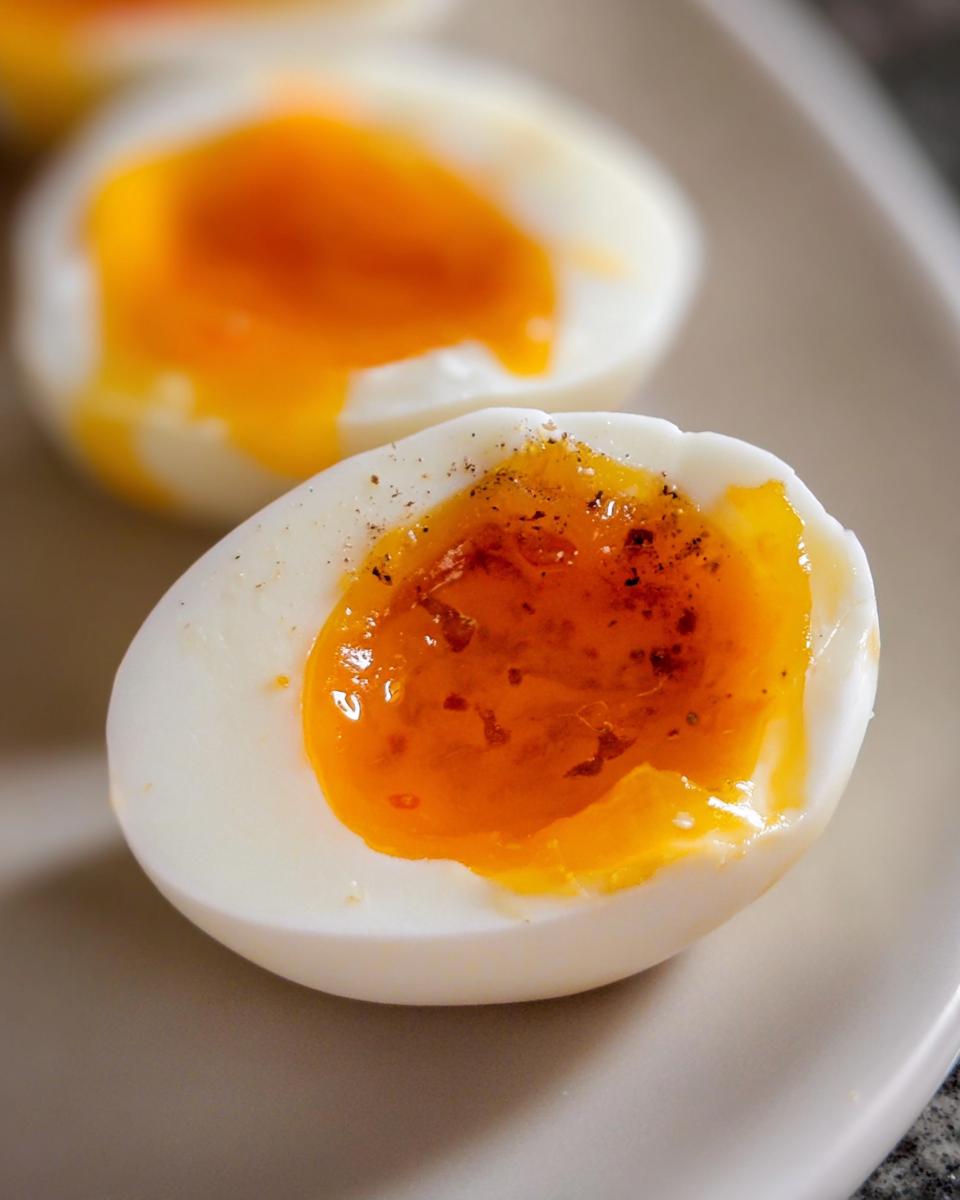
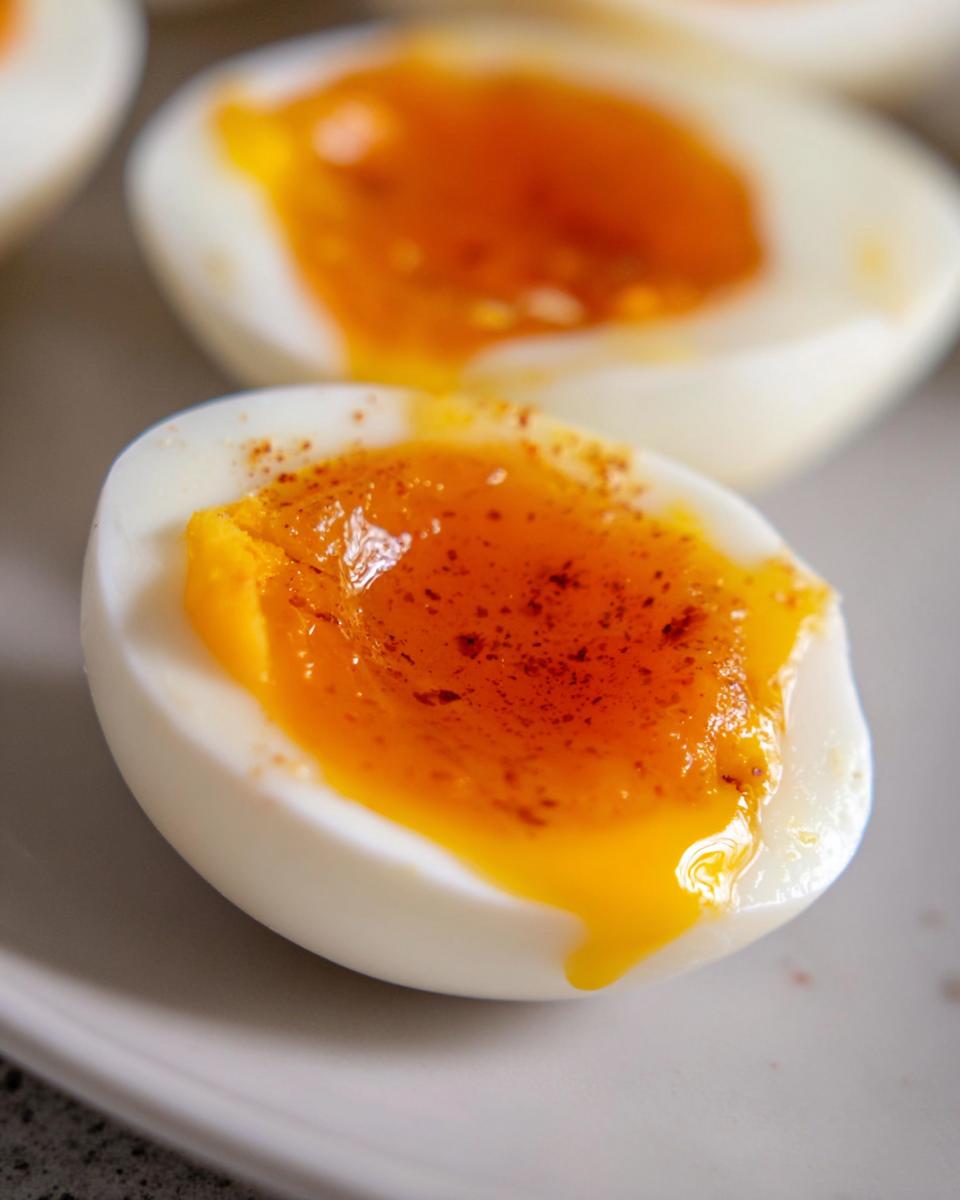
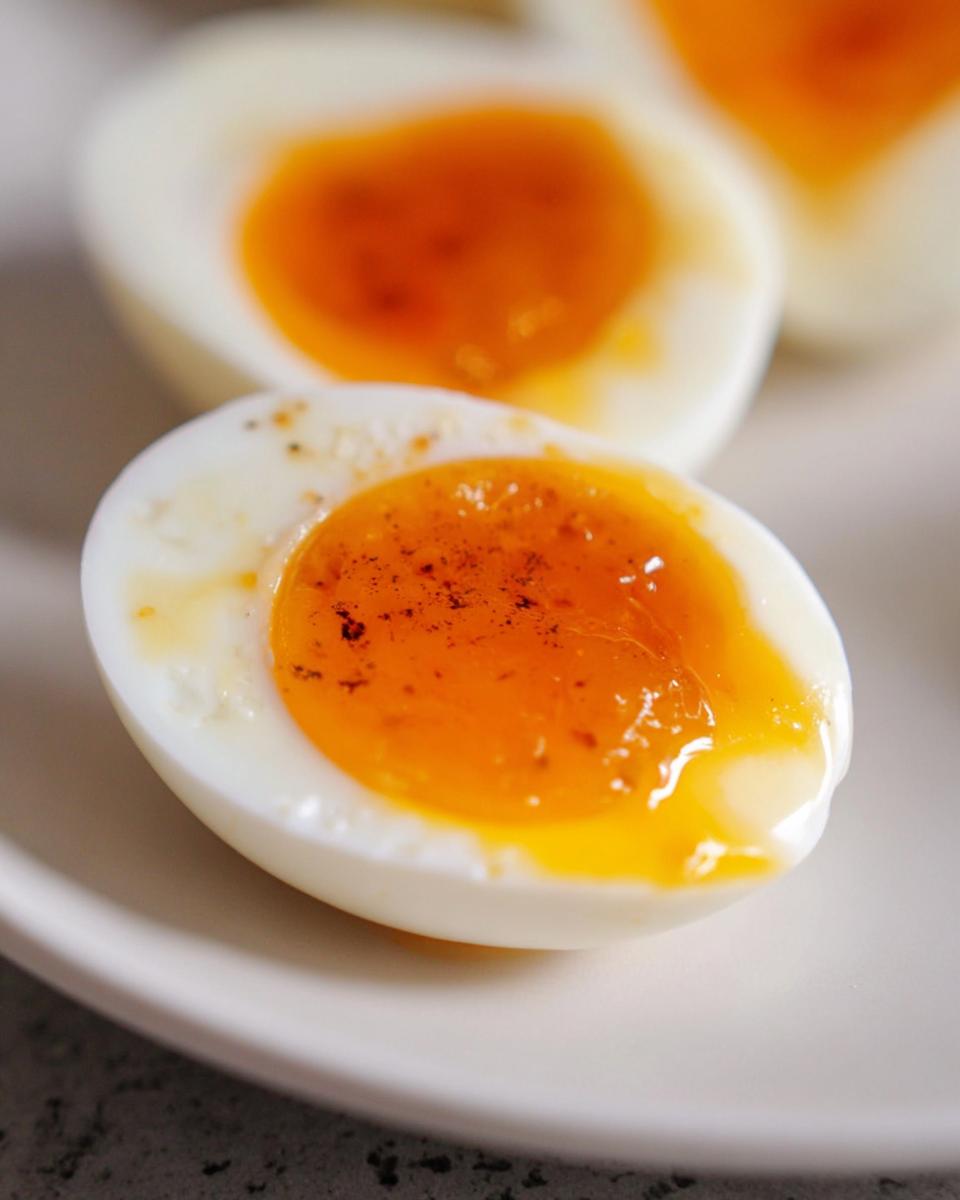
Use your slotted spoon to gently ease the eggs into the actively boiling water. Try not to drop them! As soon as they are submerged, start your timer right away. For that perfect level of ‘jammy’—where the white is set but the yolk is like thick, spreadable gold—set your timer for exactly 6½ minutes. If you like it just a hair softer, try 6 minutes. For the upper end of jammy, creep up to 7 minutes, which is my personal go-to. We are aiming for incredible texture here, so zero distractions during this time!
Stopping the Cook with the Ice Bath
The absolute second that timer dings, you need to move fast! Use your spoon again to scoop the eggs out and plunge them straight into that ice bath we prepared earlier. That drastic temperature drop is crucial because it halts the residual heat immediately. If you let them sit on the counter, they will keep cooking, and that beautiful jammy center will turn solid before you know it. Let them sit in the ice for at least 3 minutes to chill down completely before peeling.
Tips for Success Making Soft Boiled Eggs with Jammy Centers
Nailing the timing is half the battle; the other half is getting them peeled without losing half the white! Trust me, I’ve wept over tragically mangled yolks more times than I care to admit. But I’ve learned a couple of little tricks that make peeling so much easier, even right out of that cold bath. These tips really elevate this from a great idea to a reliable method you can use for easy food recipes all the time. While you’re thinking about seasoning your eggs, you should check out my deep dive on kosher salt versus sea salt—timing is everything, but so is the finishing touch!
Peeling Soft Boiled Eggs Without Damage
As soon as the eggs have chilled in the ice bath for a good few minutes, I gently tap the entire surface all over a counter or cutting board until the shell is finely cracked like a spiderweb. Don’t smash it! Then, peel the eggs under a slow trickle of cool running water. The water gets underneath the membrane and helps separate it from the white, making the peeling an absolute breeze. You want to start peeling at the larger, rounder end where the air pocket usually is—that spot gives you the best starting leverage. Don’t try to peel them until they are fully chilled, or those delicate jammy centers will just ooze out!
Serving Suggestions for Soft Boiled Eggs with Jammy Centers
Now that you have the perfect, creamy yolk, comes the fun part: eating them! These eggs are so versatile. They elevate a simple breakfast, but honestly, they are fantastic additions to dinner too if you’re leaning toward those easier options. Forget planning an elaborate feast; sometimes a perfectly timed egg is all you need for a comforting meal.
If you want to make a quick meal that feels complete without a lot of fuss, check out my collection of easy dinner recipes for family. It’s full of ideas for when you want something satisfying but don’t want to spend hours slaving over the stove!
Pairing with Toast Points
This is the classic, right? Slice some good quality sourdough or brioche, toast it until it’s golden brown, and slather it with butter—maybe even a little sprinkle of flaky salt. Then, gently slice off the top of your jammy egg and dip those toast points right into that gorgeous, creamy yolk. It’s heavenly. It’s the simplest way to enjoy your perfect texture.
Incorporating into Lazy Dinners
Don’t just save them for breakfast! These are perfect for those lazy dinners when you need protein fast. Halve an egg and place it right on top of a quick bowl of microwaved rice with some soy sauce and a drizzle of sesame oil. Or try them thinly sliced over a simple bed of mixed greens. That jammy yolk acts as a beautiful, creamy dressing all by itself!
Storage and Reheating Soft Boiled Eggs with Jammy Centers
Okay, so you’ve made the perfect batch, but maybe you’re not eating all four at once. That’s fair! Planning ahead is smart, especially when you’re working on things like meal prep snack boxes.
For storage, you have two options, and one is definitely better than the other. If you plan to eat the eggs peeled within 24 hours, you can peel them after the ice bath, but you must store them submerged in a small amount of water in an airtight container in the fridge. Change the water daily.
However, I always find it best to keep them unpeeled until right before serving. The shell acts as a natural barrier. Store the unpeeled eggs in a covered container in the main part of the fridge—not the door, where the temperature fluctuates too much. They are best used within two days of cooking.
Now, for reheating. This is the absolute deal-breaker for jammy eggs. If you try to microwave or simmer these again, you’ll lose that perfect texture really fast. Seventy-five seconds in the microwave will turn that creamy yolk into a rubbery disaster! For the best experience, treat these eggs like leftovers that should be eaten cold, sliced onto a salad, or brought up to cool room temperature before peeling and serving.
Frequently Asked Questions About Soft Boiled Eggs with Jammy Centers
I know timing is tricky, so let’s clear up anything that might make you hesitate before dropping those eggs in the water. These questions pop up all the time, especially right before I’m whipping up a batch for quick, healthy lunch ideas!
Can I use older eggs to make Soft Boiled Eggs with Jammy Centers?
That’s a classic dilemma! Older eggs (say, a week or two in the fridge) are usually much easier to peel because the air pocket forms better, which is a huge bonus when you’re impatient. However, the cooking time remains the key factor here. Whether your egg is super fresh or a little older, stick to that 6½ to 7-minute window to get the perfect jammy center. The freshness mainly affects how much you have to wrestle with the shell!
What is the difference between soft-boiled and jammy eggs?
This is important because people often use the terms interchangeably, but for texture perfection, they are different! A traditional soft-boiled egg has a completely liquid, runny yolk that flows right out when you cut it. Our jammy eggs—the goal here—have a yolk that is set around the edges but still thick, gooey, and wonderfully creamy in the middle. It ‘jams’ up beautifully when you spoon it out, perfect for spreading on your toast.
Do I need to add salt to the water?
Nope, you absolutely do not need to add salt to the water for the cooking process itself. Salt doesn’t affect the structure or the timing of the egg setting. Some folks add a splash of vinegar, which is supposed to help the white firm up faster if it leaks, but for these precise times, just focus on maintaining that boil. Save the salt for sprinkling on AFTER you peel them!
Author Expertise and Recipe Reliability
You can trust these times because they were vetted repeatedly. My role as Efficiency & Testing Coordinator means I spend a lot of time tracking variables—water height, starting temperature, and those critical seconds lost during the transfer. If a method works consistently in my test kitchen, it’ll work perfectly for your quick weeknight meal!
I’m Emily Mitchell, by the way, and you can read more about our rigorous testing standards over on the About Us page. We sweat the small stuff so you don’t have to worry about mushy yolks!
Soft Boiled Eggs with Jammy Centers
Equipment
- Saucepan
- Slotted Spoon
- Ice bath
Ingredients
- 4 Large eggs
- Sufficient amount Water For boiling
Instructions
- Bring a saucepan of water to a gentle boil.
- Carefully lower the eggs into the boiling water.
- Cook for 6½ to 7 minutes for jammy yolks.
- Transfer the eggs immediately to an ice bath to stop the cooking process.
- Peel the eggs gently or serve them immediately in egg cups.