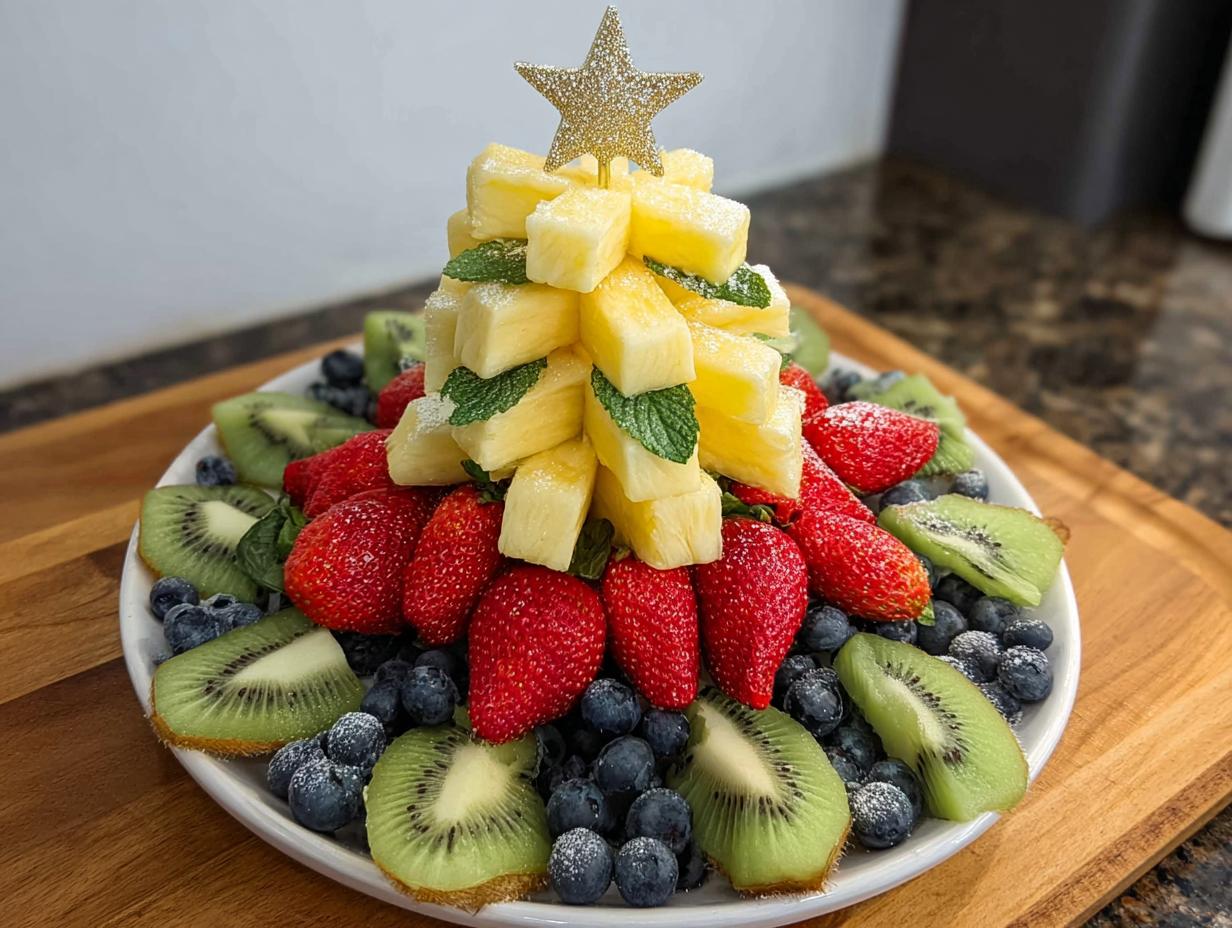
You know those holiday parties where every platter seems to be covered in chocolate and cheese? I wanted something fresh and bright that could hold its own on a crowded buffet table. That’s when I discovered the magic of a Pineapple Christmas Tree Platter – it’s like edible holiday decor! Last December, while testing festive recipes, I played around with golden pineapple chunks and suddenly realized they formed the perfect little tree when arranged just right. The juicy sweetness combined with vibrant berries made such a stunning centerpiece that my guests couldn’t resist nibbling on it all night. Best part? It takes just 15 minutes to create this healthy showstopper.
Why You’ll Love This Pineapple Christmas Tree Platter
Oh my gosh, let me count the ways this platter will become your new holiday MVP! I still remember the first time I made it – my sister thought I’d spent hours crafting this “fancy” centerpiece. Nope! Here’s why you’ll adore this simple stunner:
- Effortlessly festive: It looks like you tried way harder than you actually did. Arrange the chunks in a tree shape, toss on some berries, and boom – instant holiday magic!
- A healthy hero: When everyone’s indulging in sweets, this gives guests something fresh and light they’ll appreciate (though let’s be real, they’ll still hit the cookies after).
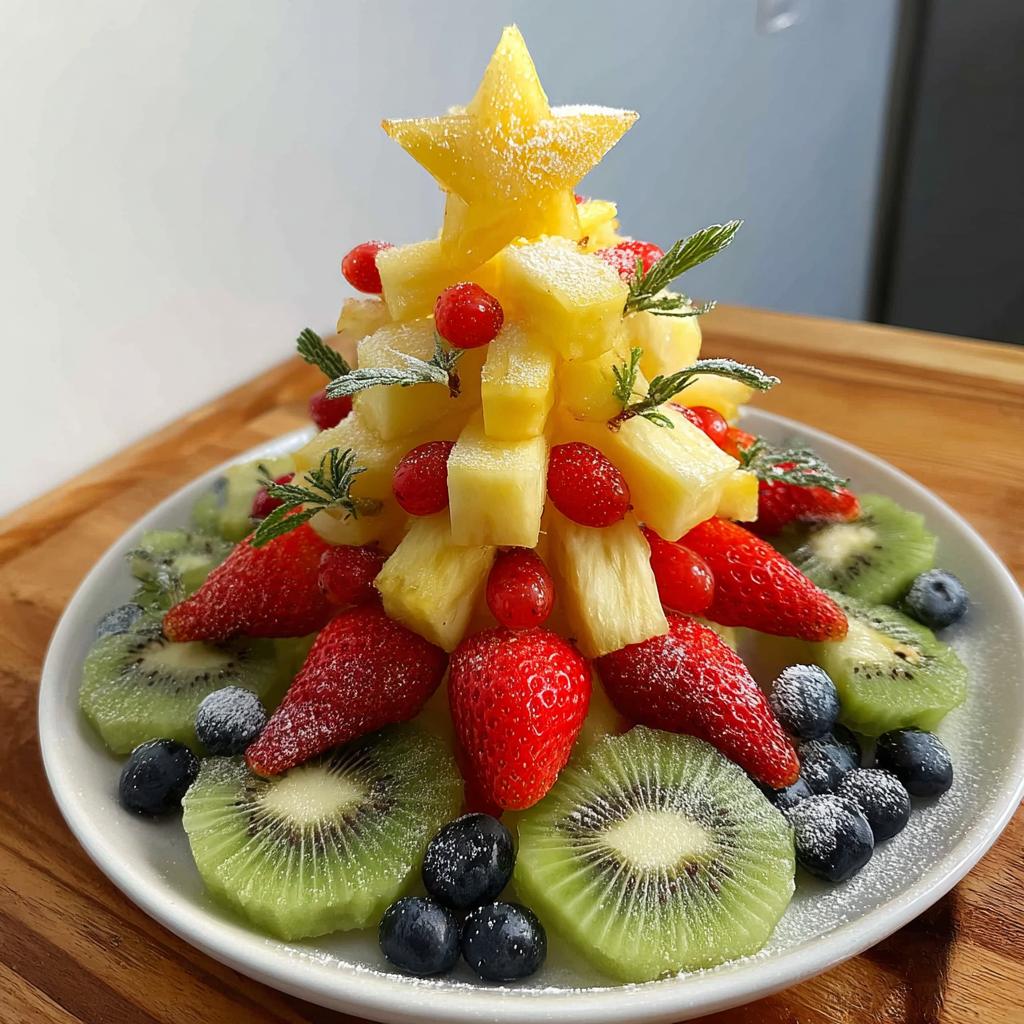
- Customizable cuteness: Out of strawberries? Use pomegranate seeds! Prefer green grapes to kiwi? Go for it! I’ve even used starfruit slices as the tree topper before – so fun.
- Kid-approved craftiness: My niece calls it the “edible craft project” and loves helping decorate it with “ornaments.” Bonus: they’ll actually eat the fruit afterwards!
Trust me, once you see how easy this is and how much people rave about it, you’ll be making it every Christmas!
Ingredients for Your Pineapple Christmas Tree Platter
Okay, let’s gather our fruity decorations! Here’s what you’ll need to create this edible masterpiece. I like to shop for these ingredients the day before so everything’s fresh and ready to go. Pro tip: choose a pineapple that smells sweet at the base – that’s how you know it’ll be perfectly ripe!
For the Tree:
- 1 large pineapple (peeled and cut into 1-inch chunks – gotta have that golden color!)
For the Ornaments:
- 1 cup strawberries (halved – the red makes such pretty decorations!)
- 1 cup blueberries (my favorite “bling” for the tree)
- 1 kiwi (sliced – the green adds such a festive pop!)
Optional Garnish:
- 1 tbsp fresh mint leaves (for that perfect finishing touch)
And hey, if you’re feeling adventurous with leftover pineapple, you could always try making some homemade fruit roll-ups with the scraps! But that’s a project for another day – right now, we’ve got a Christmas tree to build.
Equipment Needed for Your Pineapple Christmas Tree Platter
Don’t worry – you won’t need any fancy gadgets for this! Just grab these basic kitchen essentials:
- Large serving platter: Go for something flat with plenty of space – I love using my big white ceramic platter because it makes the colors pop!
- Sharp knife: A good chef’s knife makes quick work of that pineapple. Safety first though – watch those fingers!
- Cutting board: Any sturdy board will do – bonus points if it’s festive red or green!
See? Told you it was simple! Now let’s get to the fun part – assembling our fruity masterpiece.
How to Assemble Your Pineapple Christmas Tree Platter
Alright, let’s turn that pile of fruit into the star of your holiday table! I promise it’s easier than wrapping presents – and way more fun. Here’s exactly how I put together my Pineapple Christmas Tree Platter every year:
Step 1: Prep Your Pineapple
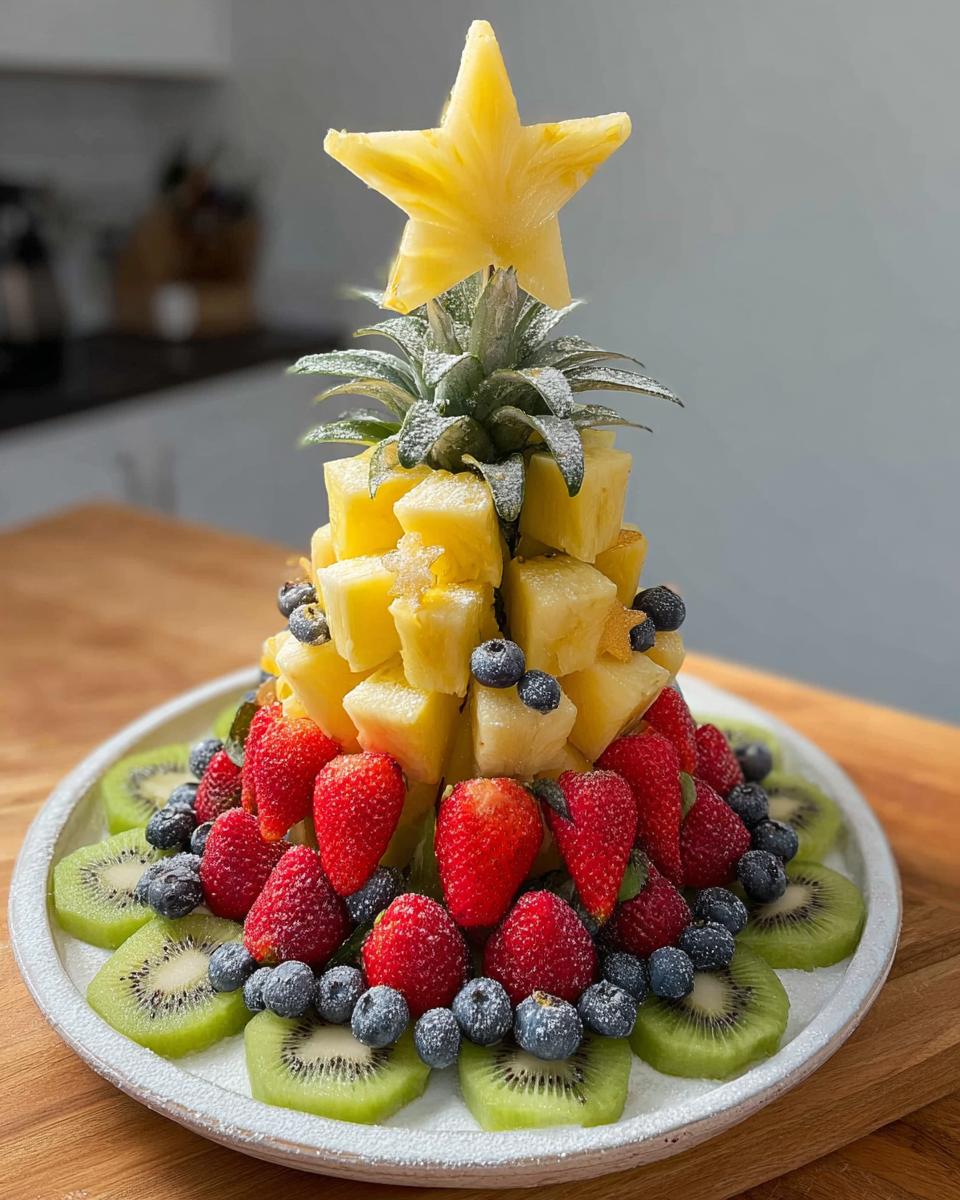
First things first – let’s tackle that pineapple! I like to cut off the crown and base so it sits flat. Then, standing it upright, I slice off the skin in strips from top to bottom. Once it’s naked (oops, I mean peeled!), I quarter it lengthwise and remove the tough core. Now comes the fun part – chopping it into those perfect little chunks! Aim for about 1-inch pieces so they’re easy to pick up but still make a nice tree shape.
Step 2: Build Your Tree Shape
This is where the magic happens! Start by making the bottom row – arrange pineapple chunks in a straight line across your platter. Then layer rows above it, making each one slightly shorter than the last. I usually do about 5-6 rows total, tapering up to a single chunk at the top. Don’t stress about perfection – a slightly wonky tree has character! (Trust me, mine are never perfectly symmetrical and people still go crazy for them.)

Step 3: Add Your Festive Ornaments
Now for the decorating fun! Place strawberry halves randomly as red ornaments. Scatter blueberries like little twinkling lights. Tuck kiwi slices in as green accents – they look like holly leaves! I like to step back every few decorations to check the balance. Pro tip: If your fruit keeps sliding, pat the pineapple chunks dry first – it helps everything stick better.
Step 4: The Finishing Touches
Almost there! If you’re using mint, tuck little leaves around the base like a tree skirt. For extra holiday cheer, you could even add a starfruit slice at the very top as a tree topper! Once assembled, you can refrigerate it for up to 2 hours before serving – just cover it lightly with plastic wrap. Pair it with some simple cranberry sauce on the side if you want to really impress your guests!
See? Told you it was easy! Now stand back and admire your handiwork – you’ve just created the most festive (and delicious) centerpiece on the block!
Tips for the Perfect Pineapple Christmas Tree Platter
After making this platter more times than I can count (and yes, there were some hilarious fails along the way!), I’ve picked up some foolproof tricks. First, always sniff your pineapple – if it smells sweet at the base, you’re golden! I learned the hard way that underripe pineapple makes for a sad-looking tree. Another lifesaver? Patting those pineapple chunks dry with a paper towel before arranging. Nothing ruins holiday cheer faster than blueberries rolling off like runaway ornaments! My best advice? Start decorating from the bottom up and step back occasionally to check your spacing. Oh, and if your tree looks a little lopsided? Call it “rustic charm” and no one will know the difference!
Variations for Your Pineapple Christmas Tree Platter
Oh, the fun you can have with this platter! Once I realized how easy the basic version was, I started playing around with different fruits – now it’s like my edible holiday art project. Here are my favorite twists:
- Jewel-toned ornaments: Swap the berries for pomegranate seeds – they look like little ruby lights!
- Star power: Top your tree with a starfruit slice instead of a single pineapple chunk – instant wow factor.
- Winter wonderland: Sprinkle coconut flakes around the base like fresh snow – bonus points if you dust the “tree” lightly too!
- Tropical twist: Use mandarin orange segments and kiwi for a citrusy take on the classic.
The best part? No matter what fruits you use, it always looks festive and disappears fast from the buffet table!
Serving and Storing Your Pineapple Christmas Tree Platter
Here’s the best part – this platter actually gets better with a little chill time! I always pop mine in the fridge for about 30 minutes before serving – the cold makes the pineapple extra refreshing. If you need to prep ahead, just cover it loosely with plastic wrap (don’t squish those pretty ornaments!) and it’ll keep beautifully for up to 2 days. Quick tip: If you’re worried about browning, give the pineapple chunks a quick spritz of lemon juice before arranging. But honestly? Even if the edges darken a bit, it still tastes amazing and looks plenty festive!
Frequently Asked Questions About Pineapple Christmas Tree Platters
I get so many questions about this platter every holiday season – seems like everyone wants to make their own fruity masterpiece! Here are the answers to the ones I hear most often:
Can I use canned pineapple instead of fresh?
You totally can in a pinch, but fresh is best! Canned pineapple tends to be softer and wetter, which makes it harder to arrange neatly. If you do use canned, be sure to drain it really well and pat the chunks dry. But trust me – that fresh pineapple smell is half the holiday magic!
How far in advance can I assemble this?
I usually make mine the morning of the party – about 2-3 hours ahead is perfect. Any longer and the fruit might start drying out or sliding around. If you need to prep earlier, store the cut pineapple separately in an airtight container overnight, then assemble right before guests arrive.
What other fruits work as ornaments?
Oh, the possibilities are endless! I’ve used red grapes, raspberries, blackberries, even sliced starfruit. For more inspiration, check out these Christmas appetizer ideas – they’ve got great fruit platter combos! Just stick with firm fruits that won’t make the platter soggy.
Will the pineapple turn brown?
A little browning at the edges might happen, but it’s nothing a quick squeeze of lemon juice can’t prevent! The acid helps keep the pineapple looking fresh. Honestly though, even if it darkens slightly, your guests will be too busy eating it to notice!
Can kids help decorate this?
Absolutely! My nieces and nephews love being in charge of placing the “ornaments.” Just give them clean hands and let their creativity shine. Warning: you might end up with a very berry-heavy tree, but it’ll be adorable!
Nutritional Information
Just a quick note – since fruit sizes and brands vary, I don’t provide exact nutritional counts. But hey, it’s all fresh fruit, so you know it’s packed with vitamins and natural sweetness! Enjoy guilt-free!
Pineapple Christmas Tree Platter
Equipment
- Large serving platter
- Sharp knife
- Cutting board
Ingredients
For the Tree
- 1 large pineapple peeled and cut into chunks
For the Ornaments
- 1 cup strawberries halved
- 1 cup blueberries
- 1 kiwi sliced
Optional Garnish
- 1 tbsp mint leaves
Instructions
- Cut the pineapple into small chunks.
- Arrange the pineapple chunks in the shape of a Christmas tree on a large serving platter.
- Decorate the tree with strawberry halves, blueberries, and kiwi slices as ornaments.
- Garnish with mint leaves if desired.