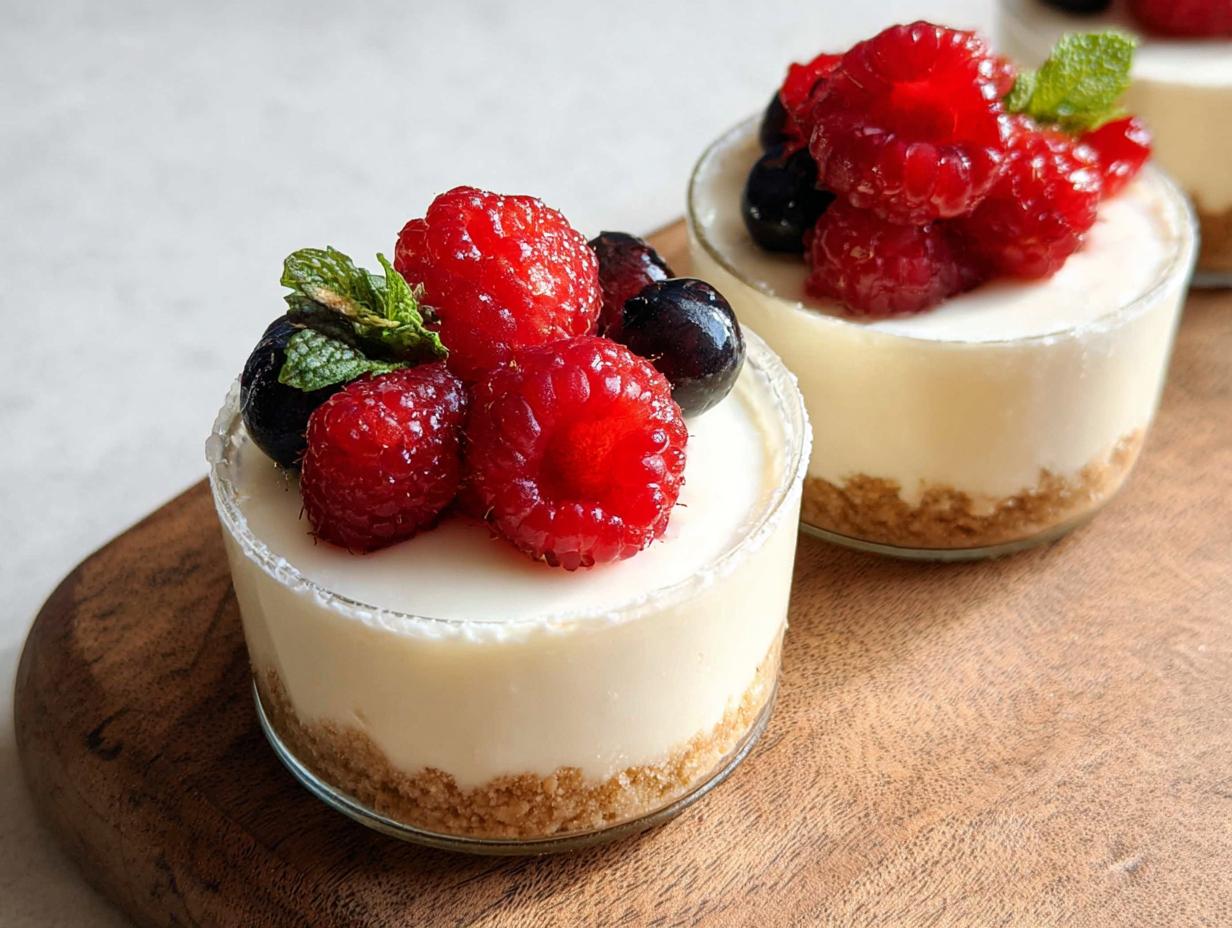
I’ll never forget that sweltering July afternoon when my sweet tooth hit hard, but the thought of turning on the oven made me sweat even more. That’s when I threw together my first batch of No-Bake Cheesecake Cups – little jars of heaven with a buttery graham cracker crunch, cloud-like filling, and jewel-toned berries on top. What started as a desperate attempt to cool down became my signature summer dessert. Now I make these creamy cups for every occasion – they’re ridiculously easy but look like you spent hours in the kitchen. The best part? That magical contrast between the crisp crust, velvety filling, and juicy fruit that bursts in your mouth with every spoonful.
Why You’ll Love These No-Bake Cheesecake Cups
Let me tell you why these little cups of joy have become my dessert obsession:
- No oven required – Perfect for hot days or when you just can’t be bothered to turn on the heat
- Ready in 25 minutes (plus chilling) – Faster than running to the bakery!
- Make-ahead magic – They actually taste better after chilling overnight
- Endless topping options – I change mine with the seasons (berries in summer, spiced apples in fall)
Trust me, once you try these, you’ll be hooked. They’re like little edible gifts to yourself!
Ingredients for No-Bake Cheesecake Cups
The magic of these cheesecake cups comes from just a handful of simple ingredients – but oh, how they transform into something spectacular! I’ve learned over the years that quality makes all the difference here. Let me walk you through exactly what you’ll need:
For the crust:
This buttery base is the foundation of every perfect bite:
- 3/4 cup graham cracker crumbs – I pulse mine fresh in the food processor for maximum flavor
- 2 tablespoons butter, melted – Unsalted is my preference, but salted adds a nice contrast
- 1 tablespoon powdered sugar – Just enough sweetness to balance the tangy filling
For that dreamy filling:
Here’s where the magic happens:
- 8 ounces cream cheese, softened – Full-fat only! Low-fat just won’t give you that luxurious texture (my lemon version taught me this the hard way)
- 1/2 cup heavy whipping cream – Chilled is crucial for perfect peaks
- 1 cup powdered sugar – Sifted if you’re feeling fancy
- 1 teaspoon vanilla extract – The real stuff, please!
For serving:
The crowning glory:
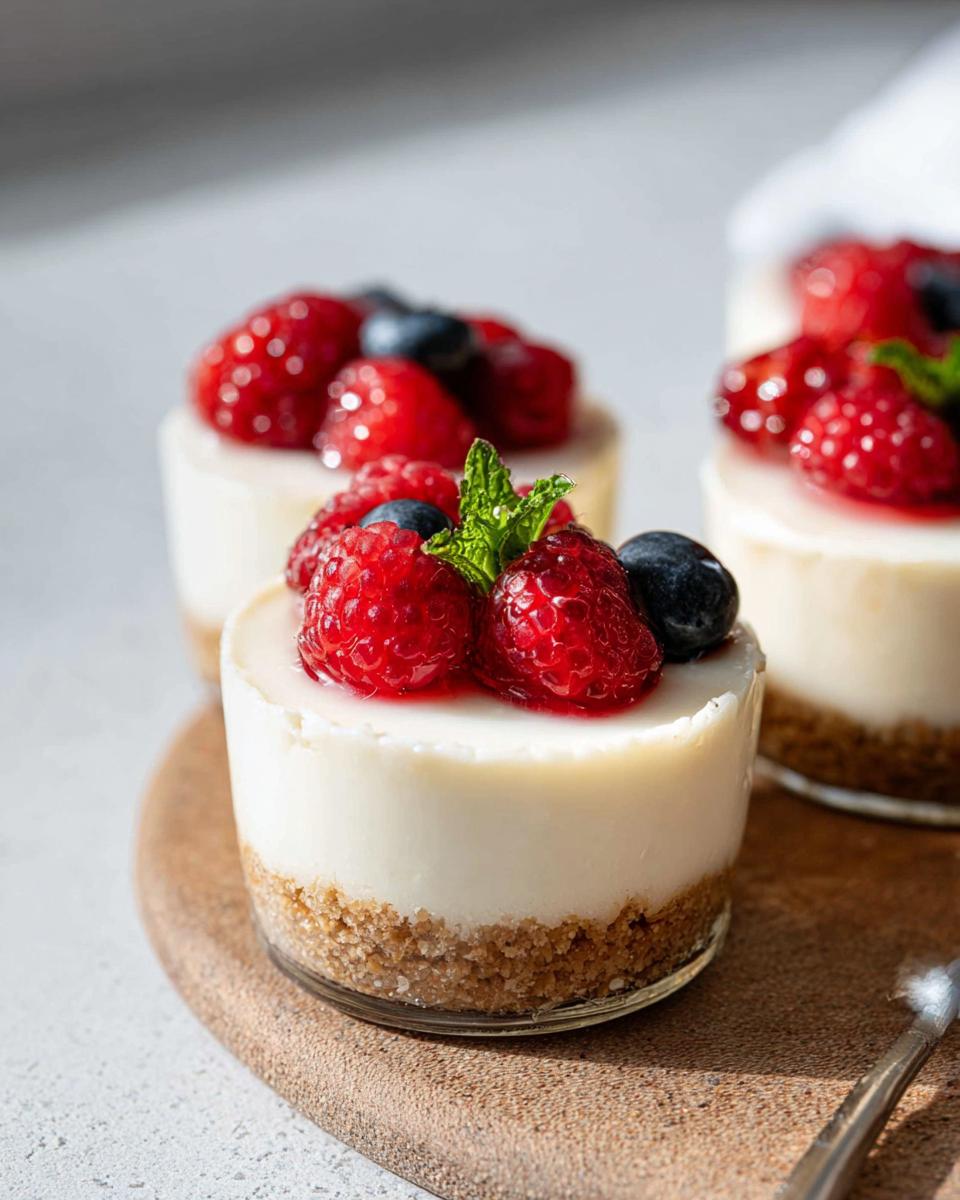
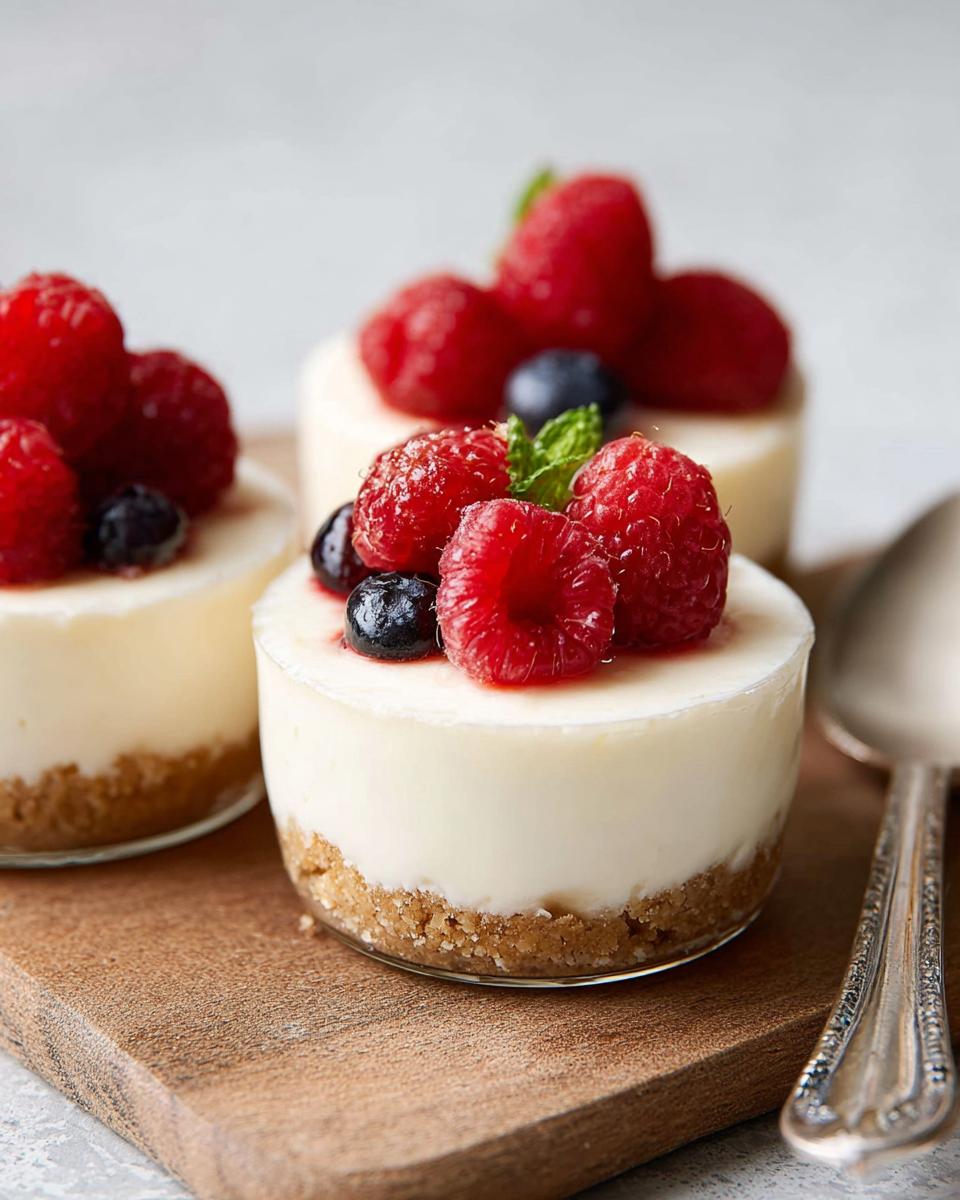
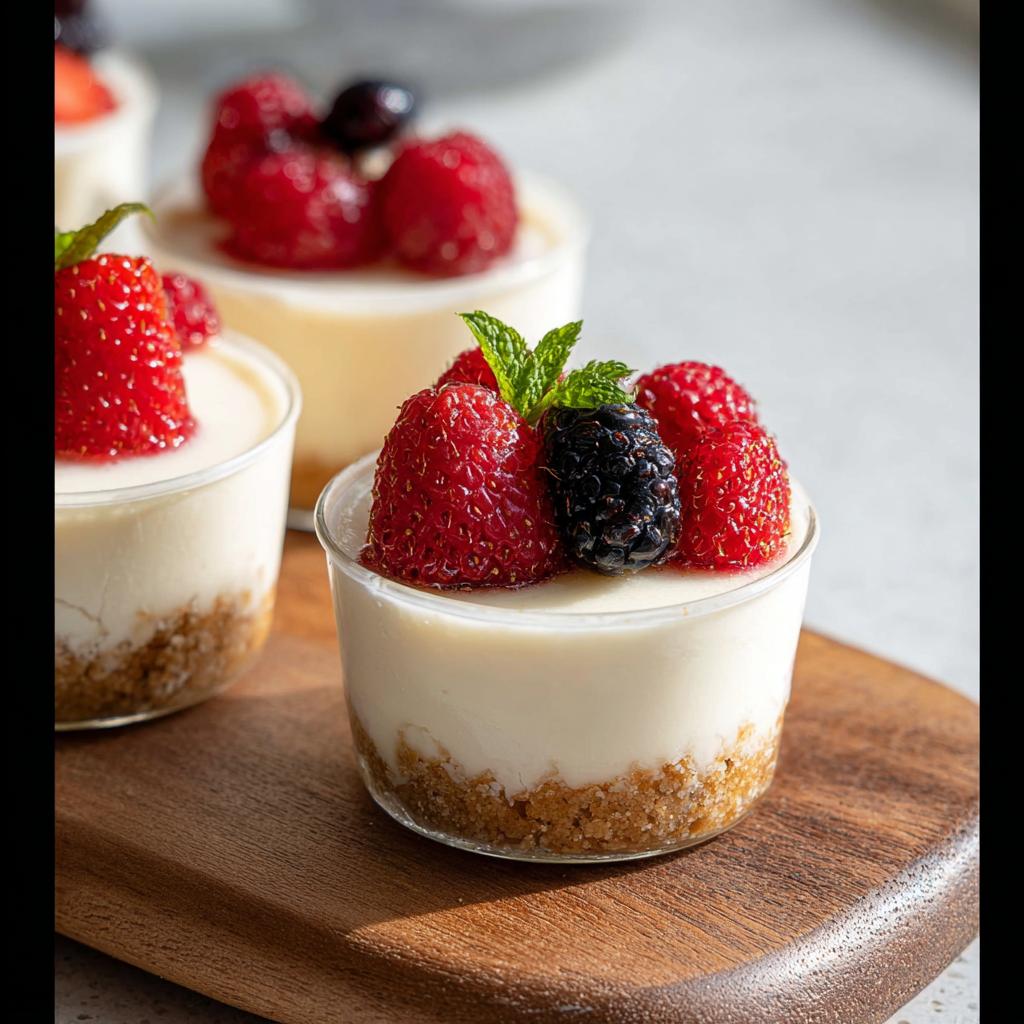
- Fresh fruit or berries – Whatever’s in season! My summer favorites are raspberries and blueberries

A quick note about shortcuts: I’ve tried pre-made crusts and low-fat versions, and honestly? They’re just not the same. Taking those extra few minutes with real ingredients makes all the difference in turning good into heavenly.
How to Make No-Bake Cheesecake Cups
Okay, let’s get to the fun part – assembling these dreamy little cups! I promise it’s easier than you think, but I’ve got some tricks up my sleeve to make them absolutely perfect. Follow these steps closely, and you’ll have people thinking you trained at a fancy pastry shop.
- Make the crust: In a small bowl, mix those graham cracker crumbs with melted butter and powdered sugar until it feels like wet sand. I use my fingers – it’s messy but satisfying! Divide this between your cups (I like using clear glass ones so you can see the layers) and press firmly with the back of a spoon. Really pack it in there – a loose crust is a sad crust.
- Whip the cream: Now, take that chilled heavy cream and beat it in a separate bowl until soft peaks form. This is KEY – if your cream isn’t cold, it’ll never whip up right. Add half the powdered sugar and the vanilla, then keep beating until it holds its shape. Set this aside for a moment.
- Beat the cream cheese: In another bowl (yes, lots of bowls – totally worth it), beat the softened cream cheese until it’s completely smooth. No lumps allowed! Scrape down the sides often – those sneaky lumps hide in the corners. Now add the remaining powdered sugar and mix until silky.
- Combine everything: Here’s where the magic happens! Gently fold half the whipped cream into the cream cheese mixture until just combined. Then fold in the rest. Be gentle – overmixing is the enemy of fluffy filling. You want it light and cloud-like, not dense like paste.
- Assemble and chill: Spoon or pipe the filling over your crusts. Now the hard part – covering them and popping them in the fridge for at least 4 hours. I know it’s tough to wait, but trust me, this transforms the texture from good to “oh my goodness!” perfection.
- Top and serve: When you’re ready to serve (or sneak a midnight snack), add your fresh fruit or other toppings. The contrast between the cool creamy filling and sweet juicy berries? Absolute heaven.

Tip: Achieving the Perfect Creamy Filling
Here’s my secret weapon: make sure that cream cheese is truly softened – leave it out for a good hour. Cold cream cheese equals lumpy filling, and nobody wants that. And always use cream straight from the fridge – warm cream won’t whip properly. Scrape your bowl constantly to catch any unmixed bits!
Want more pro tips? Check out this fantastic guide on no-bake cheesecakes, or if you’re feeling adventurous, adapt some techniques from our scone secrets to your dessert game!
Creative Toppings for No-Bake Cheesecake Cups
Now for my favorite part – dressing up these creamy beauties! The topping possibilities are endless, and I love changing them with the seasons. Here are my go-to favorites that always impress:
- Summer Berry Bliss: Fresh raspberries, blueberries, or sliced strawberries – their natural tartness cuts through the richness perfectly. For special occasions, I’ll macerate them with a bit of sugar and lemon juice to create a glossy sauce. It reminds me of my favorite strawberry mousse cake but in convenient cup form!
- Autumn Spiced Apples: Thinly sliced apples sautéed with cinnamon, nutmeg, and a pat of butter until tender. Top with a drizzle of caramel and crushed pecans – it’s like apple pie met cheesecake!
- Chocolate Lover’s Dream: Melted dark chocolate swirled on top, or chocolate shavings for texture. Sometimes I’ll crush up Oreos for a cookies-and-cream version (my nephew’s favorite).
- Tropical Escape: Mango cubes, toasted coconut flakes, and a lime zest sprinkle. Close your eyes and you’re practically on a beach!
- Holiday Special: Crushed peppermint candies and chocolate drizzle for Christmas, or pumpkin puree mixed with whipped cream for Thanksgiving.
The best part? You can mix and match based on what’s in your fridge or what mood strikes you. I’ve even done a “leftover fruit salad” version that turned out surprisingly delicious! Just remember – add fresh toppings right before serving so they stay pretty and crisp.
Storing and Serving No-Bake Cheesecake Cups
Here’s the scoop on keeping these little beauties at their best! These cheesecake cups will stay dreamy in the fridge for up to 3 days – just make sure they’re covered tightly with plastic wrap. Want to freeze them? Go for it! (But skip the fruit toppings first.) When you’re ready to enjoy, let them thaw overnight in the fridge. And here’s my golden rule – always serve them chilled. That first cool, creamy bite straight from the fridge? Absolute perfection.
No-Bake Cheesecake Cups FAQs
After making countless batches of these cheesecake cups (and taste-testing them all – tough job, I know!), I’ve answered every question under the sun. Here are the ones people ask me most:
Can I use low-fat cream cheese?
Please don’t – I beg you! I learned this lesson the hard way when I tried to “healthify” a batch. Low-fat cream cheese just won’t give you that luscious, velvety texture we’re after. The filling turns out grainy and lacks that signature richness. Trust me, the real full-fat version is so worth it for special treats like these.
How do I prevent a soggy crust?
Here’s my two-step secret: First, pack that crust mixture down like you’re mad at it – really press it firmly into the cups with the back of a spoon. Then chill the crusts for about 15 minutes before adding the filling. This little rest time lets the butter firm up and creates a moisture barrier that keeps the crumbs delightfully crisp.
Can I make these vegan?
Absolutely! My dairy-free friends love them made with coconut cream instead of heavy cream, and there are some great vegan cream cheese options out there now (just check the texture isn’t too watery). For the crust, swap in maple syrup or coconut oil for the butter, and use gluten-free graham crackers if needed. The texture changes slightly, but they’re still delicious!
Nutritional Information (Estimate)
Okay, let’s talk numbers – but remember, these are just ballpark figures because let’s be real, who measures their whipped cream exactly? (Not me!) Here’s the scoop on what you’re getting in each heavenly No-Bake Cheesecake Cup, without toppings:
- Calories: About 380-420 per cup (depending how generously you fill them!)
- Fat: 28g – but it’s the good, creamy kind that makes your taste buds sing
- Carbs: 32g (mostly from that dreamy powdered sugar and graham crackers)
- Protein: 5g – consider it a bonus!
Now, here’s the fun part – these numbers will dance around based on your choices. Go wild with berries? Maybe add 15-30 calories. Drizzle caramel sauce? Well… let’s not count those happy calories, shall we? Using full-fat everything (like I recommend) bumps up the richness but also the fat content slightly. Low-fat versions might trim some numbers, but like I said earlier – not worth the texture sacrifice in my book!
Remember, these are treats meant to be savored, not stressed over. One perfectly balanced cup feels indulgent but won’t leave you in a sugar coma. Everything in moderation – including moderation, right?
More Easy Dessert Recipes to Try
If you’re as obsessed with no-bake treats as I am (and really, who isn’t?), you’ve got to try some of these other foolproof recipes I can’t live without. They’re perfect for when you want something sweet without the fuss of baking – and they’re all guaranteed crowd-pleasers!
- No-Bake Strawberry Cheesecake Parfaits – My go-to when I want layers of creamy goodness with fresh berries. So pretty in glass jars!
- Easy Chocolate Mousse – A three-ingredient wonder that feels ridiculously fancy. My secret weapon for last-minute dinner parties.
What I love about these recipes is how they all share that same magic combination – simple ingredients, minimal effort, and maximum deliciousness. They’re all part of my “lazy baker’s arsenal” that keeps me looking like a dessert pro without actually having to try too hard.
No-Bake Cheesecake Cups
Equipment
- Electric mixer
- Small bowls
- Wooden spoon
Ingredients
For the crust:
- 3/4 cup graham cracker crumbs
- 2 tablespoons butter melted
- 1 tablespoon powdered sugar
For the filling:
- 8 ounces cream cheese softened
- 1/2 cup heavy whipping cream
- 1 cup powdered sugar
- 1 teaspoon vanilla extract
For serving:
- fresh fruit or berries
Instructions
- In a small bowl, combine the graham cracker crumbs with the melted butter and powdered sugar.
- Divide the crust mixture evenly between 4 cups and use the handle of a wooden spoon to pack it lightly into the bottom of each cup.
- In a small bowl, beat the cream cheese with an electric mixer on high speed until soft and creamy, about 30 seconds. Set aside.
- In another small bowl, beat the whipping cream until soft peaks form. Beat in the powdered sugar and vanilla.
- Add half of the whipped cream to the cream cheese and beat on medium speed until combined. Repeat with the remaining half.
- Divide the cheesecake filling evenly among the cups with the crust. Cover and refrigerate for at least 4 hours. Serve with fresh fruit on top.