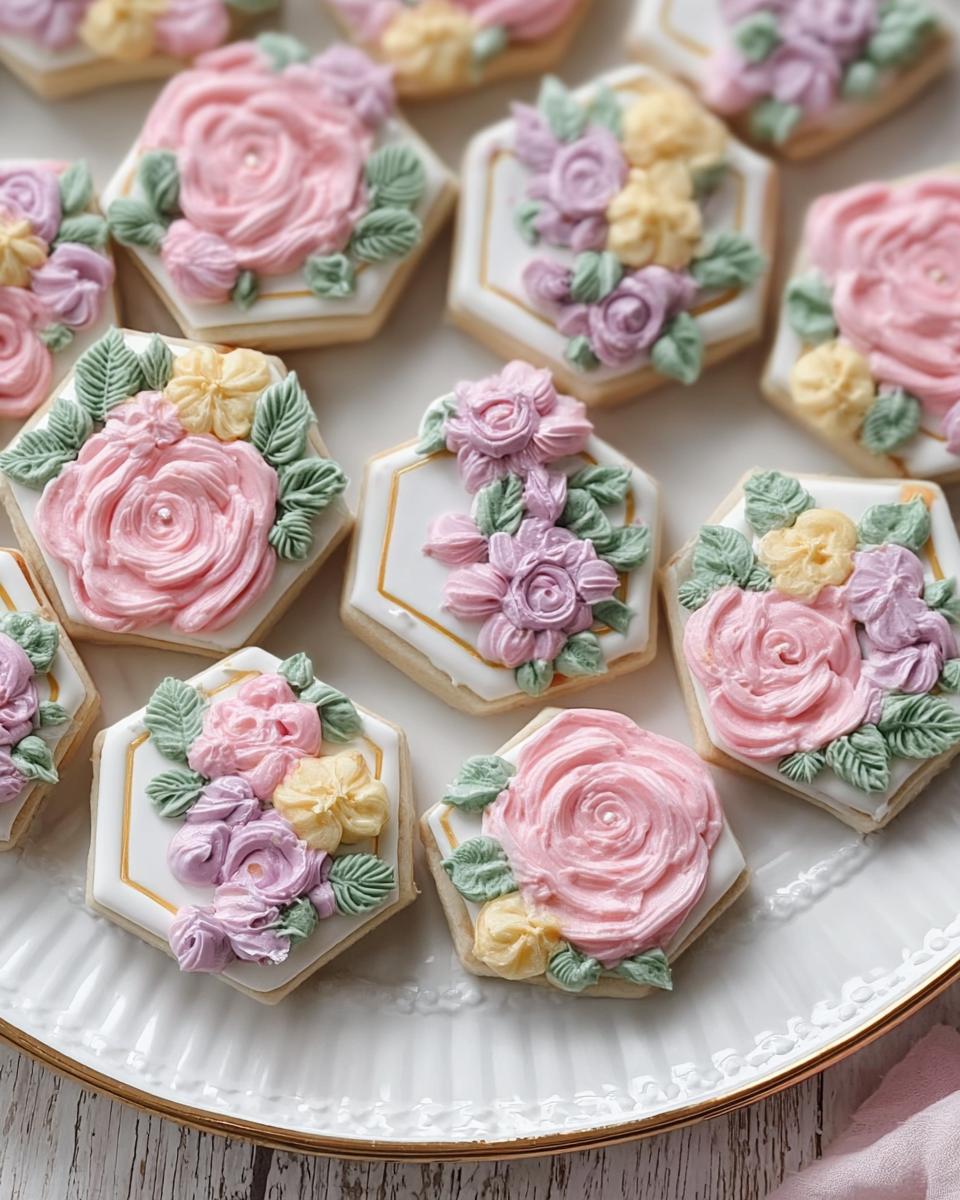
Oh my goodness, if you’re planning a celebration and need something absolutely darling, stop everything else you’re doing! These little gems are my party secret weapon. Forget giant, messy slices; when you’re juggling gifts and games, presentation and portability are everything. That’s why I developed these precise Mini Flower Baby Shower Cookies. They’re small, so guests can easily grab one while mingling, but the detail you can get with the royal icing is just stunning. I remember the first shower I used these at—everyone raved about how delicate they looked! Working with smaller cut-outs takes a little patience, but trust me, the payoff is worth the effort when you see the finished spread. If you love beautiful, detailed baking, you’ll want to check out my wildflower baby shower cookies recipe too, though these minis are perfect for petite tea parties!
Why You Will Love These Mini Flower Baby Shower Cookies
Honestly, these little guys are just magic on a platter. Party planning is hard enough, but these cookies take the guesswork out of serving something show-stopping. Here’s why I keep coming back to this exact mini design:
- They are perfectly bite-sized—no messy half-eaten cookies left on plates!
- The small canvas means you can decorate way more quickly than giant cookies.
- The delicate floral designs look incredibly fancy without requiring impossible piping skills.
- They hold up beautifully, even when stacked in cute little boxes for favors.
- They dry faster, which is a huge win when you’re on a tight shower timeline.
Essential Equipment for Your Mini Flower Baby Shower Cookies
You don’t need a whole industrial kitchen setup for these, but a few specific tools really make the difference, especially when dealing with tiny shapes! For the dough, just grab your standard mixing bowls and an electric mixer. You’ll need a good rolling pin, of course.
Now, for the real action: the cutting. Look, if you want those perfect little flower edges, you MUST use small, sharp cookie cutters. Nothing ruins the look faster than a cutter that rips the dough because it’s dull. You’ll also need baking sheets and, most importantly, your piping bags and those tiny fine tips for painting on the details!
Ingredients for Perfect Mini Floral Cookies
Getting the right ingredients is non-negotiable here, especially when you’re trying to achieve that clean, polished look of mini flower baby shower cookies. We need sturdy little cookies that won’t spread in the oven, and icing that holds its shape beautifully. I always make sure my butter is perfectly softened—not melted, just right—and my egg is at room temperature. For the decorating, use only gel coloring; liquid drops thin out the icing too much and we need stability!
For the best results in your icing consistency, I rely on my method for my favorite sprinkle sugar cookie frosting, but you can use the royal icing here as written below. You’ll get about 36 beautiful little cookies, which is just the right amount for a darling shower display.
For the Sugar Cookie Base
- 2 3/4 cups all-purpose flour
- 1 tsp baking powder
- 1/2 tsp salt
- 1 cup unsalted butter, softened (this MUST be room temperature!)
- 1 cup granulated sugar
- 1 large egg (also room temp, please!)
- 1 1/2 tsp vanilla extract
For the Royal Icing
This is what brings the flowers to life, so make sure you have the stabilizing meringue powder!
- 2 cups powdered sugar
- 1 1/2 tbsp meringue powder (This is key for stiff peaks!)
- 3-4 tbsp warm water (add slowly!)
- As needed gel food coloring (Think soft pinks, buttery yellows, and classic green for leaves!)
Step-by-Step Guide to Making the Mini Flower Baby Shower Cookies Dough
Okay, we’re moving onto the fun part where we make the actual dough for our mini flower baby shower cookies. Since we want these tiny cut-outs to hold their detailed shapes perfectly, we need a firm, non-spreading base. That means paying attention to room temperature ingredients and mixing just long enough!
First, get your dry stuff together. In one bowl, whisk up your 2 3/4 cups of flour, the baking powder, and salt. Just a quick whisking gets everything incorporated evenly. Don’t skip this part; it’s like setting the foundation for a sturdy little cookie structure.
Next, grab your electric mixer and work on the wet ingredients. You’re creaming the butter and granulated sugar until it gets light and fluffy—it usually takes me about two or three minutes. After that, beat in that room-temperature egg and the vanilla extract until it looks smooth.
Now, slowly introduce the dry mix into the wet mix. Add it gradually! If you dump it all in at once, you’ll end up with a crumbly mess that won’t hold its shape. Mix until it just comes together into a cohesive dough. Seriously, stop mixing as soon as you don’t see streaks of flour anymore.
The final, and most crucial, step for cut-out cookies is chilling. Divide your dough, wrap it up tightly in plastic wrap, and stick it in the fridge for at least one full hour. This rest period firms up the fat, ensuring your tiny flower shapes bake up crisp and not like melted puddles. Trust me on the chill time!
Baking and Preparing for Decorating Your Baby Shower Decorated Cookies
Alright, the dough is chilled—time to transform these little pucks into perfect cookies! Pull your dough out and let it sit just long enough so it rolls without cracking, usually about ten minutes on the counter. Grab your rolling pin and get that dough down to exactly 1/4 inch thickness. Consistency is everything here for uniform baking, especially when making baby shower decorated cookies this small.
Cut out your shapes! Use those small flower cutters, and don’t be shy about rerolling scraps. Place them on a lined baking sheet. You want to bake these at 175°C (that’s 350°F), but watch them closely! Since they are so tiny, they’ll take about 8 to 10 minutes, maybe less. My biggest tip? Don’t over-bake them! A few minutes too long means hard cookies, and we want a tender snap, not a jaw workout. You can check out my ideas on preventing spreading in other baked goods, as those tips apply here too!
Once they come out, let them sit on the sheet for just a minute or two, then carefully move them to a wire rack to cool completely. And I mean COMPLETELY. If there is even a whisper of warmth left when you start icing, that royal icing is going to melt right off your fabulous mini flower baby shower cookies. Patience is key before decorating!
Decorating Techniques for Stunning Mini Flower Baby Shower Cookies
Now for the part that makes people gasp—the decoration! Making exquisite mini flower baby shower cookies relies entirely on your royal icing consistency. Once you mix up that base icing, you need to thin out about two-thirds of it slightly for ‘flood consistency.’ This means when you drizzle a line across the surface, it settles back into smooth perfection in about 10 seconds. If it settles too fast, it’s too thin; if it takes forever, it’s too thick.
Use your thinned icing to outline every tiny cookie first. Then, using a toothpick, gently nudge the icing into the center to flood the base layer. This smooth, flat layer needs serious drying time—I usually leave mine alone for a minimum of four to six hours. Seriously, don’t rush this! If you try to pipe details onto wet flood icing, you’ll just create a muddy, colorful mess.

Once the base is dry and hard to the touch, take the remaining stiff icing (that’s the thick stuff you kept aside!) and tint it for your details. Fit your piping bag with a very fine tip—you need precision for these little blooms! Pipe tiny dots for centers, small leafy vines, or delicate petals directly onto the dry base. I find keeping my hand steady helps a lot, almost like drawing with icing! If you need a quick tutorial on handling delicate items, check out my post on making mini macarons, as the same steady hand technique applies here. Let those detailed flowers dry completely—that’s another few hours, maybe overnight—before stacking or packaging!
Tips for Success When Making Mini Flower Baby Shower Cookies
You’ve got the dough chilling and the icing ready, but there are just a few little secrets to nailing these tedious, tiny projects. Don’t let the scale fool you; perfecting these mini flower baby shower cookies means taking a couple of extra steps to ensure you don’t end up with messy little failures!
First up: Thickness control. When you roll out the dough, use guides or spacers if you have them. A consistent 1/4 inch thickness is critical. Too thin, and they shatter; too thick, and the icing doesn’t look right proportionally.
Second, fight the spread! If you notice your cutouts start to puff out during the first five minutes of baking, your oven might be running cool. Use an oven thermometer! A consistent, slightly higher heat helps set the edges instantly.
Finally, when creating your flower details, use tips that dry quickly. A simple petal outline in a slightly thicker icing dries faster than a huge flood area, meaning you can layer those gorgeous pastel colors quicker without waiting all day for the base to set!
Storing Your Beautiful Baby Shower Decorated Cookies
Whew! After all that detailed piping work, the last thing you want is for the icing to crack or the cookie to go stale before the guests even arrive. Once your mini floral cookies are completely rock hard—and I mean totally dry, usually after a full overnight air dry—you can store them safely. I find that laying them in a single layer in an airtight container works best to protect those delicate petals.
If you have to stack them (because you made 300, like I tend to do!), make sure you put a piece of parchment paper or wax paper between each layer. This prevents the dry icing from sticking to the cookie underneath. For transporting them to the party, tuck the container snugly into a box where they won’t slide around. If the shower is happening the next day, they are perfectly fine just sitting on the counter in that sealed container!
Frequently Asked Questions About Mini Flower Baby Shower Cookies
I know decorating can feel intimidating, especially when you’re aiming for perfection for lovely mini floral cookies. It’s totally normal to have questions when folks are getting ready to bake these delicate treats. I always refer back to my general decorating notes, and you might find my comparison of Italian vs. French macarons helpful if you ever get into piping, as the handling principles are similar!
Can I make these cookies ahead of time?
Oh absolutely! Make-ahead is the secret to stress-free party prep. You can bake your sugar cookie bases up to a week in advance, and store them in an airtight container at room temperature. You don’t want to frost them until about 1-2 days before the shower, though. The royal icing needs time to set hard, and you want the freshness for the presentation!
What is the best icing consistency for piping fine details on these mini floral cookies?
For those teeny tiny petals and leaves, you need a very stiff icing—we call it piping consistency. It should be so thick that when you lift your tip away, the little peak you created stays standing straight up without sinking back into the dollop. If it slumps at all, it’s too soft for fine detailing and will just spread out instead of sitting pretty on top of your base layer!
How do I prevent the dough from spreading while baking?
Spreading ruins those perfect cut-out edges! The number one thing is making sure that dough is seriously cold before it ever hits the oven. I chill it for at least an hour, and sometimes I even pop the cut shapes back on the tray for 15 minutes in the freezer before baking. Also, make sure your oven is fully preheated to the right temperature—if it’s too cool when the dough goes in, it spreads before it sets.
Mini Flower Baby Shower Cookies
Equipment
- Mixing Bowls
- Electric mixer
- Rolling Pin
- Cookie cutters (small flowers or circles)
- Baking sheets
- Piping bags and fine tips
Ingredients
For the Cookies
- 2 3/4 cups all-purpose flour
- 1 tsp baking powder
- 1/2 tsp salt
- 1 cup unsalted butter, softened
- 1 cup granulated sugar
- 1 large egg
- 1 1/2 tsp vanilla extract
For the Royal Icing
- 2 cups powdered sugar
- 1 1/2 tbsp meringue powder
- 3-4 tbsp warm water
- As needed gel food coloring (pink, yellow, green, purple)
Instructions
- Whisk the flour, baking powder, and salt together in one bowl.
- Cream the softened butter and granulated sugar in a separate bowl until the mixture is light and fluffy, about 2 to 3 minutes.
- Add the egg and vanilla extract to the butter mixture and mix until smooth.
- Gradually add the dry ingredients to the wet ingredients until the dough forms.
- Wrap the dough and chill it for a minimum of 1 hour.
- Roll the dough to 1/4 inch thickness. Cut small shapes, such as flowers or circles.
- Place the cut shapes on a lined baking sheet. Bake at 175°C for 8 to 10 minutes, or until the edges are set.
- Remove the cookies from the oven and cool them completely.
- Prepare the royal icing by mixing the powdered sugar, meringue powder, and water until the mixture is smooth and glossy.
- Divide the icing and tint it with pastel colors using gel food coloring.
- Use piping bags with fine tips to outline and flood the cookies with the base icing layer.
- Let the base layer dry for 4 to 6 hours.
- Pipe small floral details, such as dots, petals, or leaves, using thicker icing.
- Allow the cookies to dry fully before you serve or package them.