If you’re anything like me, you eat with your eyes first, and sometimes I just crave a breakfast bread that looks as good as it tastes. Standard banana loaves are wonderful, don’t get me wrong, but sometimes you need a little drama in your life—and that’s where this amazing Marbled Chocolate Banana Bread comes in. It’s the best of both worlds: that classic, sweet, familiar banana flavor perfectly swirled with rich dark chocolate. Watching the chocolate swirl through the banana batter felt like painting with food — every loaf turns out slightly different, and that’s part of the magic. It adds such a beautiful visual punch to your counter! I’m Clara Bennett, by the way, and as a Lead Plate Designer here at Recipes by Betty, I spend a lot of time thinking about presentation, and trust me, this recipe delivers flair with zero fuss.
Why This Marbled Chocolate Banana Bread is a Must-Bake
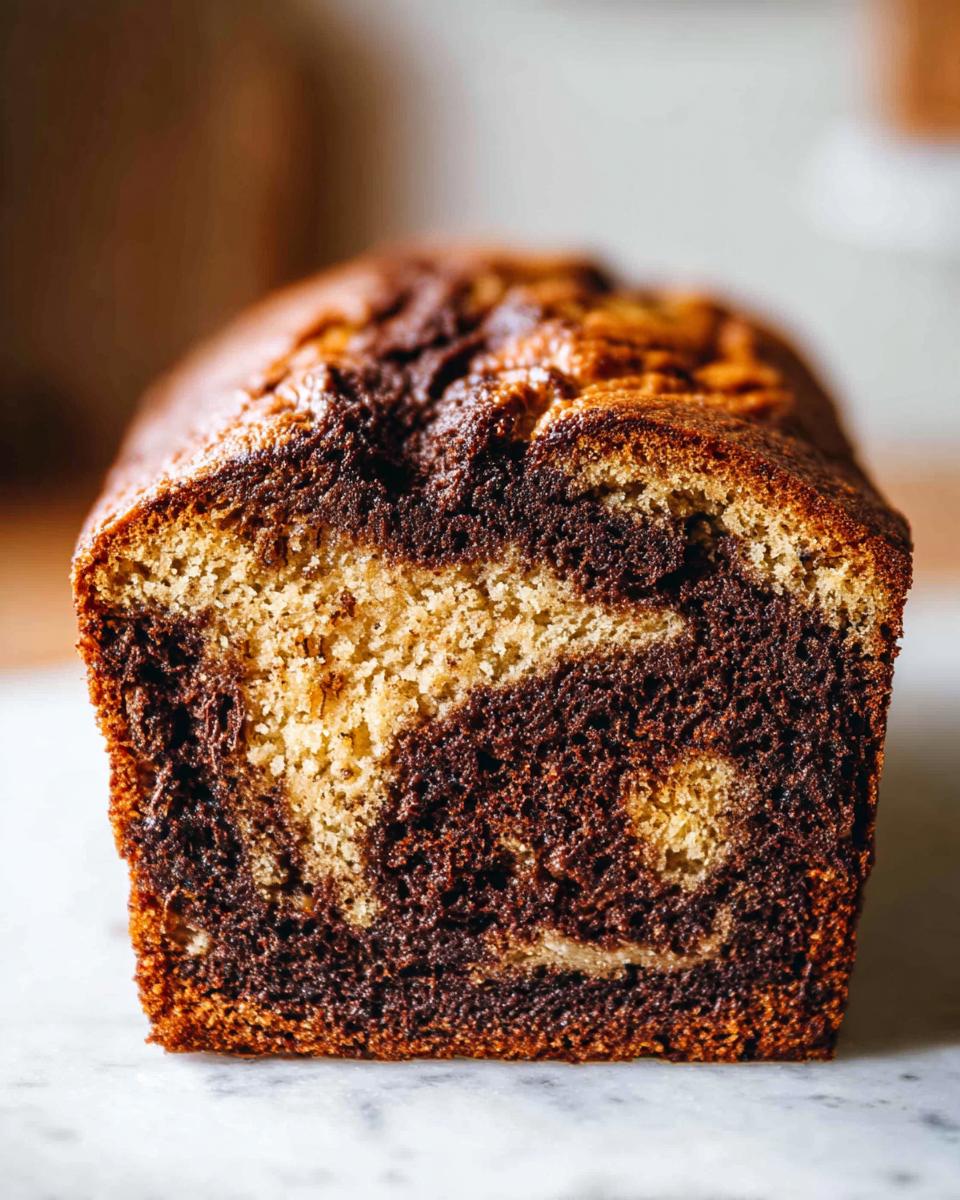
Honestly, this marbled loaf is what happens when standard banana bread gets a glow-up! It’s guaranteed to be a showstopper for weekend brunch or even a dessert. You get all the cozy comfort of a Super Moist Banana Bread Recipe, but with that gorgeous visual element that makes it feel fancy.
- It brings instant Banana Bread Aesthetic to your table—no extra garnish needed!
- It’s perfect as a quick, satisfying Breakfast Bread for busy mornings.
- It uses up those sad-looking ripe bananas sitting on your counter.
Achieving the Perfect Banana Loaf Aesthetic
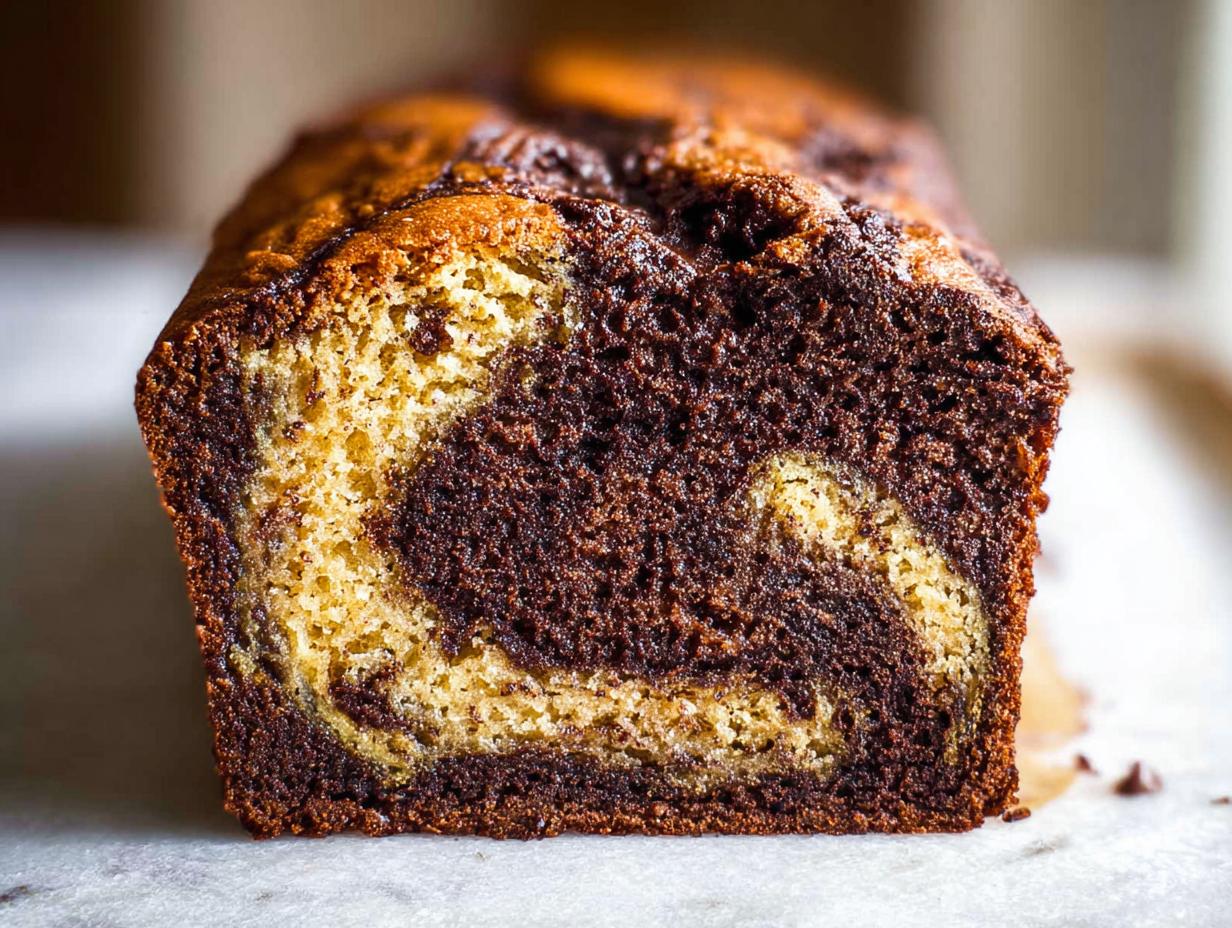
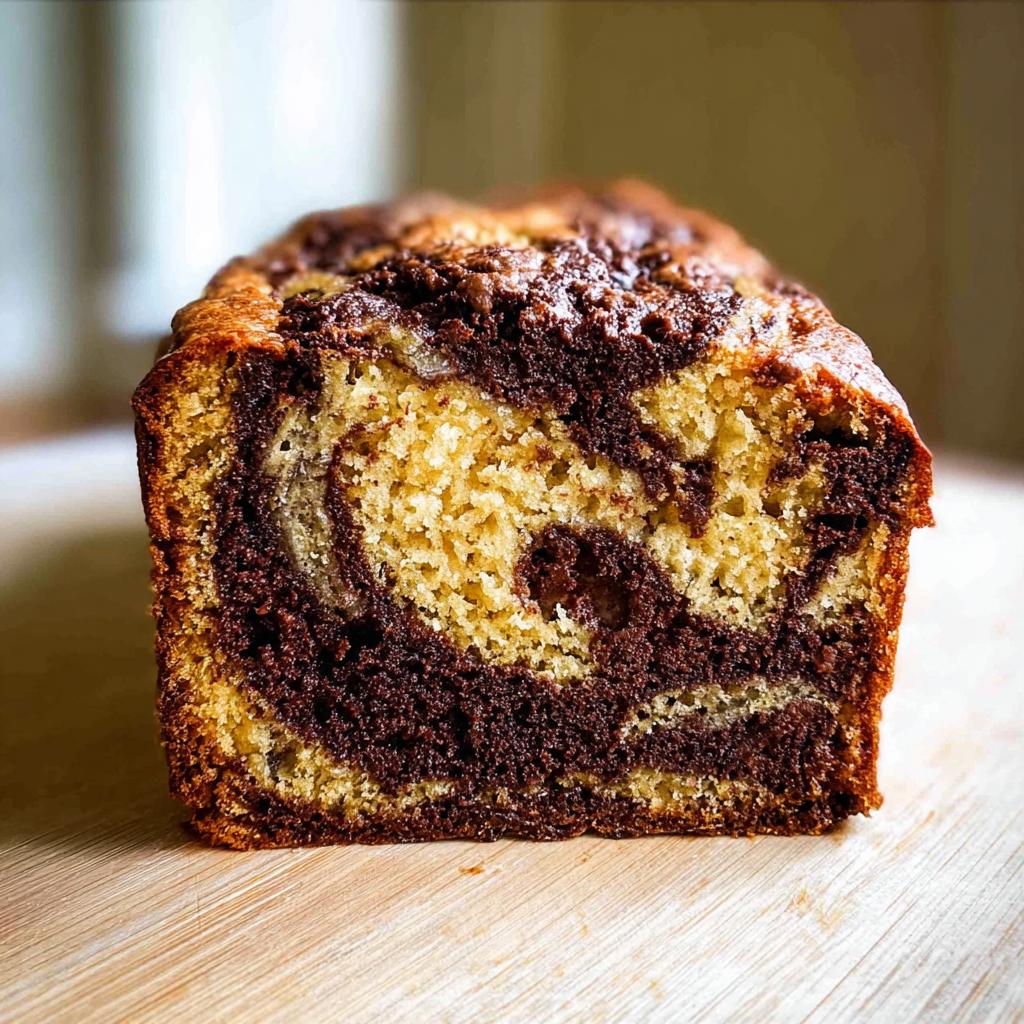
Why serve plain when you can serve marbled? The contrast between the dark chocolate batter and the naturally happy yellow banana batter is just stunning once baked. It elevates your simple breakfast bread into something worthy of company. It’s all about those beautiful swirls!
Essential Ingredients for Marbled Chocolate Banana Bread
You know I stress quality ingredients because they make or break any moist bread, and this marbled beauty is no exception. We have two main factions here: the wonderful, comforting banana base, and the intense chocolate portion we create separately. Every measurement matters, so have your scale handy!
For the Banana Bread Batter Base
For the main body of the loaf, we need three very important things to start: you absolutely must have 3 ripe bananas, and they need to be properly mashed—no big clumps allowed! We also use 120g of butter that must be melted first before mixing it in. Then we throw in the sugar, 2 eggs, and a teaspoon of vanilla to keep things sweet. Don’t forget the dry team: 200g of all-purpose flour and 1 teaspoon of baking soda to give it just a little lift.
For the Rich Chocolate Swirl
This is the fun part that makes the whole thing look like an artistic endeavor! We take maybe a third of that beautiful plain batter we just made, and into that smaller bowl goes 30g of cocoa powder. You’ll whisk that cocoa in until it’s all dark and mysterious. That’s it! That separate chocolate potion is what we’ll be swirling in later to get that spectacular contrast.
Expert Tips for the Best Banana Bread Recipe Moist Results
Okay, listen up, because getting that truly Best Banana Bread Recipe Moist texture is all about the details, especially when you’re dealing with two batters! First, you absolutely have to use those brown, spotty, almost black bananas. If they aren’t sad-looking, they aren’t sweet enough for great Ripe Banana Recipes. Those super ripe bananas provide crucial moisture that regular yellow ones just don’t have.
When you mix the main batter, be careful! Gently fold that flour mixture in. If you overmix, you’ll develop too much gluten, and suddenly your beautiful bread gets tough instead of tender. We want it just combined—just see the last streak of flour disappear, and stop stirring! That’s rule number one from my kitchen notebook.
Ingredient Notes and Substitutions for Marbled Chocolate Banana Bread
Sometimes we need to pivot, right? If you want a slightly deeper, nuttier flavor—seriously impressive—swap out the melted butter for browned butter! It adds a layer of complexity that makes people ask, “What is that amazing flavor?” for the Brown Butter Banana Bread crowd, this is a game-changer. Also, while this is a classic treat, if you’re aiming for a Healthy Banana Bread Recipe option, you can easily swap half the white sugar for coconut sugar and use half whole wheat flour. Remember to check out my tips on preventing drying out here, because those rules apply to banana bread too. You can find great base tips over at Love and Lemons too!
Step-by-Step Instructions for Marbled Chocolate Banana Bread
Now for the best part—actually putting this masterpiece together! Remember, we want distinct lanes of chocolate and banana, not a muddy brown mess, so patience in these mixing phases is key. We are aiming for that beautiful Banana Bread Aesthetic, and that means respecting the two separate batters we’re about to create.
Mixing the Batters for Marbled Chocolate Banana Bread
First things first, make sure your oven is preheated to 175°C (350°F) and your loaf pan is greased and floured up nicely. Once your main banana batter is mixed—just until the flour disappears, remember our lesson on overmixing!—you need to stop. Scoop about one-third of that plain batter out into a separate little bowl. This is crucial! Into that smaller bowl, you’ll gently whisk in your 30g of cocoa powder. Take your time getting the cocoa incorporated into that small portion, but remember: don’t beat it to death! We just want smooth, dark chocolate batter ready for action.
Creating the Signature Swirl in Your Banana Loaf
Time to load the pan! I find it’s much easier than trying to mix everything in one massive bowl. You’ll just alternate spooning spoonfuls of the plain banana batter and the newly made chocolate batter right into your prepared loaf pan. Don’t worry about making perfect layers; just alternate spoonfuls until both batters are used up. Then, grab a knife—a table knife or thin offset spatula works perfectly—and gently run it through the batters just a few times, maybe two or three slow passes across the whole pan. That slight movement is what creates the stunning swirl. If you stir it a lot, you lose the marble! For more tips on gentle mixing that still produces amazing results, check out my baking secrets here. You can see a great guide on basics like this type of loaf over at Joy of Baking as well.
Baking and Cooling Your Marbled Chocolate Banana Bread
Now that you’ve created your beautiful, swirled masterpiece, the oven does the heavy lifting. We need to bake this perfectly so that the moisture locks in and that gorgeous marble doesn’t sink or deflate on us. Trust me, I watch the oven like a hawk when this loaf is in there because timing is everything for that ultimate moist result!
First, make sure your oven is fully preheated to exactly 175°C (350°F). We want that initial blast of heat to set the structure. Slide your prepared loaf pan into the center rack. The baking time is usually about 55 minutes, but really, you need to trust your senses more than the clock.
How do you check if it’s done without cutting into it and letting all that steam escape? Use the toothpick test, but do it twice! Insert a toothpick (or a thin wooden skewer) right into the thickest part of the loaf—try to aim for a spot that looks mostly banana bread, not pure chocolate, right where the two meet. If the toothpick comes out with wet batter clinging to it, give it another 5 minutes and check again.
But we’re aiming for perfect doneness, remember? That means you want moist crumbs clinging to that toothpick, not dry or dusty bits. If it’s completely clean coming out, it might already be slightly overdone! Once you see those moist crumbs, pull it right out. Seriously, don’t wait another minute!
Cooling is where we build patience! It might smell incredible, but if you try to dump it out immediately, you risk tearing the bottom. Let the Marbled Chocolate Banana Bread cool right there in the pan for about 10 minutes. This lets the structure firm up just enough to handle being flipped. After those 10 minutes, gently run a knife around the edges (just in case it stuck anywhere), place your wire cooling rack over the top, and flip the whole thing over with confidence! Let it cool completely on that rack before slicing—that keeps the bottom from getting soggy.
Serving Suggestions for Marbled Chocolate Banana Bread
When this beautiful loaf comes out of the oven, you’ll want to show it off! While it looks stunning on its own, serving it warm is pure heaven—it softens the chocolate just a tiny bit, making for the best melt-in-your-mouth experience. A slice of this dense Breakfast Bread pairs perfectly with a hot cup of coffee, honestly. If you’re feeling fancy, a simple dusting of powdered sugar or a thin drizzle of vanilla glaze makes the marble pop even more. The contrast is just wonderful, and it’s perfect alongside my apple cinnamon overnight oats if you want a double breakfast!
Storage and Reheating Instructions for Marbled Chocolate Banana Bread
Don’t you hate when a day-old banana bread turns into a hockey puck? We absolutely cannot let that happen to this beautiful loaf! Since we work hard to make this the best banana bread recipe moist ever, we need to treat it right for storage. The great news is that because of the high moisture content from those ripe bananas, this Marbled Chocolate Banana Bread keeps really well.
For short-term storage, which is usually about 3 to 4 days in my house (it never lasts longer!), keep the loaf tightly wrapped. I recommend wrapping it first in plastic wrap—make sure it’s sealed up well so air doesn’t sneak in—and then tucking that whole package into an airtight container or a Ziploc bag. Keep it right on your counter, not in the fridge. Cold air actually pulls moisture right out of baked goods, and we don’t want that!
If, by some miracle, you have leftovers after four days, you can freeze slices! Wrap each slice individually and slip them into a freezer-safe bag. It keeps beautifully for about two months frozen.
Reviving Slices: The Best Way to Reheat
If you’re eating it cold from the counter, it’s great, but if you want to really bring that tender crumb back to life—especially if you’re serving it as a dessert—you need a quick reheat. This is my favorite trick, and it works wonders.
Take a single slice of your Banana Loaf and wrap it loosely in a slightly damp paper towel. Don’t soak the towel, just make it lightly damp to create a little steam environment. Pop that wrapped slice into the microwave for just 10 to 15 seconds. That tiny burst of heat and steam melts the butter just slightly, softens the chocolate pieces inside, and makes the entire slice feel like it just came out of the oven. Seriously, you won’t believe the difference!
If you’re reheating a whole loaf from frozen, thaw it on the counter first, and then use the damp paper towel trick for 20 seconds. It keeps our Super Moist Banana Bread Recipe tasting fresh every single time.
Frequently Asked Questions About Marbled Chocolate Banana Bread
I get so many questions in my DMs about banana bread variations, and that’s totally fair! This recipe is versatile, but there are a few things folks always ask about to make sure their loaf turns out perfect every time. Let’s tackle these common hurdles so you can nail this beautiful chocolate swirl!
Can I make this recipe without overripe bananas?
Oh, honey, please don’t! If you use yellow or only slightly spotted bananas, you are setting yourself up for a disappointment. For any Ripe Banana Recipes, whether it’s this one or a standard breakfast bread, those super brown, almost black peels are your best friend. The riper the banana, the higher its sugar and moisture content. If your bananas aren’t mushy and dark, your final product will taste bland and dry out way too fast. It’s the secret sauce to any truly Super Moist Banana Bread Recipe, marbled or not!
How do I get the best marbling effect in my Banana Loaf?
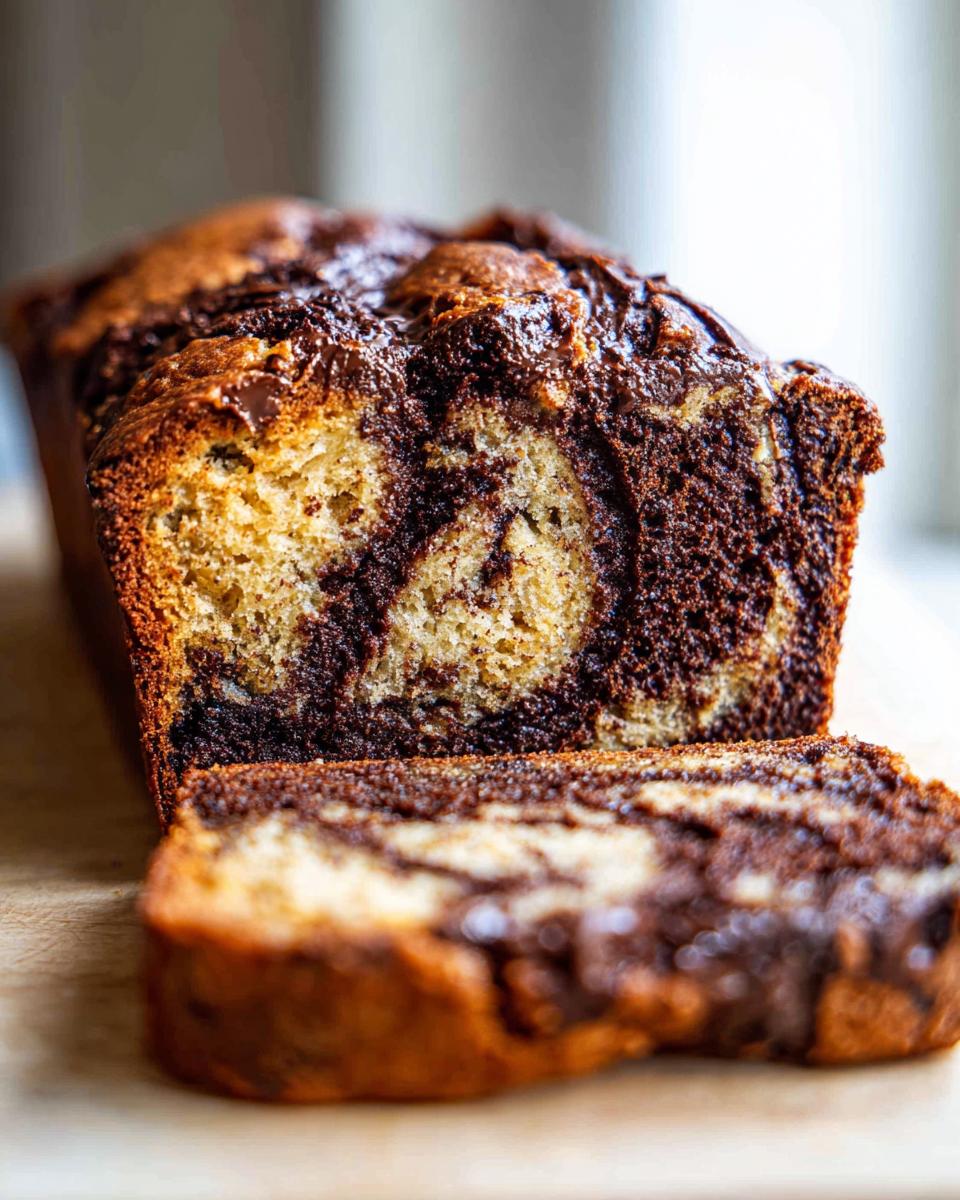
This is the artistic part! The goal is to have distinct ribbons of light and dark batter running through your Banana Loaf, not one big brown smudge. The trick is gentle handling after you divide the two batters. Remember when we put the alternating spoonfuls in the pan? After that, take a butter knife or a thin skewer and gently draw it through the batter just a couple of times—think a very light figure-eight motion, maybe two passes total across the top. Stop immediately when you see the swirl! Over-mixing those batters together just blends them back into a standard loaf, and we put in extra work for that gorgeous visual!
Is this considered a Healthy Banana Bread Recipe?
That is such a good question that comes up a lot! While this Marbled Chocolate Banana Bread is made with real fruit, the sugar and melted butter content means it definitely falls into the “delicious treat” category rather than being a skinny health food. It’s wonderful for a weekend treat or an occasional breakfast, which is why it’s listed under our desserts too! However, if you are looking to sneak in some healthy swaps—and I talked about this in the tips section—you absolutely can use whole wheat flour or even swap out half the white sugar for something like coconut sugar to make it a bit better for you. It won’t be the *exact* recipe, but it’s a step toward a Healthy Banana Bread Recipe modification!
Estimated Nutritional Data for Marbled Chocolate Banana Bread
I always get asked about the stats when someone makes a showstopper like this! Remember, a beautiful loaf like our Marbled Chocolate Banana Bread falls somewhere between a cozy breakfast and an indulgent dessert, right? Because of the melted butter and the cocoa powder, it’s rich, but the mashed bananas keep it feeling fresh.
Here are the estimates for one generous slice (based on 8 total slices):
- Calories: About 300 calories
- Carbohydrates: Roughly 45 grams
- Protein: Around 5 grams
- Total Fat: Close to 12 grams
Now, here’s the important bit, because I want you folks to bake smart! These numbers are based on the exact measurements provided earlier—the 200g of flour, the sugar amount, everything. If you decide to go rogue and swap that butter for coconut oil or add a whole half-cup of chocolate chips, those numbers are going to shift!
What I’m saying is, please treat these figures as a good starting point. For more details on how we calculate these estimates and what to watch out for when substituting ingredients, you can always peek at our general nutritional disclaimer page. If you end up sneaking bites while slicing—and I totally won’t judge you—just know that you’re enjoying one of the most visually stunning and delicious banana loaves around!
Share Your Beautiful Marbled Chocolate Banana Bread Creation
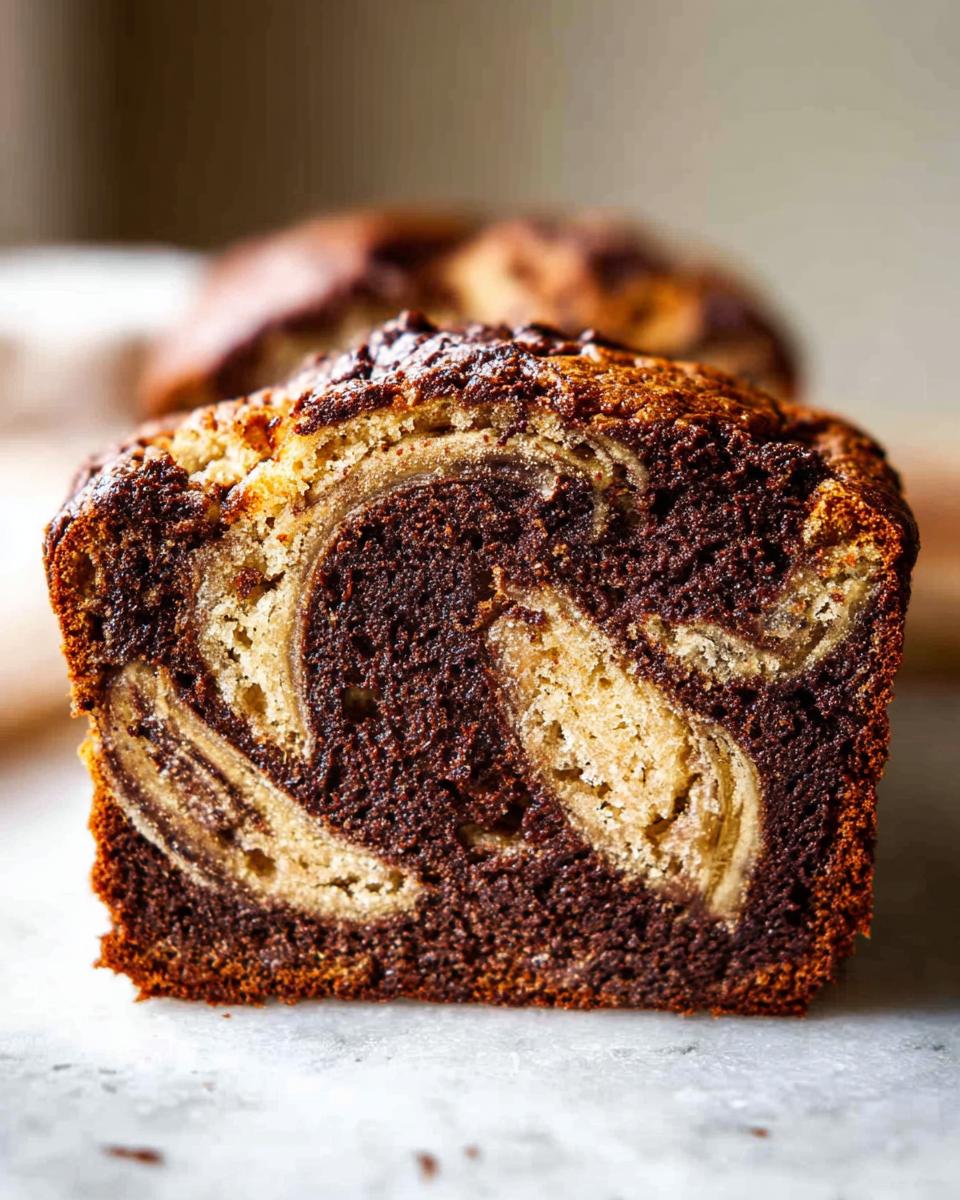
Alright, bakers, that’s it! You’ve managed the perfect swirl, you’ve avoided the dreaded sunken center, and now you have one truly gorgeous loaf of Marbled Chocolate Banana Bread cooling on your rack. I’m so invested in seeing how your artistic swirls turned out!
Please don’t be shy! I absolutely live for seeing your creations. When you pull that loaf out and see those beautiful ribbons of chocolate winding through the banana base, snap a photo and tag us on social media! Let us know just how much you loved this Breakfast Bread. Did you use slightly more cocoa? Did you try the brown butter trick? Drop a comment below and give this recipe a star rating so other bakers know they’ve found a winner.
Every comment helps us know which recipes to keep in rotation, and seeing your happy faces enjoying this is truly the best part of my day!
Happy baking, everyone!
By Clara Bennett, Lead Plate Designer at Recipes by Betty.
Marbled Chocolate Banana Bread
Equipment
- Loaf pan
- Mixing Bowls
- Whisk or electric mixer
Ingredients
For the Banana Bread Batter
- 3 ripe bananas Mashed
- 120 g butter Melted
- 150 g sugar
- 2 eggs
- 1 tsp vanilla extract
- 200 g all-purpose flour
- 1 tsp baking soda
For the Chocolate Swirl
- 30 g cocoa powder Added to a portion of the batter
Instructions
- Preheat your oven to 175°C (350°F). Grease and flour a loaf pan.
- Prepare the standard banana bread batter by mixing the mashed bananas, melted butter, sugar, eggs, and vanilla. Mix in the flour and baking soda until just combined.
- Remove about one-third of the plain batter and place it in a separate small bowl. Whisk the cocoa powder into this smaller portion until fully incorporated, creating the chocolate batter.
- Alternate spooning the plain batter and the chocolate batter into your prepared loaf pan. Do not mix them completely.
- Take a knife and gently swirl it through the batters in the pan a few times to create the marbled effect. Do not over-swirl, or the colors will blend too much.
- Bake for 55 minutes, or until a toothpick inserted into the center comes out clean.
- Let the bread cool in the pan for 10 minutes before transferring it to a wire rack to cool completely.