When you need a dinner that just hugs you from the inside out, forget salads and light fare. You need deep, savory comfort, and that’s exactly what we get when we drop crispy chicken katsu right into a pool of thick, aromatic Japanese curry. I’m telling you, making this Katsu Bowl with Curry Sauce from scratch is shockingly fast, clocking in under 40 minutes total.
My favorite memory of this dish is from last November when the rain wouldn’t quit. I whipped this up—the sound of the panko sizzling was the only cheerful noise in the house! It instantly felt like the perfect, hearty Japanese meal for a chilly night. This isn’t just food; it’s a reliable hug in a bowl, and you absolutely deserve to make it soon.
If you’re looking for other quick, satisfying dinners packed with flavor, you might want to check out my guide on easy dump and go Asian chicken dinner ideas. It’s all about maximizing flavor with minimal daily effort!
Why You Will Love This Katsu Bowl with Curry Sauce
Honestly, I keep this recipe on rotation because it hits all the requirements for a perfect weeknight meal. It’s robust, it’s got that irresistible crunch, and the sauce is just pure depth. I promise you, once you try this Katsu Bowl with Curry Sauce, you’ll see why it’s one of my go-to comfort meals.
- Incredibly Fast Prep: We’re talking done in about 35 minutes total! Seriously, it’s faster than ordering takeout, and way more satisfying. If you need easy Asian food ideas, bookmark this one immediately.
- Perfect Texture Contrast: That satisfying *crunch* from the panko coating on the chicken is totally necessary. It stands up beautifully to the thick, warm curry sauce without getting immediately soggy.
- Deep Flavor Without the Fuss: You get that classic, rich Japanese curry taste—sweet, savory, and just slightly earthy—using just pantry staples to build the sauce quickly. No days of simmering required here!
- Ultimate Comfort Food: This dish just wraps you up in a delicious blanket. It pairs perfectly with simple steamed rice, making it an absolute dream for those cooler evenings when you need something hearty on your plate.
- It’s Customizable: While this is my favorite chicken version, it’s simple to change the protein or load up on veggies, making it a flexible addition to your rotation of satisfying Japanese Meals.
Essential Ingredients for Katsu Bowl with Curry Sauce
You know how sometimes you stare at a recipe and think, “Oh, I’m definitely missing something obscure”? Not here! This dish relies on simple things, but how you prep them really matters. We need to make sure we have the right crunchy stuff for the katsu and just the right mix of sweet and spice for that glorious sauce. Trust me, nailing this short ingredient list is the secret to truly authentic Japanese Food Recipes like this one. And hey, if you’re into deep, savory flavors, you absolutely have to peek at my recipe for Thai red curry chicken soup for another cozy night!
Let’s break down what you need so you can gather everything before you start the breading chaos—because things move fast once you get the oil hot!
For the Chicken Katsu
Here’s where we build the crunch. Don’t skip flattening the chicken; it helps it cook evenly and keeps everything from drying out while you get that golden crust.
- 2 chicken breasts, which you absolutely must pound or slice until they are nicely flattened for even cooking.
- Salt and pepper, seasoned to taste—don’t be shy here!
- 1/2 cup of plain flour for dredging.
- 1 egg, beaten well so it can coat things nicely.
- 1 cup of panko breadcrumbs. Panko is non-negotiable; it gives that characteristic airy crunch that regular breadcrumbs just can’t manage.
- Oil for frying—you need enough to create a nice shallow bath for the chicken.
For the Curry Sauce
This is where the magic happens! The slight sweetness combined with the earthy curry powder creates that signature Japanese flavor profile people adore in a great Katsu Bowl with Curry Sauce. It’s so much better than the jarred stuff, I promise.
- 1 tbsp of butter—this starts our little roux.
- 1 tbsp of flour—this mixes with the butter to thicken everything up later.
- 1.5 cups of chicken broth—low sodium is usually best so you can control the saltiness later.
- 1 tsp of curry powder. This is the star! Pick a good quality one.
- 1 tsp of sugar. Yep, sugar! This balances the savory spices perfectly.
Step-by-Step Instructions for the Katsu Bowl with Curry Sauce
Okay, getting the timing right is everything here! We need crispy chicken hitting hot rice at the exact moment the sauce is perfectly smooth and bubbling. Don’t stress about this sequence; just move with purpose! If you’ve ever thought about making this a healthier meal, I have guides on baked chicken katsu or air fryer chicken katsu, but since we’re making the real deal today, let’s get frying!
Preparing and Frying the Chicken Katsu
First things first: get your chicken ready to wear its crispy coat. Take those flattened chicken breasts and season them all over with salt and pepper. Next, set up your little three-stage breading station. You need one shallow dish with flour, a second with your beaten egg, and the third loaded up with panko breadcrumbs. Don’t overcrowd things!
Now, dredge them! Shake off the excess flour first, then dip into the egg, and finally, press firmly into the panko. You really want that coating to stick. Heat your oil in a skillet over medium-high heat—it needs to be hot enough to sizzle immediately. Fry the breaded chicken until it’s gorgeously golden brown on both sides and cooked all the way through. Once they look perfect, pull them out and put them on a rack to drain. Wait until they’ve rested just a minute, then slice them right across into thick, satisfying strips.
Making the Rich Curry Sauce
While the chicken is resting (or while you’re frying each piece individually—you can multitask!), turn your attention to the saucepan. Melt that tablespoon of butter over medium heat. Once it’s foamy, whisk in the flour, and cook that mixture, stirring constantly, for about a minute. This creates our roux, guys—the thickening base! It means we won’t end up with watery curry today.
Start whisking the chicken broth in slowly, making sure there are zero lumps before adding more. Once it’s all smooth, stir in your curry powder and that essential pinch of sugar. Let this simmer gently while you’re finishing the chicken, stirring now and then, until you see it getting thick enough to coat the back of a spoon. That’s how you get authentic flavor for your Katsu Bowl with Curry Sauce!
Assembling Your Katsu Bowl with Curry Sauce
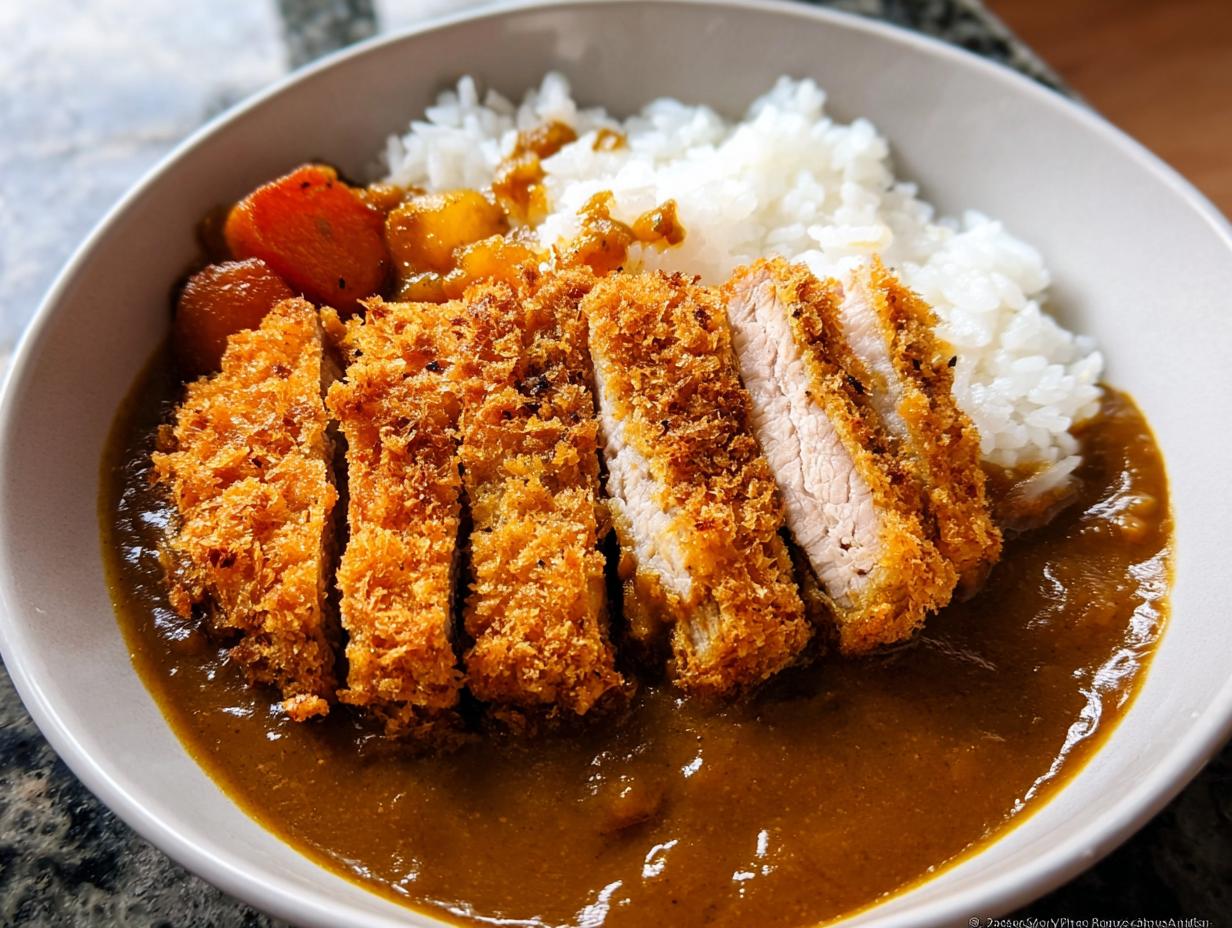
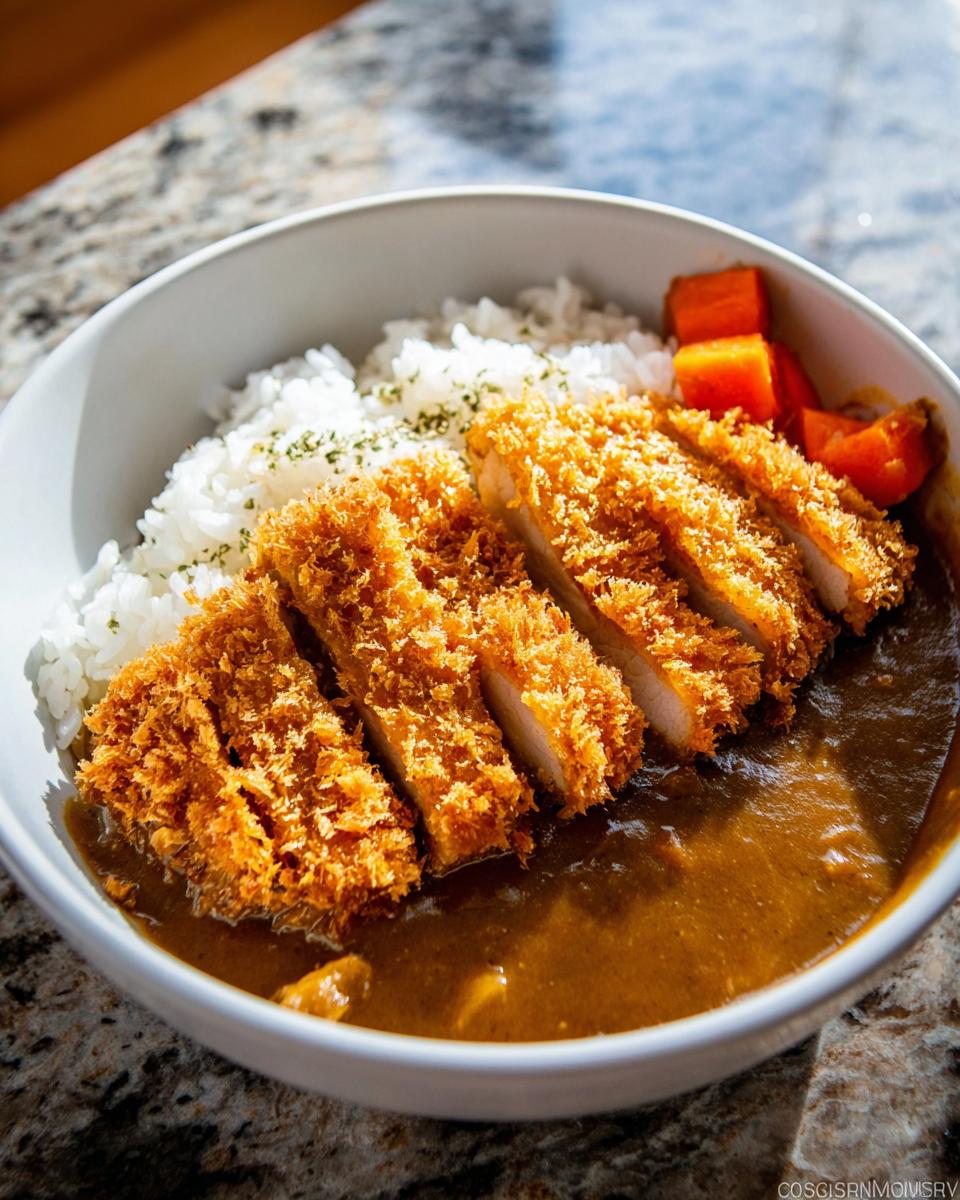
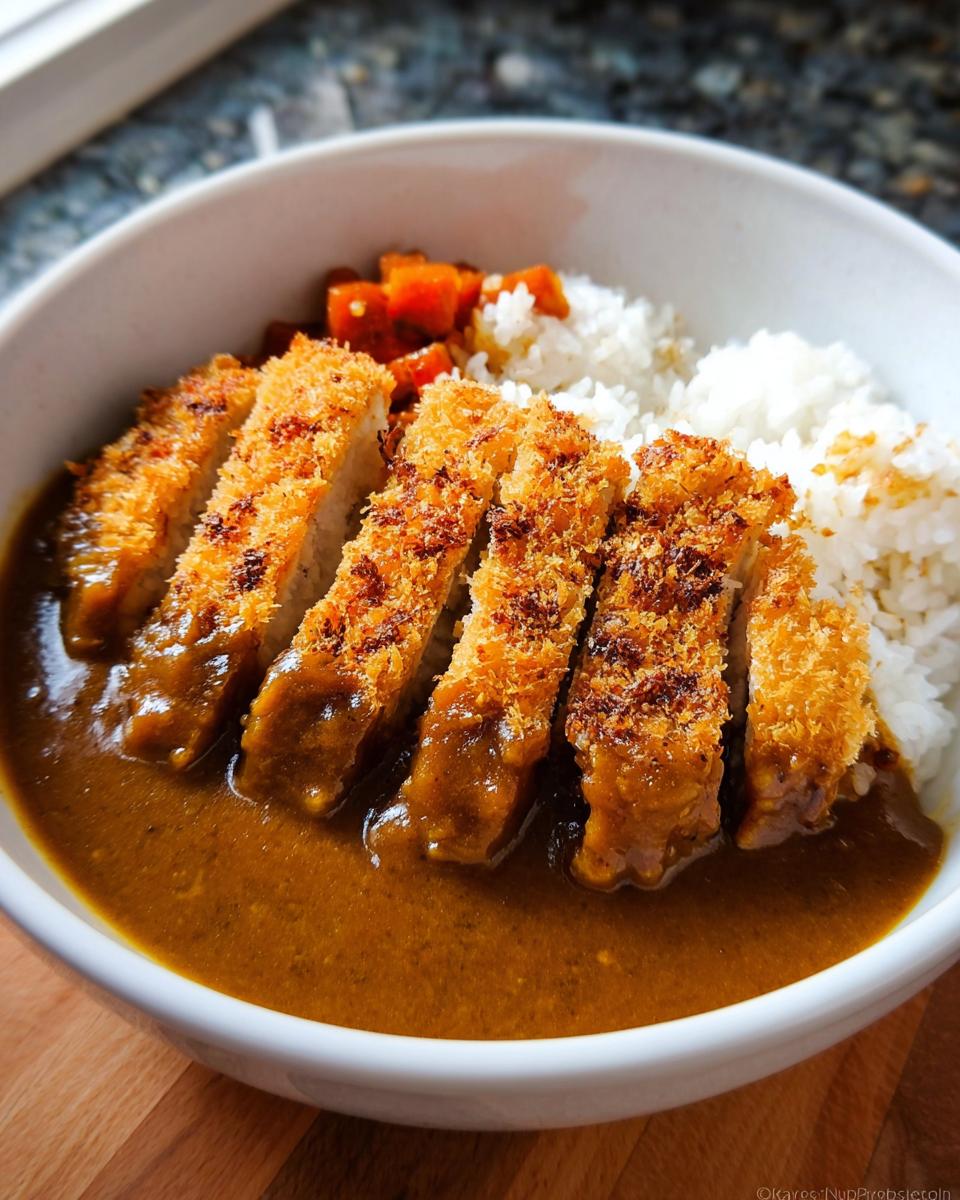
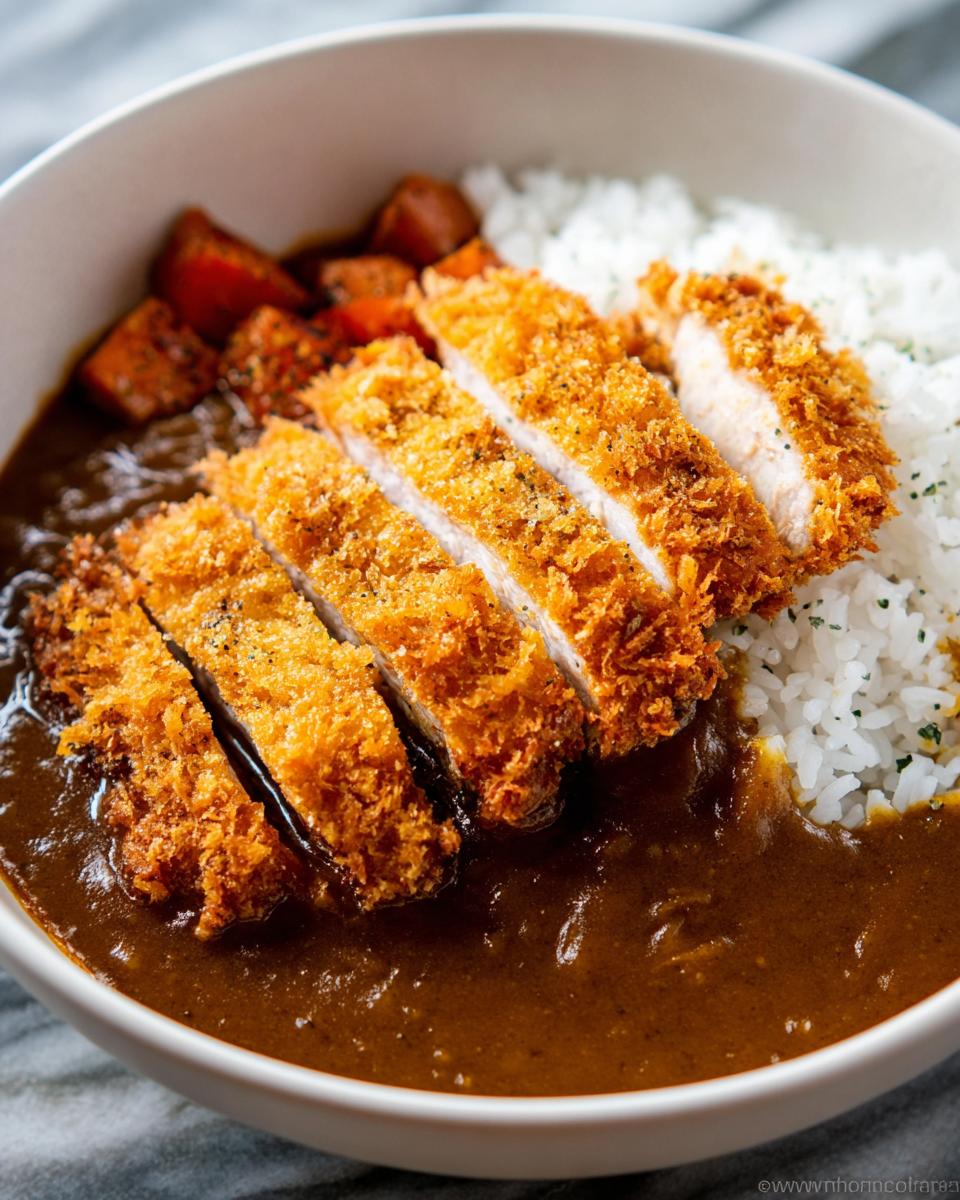
This is the grand finale! Grab your favorite wide bowl. Spoon a generous amount of hot, steamed white rice right into the center. Arrange those beautiful, sliced katsu strips right over the rice. Finally, ladle that unbelievably thick, warm curry sauce right over the top. Doesn’t that look amazing? Dinner is ready!
Tips for the Perfect Katsu Bowl with Curry Sauce
Listen, making this Katsu Bowl with Curry Sauce is easy, but making it *mind-blowingly* good takes a couple of tricks I picked up from reading countless Japanese Food Recipes. It all comes down to temperature control and moisture management, honestly. If you follow just these few insider tips, your rice bowl will taste like it came straight from a little specialty shop!
Since we’re aiming for peak crispiness, here are the things I swear by:
- Don’t Skimp on Oil Depth: You don’t need to deep fry, but you do need enough oil so the chicken is mostly submerged. If the chicken sits directly on the bottom of the pan, the heat transfer won’t be even, and you’ll get pale spots. I like my oil about an inch deep for the katsu.
- Panko Must Be Dry: Before you even start setting up your breading station, make sure those panko crumbs aren’t clumpy or wet from humidity. If they look a little sad, spread them on a baking sheet and toast them lightly in a 300°F oven for about five minutes. Toasting makes them absorb less oil and brown up richer.
- Rest That Katsu! This is crucial. As soon as the chicken comes out of the hot oil, don’t slice it immediately! Let it rest for at least three minutes laid out on a wire rack over paper towels. This lets the residual heat finish cooking the center gently and keeps the crust dry. Slicing too soon lets all the juices and steam escape, leading to a mushy crust.
- Whisk the Roux Vigorously Initially: When you add the broth to your butter/flour mixture, whisk like your life depends on it for the first 30 seconds. You are physically pushing the starch granules apart so they hydrate evenly. Once it’s smooth, you can relax, but that initial burst of energy stops lumps for good!
Master these simple things, and your Katsu Bowl with Curry Sauce is going to be a massive hit. If you’re looking for more ways to incorporate these bold flavors, my collection of Asian recipes authentic ways has tons of ideas!
Variations on the Katsu Bowl with Curry Sauce
While I absolutely adore this chicken version—it’s so easy to fry up quickly—the beauty of a great foundation like this katsu bowl is that you can totally remix it! When I get a hankering for something slightly different, or I just don’t have chicken breasts on hand, I reach for swaps that keep that cozy, comforting vibe we love in our Asian Cuisine Recipes.
If you try any of these, don’t forget to adjust your frying time slightly based on the thickness of whatever you choose to bread!
- Go Pork Power (Tonkatsu Style): This is the classic switch! Use thick-cut pork loin chops instead of chicken. You’ll just want to make sure they are pounded thin, maybe about a half-inch thick, and they might take 1-2 minutes longer in the hot oil to cook all the way through. The pairing of pork with Japanese curry is legendary for a reason!
- A Vegetarian Katsu: You can make fantastic veggie katsu! Thick slices of firm tofu (pressed very well to get the water out!) or even large portobello mushroom caps work wonderfully as the base instead of meat. Make sure you press that tofu until it’s rock hard, or it will fall apart when you bread it.
- Bulk Up That Curry Base: If you want to stretch this recipe or make it even more of a substantial “stew” vibe, toss some veggies into the curry sauce while it simmers. Soft root vegetables are perfect. I often drop in small chunks of carrot and potato about 10 minutes before the sauce finishes thickening. They absorb all that curry flavor and make the meal heartier.
- Spice Adjustment: If you find that 1 teaspoon of curry powder isn’t quite enough kick for your crew, you can add a tiny bit of cayenne pepper or even a dash of chili garlic sauce to the simmering sauce. Just taste as you go; we don’t want to overpower the natural sweetness of the dish!
These little tweaks keep the core concept of a crunchy item drowning in savory sauce alive, but they keep things interesting week after week!
Serving Suggestions for Japanese Food Recipes
You’ve made your perfect, crisp Katsu Bowl with Curry Sauce, and now the best part—building the bowl! While the katsu and thick curry are the stars of the show, the rice underneath and the little bits you add on the side are what truly complete these wonderful Japanese Meals. Think of it like a beautiful stage: you need the right flooring and lighting to make the main act shine!
The one non-negotiable item here, in my book, is rice. You need something light but substantial to soak up every bit of that rich curry sauce. If you’re looking for quick rice methods that pair well with things like this, I always suggest looking at my dump and go Asian chicken dinner post because many of those rice cooker tricks apply here too!
Here are the simple side elements that elevate this from a quick plate of food to a real experience:
- Steamed White Rice (Mandatory Base): You need short-grain or medium-grain sticky rice. The stickiness ensures it acts like a little dam holding all that gorgeous curry sauce in place. Don’t use long-grain rice here; it just doesn’t absorb the sauce correctly! Make sure it’s piping hot when you assemble the bowl.
- Finely Shredded Cabbage: This is such a classic pairing in Japanese cuisine, and for good reason! A mound of raw, thinly shredded cabbage offers a cool, crisp counterpoint to the hot, rich, and savory everything else. Plus, it adds some much-needed freshness. A tiny drizzle of sesame dressing doesn’t hurt, but keep it light so it doesn’t compete with the curry.
- Pickled Ginger (Beni Shoga or Gari): A small pile of the pink, vinegary ginger on the edge of the bowl acts as a palate cleanser. You take a tiny bite between mouthfuls of katsu and curry, and it cleanses your mouth so the next bite tastes as vibrant as the first. It cuts through the richness beautifully.
- A Soft-Boiled Egg: If you didn’t add one to the sauce itself, topping the bowl with a marinated or perfectly jammy soft-boiled egg (ramen style!) is next-level delicious. When you pierce that yolk, it just melts into the curry, making it even creamier.
Assemble it artfully—rice first, then the sliced katsu, sauce generously over the meat and slightly onto the rice edges, and then those little colorful sides tucked right next to the katsu. It makes such a stunning plate!
Storage and Reheating Your Katsu Bowl with Curry Sauce
I get it—sometimes you make a giant batch of this amazing Katsu Bowl with Curry Sauce because you just can’t stop eating it, or maybe you want to meal prep for the week. Life happens! The trick here, and this is vital for any crispy fried food you save, is that you *must* store the components separately. If you put crispy katsu directly into the curry sauce, you end up with soggy chicken, and nobody wants that sad sight waiting for them in the fridge. Nope, we fight for that crunch!
If you’re planning ahead, consider checking out my tips for low-carb chicken meal prep—the storage techniques are honestly transferable here, especially when dealing with anything breaded.
Storing the Components Separately
When you’re ready to pack this up for later (it lasts great for about three days in the fridge), you’ll want three separate containers. In one, keep your leftover rice. In another, put your sliced katsu. I usually lay a paper towel under them in the container just to absorb any moisture that tries to sneak in overnight.
The curry sauce is the easiest piece. It goes into a small, airtight container. Honestly, Japanese curry sauce usually tastes even better the next day because those spices really meld, so congratulations, you’ve basically made tomorrow’s dinner easier!
Reheating for an Authentic Experience
The goal when reheating is always to bring back the *crisp* to the chicken and the warmth to the sauce without turning everything into mush.
- Reheat the Sauce: Pour your reserved curry sauce into a small saucepan. Heat it gently over medium-low heat, stirring frequently until it’s bubbling gently and hot all the way through. You can splash in a tiny bit of water or broth if it seems too thick after refrigeration.
- Reheat the Katsu (The Crunchy Way): Do NOT microwave the chicken! Seriously, don’t. The best way to recover the crispness is using an air fryer or a toaster oven. Spread the cold, sliced chicken in a single layer and cook at about 375°F (190°C) for 5 to 7 minutes. If you don’t have those tools, a dry skillet over medium heat for a few minutes per side works too—just watch it carefully so the breading doesn’t burn!
- Assemble: Reheat your rice separately (microwave or steamer works fine). Then, build that perfect bowl all over again: hot rice, crispy reheated katsu, and the steaming hot, rich curry sauce poured right over the top.
By taking just a few extra minutes to reheat the chicken properly, you save the integrity of the katsu. It makes leftovers taste almost as good as fresh!
Frequently Asked Questions About Katsu Bowl with Curry Sauce
I know when you dive into a new dish, especially one that falls under the umbrella of Easy Asian Dishes like this one, a few questions always pop up. You want that perfect balance, right? You want that crunchy cutlet nestled under savory, thick curry. Here are the things I get asked most often when people try making their first authentic Katsu Bowl with Curry Sauce!
Can I bake the katsu instead of frying it?
You absolutely can swap frying for baking, or even air frying, if you’re watching the oil content! Just know that the texture will be different. Frying locks in that incredible, uniform crispness that we love. If you bake, make sure you spray the panko coating well with cooking oil before putting it in the oven (around 400°F or 200°C). If you use the air fryer, you get closer to the fried texture, but always make sure your chicken cutlets are thin so they cook through before the outside burns!
What makes Japanese curry different from Indian curry?
This is a fantastic question that gets right to the heart of these amazing Asian Recipes Authentic! Indian curries are vast, but they often rely on fresh or ground spices simmered to create a complex flavor base, sometimes using yogurt or tomato. Japanese curry, which we are using for our Katsu Bowl with Curry Sauce, is usually much sweeter, thicker, and milder. We build the thickness purely using a roux (flour and fat) rather than relying as heavily on pulverized vegetables or dairy. Think savory depth with a noticeable sweet undertone!
How can I make the sauce vegetarian?
That’s easy to adapt! The wonderful thing about the Japanese curry roux base is that it stands strong even without meat broth. For the curry sauce, simply swap the chicken broth for an equal amount of high-quality vegetable broth. If you use vegetable broth, you might need to add just a tiny pinch more salt or maybe a drop of soy sauce at the end to mimic the savoriness that the chicken broth brought, but otherwise, the process is identical!
Why is my curry sauce grainy instead of smooth?
That almost always happens if you don’t cook the flour and butter mixture—the roux—long enough *before* adding the liquid, or if you dump all the broth in at once. Remember in the instructions how I stressed whisking the broth in GRADUALLY? That’s key! If you splash in too much liquid too fast, the starch lumps up immediately. If you notice lumps even after whisking hard, you can pull the pan off the heat, strain the sauce through a fine-mesh sieve, and reheat it. It works like magic!
Do I have to use Panko breadcrumbs?
Yes, please use panko! While you *could* technically use regular fine breadcrumbs, you won’t get the signature texture of a true Japanese Curry Rice Bowl. Panko crumbs, those large, airy flakes, create a much lighter, crispier crust that stays crunchy longer when the sauce hits it. They absorb less oil, too, which is a major win for us!
Nutritional Estimates for Katsu Bowl with Curry Sauce
Okay, let’s talk turkey—or in this case, chicken and carbs! Because we are frying the katsu and serving this over a generous bed of white rice along with a slightly sweetened sauce, this Katsu Bowl with Curry Sauce definitely slides right into the satisfying, hearty end of the spectrum. It’s comfort food, after all, not a salad!
I pulled some general numbers together based on two servings using standard chicken breasts and average white rice amounts. If you are looking for ways to keep things lighter, though, you absolutely must check out my thoughts on keto chicken family dinner recipes—even though this dish isn’t strictly low-carb, the techniques for reducing fat sometimes overlap!
Remember, this is just an estimate for one serving (half the batch), so use your best judgment based on how much rice you decide to pile in your bowl! We’re aiming for deliciousness here, not a precise science contest.
- Estimated Calories: Approximately 650 – 750 kcal
- Estimated Total Fat: Around 28g – 35g (A lot of this depends on the oil absorbed during frying!)
- Estimated Protein: Very solid! About 45g – 50g thanks to that chicken breast.
- Estimated Carbohydrates: Roughly 65g – 75g (Primarily from the rice and the flour/sugar in the sauce.)
A Quick Word of Caution: Since this recipe is so customizable—you might use more oil, thicker chicken, less sugar in the sauce, or use brown rice instead of white—these numbers are just a starting guide. If you’re counting macros for a specific diet plan, I always recommend plugging the base ingredients into your favorite tracking app and then adjusting for any changes you make in the kitchen!
Share Your Katsu Bowl with Curry Sauce Experience
Phew! We made it through the whole process, from prepping the chicken to perfectly thickening that incredible curry sauce. Now that you’ve had a chance to sit down with your own piping hot, comforting Katsu Bowl with Curry Sauce, I really want to hear what you thought!
This is one of those fantastic Asian Food Ideas that tastes better every time you make it. Did the salt and sugar balance in the sauce hit just right for your family? Did you manage to keep the katsu extra crispy, or did the sauce win that wrestling match? Tell me everything!
Please, please leave a star rating below—it helps others know this recipe is a winner. And if you tried adding potatoes to the curry or maybe used pork instead of chicken, drop a comment in the box! I’m always tinkering, and I love seeing how you adapt these recipes for your own tables. If you need to shoot me a direct question or feedback, you can always find my contact page here: I’m here to chat!
About the Author: Hanna Foster
By Hanna Foster, Adaptation Specialist at Recipes by Betty.
Katsu Bowl with Curry Sauce
Equipment
- Skillet or deep frying pan
- small saucepan
Ingredients
For the Chicken Katsu
- 2 chicken breasts, flattened
- to taste Salt and pepper
- 1/2 cup flour
- 1 egg, beaten
- 1 cup panko breadcrumbs
- Oil for frying
For the Curry Sauce
- 1 tbsp butter
- 1 tbsp flour
- 1.5 cups chicken broth
- 1 tsp curry powder
- 1 tsp sugar
Instructions
- Season the flattened chicken breasts with salt and pepper.
- Set up a breading station: place flour in one shallow dish, the beaten egg in a second, and panko breadcrumbs in a third.
- Dredge each chicken piece first in flour, shaking off excess. Dip into the egg, letting excess drip off. Coat thoroughly in panko breadcrumbs.
- Heat oil in a skillet over medium-high heat. Fry the breaded chicken until it is golden brown on both sides and cooked through. Remove from oil and slice into strips.
- For the sauce, melt the butter in a small saucepan over medium heat. Whisk in the flour and cook for one minute.
- Gradually whisk in the chicken broth until smooth. Add the curry powder and sugar. Bring the mixture to a simmer and cook, stirring occasionally, until the sauce thickens.
- Serve the sliced chicken over rice, topping generously with the warm curry sauce.