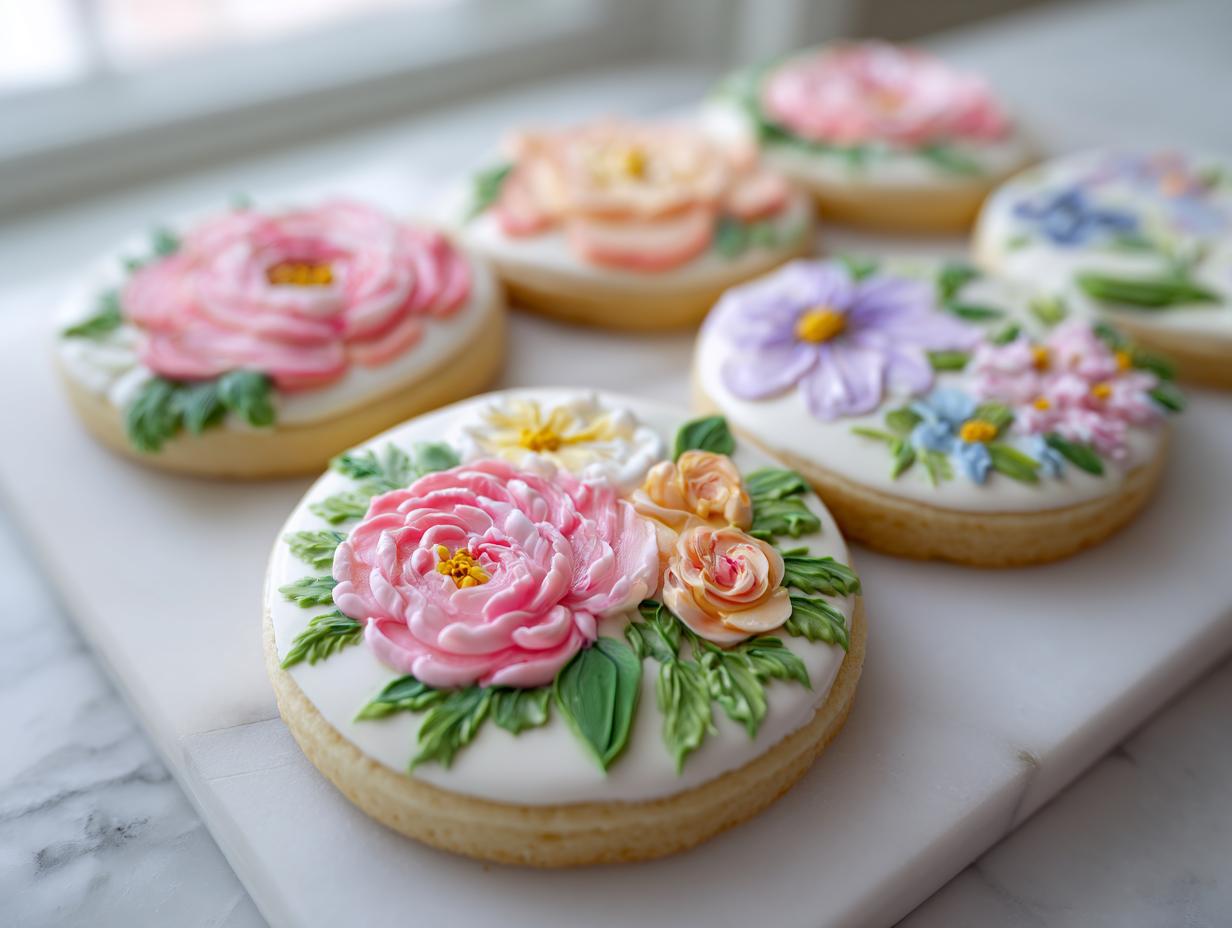
If you think cookies are just for eating, well, you haven’t truly seen what a little edible paint can do! I absolutely adore transforming a simple, sturdy sugar cookie into a tiny piece of art. Seriously, there’s nothing quite like the hush that falls over a room when you set out these stunning creations. They aren’t just treats; they are conversation starters.
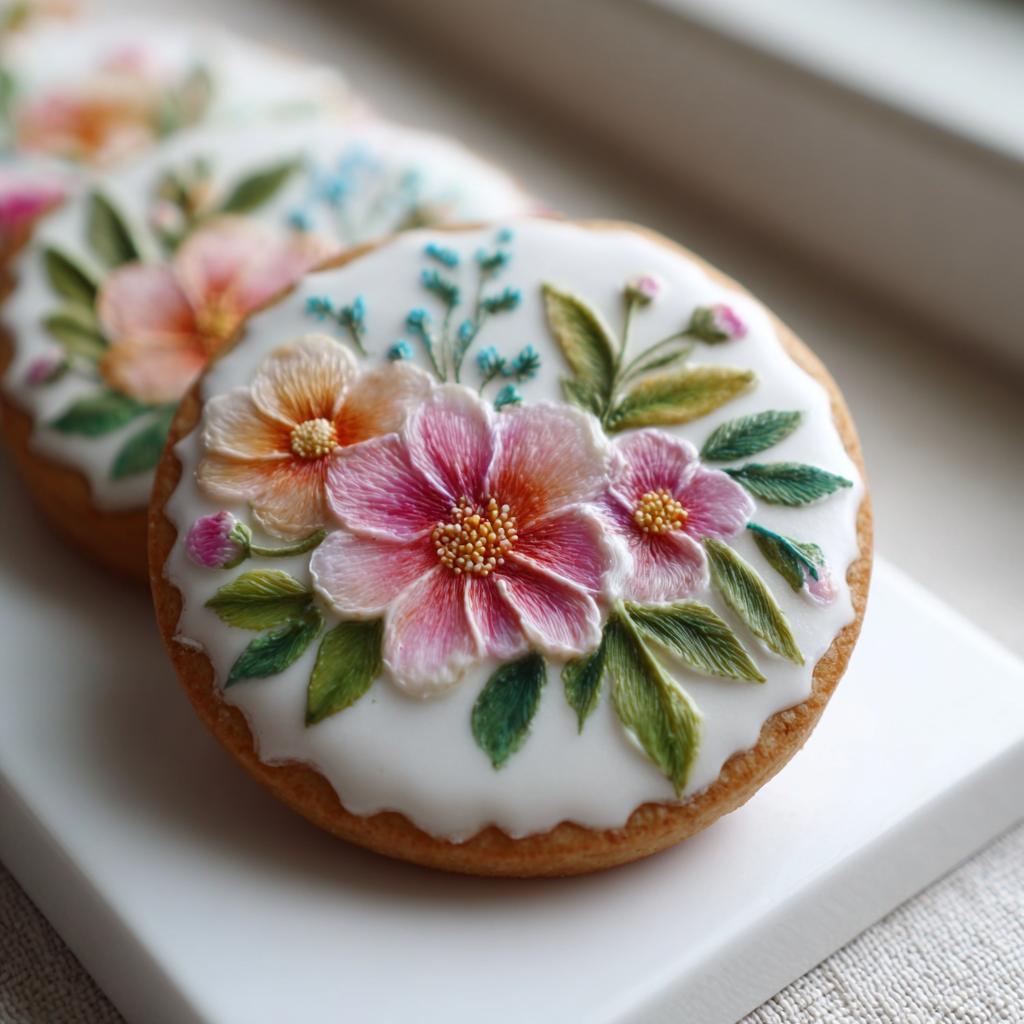
The real thrill I get comes from perfecting the details on these Hand Painted Floral Baby Shower Cookies. Because I paint every single leaf and petal by hand, no two cookies ever come out exactly alike. That’s the magic! I remember one time, I spent almost an hour on one tiny batch for a client whose baby’s nursery theme was ‘Watercolor Garden.’ Seeing her cry happy tears because the cookie looked exactly like the custom print? That’s why I do this.
This process requires patience—lots of it, since we need that royal icing base to set rock solid—but the result is absolutely worth every nervous brushstroke. You’re going to want to make sure your base cookie recipe is super reliable, by the way. You can find my favorite sturdy sugar cookie base right here, because you need a canvas that won’t crack when you get detailed!
Why You Will Love These Hand Painted Floral Baby Shower Cookies
Honestly, these cookies just elevate any celebration. If you’re tired of standard, identical stamped cookies, this is your answer! They bring such an amazing, elegant touch to a baby shower theme. They aren’t just sweet; they’re little personalized gifts.
- Incredible Artistic Appeal: Each cookie is a tiny masterpiece waiting to happen.
- Perfect Baby Shower Theme: The florals naturally suit themes involving blossoms, gardens, or sweet new arrivals.
- Total Customization: You control the shading, the types of flowers, and the color palette exactly.
- Pure Baking Satisfaction: There’s a unique pride when you see a detailed design come together so beautifully.
Key Benefits for Creative Bakers
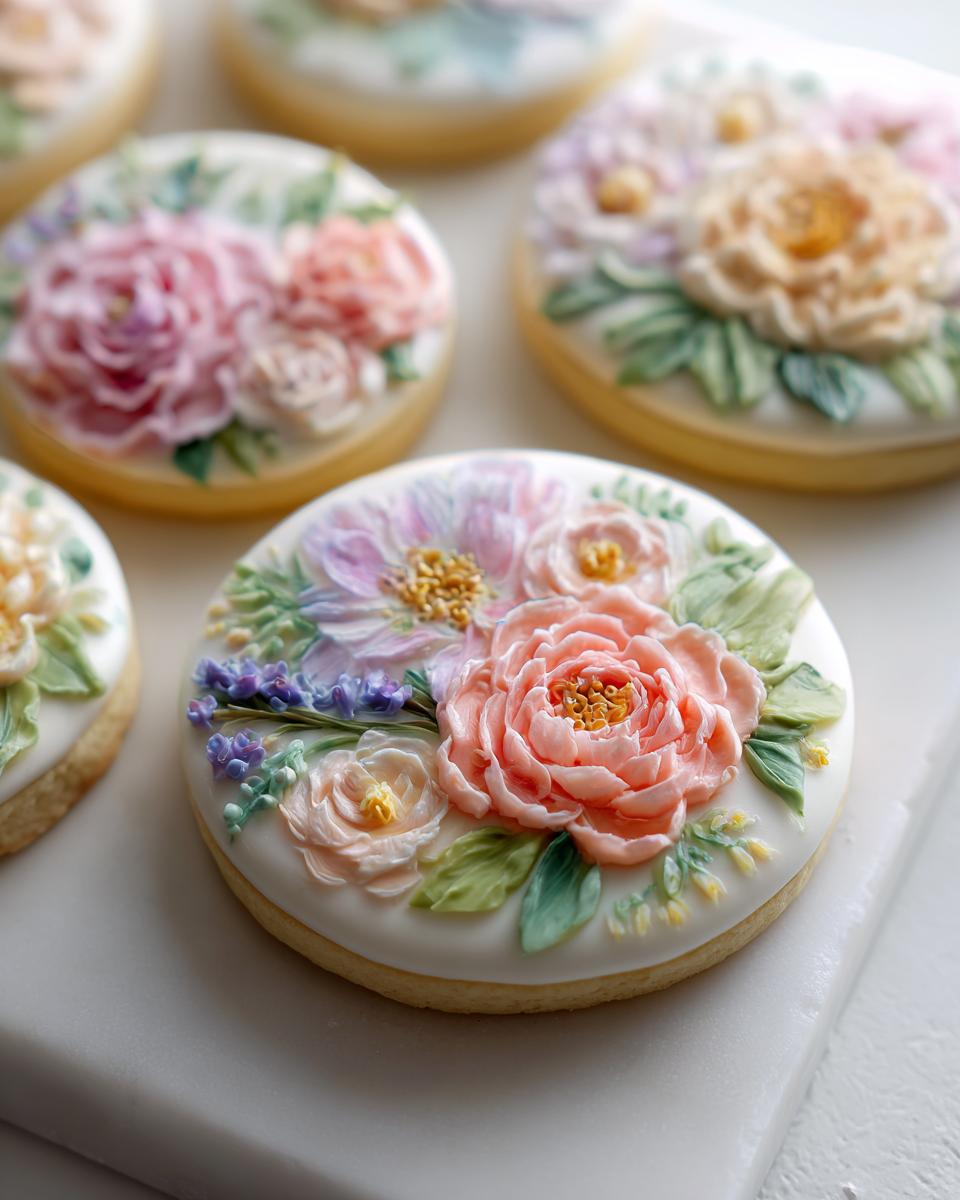
For those of us who love decoration, simple stamping just doesn’t cut it sometimes. Creating these hand painted floral cookies lets you really flex those creative muscles. Think of them less like baking and more like miniature watercolor painting on a delicious surface. The challenge is in the finesse, not the mixing, and that reward feels entirely different when you watch someone admire your work before taking that first bite!
Essential Equipment for Hand Painted Floral Baby Shower Cookies
Okay, since we are moving into true artistic territory here, your tools really matter. You wouldn’t try to watercolor a portrait with a scrub brush, right? Same idea applies here! If your tools are cheap or low quality, your results are going to look sloppy. We need precision for detail work, especially when dealing with the delicate nature of hand painted floral cookies.
First things first, you absolutely must invest in a proper, fine food-safe brush set. I’m talking incredibly fine tips—size 000 or even smaller if you can find them! This brush is going to be your absolute favorite tool when decorating because it lets you draw those tiny stems and the center stamens on the flowers without bleeding all over your smooth white base.
Beyond the brushes, you’ll want a collection of small, shallow dishes or a ceramic paint palette. This is where you mix your colors; don’t try to mix them directly on the cookie! Having a dedicated palette keeps your work area tidy and lets you test shades before you commit them to the royal icing. Also, make sure you always have plenty of clean paper towels on hand because cleaning the brush between every single color is non-negotiable if you want colors that pop and don’t muddy up.
For general guidance on equipment that holds up well to constant baking prep—even though this isn’t about scones—I always refer back to my tips on durable kitchen items. You can read more about setting up a quality baking station here!
Ingredients for Hand Painted Floral Baby Shower Cookies
Gathering your supplies for these Hand Painted Floral Baby Shower Cookies is like setting up an artist’s studio! We break this down into three key areas: the sturdy cookie itself, the smooth white canvas (that’s the royal icing), and finally, the exciting palette of colors we’ll use for painting. You must be precise with the icing ingredients, trust me, because a weak base means your beautiful painting job will crack or smudge!
The success of the final painted look hinges entirely on getting that base icing exactly right. It needs to be thick enough to cover the cookie evenly but smooth enough to dry totally flat. Once you have everything measured out, you’re ready to start assembling your edible art materials.
For the Cookie Base
Remember, these cookies have to withstand a little bit of gentle brushing and layering, so we can’t use anything too delicate. You need a recipe that produces a firm, flat surface that won’t spread while baking. I always bake my base cookies a day ahead, just to make absolutely sure they are cool and completely hardened before we even think about icing them. For this recipe, you’ll need: 1 batch of baked sugar cookies (use your favorite sturdy recipe, like the one I mentioned earlier!).
For the Smooth Royal Icing Base
This is the surface that truly matters. Get this mixture right, and you’ve done 80% of the heavy artistic lifting! It needs to flood beautifully and dry hard as a rock. You will require about 2 cups of powdered sugar, 1.5 tablespoons of meringue powder (don’t skip this!), and 3 tablespoons of water. Whisk these until they are totally smooth and then let them sit to let the air bubbles work themselves out before you start flooding your cookies.
For the Edible Paints
This is the fun part! We aren’t using standard food coloring here; we want rich, concentrated pigment that dries beautifully. You’ll need edible gel food colors—pretty much any color you imagine for your floral arrangement. The critical secret, and please pay attention here, is that you can’t use the gel straight from the jar. You need to dilute the colors with just a few drops of clear alcohol, like vodka or clear extract, such as pure vanilla extract. The alcohol evaporates super fast, leaving behind a vibrant, smooth paint that won’t bleed into your white icing base. It’s magic, I promise!
Step-by-Step Guide to Making Hand Painted Floral Baby Shower Cookies
Alright, we have our supplies gathered, our canvases baked, and our tiny paint pots ready to go! This part moves slower than regular cookie decorating because we have to wait for things to dry, but that waiting time is actually where the magic solidifies. If you rush the base, you ruin the painting, so take a deep breath and embrace the slow process. It’s all part of creating these magnificent Hand Painted Floral Baby Shower Cookies!
Preparing and Baking the Cookie Canvas
First things first, make sure your sugar cookies are baked perfectly flat and have cooled completely on a wire rack. I like mine to sit out for at least an hour after they come off the cooling rack—we want them cold, not just room temperature. Any lingering warmth can cause the wet icing base to slide right off. Just bake according to your reliable recipe and let them rest!
Flooding and Drying for Artistic Cookies
Next up is flooding. You want your royal icing base to be smooth, white, and perfectly level, similar to freshly fallen snow on a still morning. Dip your brush into the icing and gently move it across the cookie surface to smooth out any ripples you see. Then, you have to wait. This is the longest, most necessary step! You need that white layer to dry fully, which means waiting a minimum of 8 hours. Seriously, overnight is best. If you touch it and it’s even slightly soft, it means it isn’t ready for painting yet, and you’ll smudge your future masterpiece. Don’t rush the drying process if you want truly artistic cookies!
Mixing Your Edible Paints
While the cookies are drying, prepare your palette! This is where we turn thick gel colors into beautiful, workable paint. Take a tiny dab of your chosen edible gel color—let’s say a pale pink for rose petals—and drop it into a small dish. Then, slowly add just a drop or two of clear alcohol or lemon extract. Stir it gently until it reaches the consistency of watercolor paint. You want it thin enough to flow gently off your brush but pigmented enough to give you good color payoff when applied to the icing. Always mix a bit more than you think you’ll need so you don’t have to stop mid-flower to mix more! For more tips on getting icing right, check out some of my favorite frosting formulas here.
The Art of Hand Painting Floral Designs
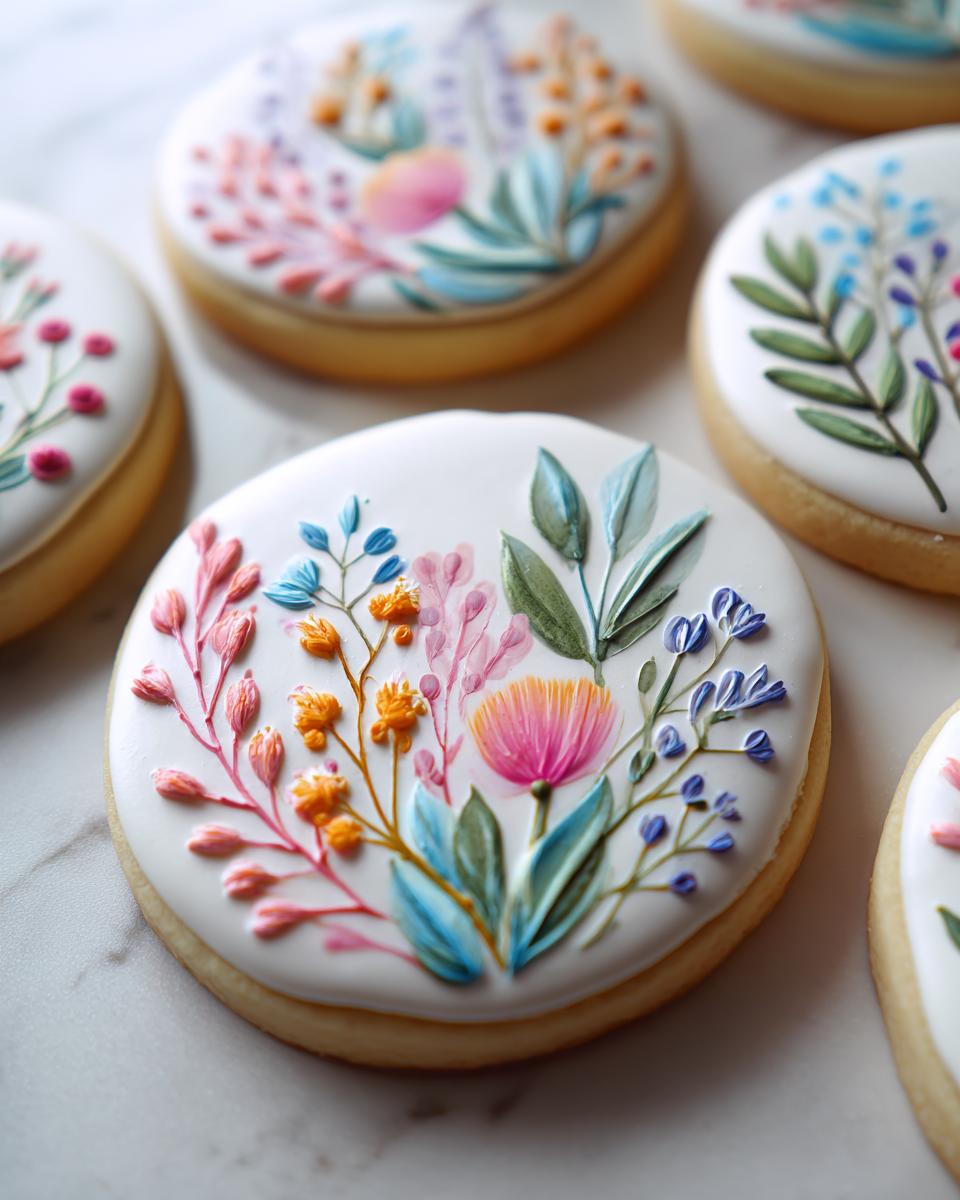
Now the truly rewarding part! Take your finest brush and lightly test your paint consistency on a piece of parchment paper first. When you start on the cookie, remember to be gentle. You are painting on a hard surface, not watercolor paper, so you don’t need heavy pressure. I always start with the lightest base colors first, like pale greens for leaves or the lightest petal color.
For depth, which is what makes these hand painted floral cookies look professional, layer your colors once the first layer is dry to the touch. For example, paint the entire petal pink, let it dry for about 15 minutes, and then lightly tap a deeper shade of pink just near the center of the blossom to create shading. This layering technique adds dimension and really makes those simple round cookies look three-dimensional. Clean your brush thoroughly between every color change, or you risk muddying up your beautiful pastels!
Tips for Perfect Hand Painted Floral Baby Shower Cookies
Even when the base icing is dry as a bone, things can still go wrong! The biggest culprit is usually humidity, which attacks that lovely smooth royal icing surface and causes our beautiful paint to bleed or look fuzzy. My biggest tip, honestly, is to only work on these when your kitchen isn’t humid. If it’s a rainy day, I crank the dehumidifier or just wait. It saves so much heartache!
When you are working with those super thinned-out edible paints, you need to learn how to ‘feather’ them. Feathering means using the lightest touch so the color settles gently onto the icing instead of just washing over it. If you press too hard, the pigment sinks down into the icing layer and you get that dreaded bleed effect, which ruins the crisp lines we worked so hard to achieve on these Hand Painted Floral Baby Shower Cookies.
Cleaning your brush between every single color is crucial, even if you are just switching from a light green to a slightly deeper green. You don’t want any residual dark pigment contaminating your light shade. I keep two jars of water near my palette: one for a quick rinse and one for a final clean. Then, I always dry the brush completely onto a lint-free cloth.
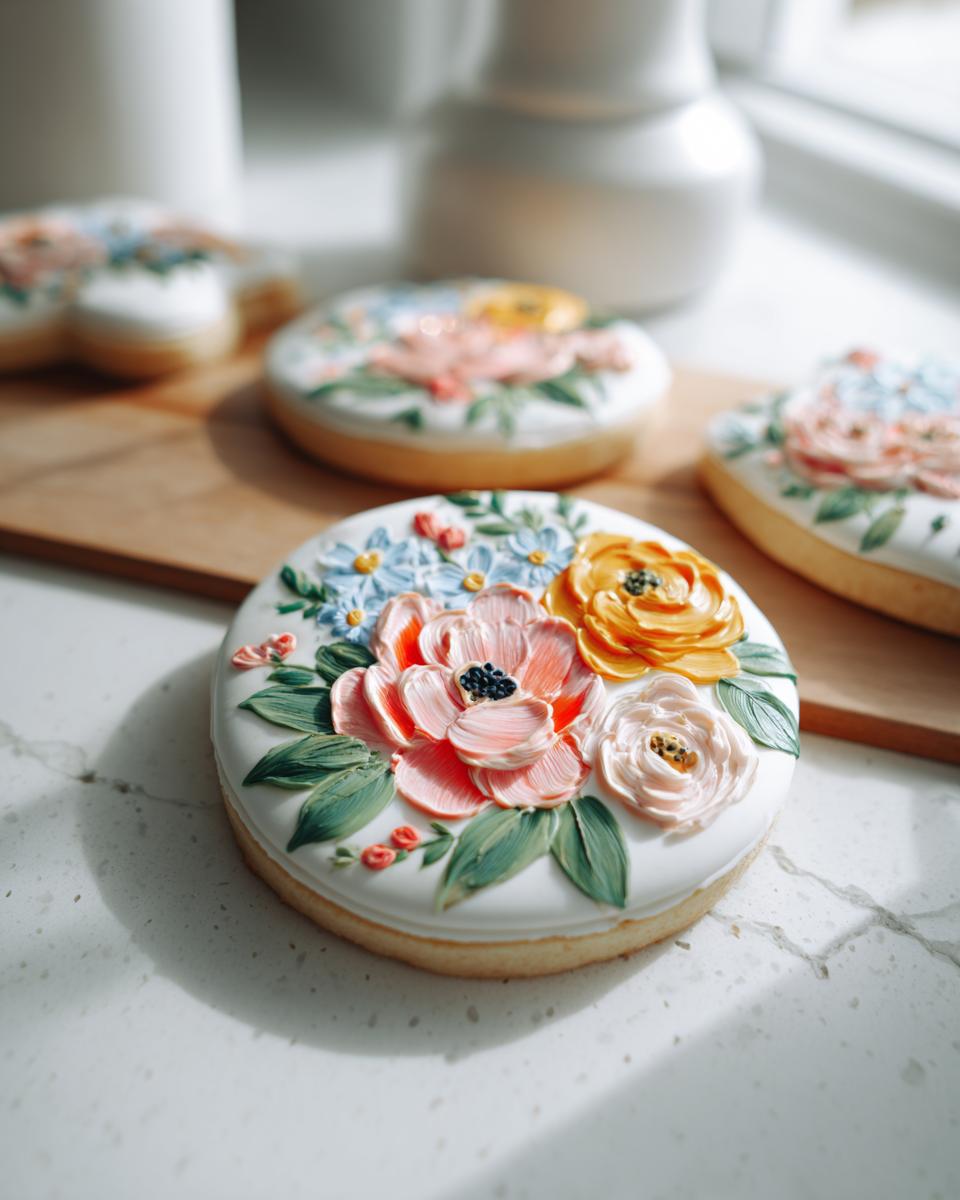
If you are aiming for that gorgeous, multi-toned shadow effect, always make sure your first layer is completely dry to the touch before adding the darker accent colors. If you are using any shades of white or cream in your design, use a special white edible paint (which you can buy pre-made or mix titanium dioxide dust into alcohol) for highlights. A bright white gleam at the center of a petal makes the whole design pop off the cookie surface. It really takes your hand painted floral cookies to the next level!
If you ever feel like you’re struggling with keeping your lines straight—and trust me, everyone struggles sometimes—you can always refer back to how the pros handle incredibly small, tricky details. It’s kind of like learning to pipe those tiny shells on macarons; precision matters! If you’re thinking about diving into other fiddly decorative arts, I found some fascinating advice in this guide I read about mini macaron secrets that actually applies to brush control!
Storage and Display of Your Hand Painted Floral Cookies
We’ve put so much effort into these little works of art, haven’t we? The last thing we want is for humidity to sneak in overnight and turn our crisp, detailed flowers into a smudgy mess. Proper storage is just as important as the painting itself when dealing with royal icing that has been embellished with edible paints.
The key to keeping these beautiful hand painted floral cookies pristine is making sure they are completely dry and then getting them away from moisture. You absolutely cannot stack fresh-painted cookies on top of each other right away. I learned that the hard way—never again!
First, ensure every single painted detail is touch-dry. If you’re using alcohol as your solvent, this happens fast, maybe in an hour or two on the surface, but you need to give the inner layers time to cure. Once you are certain they are totally hard, you can package them up.
Best Practices for Maintaining Painted Detail
My recommendation is to store these cookies in airtight containers, but you *must* place a layer of parchment paper between each cookie. Don’t use wax paper; parchment has a bit more grip and prevents any slight condensation build-up from sticking to the paint. Think about separation! If you made a standard batch yielding about 12 perfect cookies, you might use a large container, but slice up an extra sheet of parchment paper between every layer of cookies you stack inside.
Never, ever store these with any moisture source nearby. That means no fresh fruit in the container! Also, avoid placing them near the stove or an active dishwasher. If you’re preparing these babies ahead of time for the baby shower, make sure the storage area is cool and dark—sunlight can actually fade those beautiful edible pigments over time, making your vibrant florals look tired.
Displaying Your Artistic Treat
When it comes time to display your hand painted floral cookies, treat them like the precious gems they are. Keep them at room temperature until just before the guests arrive. If your baby shower venue is particularly cold or might have sudden temperature shifts (like sitting near an open door), maybe use a cake dome or cover them loosely until serving time. They look best under bright, flattering light where everyone can see the fine detail you worked so hard to achieve!
Variations for Baby Shower Cookies
Once you’ve mastered the basic floral brushwork, you can start playing around with the theme to customize these beautifully for the specific parents-to-be. That’s the joy of making custom baby shower cookies; they feel so much more personal than anything store-bought!
I always ask the mom-to-be about the nursery colors. If they are leaning into soft blues and grays instead of the traditional pinks and yellows, you can easily swap out your palette. Instead of painting traditional roses, try painting soft, monochromatic lavender sprigs or deep indigo leaves. It gives the same elegant, complex texture but fits a completely different aesthetic. It’s remarkable how much color can change the entire mood of the floral design!
Another wonderful adaptation, which works beautifully for those second-layer details, is adding tiny, delicate script. If you can handle lettering without it becoming wobbly, you can paint the baby’s initial right in the center of a large main bloom, or maybe the due date tucked subtly into the greenery at the bottom of the cookie. This takes practice—you’ll definitely want to trace a few practice letters on parchment paper first—but when it works, these baby shower cookies look like they came straight from a high-end invitation suite.
If you’re ever looking for inspiration on how to manage intricate piping or complex color layers—even though these aren’t macarons—sometimes looking at how bakers handle delicate details on other treats can spark an idea for adjusting your brush technique. I found some fascinating tips on handling tricky details in this guide about marshmallow cream macarons that surprisingly helped me perfect blending shadows on petunias!
Don’t forget to think about the cookie shape itself! While florals look stunning on large rounds or squares, try painting tiny sprigs onto small heart-shaped cookies or even simple oval tags. A cascade of ivy down the side of an oval cookie is much faster to execute than a huge, detailed full bloom, but still looks incredibly elegant and definitely counts as hand painted floral cookies!
Frequently Asked Questions About Hand Painted Floral Cookies
It’s funny how many questions pop up once you start going beyond basic flooding! People usually want to know about the color quality or what happens if they need to speed things up during these intricate decorating phases. I’m happy to share what I’ve learned along the way about mastering these beautiful designs!
Can I use regular food coloring instead of edible gel colors for hand painted floral cookies?
Oh, please don’t try it! Regular liquid food coloring—the kind you buy in the grocery aisle for your kid’s birthday cakes—is way too watery. If you try to dilute that, you end up with something that barely colors the icing, and it’s so thin it just spreads out and bleeds everywhere on your dried royal icing canvas. Gel colors are concentrated pigments suspended in a thicker base, which is exactly what you need. When you mix just a drop of alcohol with the gel, you get that perfect, vibrant paint consistency that holds its shape for those sharp lines on hand painted floral cookies. Stick to the gels for deep saturation!
What is the best cookie type for detailed artistic cookies?
You really need a cookie that doesn’t puff up or spread out during the bake. If the surface is domed or uneven, painting tiny details becomes nearly impossible because your brush keeps catching on high spots. I always insist on a good, firm vanilla or almond sugar cookie base. They should bake up completely flat and hold their shape even after cooling. A delicate, crumbly butter cookie won’t survive the level of handling needed when working on truly artistic cookies like these. You need structural integrity!
How long do these beautiful baby shower cookies last?
This is a trick question because they usually disappear the day they are finished! Kidding aside, because we use stable royal icing—and we let the paint completely cure—these last quite well, provided you store them correctly (remember airtight containers and parchment separators!). Under ideal, cool, dry conditions, they should look perfect for about two weeks. If your paint solvent was pure vodka, that extra alcohol content acts as a little extra preservative, too. But honestly, once they are made for the party, they tend to go fast!
If you’re curious about working with different, delicate finishes, I found a whole discussion on the pros and cons of different meringue bases, which affects texture immensely, that you might find interesting over on this article comparing different macaron styles here!
Sharing Your Hand Painted Floral Baby Shower Cookies Creations
Okay, you’ve done the hard part! You’ve baked, you’ve flooded, you’ve patiently waited, and now you have a gorgeous platter of custom, one-of-a-kind edible artwork. I absolutely have to see what you’ve created! When you spend that much time layering delicate petals and mixing custom shades, you deserve a round of applause!
Please, please, please take a picture of your finished batch of Hand Painted Floral Baby Shower Cookies and show them off! This step is genuinely important to me because seeing your unique interpretation of the floral designs is the biggest reward for sharing such a detailed technique. Did you go with dusty lavender and sage green? Did you try tiny little berries as an accent?
Drop a comment below and tell me how the painting went! Did you find a favorite brush size? Which colors ended up being your go-to shades for the baby shower theme? I read every single comment, and I love hearing about your successes—and even troubleshooting any little snags you might have run into. It helps me make these instructions even better next time!
If you’re proud of your work—and you should be!—please consider leaving a star rating for this recipe. It really helps other creative bakers find this guide when they are looking for something truly special for their events. And if you need to reach out directly with a specific, complicated question, you can always send a note via my contact page, which you can find right here. Happy painting, and congratulations to the mom-to-be!
Estimated Nutritional Data for Hand Painted Floral Baby Shower Cookies
Now, while these Hand Painted Floral Baby Shower Cookies are certainly a feast for the eyes, we do have to acknowledge that they are a lovely, sweet treat! Because the exact nutritional breakdown depends so much on the sugar cookie base recipe you use and how thick your royal icing layer ends up being, the numbers below are just my best educated guess based on standard ingredient ratios for a standard, decorated cookie of this type.
I always tell people not to worry too much about the numbers when it comes to specialty desserts like this—they are treats reserved for big, happy occasions! But for completeness, here is what you can generally expect one of these finished, individually decorated cookies to clock in at:
- Calories: Approximately 180-220 kcal
- Total Fat: Around 7-9g
- Protein: About 2g
- Total Carbohydrates: Roughly 30-35g
Please keep in mind this is an estimate per cookie, based on a standard size meant for detailed painting. If you’re using a much larger cookie canvas, those numbers will naturally increase! Also, this estimation doesn’t count any added dusting powder or specialty glaze, so if you add those extra touches, factor in a little bit more sugar!
They are certainly decadent, but nothing beats the beauty of these truly unique Hand Painted Floral Baby Shower Cookies on a beautiful platter for the celebration!
Hand Painted Floral Baby Shower Cookies
Equipment
- Fine food-safe brush
Ingredients
For the Cookies
- 1 Baked sugar cookies (use base recipe)
For the Base Icing
- 2 cups Powdered sugar
- 1.5 tbsp Meringue powder
- 3 tbsp Water
For Decoration
- As needed Edible gel food colors Diluted with a few drops of clear alcohol or lemon extract
Instructions
- Bake and cool the sugar cookies.
- Cover each cookie with smooth white royal icing. Let the icing dry completely for at least 8 hours to create a firm surface.
- Mix edible colors with a small amount of alcohol to create paint consistency.
- Use a fine food-safe brush to gently paint floral designs onto the dried icing. Layer colors to achieve depth and shading.
- Allow the painted designs to dry before storing the cookies.