
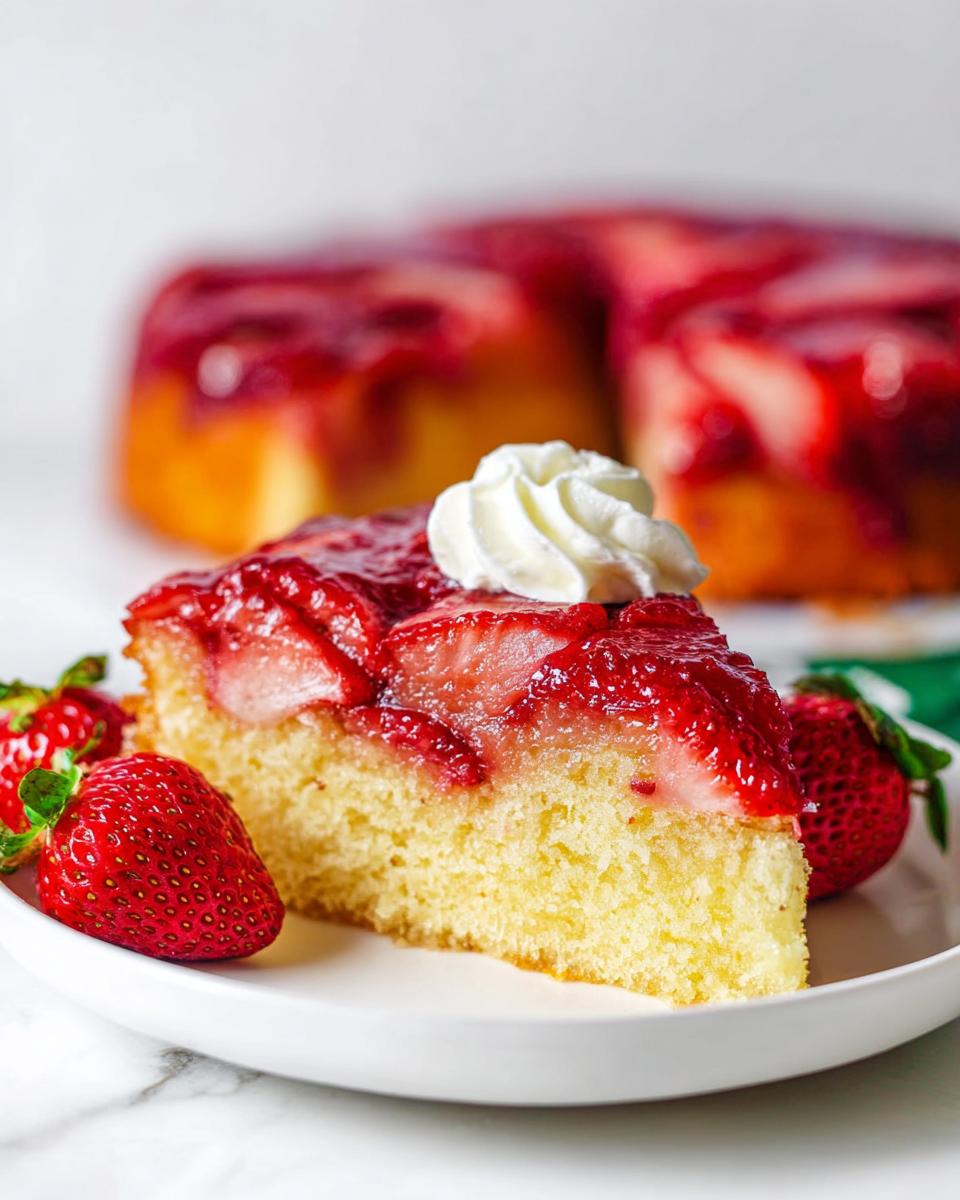
Is there anything that screams summer louder than vibrant, sweet fruit baked right into a cake? I don’t think so! This recipe takes that cozy, nostalgic feeling of an upside-down cake—the kind my mom used to make with pineapple rings—and gives it the brightest, juiciest upgrade possible with fresh strawberries. Flipping this Fresh Strawberry Upside Down Cake out of the pan is always my favorite moment; it’s pure magic watching those glossy red berries reveal themselves!
It truly tastes like sunshine, and honestly, it’s one of the easiest strawberry baking projects you can tackle. Trust me, this will quickly become your go-to for potlucks or just a casual Tuesday dessert.
Why This Fresh Strawberry Upside Down Cake is Your New Favorite
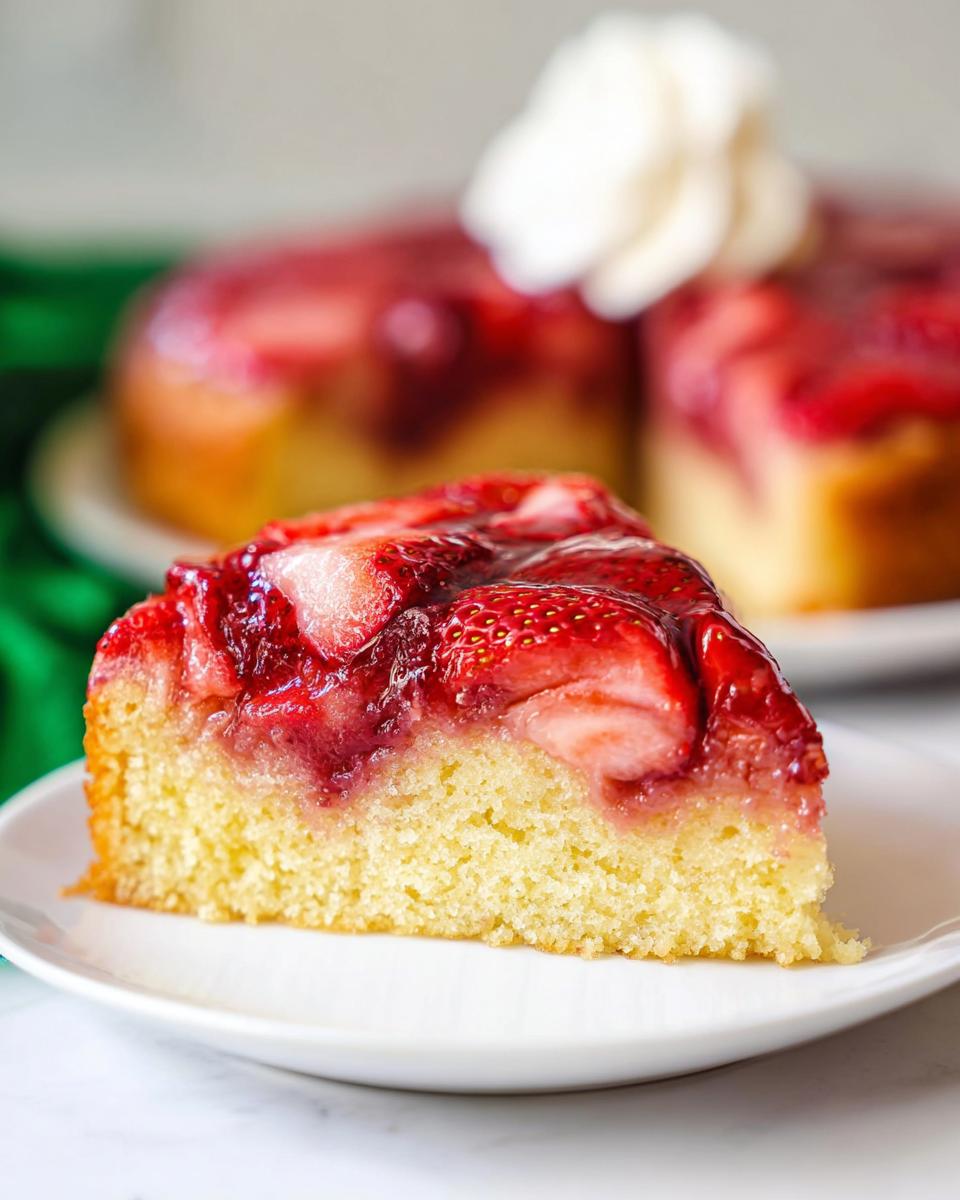
You want desserts that look amazing but don’t demand hours of fuss, right? This Fresh Strawberry Upside Down Cake delivers big time. It’s got that perfect, bright summer flavor packed into a tender crumb.
- It’s incredibly easy for such a show-stopping result.
- The flavor is intensely summery—hello, fresh strawberry desserts!
- The visual appeal is stunning; the top layer looks just like a beautiful Strawberry Cake Design.
For the secrets to perfect texture in cakes like this, I always refer back to some foundational baking knowledge, like what I learned when I perfected my scone recipe. Check out my tips for perfect baking technique here!
Essential Ingredients for the Perfect Fresh Strawberry Upside Down Cake
You just can’t fake the flavor in a cake like this. Because the topping is so simple, every single ingredient really needs to pull its weight. We’re keeping things straightforward here—just a few pantry staples for the cake and beautiful, fresh strawberries for the star layer. If you are ever wondering about the small differences between salts, check out my notes on kosher versus sea salt; it impacts texture!
Make absolutely sure your butter for the cake batter is actually room temperature—not melted! That’s crucial for getting that light, fluffy texture we want before we add the liquids.
For the Topping
- 2 tbsp unsalted butter, melted
- 1/2 cup sugar (about 104g)
- 3 cups sliced strawberries (about 390g)
For the Cake Batter
- 1 1/4 cups all-purpose flour (about 163g)
- 1 tsp baking powder
- 1/4 tsp salt
- 6 tbsp unsalted butter, room temperature (about 84g)
- 2 tbsp vegetable oil (30ml)
- 3/4 cup sugar (about 155g)
- 1 1/2 tsp vanilla extract
- 2 large eggs
- 1/2 cup + 2 tbsp milk (total 150ml)
Step-by-Step Instructions for Your Fresh Strawberry Upside Down Cake
Okay, the best part of any upside-down cake is the reveal, but you have to nail the preparation first! These steps are straightforward, but timing is everything, especially when it comes to that gorgeous strawberry topping.
Preparing the Pan and Fruit Layer
First things first: crank that oven up to 350\u00b0F (176\u00b0C) so it’s nice and hot. Now, take your melted butter for the topping and mingle it with the topping sugar right in the bottom of your 9×2 inch cake pan. Spread that sweet gooey base around evenly. This is your foundation!
Next, arrange those beautiful sliced strawberries! I like to place a few slices around the outer edge of the pan first—it makes the final presentation look so polished. Then, fill in the middle space. Don’t worry if they overlap a bit; they’ll settle perfectly later!

Mixing the Fresh Strawberry Upside Down Cake Batter
In one medium bowl, whisk your flour, baking powder, and salt together. That’s your dry mix, set it aside. Now for the main event in your large mixer bowl! You absolutely must cream the room-temperature butter, oil, the main sugar, and vanilla extract until it gets visibly light and fluffy. This takes a solid 2 to 3 minutes, and trust me, you aren’t beating it too long here!
Add in the two eggs one at a time, mixing just until each one disappears. Then, follow the rule of thirds: add half the dry mixture, mix. Then pour in all the milk and mix. Then the last of the dry. You might notice the batter looks a tiny bit curdled after the milk goes in—don’t panic! Just scrape down the sides. The super important part is this: Do not over mix the batter once that last bit of flour goes in, or you’ll lose the fluffiness.
Baking and the Crucial Flip
Gently spoon your batter over the strawberries and smooth the top gently. Bake this beauty for a total of 45 to 50 minutes. Watch it closely around the 35-minute mark; if the top is getting too dark, just tent it loosely with some aluminum foil so the strawberries don’t burn before the center is cooked.
When a toothpick comes out clean, pull it out! Here’s a pro kitchen trick I learned: while it’s still piping hot, press down gently on the top of the cake with a clean dish towel. This helps flatten any dome that formed while baking. Let it cool in the pan for exactly 30 minutes. Not 10, not 40—30! After that, place a cooling rack on top and flip it over. It takes confidence! If you cool it too long, the topping sticks, and if you rush it, the whole thing caves in. If you struggle with cakes sticking, I found this great guide on preventing overly sticky baked goods, even though this isn’t bread!
Expert Tips for Baking the Best Fresh Strawberry Upside Down Cake
You want that perfect, glossy layer of fruit, not scorched edges or a sunken middle. It all comes down to paying attention when the heat is high!
When selecting strawberries, pick firmer ones if you can. Softer ones tend to break down much too quickly in the topping base. Remember how I told you to press the cake down right after it comes out? That little trick, right when it’s hot, ensures it flattens out nicely before it cools completely.
Also, definitely use that foil trick—tenting the cake around the 35-minute mark is a lifesaver for the topping. It keeps the sugar from seizing up or burning before the cake itself is done baking through. For the secrets to keeping any baked good moist, check out my best tips here: it’s all about moisture retention!
Serving Suggestions for Your Fresh Strawberry Desserts Recipes
This Fresh Strawberry Upside Down Cake truly shines on its own because of that vibrant topping! But if you want to dress it up for a real celebration, I have a few ideas.
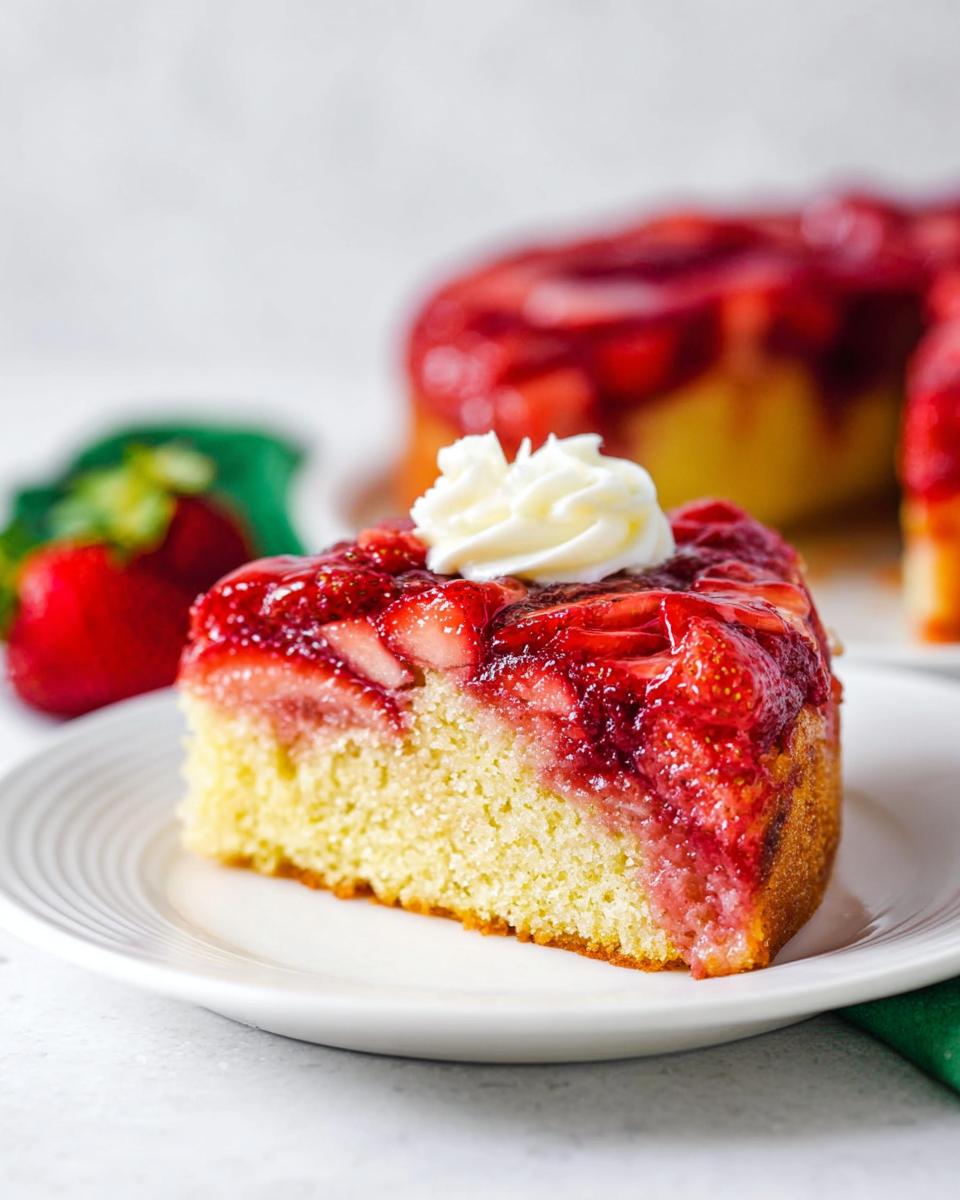
Because this is one of my favorite Fresh Strawberry Desserts Recipes, I often serve it just slightly warm. A simple dollop of freshly whipped cream makes it feel like a fancy Strawberry Shortcake Cake. Vanilla bean ice cream is another winner, letting the warm, caramelized strawberries really pop.
If you’re feeling extra fancy, ditch the ice cream and try whipping up some whipped pink lemonade to go alongside it. You can find my recipe for that right here!
Storage and Reheating for Your Fresh Strawberry Upside Down Cake
This cake manages to stay soft, but you do need to treat it with a little care once it’s cut. If I know we won’t finish it in one day, I cover the remaining half tightly with plastic wrap and leave it right on the counter at room temperature. It stays perfectly fine for about two days that way, which keeps the crumb soft.
If you need to keep it longer, the fridge works, but it can firm up the cake a bit. Here’s the trick: you don’t serve cold cake! Just take your individual slice, cover it loosely with a paper towel, and warm it up in the microwave for about 10 to 15 seconds. It comes out practically gooey and perfect again. Isn’t it great when easy strawberry desserts reheat so well?
Frequently Asked Questions About Fresh Strawberry Upside Down Cake
I get tons of messages after posting this recipe asking for clarification, especially since it’s such a famous dish in the world of Strawberry Baking. Since this is one of our favorite Easy Strawberry Desserts, I want to make sure everyone gets a perfect flip!
Can I use frozen strawberries in this Fresh Strawberry Upside Down Cake?
Oh, I really wouldn’t recommend it, honey. Frozen strawberries hold way too much ice and water, even after thawing. When you try to bake them into that topping layer, they release all that liquid, and you end up with a soupy, soggy mess instead of that beautiful caramelization. For a perfect flip, stick to fresh, firm berries!
What is the best way to achieve the Strawberry Shortcake Aesthetic on top?
That’s such a great question because presentation matters! If you want that classic, simple look, just let the cake cool slightly after flipping and dust the entire top liberally with powdered sugar. It gives those glossy strawberries a lovely snowy contrast. Alternatively, serving individual slices with a big dollop of fresh, homemade whipped cream really leans into that gorgeous Strawberry Shortcake vibe.
If you are looking for other quick and easy ideas that won’t take up your whole afternoon, I’ve put together a list of easy, healthy snacks that might also hit the spot!
Nutritional Estimates for This Fresh Strawberry Upside Down Cake
I always get asked about the numbers, and while baking should primarily be about joy and flavor, it’s helpful to have a general idea! The following estimates are based on the total recipe yield (8 slices) and the specific amounts I listed using standard ingredient brands.
Keep in mind that because we are using fresh fruit and baking from scratch, these estimates can shift a bit depending on the size of your strawberries or the exact brand of butter you use. You can see my full policy regarding user data here if you are curious about our site standards.
- Calories: Approximately 294 per slice
- Fat: About 13.2g
- Carbohydrates: Around 41.7g
- Protein: Roughly 3.7g
- Sugar: Close to 28g
This is a lovely, bright dessert! Enjoying a slice of this Fresh Strawberry Upside Down Cake means you’re enjoying fruit, which is always a win in my book!
Share Your Fresh Strawberry Upside Down Cake Creations
Seeing what you all bake makes my whole week! I truly hope this Fresh Strawberry Upside Down Cake brings a little taste of summer into your kitchen. Please hit those five stars if you loved the recipe, and leave a little note below telling me how your flip went!
Don’t forget to tag me on your photos when you share those gorgeous red tops everywhere! If you have any questions about adapting this recipe further, shoot me a line through my contact page. Happy baking, friends!

Fresh Strawberry Upside Down Cake
Equipment
- 9×2 inch cake pan
- Medium bowl
- Large mixer bowl
- toothpick
- Foil
- Cooling rack
Ingredients
For the Topping
- 2 tbsp unsalted butter, melted 28g
- 1/2 cup sugar 104g
- 3 cups sliced strawberries 390g
For the Cake
- 1 1/4 cups all-purpose flour 163g
- 1 tsp baking powder
- 1/4 tsp salt
- 6 tbsp unsalted butter, room temperature 84g
- 2 tbsp vegetable oil 30ml
- 3/4 cup sugar 155g
- 1 1/2 tsp vanilla extract
- 2 large eggs
- 1/2 cup + 2 tbsp milk 150ml
Instructions
- Preheat your oven to 350°F (176°C).
- Combine the melted butter and sugar for the topping and spread this mixture evenly in the bottom of your 9×2 inch cake pan.
- Arrange the strawberry slices over the sugar mixture. Place some slices around the outer edge of the pan first, then fill in the center.
- To make the cake batter, combine the flour, baking powder, and salt in a medium sized bowl and set this aside.
- Add the butter, oil, sugars, and vanilla extract to a large mixer bowl. Beat these together until the mixture is light in color and fluffy, about 2 to 3 minutes. Do not rush the creaming time.
- Add the eggs one at a time, mixing until mostly combined after adding each egg. Scrape down the sides of the bowl as needed to make sure all ingredients are well incorporated.
- Add half of the dry ingredients to the batter and mix until mostly combined.
- Slowly add the milk and mix until well combined. The batter might look a little curdled, but this is acceptable.
- Add the remaining dry ingredients and mix until well combined and smooth. Scrape down the sides of the bowl as needed to make sure all ingredients are well incorporated. Do not over mix the batter.
- Add the batter to the prepared cake pan and spread it evenly. Bake for 45 to 50 minutes. Cover the cake with foil around the 35-minute mark if needed to stop the top from browning too much. The cake is done when a toothpick inserted in the middle comes out clean.
- Remove the cake from the oven and gently press the cake down to help flatten any dome that formed. You can place a dish cloth on top of the hot cake to help press it down.
- Let the cake cool in the pan for 30 minutes. Then, invert the cake onto a cooling rack. Allow the cake to cool a bit before serving. It is best served warm, but if you let it cool completely to room temperature, you can heat individual slices for 10 to 15 seconds to warm them up.