
Oh, let’s be honest. Sometimes you walk past a fancy bakery, smell that sweet, buttery pastry, and just crave that experience right here in your own kitchen. You want those gorgeous, flaky layers but you definitely don’t want to spend hours fussing with yeast and folding. That’s exactly why I developed this recipe for the Easy Strawberry Danish. It’s my go-to when I want bakery-style treats without the bakery fuss; I focused on keeping the layers flaky while simplifying the overall process way down. Trust me, this uses store-bought puff pastry, and nobody needs to know!
We’re talking about something that looks elegant—picture those beautiful, bright red berries nestled in creamy pockets—but comes together in about 30 minutes total. It has that fantastic contrast of crispy, laminated dough and soft, sweet filling. If you’ve been hesitant about baking pastries, this is the recipe that’s going to change your mind completely. You’ll find this technique is wonderful for all sorts of sweet treats, even something like a simple strawberry dessert sandwich!
Why You Will Make This Easy Strawberry Danish Recipe Again
I get it. Your time is precious. You shouldn’t have to wake up at 4 AM just to enjoy a lovely pastry! This recipe cuts out all those complicated, traditional steps because I truly believe everyone deserves flaky happiness without the headache. You’ll love how quickly this comes together, especially when compared to recipes that claim to be like a true Danish, but require three hours of chilling!
Here are the reasons this simple version of the Easy Strawberry Danish is going to become a staple in your home:
- Speed, Speed, Speed: Seriously, we’re talking 10 minutes of prep time before it goes into the oven. That’s faster than driving to the coffee shop!
- Bakery Look, Home Skill Level: The puff pastry does like 90% of the work for you. It puffs up and layers beautifully on its own, giving you that signature light, shattering texture.
- Fresh Flavor Balance: We rely on sweet, ripe strawberries and a tangy, simple cream cheese filling. It’s not too heavy; it tastes bright and perfect, like a lovely light strawberry mousse but served in pastry form.
- Versatile as Can Be: Need breakfast? Done. Need a last-minute dessert? Yep. Need a little sunshine on a cloudy Tuesday? Absolutely!
If you’re looking for more delightfully quick sweet options, you’ll find tons of inspiration around here. Keeping things easy is kind of my specialty!
Essential Equipment for Your Easy Strawberry Danish
Okay, let’s talk tools. The beauty of keeping things simple, like with this Easy Strawberry Danish, is that you likely already own everything you need! There’s no need to pull out a stand mixer or some fancy pastry blender for this one. We’re keeping the gear list short, sweet, and effective so you can get baking faster.
When you look at the recipe details, you’ll see we are sticking to the absolute basics. This is proof that you don’t need a kitchen full of gadgets to make something that tastes incredible.
- You definitely need your Oven; make sure it’s clean, especially the bottom rack, because we want that pastry base to bake up perfectly crisp!
- A standard Baking Sheet is all we need here. Don’t bother lining it yet—we’ll deal with any sticking later in the tips section!
- A simple Mixing Bowl is required. Medium size works great for whipping up that smooth cream cheese filling.
- You’ll need a sharp knife for slicing those beautiful, fresh strawberries. Let’s keep those slices nice and uniform—it helps them bake evenly.
That’s it! Four basic items. Honestly, if you keep your knives sharp and your oven temperature accurate (maybe double-check that with an oven thermometer), you are basically set for bakery success!
Ingredients Needed for the Perfect Easy Strawberry Danish
When we focus on making the Easy Strawberry Danish, we rely on a few key components to sing. Because we’re using store-bought puff pastry, the ingredient list stays wonderfully manageable. I always encourage my friends to measure out their strawberries right away because once you start mixing, these move fast. We break the shopping list down so you know exactly what goes where. If you’re ever wondering about salt differences in baking, I’ve got a helpful guide on kosher salt vs sea salt that might come in handy for future bakes!
For the Cream Cheese Filling
This is the creamy heart of the danish. Make sure your cream cheese is truly soft—pull it out with the butter! Nothing ruins the texture faster than trying to whip cold cheese.
- 1/2 cup Cream cheese, softened
- 2 tbsp Sugar
- 1 tsp Vanilla extract
For the Pastry and Strawberry Topping
This part features our beautiful, brightly colored fruit and the flaky base that makes this recipe such a stunner. Getting the egg wash right ensures you get that gorgeous golden sheen when these bake up!
- 1 sheet Puff pastry, thawed
- 1 cup Fresh strawberries, sliced
- 1 Egg (for egg wash), beaten
Step-by-Step Instructions to Make Easy Strawberry Danish
Okay, now that we have our ingredients ready to go, let’s get these beauties assembled! Since we are using puff pastry, the timing here is key. You want to have everything ready to go before that dough starts warming up too much. Patience is needed for the mixing, but the assembly goes lightning fast, which is what makes this Easy Strawberry Danish totally reliable.
We move quickly from preheating to baking, so have your baking sheet standing by. By the way, if you want the absolute flakiest pastry possible, check out my general tips on perfect scones—some of that pastry science applies here too!
Preparing the Oven and Pastry Base
First things first: get that oven hot! You need a good, strong blast of heat to make those layers separate. Preheat your oven to 400°F (200°C). While that’s happening, take your thawed puff pastry sheet and cut it right into four neat squares. Don’t stress about making them perfectly identical; they should look rustic for the best Easy Strawberry Danish result!
Assembling the Cream Cheese and Strawberry Layers
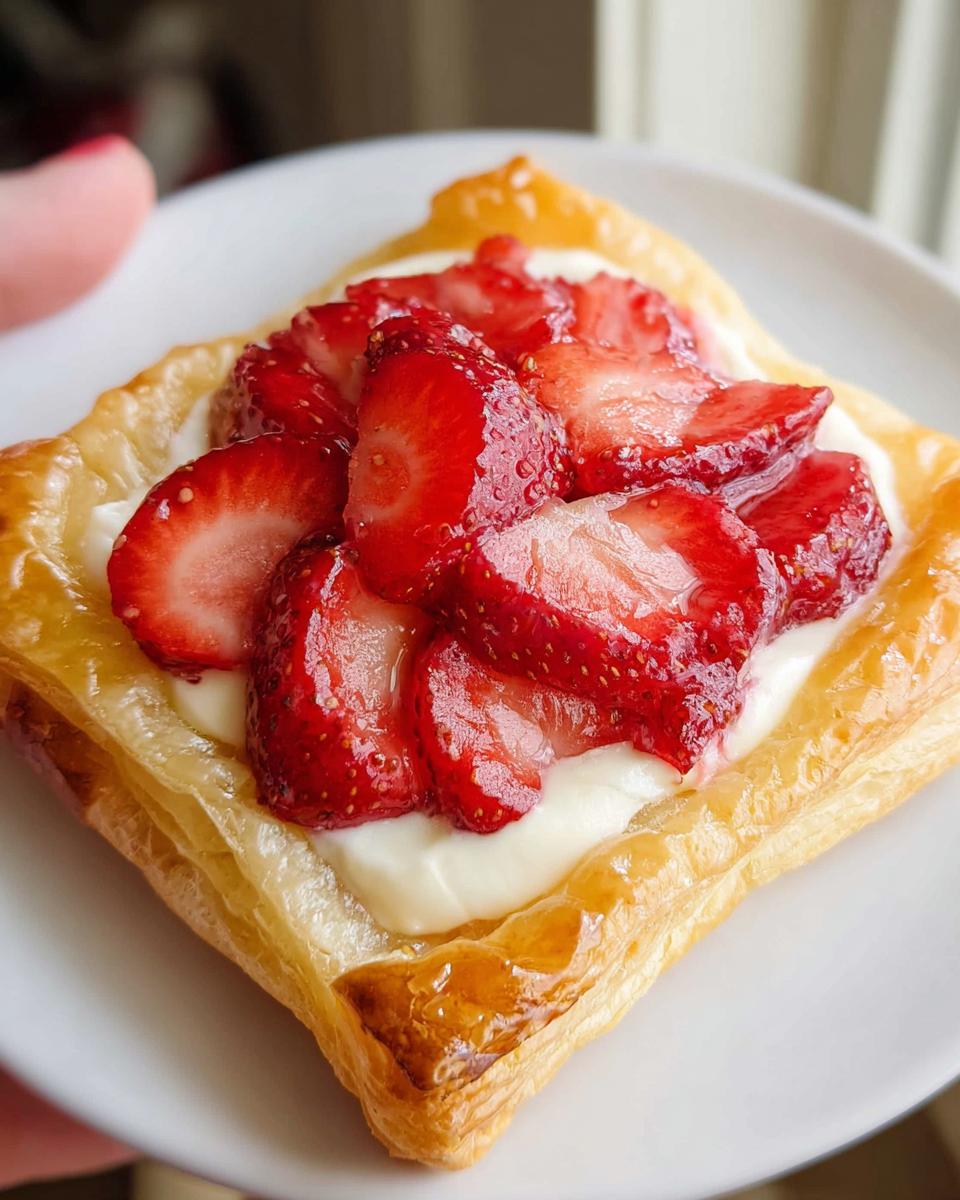
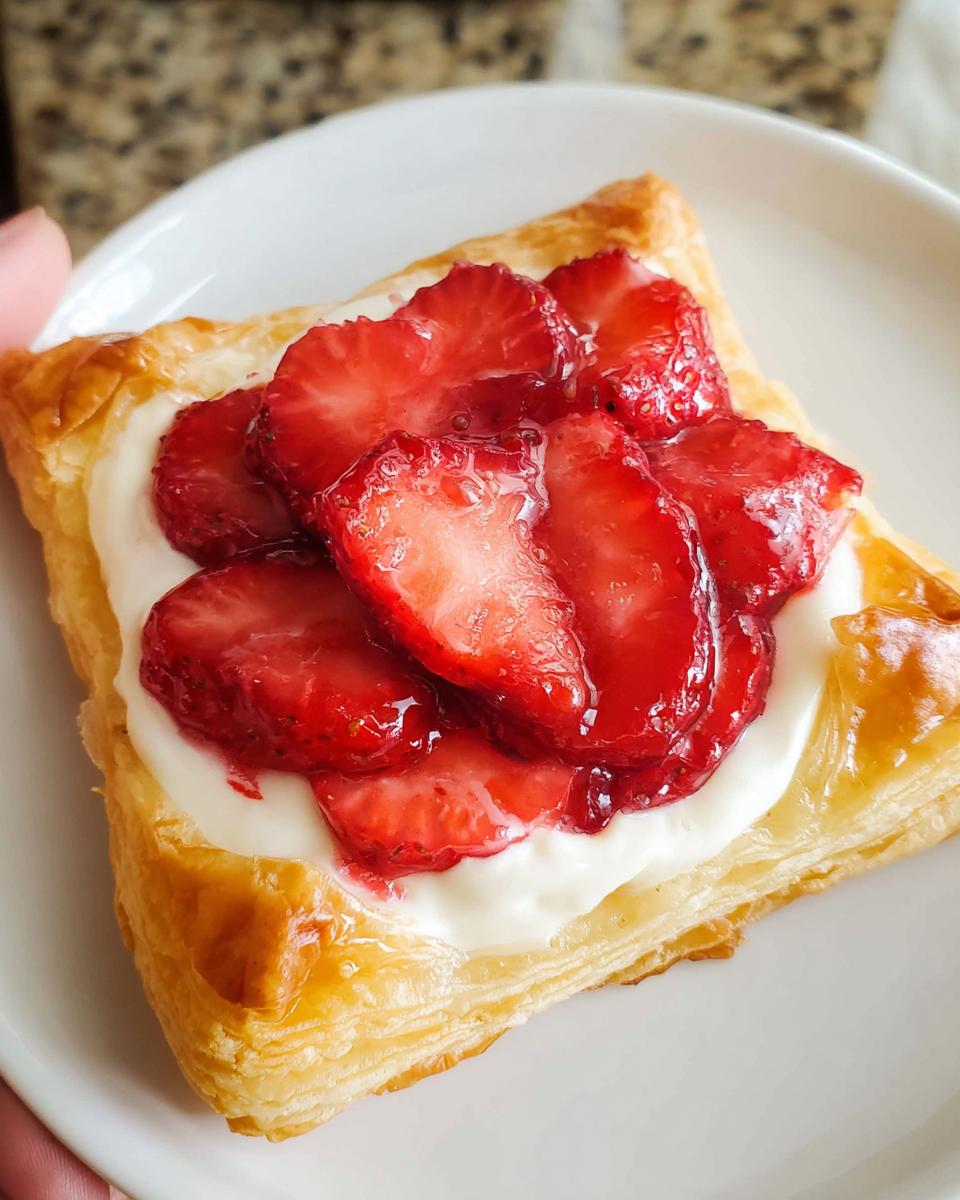
Time for the filling! Grab that bowl and whip your softened cream cheese with the sugar and vanilla extract until it’s totally smooth—no lumps allowed. Seriously, smooth lumps are just sad. Next, take a spoonful of that creamy mixture and place it right in the center of each pastry square. Then, lovingly arrange your beautiful sliced strawberries right on top of the cream cheese base. Don’t pile them too high or they’ll just slide off!
Baking and Finishing Your Easy Strawberry Danish
This next step gives you that classic bakery shine. Take your beaten egg and brush just the edges—the exposed dough—of the pastry. This is your egg wash, and it’s what makes them gorgeous and golden brown. Pop the whole tray into that hot oven and bake them for about 18 to 20 minutes. You’ll know they are done when the pastry is puffed up significantly and has a deep golden color. Once they come out, let them cool down slightly on the sheet before moving them. They taste amazing just slightly warm!
Ingredient Notes and Substitution Ideas for Strawberry Baking
Even though this Easy Strawberry Danish recipe is built on speed using pre-made puff pastry, how you handle those few other ingredients makes all the difference between a good pastry and a truly fantastic one. I always tell people that buying quality ingredients, even just strawberries, elevates the whole experience, fitting right into that scone baking mindset where simple ingredients need respect!
Since the puff pastry is the star here, let’s talk about that first. You absolutely must thaw it correctly. If you rush it in the microwave, you end up with patches of dough that start cooking right there on the counter, and you lose those thin, distinct layers that make puff pastry famous. I usually pull mine out the night before and let it sit in the fridge. When I bring it to the counter to roll, I give it about 20 minutes—just long enough that it’s pliable but still cool to the touch. If it feels greasy or sticks to itself immediately, pop it back in the fridge for ten minutes! That temperature control is crucial for flaky results.
For the strawberries, while this recipe works great with Fresh Strawberry Recipes, sometimes fresh isn’t possible. If you have to use frozen, make sure they are fully thawed and gently patted dry before you incorporate them. Frozen berries release way more water when they bake, and we don’t want a soggy bottom on our danishes. Drain them really well and maybe even mix them with a tiny bit of cornstarch—just a teaspoon or so—to absorb any extra liquid before they go onto the cream cheese.
As for the cream cheese filling, if you are out of vanilla, you could try a tiny splash of almond extract, but honestly, vanilla is so classic with strawberry. Keep it simple there. You could substitute the granulated sugar with maple syrup in a pinch, but you’d have to cut back significantly on the overall liquid in the recipe, so I usually stick to the sugar for consistency in this specific bake.
Tips for Success with Your Easy Strawberry Danish
Even though this recipe is incredibly fast, pastry is temperamental, right? It’s all about temperature, temperature, temperature. If you remember nothing else, remember that cold dough equals flaky pastry! I want every single person making this Easy Strawberry Danish to get those crisp, layered sides that look like they came straight from a professional patisserie. Here are my top secrets, learned through many, many batches of trial and error.
My biggest rule, which I stole from my grandmother when she used to make her pie crusts, is to treat the puff pastry like it’s slightly afraid of you. Keep it cold, handle it minimally, and never, ever overwork it once you cut the shapes. Overworking creates friction, friction creates heat, and heat melts those precious layers of butter before they ever hit the oven, which results in sad, flat squares instead of beautiful puffed clouds!
Here are the two absolute game-changers for flaky pastry:
- Don’t Go Overboard on Filling: This is probably the number one cause of soggy bottoms in any fruit pastry. When you spoon that cream cheese mixture on, keep it centered within the pastry area that will be covered by the strawberry slices. If you push the filling right to the edge, the moisture has nowhere to go but down into the dough. We want high centers and crisp edges!
- High Heat is Your Friend: Make sure that 400°F (200°C) is accurate before the danishes go in. That initial high blast of heat causes the water trapped inside the butter layers to instantly vaporize, creating steam that forces the dough layers apart rapidly. If your oven is only lukewarm, the butter melts slowly, and you just end up with dense bread instead of light pastry. I always let my oven preheat for a good 15 minutes—even if the *ding* happens sooner.
Finally, here’s my little author tip for that “fresh strawberry aesthetic” that looks so fabulous on these scone baking adventures: After they come out of the oven and cool just slightly, you can brush them with a thin layer of warmed apricot jam that you’ve thinned with a tiny bit of water. It sounds fancy, but it seals the strawberries, makes them gorgeous and glossy, and stops them from drying out fast. It takes these Easy Strawberry Danish from home-baked good to showstopper!
Serving Suggestions for Fresh Strawberry Desserts
These Easy Strawberry Danish treats are amazing all on their own, truly! They are perfectly balanced—sweet, slightly tangy, and buttery enough that they don’t really need dressing up. But honestly, why stop being indulgent when you’re already this close to perfection? I love serving them slightly warm when the cream cheese is still soft and gooey.
If you’re having these for brunch, they pair beautifully with something that cuts through the richness. Forget heavy syrups! A simple, strong black coffee is my morning favorite because it contrasts so nicely with the sweetness. If you want something fruitier alongside, I highly recommend a glass of cold sparkling water with maybe a basil leaf muddles in—the herbal note really lifts the flavor of the Fresh Strawberry Recipes we’ve used here. You can check out my strawberry banana bliss recipe if you’re looking for another bright, fruit-forward partner!
For dessert time, you have a few lovely options:
- Dusting: If you skipped the optional jam glaze, a simple dusting of powdered sugar right before serving looks super elegant.
- Cream: A small dollop of unsweetened whipped cream on the side keeps things light. You want the pastry texture to shine, not get weighed down.
- Icing drizzle: If you made a vanilla icing, a thin, zigzag drizzle over the entire danish is always a winner for making it feel richer.
Honestly, once you pull these gorgeous pastries out of the oven, just slice them while warm and serve immediately. That’s the best way to enjoy the maximum flakiness of your Fresh Strawberry Desserts!
Storage and Reheating Instructions for Easy Strawberry Danish
So, what happens if you manage to have leftovers? I mean, it happens! These Easy Strawberry Danish are so good, but they are definitely best eaten the day they are baked. Because we used fresh strawberries and that delicate puff pastry, maximizing their freshness for Day Two takes a little bit of strategy. We really want to protect that beautiful, flaky texture we worked so hard to achieve!
If you know you’re going to have leftovers, I highly recommend putting aside some of the fresh strawberries to top the pastries right before serving the next day. Keeping the fruit separate is my number one tip for preventing sogginess. Moisture migrates, and we do not want strawberry juice soaking into that buttery base overnight!
Here’s the best way to manage them if you have more than you can eat in one sitting:
- Short-Term Storage (Day One): If you plan on eating them within 24 hours, you can keep them at room temperature. Store them in an airtight container, but don’t stack them! If you must stack them, put a small piece of parchment paper between each danish. The best place is usually a cool, dry counter, away from any sunny windows.
- Cream Cheese Check: Since this contains cream cheese, always err on the side of caution. If your kitchen is very warm, you might need to refrigerate them after about 4 hours. If you do refrigerate, make sure the container is very well sealed, or the pastry will absorb fridge odors and lose crispness.
- Reheating for That Fresh Crunch: This is vital! Do not microwave these. You want to revive the pastry, not steam it into a soft blob. To bring back that amazing flakiness, reheat them in a toaster oven or a conventional oven set to about 300°F (150°C) for just 4 to 6 minutes. This dries the exterior just enough to bring back the shatter.
Remember, these are meant to be eaten fresh. If you try to store them for three or four days, the pastry quality just won’t be there anymore, even with careful reheating. They are designed to deliver that fantastic, immediate gratification of a perfect Easy Strawberry Danish experience!
Frequently Asked Questions About Strawberry Baking
I know you might have lingering questions! When you’re working with pastry, even easy pastry, little details matter. I’ve gathered the most common questions I get about these **Easy Strawberry Danish**—and frankly, about all my **Fresh Strawberry Recipes**—to hopefully clear things up so you can bake with total confidence. Baking should be fun, not stressful!
Can I use frozen strawberries instead of fresh ones for this recipe?
That’s a great question, especially in the off-season when the fresh ones just aren’t hitting that mark. Yes, you totally can use frozen, but you must thaw them completely first. When they thaw, they release a lot of liquid—way more than fresh berries. So, here’s the trick: place the frozen berries in a fine-mesh sieve over a bowl and let them thaw naturally at room temperature. Once totally thawed, gently pat them dry with a paper towel. If you skip drying them, you risk that dreaded soggy bottom! I still prefer fresh for the best **Strawberry Baking** look, but frozen, well-drained berries work just fine.
Can I prepare the cream cheese filling ahead of time?
Absolutely you can! I often make the cream cheese filling the night before, especially when I know I’m rushing in the morning. The filling itself, which is basically a thickened version of what you’d use for cheesecake or a simple strawberry banana cream dessert, keeps perfectly sealed in the fridge for up to three days. Just make sure that when you’re ready to assemble, the filling is still cool, but soft enough to spread easily with a spoon. If it firms up too much in the fridge, just let it sit on the counter for 15 minutes before you start cutting the pastry.
What is the best way to slice the strawberries for that perfect look?
Presentation really matters when you’re trying to achieve that **Strawberry Shortcake Aesthetic**, even in a Danish format! I aim for slices that are about 1/4 inch thick. If they are too thin, they kind of disappear or turn to mush when baked. If they are too thick, they take too long to cook through compared to the pastry. Try to keep the slices uniform in your cuts so they look cohesive aesthetically across the top of the filling. If you’re using really tiny berries, you can sometimes just halve them instead of slicing them thinly.
Should I add a glaze like they do for Strawberry Shortcake Cake?
Oh, you totally can! While the recipe doesn’t require it, a simple glaze really amps up the sweetness and look. For a classic **Strawberry Cake Design** shine, skip the thick frosting and go for light. After the danishes have cooled slightly, mix about 1/2 cup of powdered sugar with just a teaspoon of milk (or lemon juice for a tiny tang!) until it’s very runny. Drizzle that lightly over the top. It sets quickly and gives you that professional, slightly sticky, bakery finish. If you’re aiming for an **Easy Strawberry Desserts** look that screams “treat,” the glaze is your friend!
Can I make these entirely ahead of time and bake them in the morning?
This is where we have to be careful with puff pastry. Puff pastry really hates sitting around assembled, especially with wet fruit on top. The dough will start absorbing moisture, and when you go to bake it, it won’t lift as nicely. If you need to prep ahead, I strongly recommend cutting the pastry squares and mixing the filling, but keep both separate and tightly wrapped in the fridge. In the morning, assemble them as directed, brush with egg wash, and bake fresh. That way, you get the perfect flaky layers without settling for a lesser result just to save a few minutes!

Easy Strawberry Danish
Equipment
- Oven
- Baking Sheet
- Mixing Bowl
Ingredients
- 1 sheet Puff pastry, thawed
For the Filling
- 1/2 cup Cream cheese, softened
- 2 tbsp Sugar
- 1 tsp Vanilla extract
For the Topping and Finish
- 1 cup Fresh strawberries, sliced
- 1 egg Egg (for egg wash) beaten
Instructions
- Preheat your oven to 400°F (200°C).
- Mix the softened cream cheese, sugar, and vanilla extract in a bowl until the mixture is smooth.
- Cut the thawed puff pastry into squares and place them on a baking sheet.
- Spoon the cream cheese mixture into the center of each pastry square.
- Top the cream cheese with the sliced strawberries.
- Brush the edges of the pastry with the beaten egg.
- Bake for 18 to 20 minutes until the pastry is golden brown and puffed up.
- Let the danishes cool slightly before you serve them.