Oh, friends, let’s talk about desserts that just wrap you up in the warmest hug! If you’re anything like me, you absolutely adore those layered confections where every bite is a tiny, sweet adventure. These bars were one of the first desserts I ever learned to make with my mom. Each layer felt like a tiny surprise, and that feeling still hasn’t faded every time I bake them.
That’s why I’m obsessed with my recipe for **Classic Magic Cookie Bars**. They tick every single box: they’re ridiculously easy, use almost no bowls, and they are guaranteed to disappear at any gathering. I’m Hanna, and I’ve been making these for years, perfecting the balance of crunch and gooey goodness. Trust me when I say, these will become your new favorite standby for whipping up quick, homemade desserts!
Why You Will Love These Classic Magic Cookie Bars
Seriously, if you need something fast, this is it! These are the definition of Simple Desserts that taste expensive. They come together in minutes, which is perfect for those hectic evenings.
- They are the ultimate Easy Treats—just layer and bake!
- They are perfect for potlucks because everyone—I mean everyone—loves that gooey, crunchy satisfaction.
- You don’t need fancy techniques, making them great for beginner bakers.
If you’re looking for more quick hits, check out my collection of no-bake ideas when you don’t even want to turn on the oven!
Gathering Your Ingredients for Classic Magic Cookie Bars
The beauty of these bars is how few things you actually need, which is why they fall into that wonderful category of Easy Desserts With Few Ingredients. When I grab my ingredients for these, I make sure everything is exactly how it should be—especially that butter!
I always lay out my ingredients before I start mixing because it keeps me organized. I even looked up a few traditional versions, like the one on this classic recipe, just to make sure I didn’t miss a true touch. Trust me, having these ready means you can have these bars baking in under ten minutes!
For the Crust
The base has to be sturdy enough to hold all that gooey goodness, so make sure your graham crackers are truly crushed—like fine sand!
- 200 g graham crackers, crushed
- 120 g melted butter
For the Layer Toppings
This is where the magic explodes! Don’t skimp on the layers! You just sprinkle them right over the milk, and they do the rest of the work when baking.
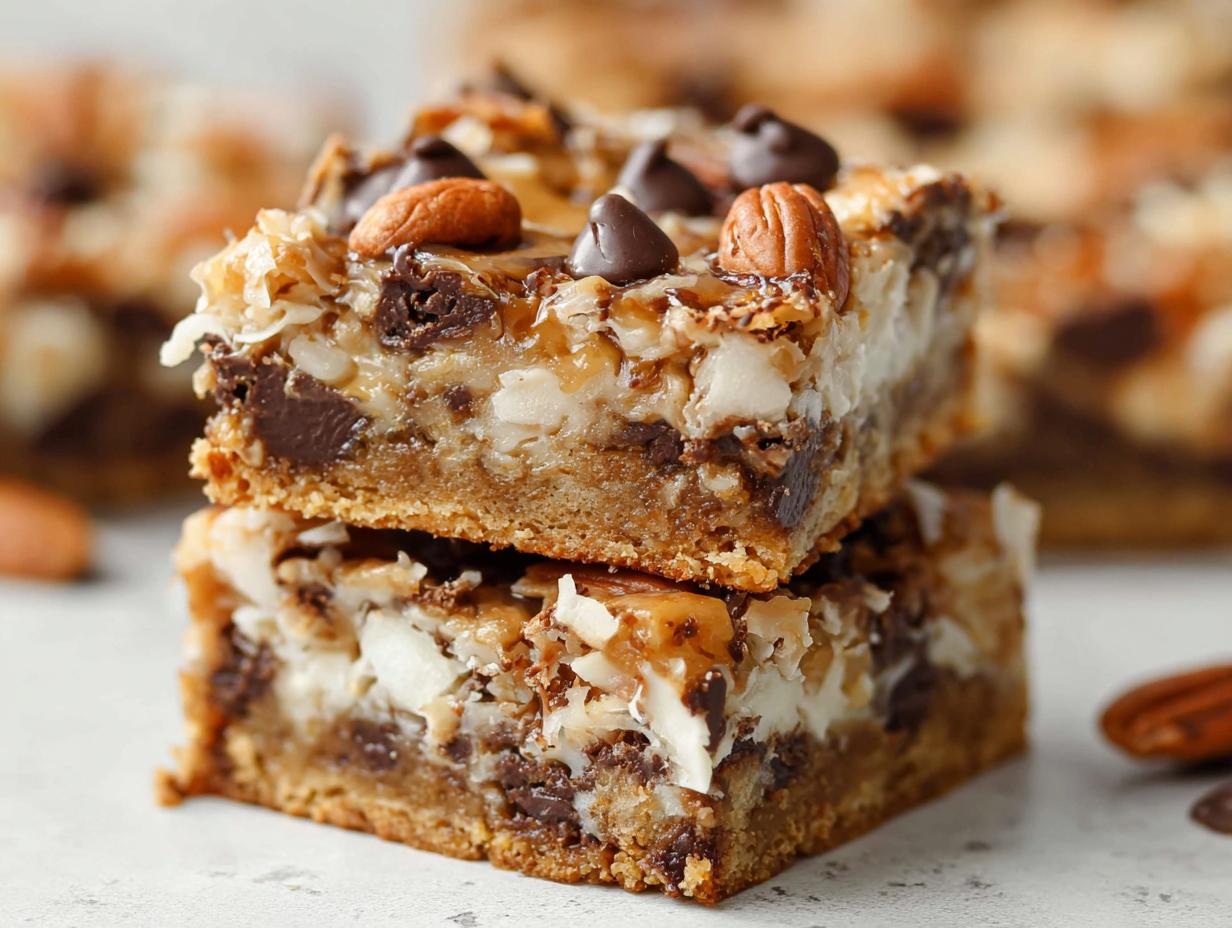
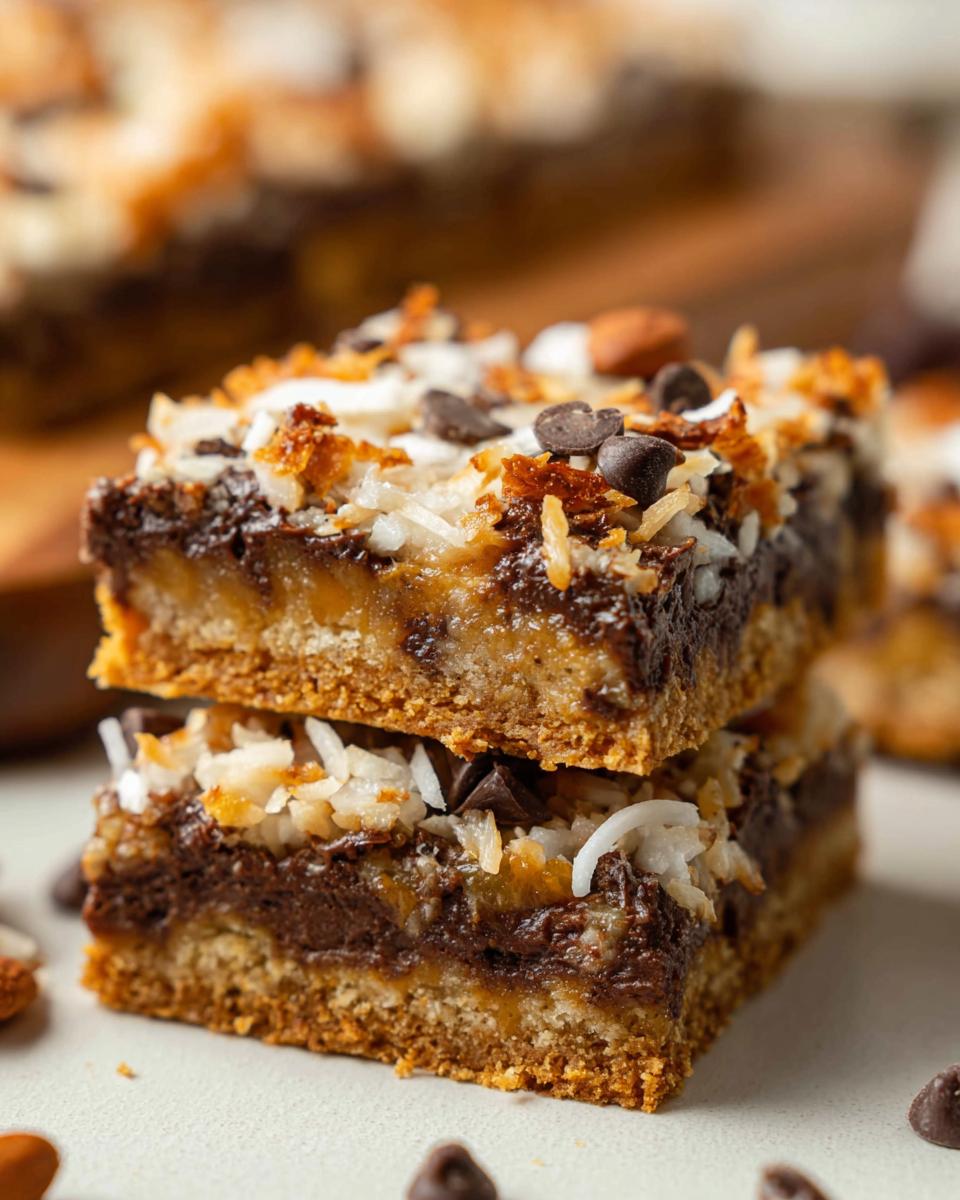
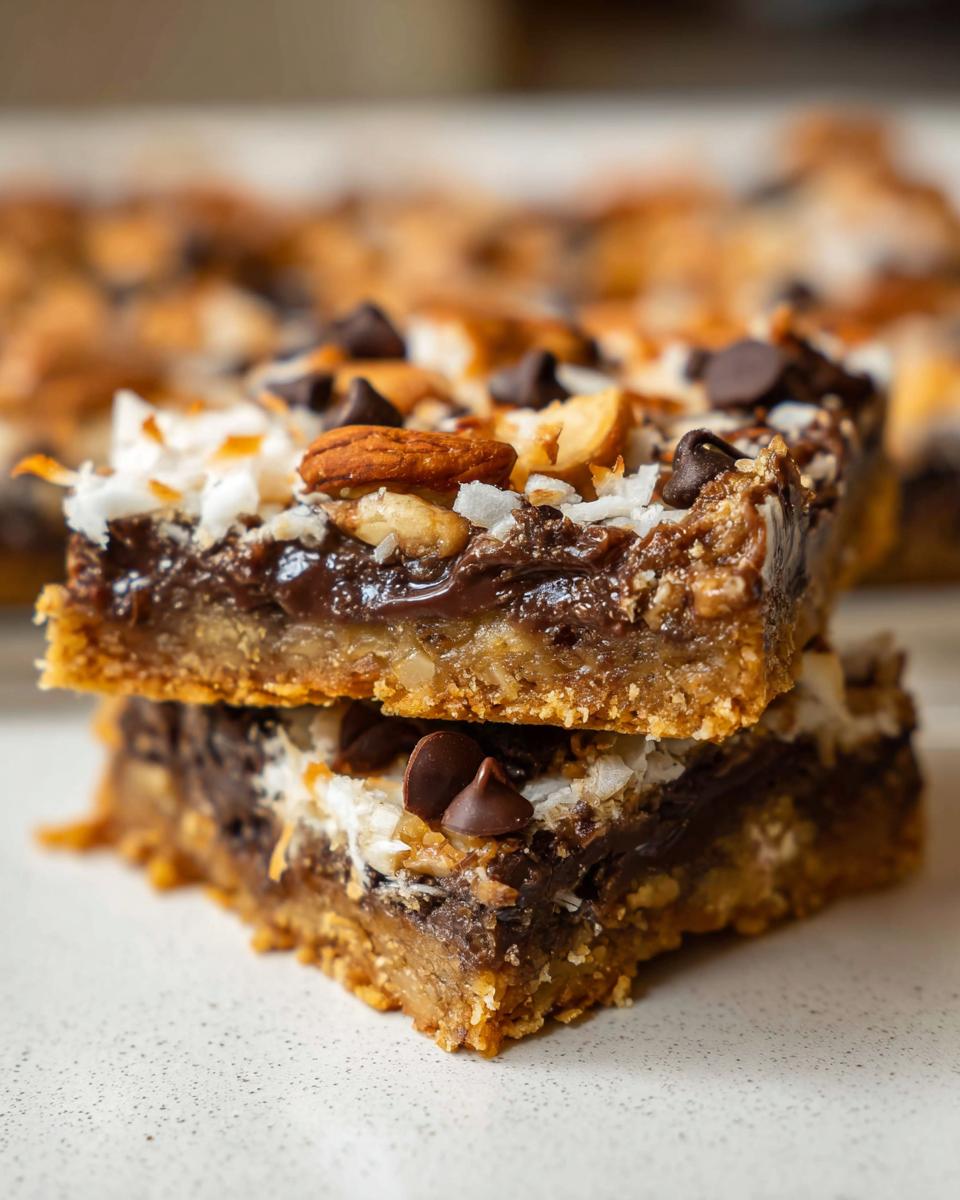
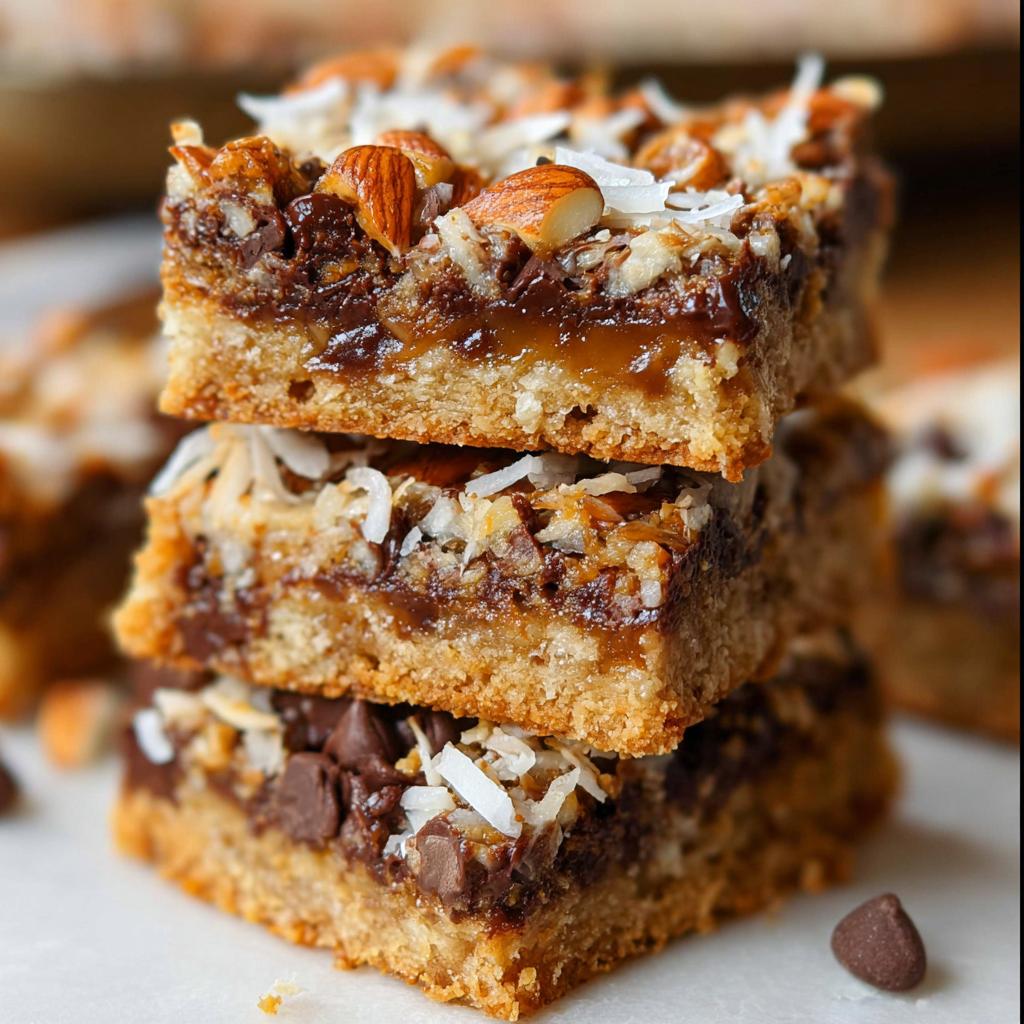
- 400 g sweetened condensed milk (this is the binding agent, don’t skip it!)
- 150 g chocolate chips (I use semi-sweet, but whatever you love works)
- 120 g coconut flakes
- 100 g chopped nuts (pecans or walnuts are my go-to)
Step-by-Step Instructions for Perfect Classic Magic Cookie Bars
This is where the fun starts! Honestly, these are some of the best Easy Dessert Ideas because there’s practically no technique involved—it’s just layering goodness! Before you even start mixing, make sure your oven is preheated to 175°C (350°F). It’s important to have that heat ready for when your pan is assembled. If you love checking out more great sweets, be sure to peek at my general dessert recipes section!
Remember, the biggest secret to getting perfect squares is patience at the very end. Don’t rush the cooling process!
Preparing the Base Layer
First thing’s first, you need that crunchy foundation. Just take your crushed graham crackers and toss them right into a bowl with that 120g of melted butter. Use a fork or your clean hands to mix it up until it looks like wet sand. Then, take your 9×13 inch pan—I always use one lined with parchment for easy lifting later—and press that mixture in tightly!
You really need to compact it down, use the bottom of a measuring cup if your hands get sticky! You want a perfectly even layer so the milk doesn’t just pool in one spot later. That firm base keeps everything steady!
Building and Baking the Classic Magic Cookie Bars
Once the crust is set, grab that can of sweetened condensed milk. Slowly drizzle all 400g of it evenly across the graham cracker base. Try to cover every single inch, that milk is what holds everything else in place!
Now for the sprinkle party! Scatter your chocolate chips, coconut flakes, and chopped nuts right over the milk layer. Don’t mix them in, just let them rest on top. Pop that beauty into the preheated oven and bake it for exactly 25 minutes. You’re looking for the edges to get just a little bit golden brown. From there, you absolutely must let them cool completely—like, totally cool—before slicing, or you’ll end up with a gooey mess instead of clean squares!
Tips for Success Making Classic Magic Cookie Bars
These bars are nearly foolproof—I swear, they practically bake themselves! But like any great recipe, a few little tips make the difference between a good bar and a *perfect* one. My main thing when making these Classic Magic Cookie Bars is making sure that milky glue gets everywhere it needs to go.
When you pour that sweetened condensed milk over the crust, don’t just dump it in the center! Slowly pour it in a circular motion, maybe using a little offset spatula to gently nudge it toward the edges. You want complete coverage so every single piece bakes evenly and gets that signature gooey center.

Secondly, and listen closely, you absolutely cannot rush the cooling process. Seriously, don’t even think about it! If you cut these warm, you get a glorious, melted puddle, which is delicious for eating with a spoon, but terrible for serving. Let them cool *completely* on a wire rack—I often leave mine overnight—so they set up perfectly. It’s worth the wait, I promise! For more general high-level tips, I always share my favorite advice for baked goods over here.
Ingredient Notes and Substitutions for Your Classic Magic Cookie Bars
I get asked about substitutions all the time, especially since everyone’s pantry looks a little different! Since these are such fantastic Homemade Desserts, flexibility is key, but we have to protect the ‘magic’—that gooey, melty quality is non-negotiable!
If you have a nut allergy or just don’t like nuts, don’t stress. You can easily swap out those 100g of chopped nuts for an extra handful of chocolate chips or even some butterscotch chips for a totally different, but still amazing, flavor profile. That keeps the texture interesting!
As for the coconut flakes? If you absolutely hate coconut, you can leave it out, but you need to replace that volume with something else so the milk layer doesn’t just sit there, bare. Try using some small peanut butter chips or maybe some crushed pretzels for a salty crunch instead. Just make sure you keep that can of sweetened condensed milk flowing evenly over everything; that’s the real star here for these Unique Cookie Recipes!
Serving Suggestions for These Easy Treats
Once these Classic Magic Cookie Bars have completely cooled—remember that crucial step!—they are ready to shine. Because they cut so neatly (if you let them cool!), they make fantastic grab-and-go options for literally any event. You won’t believe how quickly they disappear when you bring them to a party.
I always cut mine into 12 generous squares, but if you’re serving a huge crowd, you can easily slice them into 16 or even 20 smaller pieces; these are definitely considered Easy Desserts For A Crowd. For more large-scale baking inspiration, take a look at some of my favorite holiday party recipes!

For pairing, you can’t go wrong with a tall glass of cold milk—it’s so nostalgic. Or, if you’re enjoying one of these as an afternoon snack, pour yourself a piping hot cup of coffee. The dark roast really cuts through the sweetness of the condensed milk layer. These are perfect every time!
Storage and Reheating Instructions for Classic Magic Cookie Bars
Because these Classic Magic Cookie Bars are so rich and full of goodness, they actually keep fantastically well! I rarely have leftovers, but when I do, storage is super simple. The most important rule is that they must be completely cool before you even think about putting them in a container.
Once chilled, you want to store them in an airtight container. I usually just layer them between pieces of parchment paper inside the container—that keeps the gooey tops from sticking to each other. They’re perfectly happy sitting right there on your counter at room temperature for up to four days. Seriously, no fridge needed for these beauties!
Frequently Asked Questions About Classic Magic Cookie Bars
It’s the best when readers have questions about making these Homemade Desserts! Sometimes a recipe seems too simple, and you wonder what the trick is, right? I’ve gathered the top things people ask me when they are trying these Classic Magic Cookie Bars for the first time.
Can I make Classic Magic Cookie Bars without nuts?
Oh, absolutely! If you’re avoiding nuts for allergy reasons or just preference, you can totally skip them. When I do this, I usually add about 50g more of the chocolate chips and maybe toss in some sunflower or pumpkin seeds for a little crunch factor. That way, you don’t lose the texture, and everyone gets a delicious square!
What makes these ‘Magic’ cookie bars?
That’s a great question! They are called ‘Magic’ because of how they bake up, especially that sweet, thick layer of condensed milk. As it bakes, it melts down around the chocolate, coconut, and nuts, essentially binding the whole thing together into one impossibly gooey layer that looks like it just melted together on its own. Magic!
If you’re looking for other fun, layered desserts that look complicated but aren’t, you should check out my little mini desserts in a cup collection!
Can I use cookie dough instead of graham crackers for the crust?
While I love cookie dough, it gets really soft and doesn’t offer the same sturdy foundation that graham crackers do for these bars. The buttery crunch of the graham base is essential to balance out all the goo on top! I really stick strictly to that graham crust for the best results.
Do I need to chill these before slicing?
You don’t *technically* have to chill them, but oh my gosh, you really should! If you try to cut them warm, the milk is still very loose, and you end up with a beautiful, soupy mess that needs a spoon. Waiting until they are completely cool—I aim for room temperature, sometimes cooler—lets that gooey layer set up so you get those clean, perfect squares.
Estimated Nutritional Snapshot
Now, I always feel a little funny talking about numbers when we’re deep in the cozy world of butter and chocolate, but I know you’re curious! Since these Classic Magic Cookie Bars are made with rich ingredients like sweetened condensed milk and butter, they definitely qualify as a decadent treat. Please remember, these are just general estimates for one bar, based on standard ingredient calculations. I’m a baker, not a certified nutritionist, so take these figures as a helpful guideline!
When you’re serving these alongside your coffee, here’s what you can generally expect per bar, assuming you slice the batch into 12 good-sized squares:
- Calories: Approximately 300-350 Calories
- Total Fat: Around 17g
- Protein: Roughly 4g
- Total Carbohydrates: About 40g
See? It’s worth every single bite! These bars are dense because of all that goodness packed in there. If you are worried about richness, remember that the note in the recipe stressed that completely cooling them ensures clean slices—which means you get neat, smaller portions if you decide to stretch the batch a bit further!
Share Your Classic Magic Cookie Bars Experience
I truly hope you’ve got a warm pan of these glorious, gooey bars cooling on your counter right now! More than anything, I just love knowing that my family recipes, like these Classic Magic Cookie Bars, are finding their way into your kitchens and making sweet moments for you all.
When you make them, please don’t be shy! Let me know how they turned out. Did you load them up with extra pecans? Did you accidentally eat one while they were still warm? Tell me everything in the comments below! I read every single story, and it makes my day to hear what you think.
If you snapped a picture of your perfect, gooey squares, please tag me on social media! Seeing your beautiful stacks is the best affirmation that this recipe works its magic every single time. If you ever have a quick question or just want to send a sweet note about baking, you can always reach out through the contact page. Happy baking, everyone!
Classic Magic Cookie Bars
Equipment
- 9×13 inch baking pan
- Mixing Bowl
Ingredients
Crust
- 200 g graham crackers, crushed
- 120 g melted butter
Layers
- 400 g sweetened condensed milk
- 150 g chocolate chips
- 120 g coconut flakes
- 100 g chopped nuts
Instructions
- Mix the crushed graham crackers and melted butter together in a bowl.
- Press the crumb mixture evenly into the bottom of a 9×13 inch baking pan to form the crust.
- Pour the sweetened condensed milk evenly over the crust layer.
- Sprinkle the chocolate chips, coconut flakes, and chopped nuts over the milk layer.
- Bake at 175°C (350°F) for 25 minutes, or until the edges are lightly golden brown.
- Cool the bars completely before slicing them into individual servings.