Oh my gosh, you are going to absolutely *love* this one! If you’re hunting for those truly nostalgic, feel-good desserts that taste like childhood summers, stop what you’re doing. We’re talking about the **Classic Dirt Cake**, and honestly, it’s the simplest dessert you will ever make that gets the biggest reaction. This dessert instantly reminds me of school parties and family picnics where the dessert table was always surrounded by kids first. It’s impossible not to smile when you serve this one. Trust me when I say this recipe has been tested countless times over the years, and it always delivers smiles. It’s just cookies, cream, and magic—no oven required!
Why This Classic Dirt Cake is a Crowd Favorite (Easy Treats)
Seriously, what’s not to love here? It’s truly one of the best no-bake treats out there because the assembly is ridiculously easy. You don’t even need the oven on, which is a huge win when it’s hot outside! That ease translates directly into big smiles.
- It requires shockingly few ingredients – perfect when you need last-minute Easy Treats!
- Kids adore the layers and the fun, crumbly texture.
- You can prep the whole thing in under 20 minutes, which is fantastic when you’re planning Easy Desserts For A Crowd.
Gathering Ingredients for Your Classic Dirt Cake
This is where the magic starts, and honestly, you probably have most of this stuff already! This recipe is fantastic for those times when you need Easy Desserts With Few Ingredients. We break it down into three simple parts: the cookie dirt, the creamy filling, and the pudding layer underneath it all. Don’t worry about anything fancy; we stick to the basics because that’s what makes this Classic Dirt Cake such a reliable winner. You can check out some other yummy easy meal ideas on my blog if you need help with dinner too!
For the Cookie Base and Layers
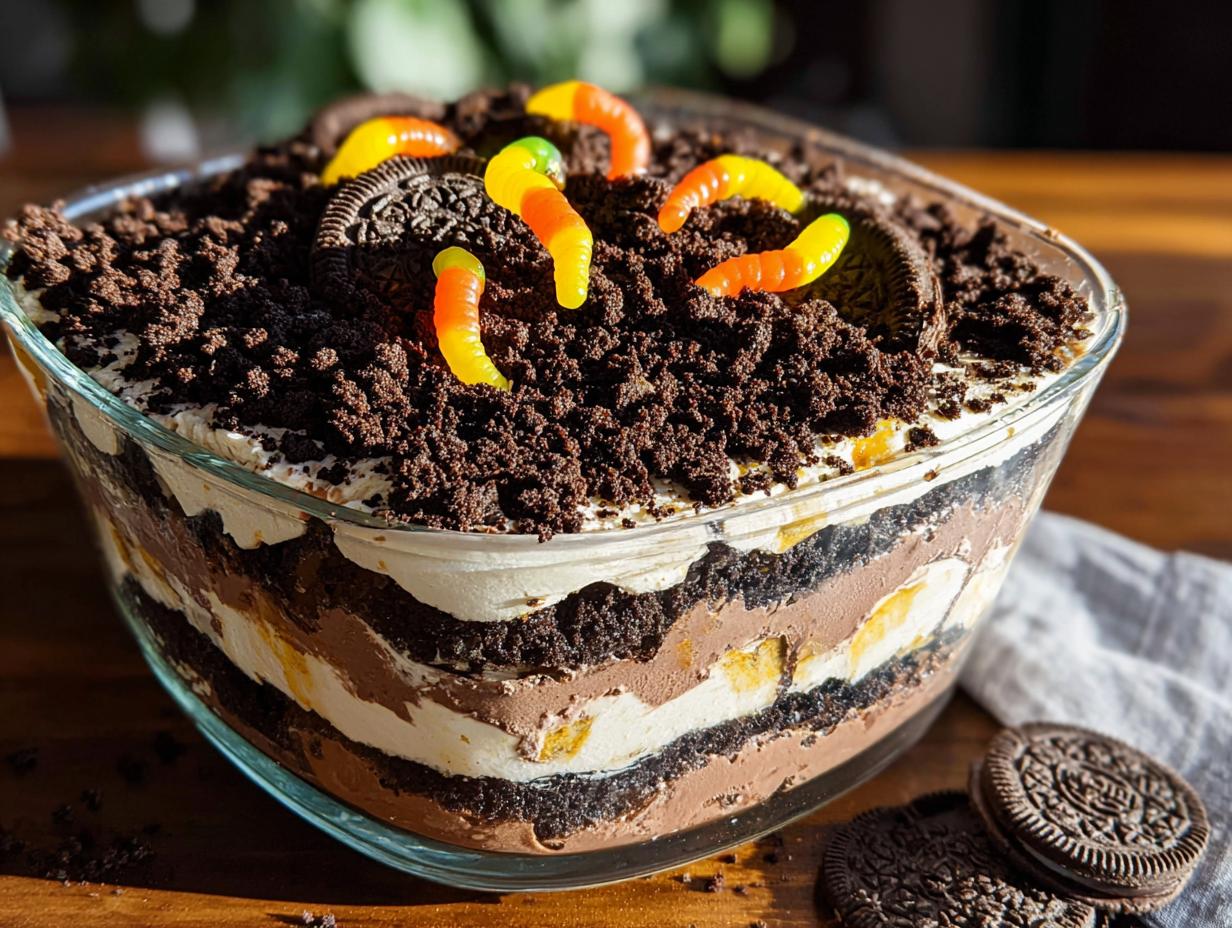
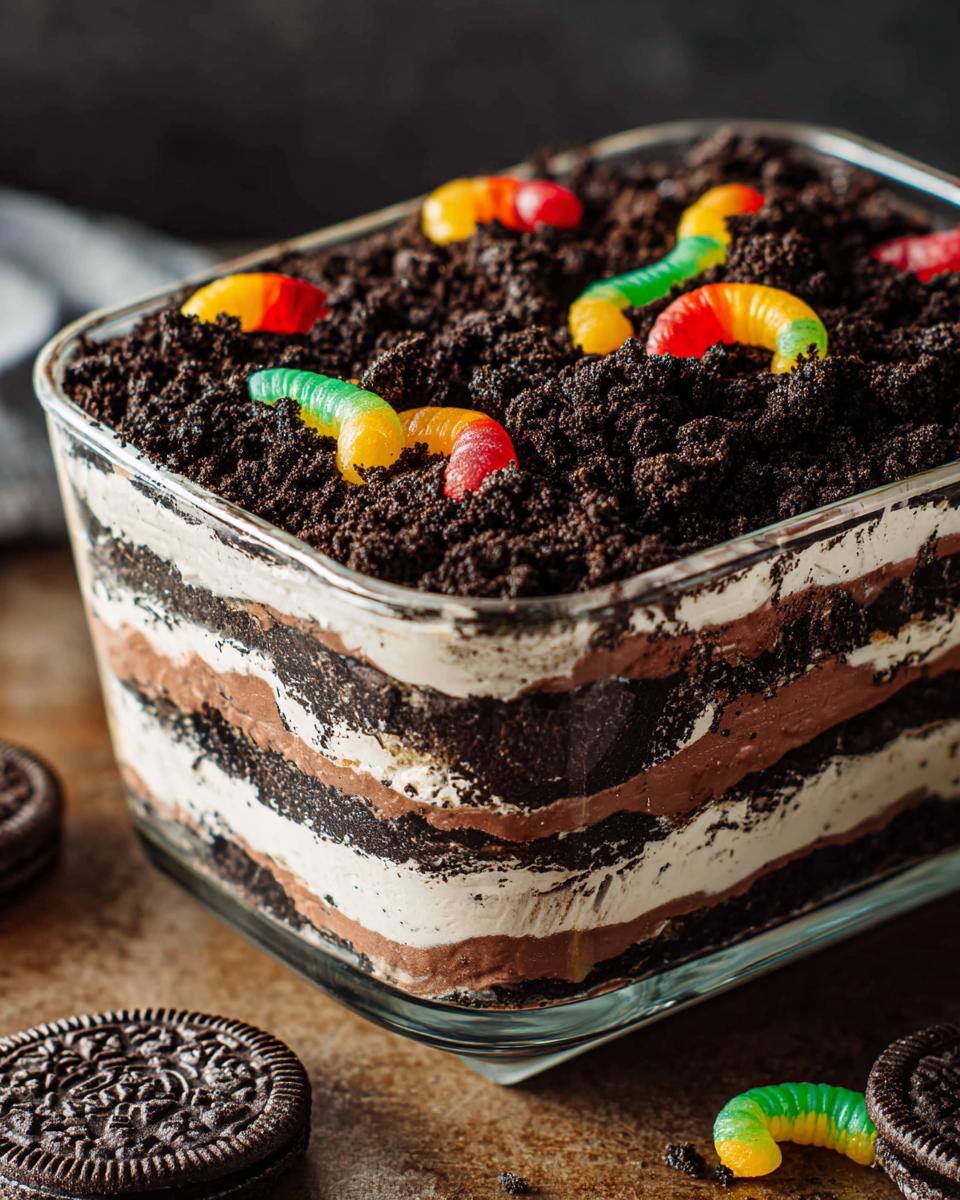
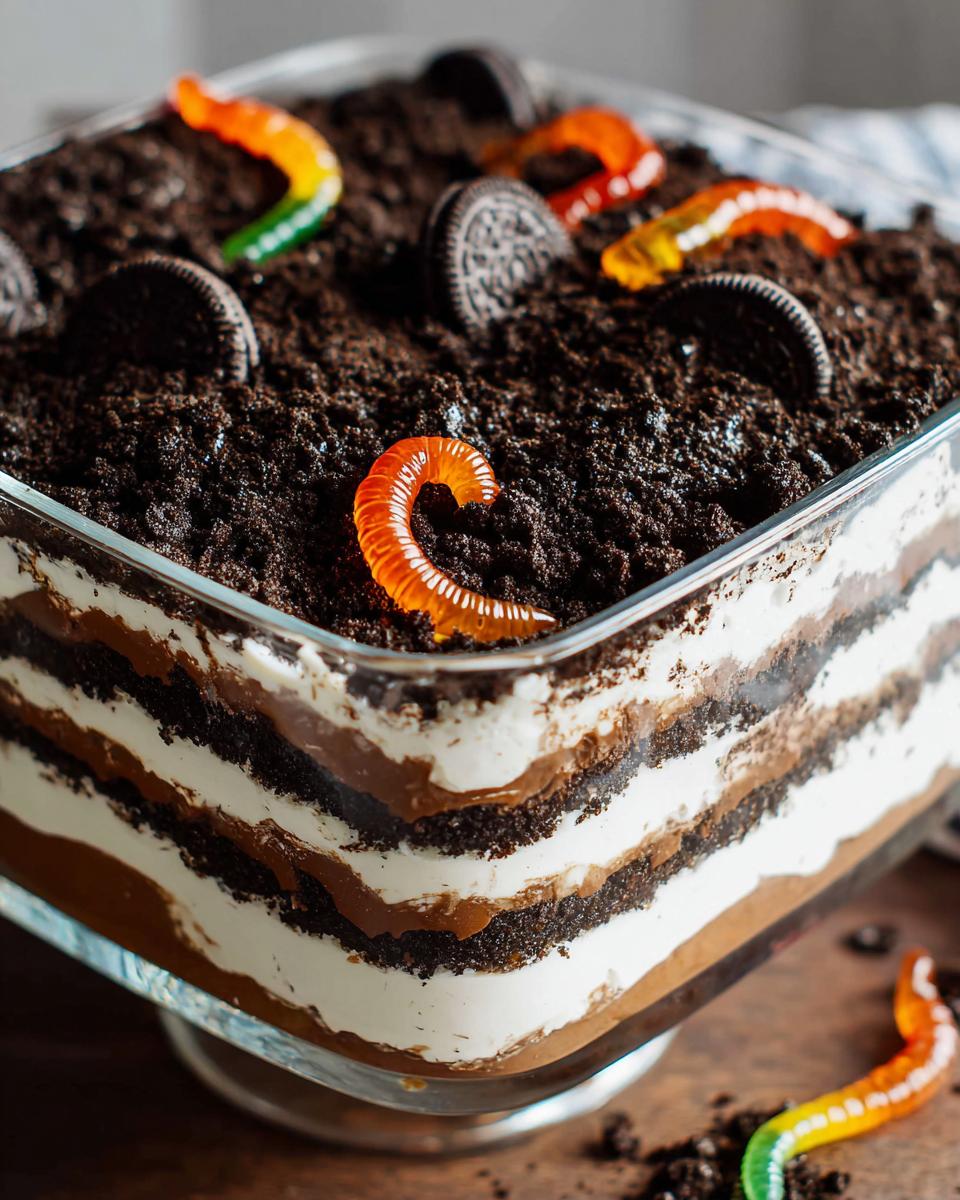
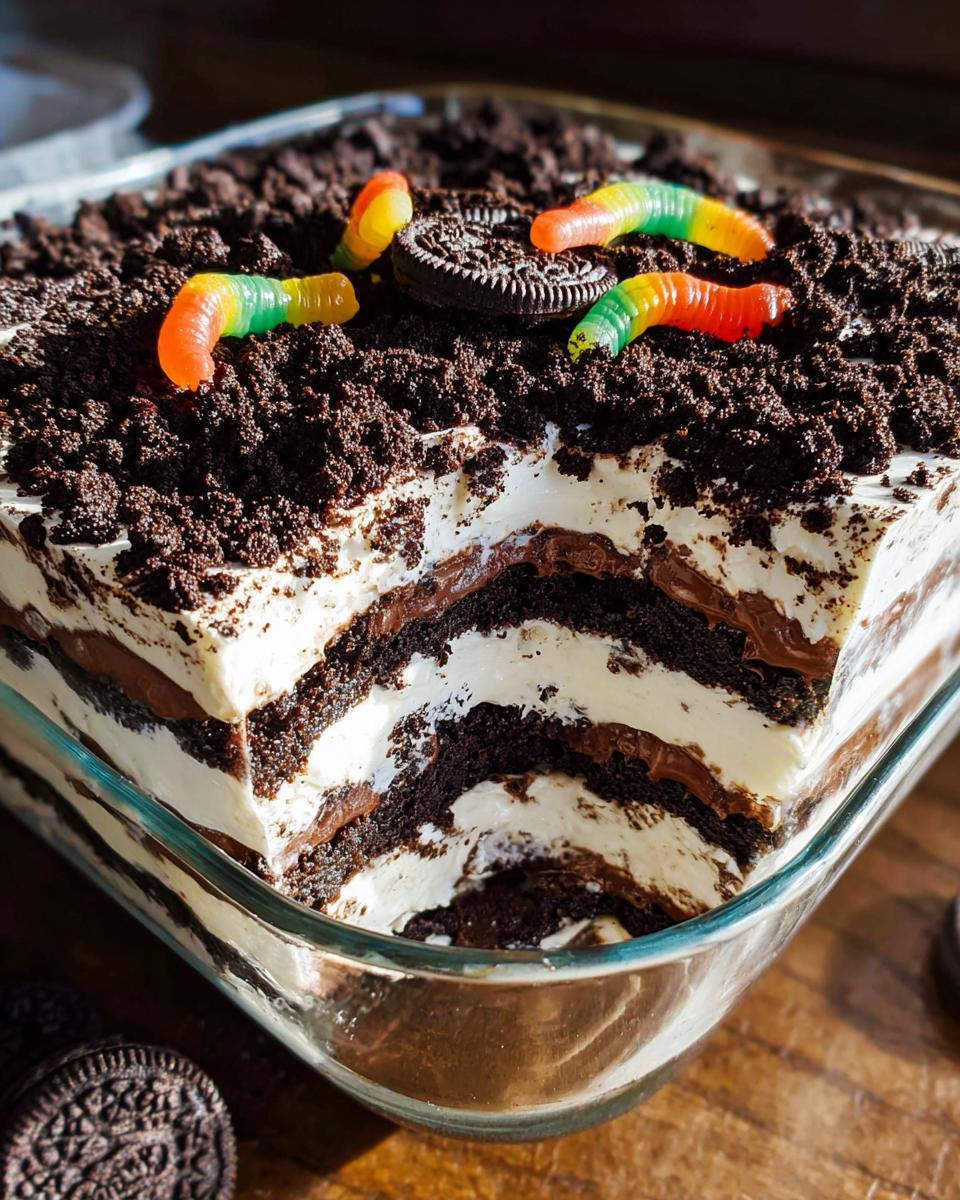
You need 500g of Chocolate sandwich cookies, and make sure they are crushed up well! This is the ‘dirt,’ so we want that crumbly texture.
For the Cream Filling
This is the rich, dreamy part! Grab 250g of Cream cheese (make sure it’s softened, this is important!), 120g of Butter (also softened!), 200g of Powdered sugar, and 400ml of Whipped topping.
For the Pudding Layer
For the pudding, keep it classic with 2 boxes of Chocolate pudding mix paired with 1L of Cold milk. Follow the box instructions exactly for the best texture!
For Topping
And finally, the fun part: Gummy worms, as needed! Don’t skimp on these; they really sell the whole look.
Assembling the Perfect Classic Dirt Cake Instructions
Alright, now that you have your ingredients ready (and your cookies delightfully crushed!), the layering process is super straightforward. This is where we take everything we just mixed and turn it into that iconic, layered look. Remember, since this is a no-bake recipe, timing is all about texture, not cooking! If you’re looking for more amazing dessert recipes, I’ve got tonnes on the blog!
Preparing the Cream Cheese Base
First things first: we need that super smooth base! Get your softened cream cheese, butter, and powdered sugar into a big mixing bowl. If you have an electric mixer, dust it off! Beat all that together until it’s perfectly smooth and creamy, with zero lumps. That aeration is key to keeping the filling light.
Making and Combining the Pudding Layer
Next up is the pudding. Follow whatever your chocolate pudding box tells you to do, using that cold milk to get it nice and thick. Once it’s set up a bit, gently fold the prepared pudding into your smooth cream cheese mixture. Don’t rush this; you want it incorporated evenly, like a beautiful muddy river!
Folding in the Whipped Topping
Now, take your whipped topping—be gentle! You want to fold it in, not beat it in. Use a spatula and bring the topping into the cream/pudding mixture until it just disappears. If you overmix here, you’ll deflate all that air we worked to put in, and we want this filling fluffy, not dense. See how easy this dirt dessert comes together?
Layering and Chilling the Classic Dirt Cake
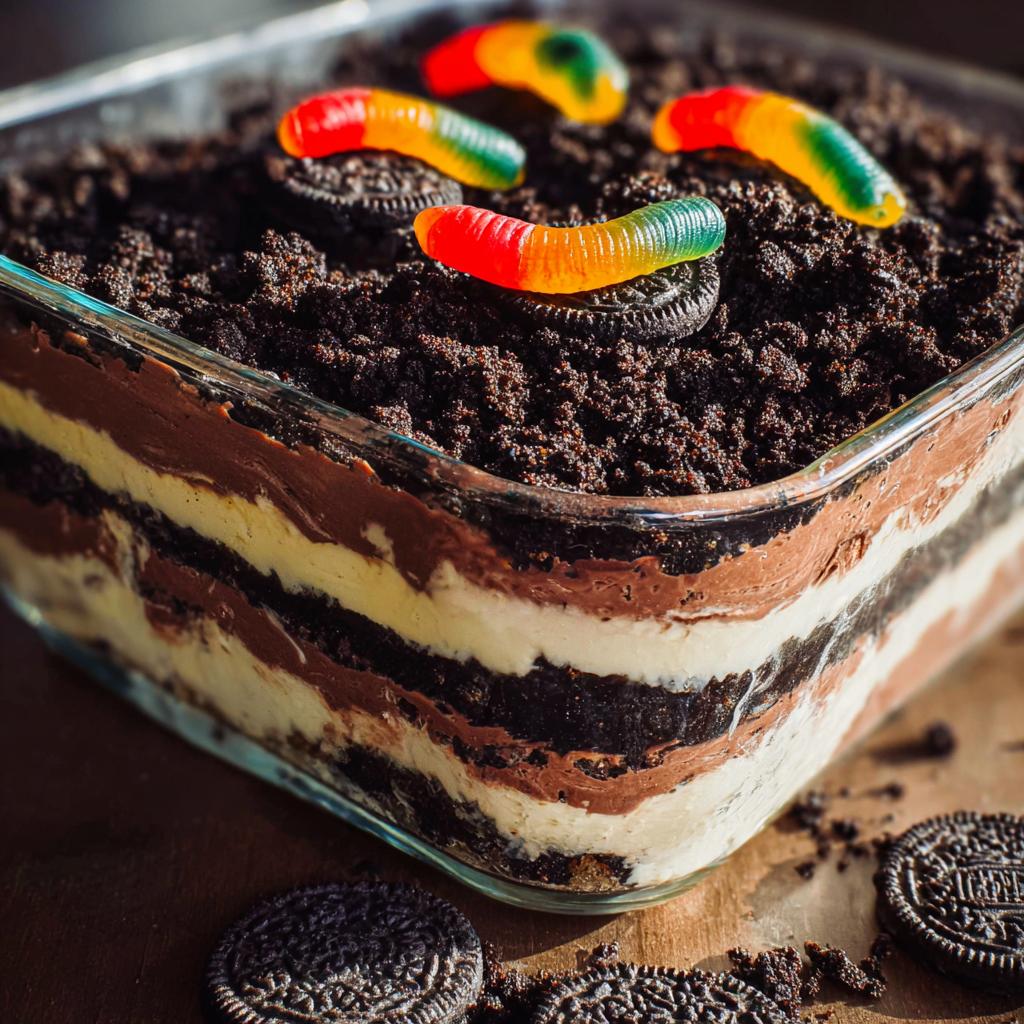
Time to assemble! Spread about half your crushed cookies in the bottom of your serving dish. Then, spread half the creamy filling on top of that cookie layer. Repeat with the remaining cream and top it all off with the last of the crushed cookies so it looks like real earth. Here is the crucial part: cover that beauty up tightly and stick it in the fridge for a minimum of 4 hours. Seriously, make it the day before if you can! That chilling time lets all those layers meld and firms up the filling so you can actually scoop it without the whole thing collapsing. Trust me on the chilling time!
Tips for Success with Your Classic Dirt Cake
Getting that perfect creamy texture in your filling is everything for a genuinely excellent **Classic Dirt Cake**. The biggest mistake I see people make, especially when they’re rushing through these Easy Treats, is not paying attention to their initial ingredients. You absolutely must let both your cream cheese and butter sit out until they are perfectly softened. If they are even slightly cold when you try to beat them, you’ll end up with rice-sized lumps of dairy in your filling, and nobody wants that!
When you’re crushing those cookies, don’t pull out the food processor unless you want sawdust! You are aiming for that coarse, earthy texture because that’s what sells this as a Homemade Dessert. Pulse it a few times, or even put the cookies in a zip-top bag and use a rolling pin—that old-school method works wonders and you get those lovely varying crumbs you see in the great dirt dessert recipes online. Also, I always keep my whipped topping folded in minimally, just until streaks disappear. It keeps the texture lighter than air, which is just what we want for this creamy layered dessert. For more tips on getting your ingredients just right, check out my advice on perfecting textures in baking!
Equipment Needed for This Classic Dirt Cake
The best part about this **Classic Dirt Cake** is that you don’t need a fancy setup at all! You already have everything you need, making this a truly simple dessert for busy days. Forget pulling out anything complicated; we are keeping this breezy.
Here is what you’ll need on hand:
- Mixing bowl: You need a solid, large bowl for combining those creamy layers.
- Electric mixer: While you *could* do this by hand, an electric mixer really helps you get that cream cheese mixture light and fluffy with no fuss.
- Serving dish: This can be anything! A big trifle bowl, a 9×13 pan, or even individual clear plastic cups if you’re trying out some fun mini dessert ideas.
Ingredient Notes and Substitutions for Classic Dirt Cake
Because this recipe is so simple, the ingredients really shine through, so pick the best ones you can find! I want you to feel confident making this, so let’s talk substitutions, especially since sometimes you can’t find exactly what the recipe calls for. Knowing how to tweak these Easy Dessert Ideas is what makes a home baker unstoppable!
First off, those chocolate sandwich cookies. While the classic brand works perfectly, feel free to experiment! If you want to call this one of your own Unique Cookie Recipes, try using a chocolate chip cookie mixed with a bit of cocoa powder, or maybe even a chocolate wafer cookie. Just make sure whatever you use is crisp enough to stand up to that creamy filling. If they get too soft before chilling, the ‘dirt’ turns into mud, which isn’t quite the same effect!
Now for the whipped topping. I usually grab the tub of frozen whipped topping because it mixes in so easily and holds its shape nicely during the long chill time. But if you’re feeling ambitious, you can absolutely substitute that with homemade stabilized whipped cream. You’ll need to whip heavy cream with a touch of powdered sugar and maybe a tiny bit of vanilla until you get stiff peaks. It tastes far fresher, though it may make the final mixture slightly looser. If you go that route, you might need an extra 30 minutes of chill time.
For the pudding, stick to instant mixes, not the cook-and-serve kind! The instant mixes set up much faster when combined with the cream cheese mixture, which is essential for a quick turnaround. If you want to get really fancy and try one of my mini desserts in a cup presentations, you can even use vanilla pudding for one of the layers, but honestly, chocolate on chocolate is the only way to go for a true Classic Dirt Cake experience!
Serving Suggestions for Your Homemade Desserts
The beauty of **Classic Dirt Cake** is how adaptable it is! While it looks amazing piled high in a big, beautiful trifle bowl—perfect for showing off those layers when you have a big crowd—I sometimes like to break it down for easier party service. Individual portions are super fun and mean everyone gets perfect worm-to-cookie ratio in every single serving!
Grab some clear plastic cups or mason jars; they make fantastic little edible flower pots which is great for mini dessert ideas. Just layer thinly: a spoon of cookie dirt, a scoop of the cream filling, another dusting of dirt, and pop two little gummy worms sticking straight up out of the top layer. Isn’t that just the cutest thing? It’s an easy way to make these simple desserts look totally gourmet without adding any extra work!
Storing Leftovers of Your Classic Dirt Cake
Since this is a chilled dessert made with dairy, storage is super important if you happen to have any left over after the party—which is rare, let’s be honest! You need to treat this one like any other creamy, layered dessert. You don’t want it sitting out on the counter for too long, especially if you used store-bought whipped topping.
The best way to keep your **Classic Dirt Cake** fresh is right in the refrigerator. Make sure you cover the serving dish really tightly with plastic wrap or even foil. If you used a trifle bowl, sometimes Saran wrap sticks best if you press it gently against the top layer of cookies. This keeps it from soaking up any weird fridge smells and prevents anyone from accidentally touching the ‘dirt’.
I’ve found this dessert holds up beautifully in the fridge for about three days. After that, the cookies start getting a little too soft, and the filling starts to lose that fluffy texture we worked so hard to build. But honestly, if it lasts past day two, you’ve got way more self-control than I do! When you bring it out to serve the next day, don’t try to warm it up at all. This is meant to be eaten ice-cold, straight from the fridge, so the cream layer is perfectly firm. Enjoy those leftover scoops—they make for the best midnight snack!
Frequently Asked Questions About This Easy Dessert
Whenever I post a recipe this simple—one of my favorite types of Easy Dessert Ideas—I always get a few questions about timing and structure. Since the **Classic Dirt Cake** is no-bake, people often worry about settling time, which is totally fair! Let’s clear up anything you might be wondering before you make this must-have treat.
Can I make the Classic Dirt Cake ahead of time?
Oh, please do! In fact, I recommend it if you’re serving it the next day. While the total prep time is only about 20 minutes, that chilling time is non-negotiable. The minimum is four hours, but when you let it sit overnight, the cookies absorb just enough moisture from the filling to become soft—that’s what gives you that cake-like texture instead of just crunchy crumbs. For truly epic results, make it the day before you plan to serve it!
What is the best cookie to use for this recipe?
You absolutely need classic chocolate sandwich cookies, the ones with the cream filling! When you crush them, that filling helps them blend seamlessly into the cream layer, which stops the ‘dirt’ from just tasting like dry crumbs floating around. If you use an Oreo-style cookie without the filling, you’ll need to add a couple of tablespoons of extra softened butter to the cookie crumbs to help everything bind together when you layer it. Otherwise, you’re missing out on that key textural element that makes this recipe work for those Simple Desserts!
Is this considered one of the best Easy Treats?
Hands down, yes! If you are looking for Easy Treats that feed a crowd and require zero fuss, this is it. It’s the definition of simple assembly. Kids expect it at every gathering, and adults always ask for the recipe because they can’t believe something that tastes so rich and decadent takes less than half an hour of active time to pull together. It’s perfect for last-minute gatherings or when you just need a guaranteed win without turning on the oven. For more ideas like this, check out some of my easy and quick recipes!
Share Your Experience Making This Recipe
Now that you’ve successfully assembled your masterpiece—your very own **Classic Dirt Cake**—I seriously want to hear all about it! I hope it brought back some fun memories for you, just like it does for me every time I make it. This recipe is just too much fun not to tell people about!
Did you use a giant trifle bowl, or did you go for those cute little individual cups? I’m always on the lookout for new ways to present these Easy Desserts. Did you let the gummy worms swim freely, or did you stick them straight up like tiny little flags?
Please, please tell me how it went down at your house! Drop a comment below and let me know your rating—five stars if it made everyone smile, which I’m betting it did! If you snapped a picture of your finished dessert, send it my way or tag me on social media. Seeing your homemade creations really inspires me to keep testing and sharing these fun, simple recipes. Happy scooping!
Classic Dirt Cake
Equipment
- Mixing Bowl
- Electric mixer
- Serving dish
Ingredients
For the Cookie Base and Layers
- 500 g Chocolate sandwich cookies Crushed
For the Cream Filling
- 250 g Cream cheese
- 120 g Butter
- 200 g Powdered sugar
- 400 ml Whipped topping
For the Pudding Layer
- 2 boxes Chocolate pudding mix
- 1 L Cold milk
For Topping
- 1 Gummy worms As needed
Instructions
- Beat the cream cheese, butter, and powdered sugar together until the mixture is smooth.
- Prepare the chocolate pudding according to package directions using the cold milk. Fold the prepared pudding into the cream cheese mixture.
- Gently fold the whipped topping into the pudding and cream mixture until just combined.
- Layer the crushed cookies and the cream mixture in a serving dish. Start and end with a layer of crushed cookies.
- Top the cake with gummy worms. Chill the dessert for at least 4 hours before serving.