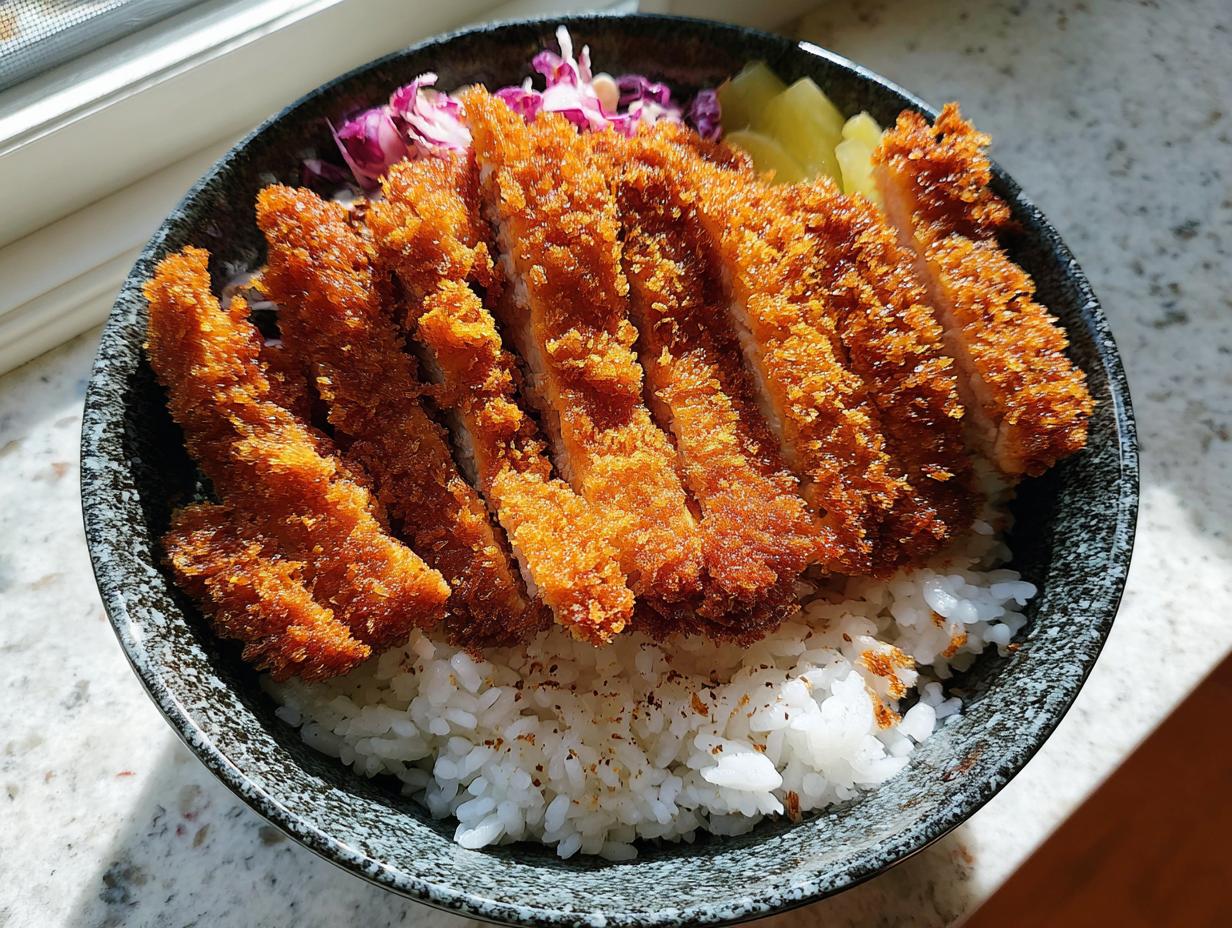
If you’re anything like me, sometimes you just need that perfect blend of comforting carbs and something seriously crunchy to make a meal feel complete. Forget complicated, long dinners for a minute! We are diving into my go-to recipe when I need satisfying Japanese Food Recipes fast: the **Classic Chicken Katsu Rice Bowl**! It checks every box—easy, quick, and absolutely delicious.
Serving katsu over rice always felt like a complete, cozy meal to me. It’s not fussy; it’s just fantastic. The key to making this bowl truly shine, and what I obsessed over when perfecting my method, is getting that chicken coating shatteringly crispy. Trust me, soggy katsu just won’t cut it in my kitchen.
Why You Will Crave This Classic Chicken Katsu Rice Bowl
Seriously, before you even look at the ingredient list, let me tell you why this dish leaps straight to the top of my ‘quick weeknight’ pile. It’s all about speed and texture, people!
- Ready in a Flash: We are talking about getting this entire Japanese Meal on the table in about 25 minutes total. That’s less time than it takes for delivery to arrive! If you need Easy Asian Food that impresses, this is it.
- That Perfect Crunch Factor: I hunt for crispness in everything, and this katsu delivers. You get that beautiful, loud crunch followed immediately by that tender, juicy chicken inside. It’s truly satisfying.
- Ultimate Comfort: There is something so inherently comforting about crispy fried chicken served simply over a mound of warm rice. It’s the definition of a complete dinner, no fuss required.
- So Simple to Master: Even if you’re new to making Japanese Food Recipes, the three-step breading process is foolproof once you get the hang of it. You’ll feel like a pro chef in your own kitchen!
Essential Ingredients for the Classic Chicken Katsu Rice Bowl
When you’re aiming for quick Asian Food Recipes, you really don’t need a pantry full of specialty items. The glory of this Classic Chicken Katsu Rice Bowl is that it uses ingredients you likely have on hand, or can grab easily. Remember, for the absolute best crunch, you’ll want to grab Panko breadcrumbs if you have them! They make all the difference.
Chicken Preparation Ingredients
This is where the main event starts, naturally. Make sure that chicken is even; otherwise, some parts will burn while others are still raw. That’s a rookie mistake I learned to avoid early on!
- Two chicken breasts, pounded thin or butterflied to an even 1/2-inch thickness.
- Salt and pepper, just to taste.
- About 1/2 cup of all-purpose flour.
- One good, large egg, beaten well.
- One full cup of breadcrumbs—Panko is my heart, but any will do in a pinch!
Frying Medium and Serving Base
Don’t skimp on the oil, but you also don’t need a deep fryer! We just need enough for a nice, cozy shallow fry.
- Oil for frying (you’ll want enough for about 1/2 inch depth in your skillet). Canola or vegetable oil works perfectly here.
- Served over perfectly cooked rice (plan for approximately 1 cup per person).
Expert Tips for Perfect Classic Chicken Katsu Rice Bowl Texture
Okay, let’s talk texture. We’ve got the ingredients, but if you don’t treat the coating right, your Classic Chicken Katsu Rice Bowl will end up soft instead of shatteringly crisp. My goal—and yours should be too—is that audible crunch every single time. A few little things I learned the hard way really make the difference here.
Achieving the Crispiest Coating
The three-step coating process might seem tedious, but it’s your secret weapon for perfectly breaded chicken. After you dip your chicken in the flour, you HAVE to shake off every speck of excess. If you leave too much flour on, it burns almost instantly in the hot oil and turns bitter.
Next step: the egg wash. Make sure that chicken is fully coated, but let it drip for a second before moving it to the Panko. When you press the breadcrumbs on, be firm! Don’t just sprinkle them on top. Press that coating right onto the meat so it adheres during the frying process. This ensures nothing falls off in the oil, which keeps your oil cleaner and your crust intact. If you want the ultimate crispness, honestly, go for the Panko breadcrumbs; they soak up less oil and puff up beautifully.
Frying Temperature Control
This is hands-down the biggest make-or-break factor for any fried chicken dish, including this amazing rice bowl base. If your oil is too cold, your katsu sits there soaking up grease like a sponge, and you end up with oily chicken encased in soft breading. Yuck!
You are looking for your oil to be consistently around 350°F (175°C). I know not everyone drags out a thermometer for casual cooking, but try to gauge it—when you drop a few breadcrumbs in, they should immediately sizzle vigorously and turn golden in about 30 seconds. If they brown instantly, it’s way too hot! If they just sit there looking sad, it’s too cool. Keeping that temperature stable is what crisps the outside perfectly in about 5 minutes per side, sealing in all those lovely juices so the inside stays moist. For more great Japanese Food Recipes tips, I always check out sites like Just One Cookbook!
Step-by-Step Instructions for Your Classic Chicken Katsu Rice Bowl
Alright, let’s finally get this marvelous meal cooked! Following these clear steps ensures you don’t get overwhelmed. This is where all that prep work pays off. While this recipe features as one of my favorite Easy Asian Dishes, the timing of the frying is everything.
Preparing the Chicken and Dredging Station
First up, take those flattened chicken breasts and season them generously with salt and pepper. Now, set up your three shallow dishes in a neat row: plate one gets the flour, plate two gets the beaten egg, and plate three must have your beautiful breadcrumbs. Remember the order! Seasoned chicken goes into the flour first—shake off anything that looks heavy. Then dip it completely into the egg, letting the extra drip back into the bowl. Finally, you press it hard into those breadcrumbs until it’s totally covered.
Frying the Katsu to Golden Perfection
Get your oil heating up in that skillet. We want it hot enough to crisp things instantly. Once the oil is ready, carefully place your breaded chicken in making sure not to crowd the pan, space is important! You need to fry these beauties for about 4 to 6 minutes on each side. That might sound long, but we need that deep golden color and to ensure it cooks through to the center. When they look perfect, pull them out immediately and set them on a rack or paper towels to drain away any extra oil.
Assembly of the Classic Chicken Katsu Rice Bowl
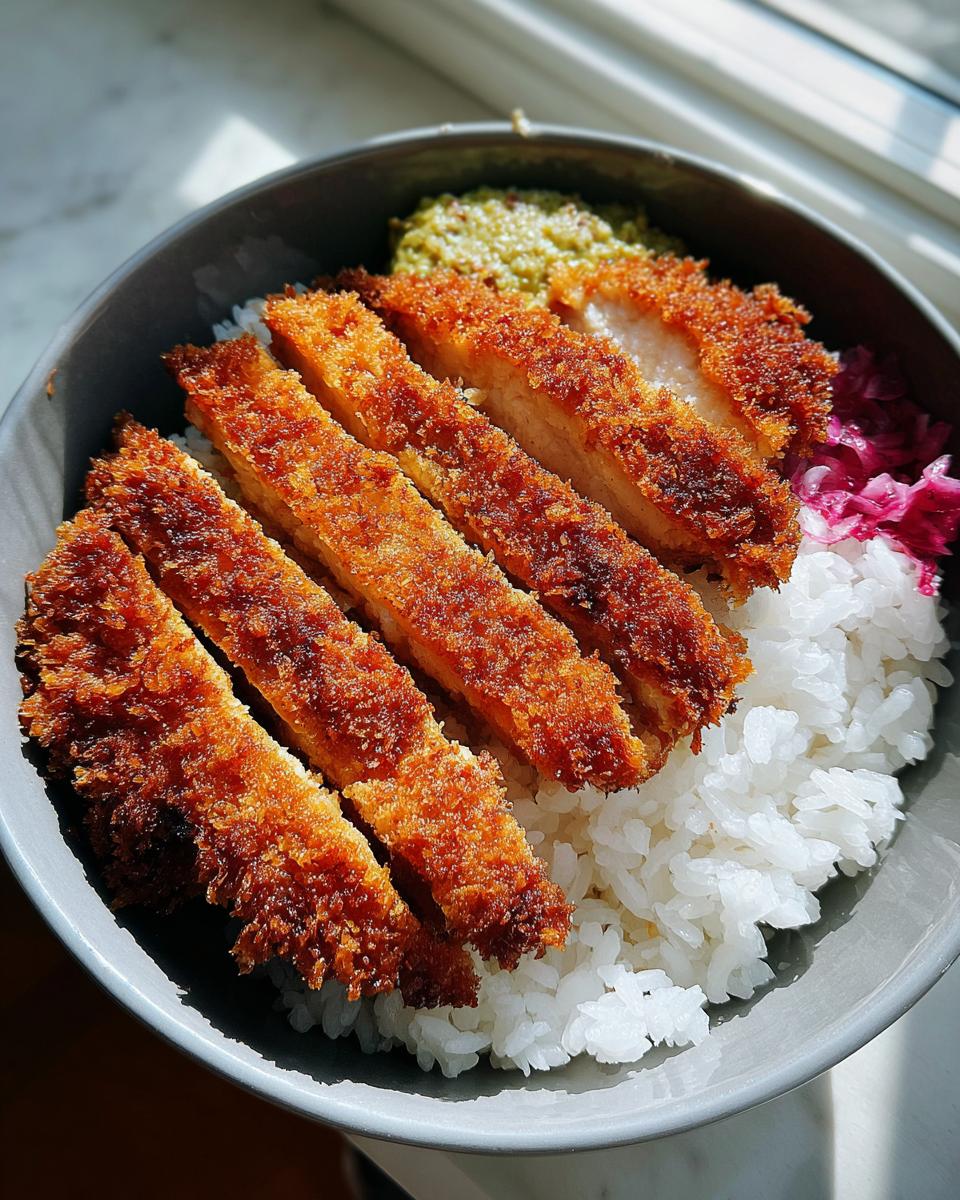
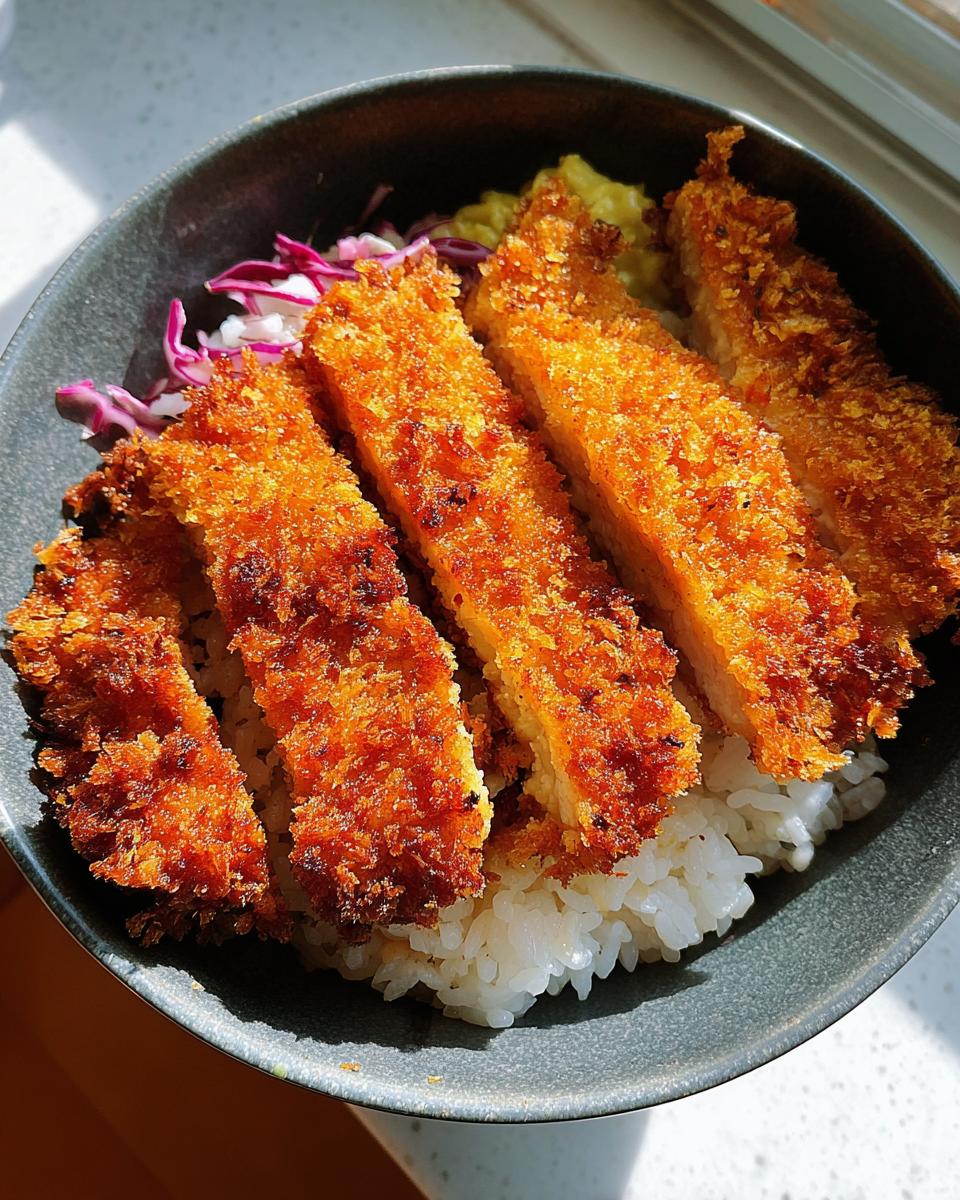
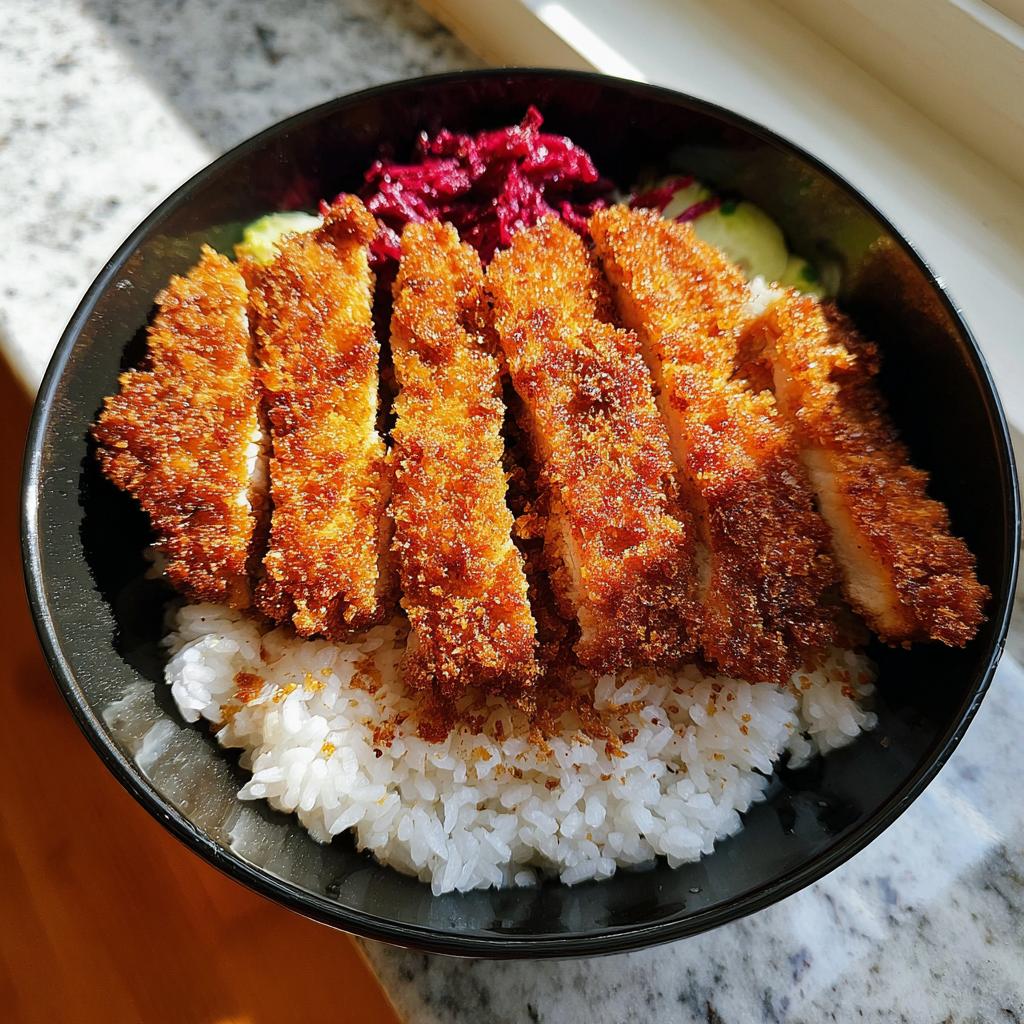
We are nearly there! Let the katsu rest for just a minute or two, then grab a sharp knife and slice the chicken into nice, easy-to-eat strips. That’s the fun part—seeing that lovely white meat against the crunchy coating! Now, get your warm rice ready in a bowl, lay those crispy slices right on top, and don’t forget your sauce! A drizzle of tonkatsu sauce or whatever you like on top, and boom, dinner is served.
Variations for Your Chicken Katsu Meal
Look, I love deep-frying. It delivers that unmatched crispiness that makes the Classic Chicken Katsu Rice Bowl so famous. But hey, sometimes we want a similar flavor profile without plunging things into oil, right? Whether you’re trying to lighten things up or just need a different flavor punch, this is where we get creative with our wonderful base recipe for these Japanese Food Recipes.
Alternative Cooking Methods
Don’t worry if you’re intimidated by frying; we can still get fantastic results! You won’t get the *exact* same texture as oil frying, but you’ll save on cleanup and oil costs, which is a win!
For air frying, you’ll want to spray your breaded katsu really generously with oil right before popping it in the basket. Cook it at about 380°F (195°C), flipping halfway through. It gets nicely browned and crispy on the edges, but it won’t have that deep golden saturation you get from the skillet. It’s a great option when you’re after something like a healthier chicken alternative.
Baking is also an option, but it takes longer and tends to be a bit drier. If you bake, place the katsu on a wire rack set inside a baking sheet. This allows air to circulate underneath, preventing the bottom from getting soggy while it cooks at about 400°F (200°C) until done. It’s easy, but it definitely sacrifices some of that authentic katsu snap.
Sauce and Topping Ideas
While that thick, sweet, tangy tonkatsu sauce is classic for a reason, sometimes you just want to switch things up! The chicken is perfect on its own, acting as a blank canvas for whatever topping you’re craving.
If you like things with a little zing, try whipping up a simple spicy mayo. Just mix mayonnaise with sriracha until you get the heat level you love. A dash of lime juice in that mix really brightens everything up! For a savory twist that brings an Asian Food Idea to life, try a soy-ginger glaze. Reduce some soy sauce with a splash of rice vinegar, a touch of honey or maple syrup, and freshly grated ginger until it thickens just enough to coat a spoon.
You can even top your rice bowl with thinly sliced green onions or some sesame seeds for a little texture contrast!
Storage and Reheating Your Classic Chicken Katsu Rice Bowl Leftovers
Nobody’s kitchen thrives when there are delicious leftovers going to waste, right? But let’s be honest—fried food is notoriously tricky to save! If you pack up that crispy chicken next to the steaming rice for your lunch the next day, you know what happens. Soggy chicken, sad rice. No thanks!
The secret to enjoying these leftovers and keeping the spirit of your Classic Chicken Katsu Rice Bowl alive is separation, separation, separation. I learned this the hard way when I tried to pack it all together in one container.
Storing the Components Separately
If you have extra katsu, make sure it has completely cooled down before you put it away. If you wrap it while it’s warm, you’re just trapping steam, and steam makes things unhappy and soft. Store the cooled, sliced chicken in a completely airtight container. You can even slip a tiny square of paper towel in there just to wick away any residual moisture, but make sure the paper towel isn’t actually touching the breading if you can help it.
Keep your leftover rice in its own separate airtight container. If you made any extra sauce, keep that in a tiny jar or small container too. If you follow this layout, your odds of having crispy leftovers the next day go way up! This is the same idea I use when prepping other easy Asian dishes for the week—prep smart, store smart.
Reheating to Restore the Crunch
Forget the microwave for reheating the actual katsu. I mean it! The microwave is the enemy of crispiness. It heats the water molecules in the breading, turning it immediately into a rubbery texture. We are not doing that!
Your best bet, hands down, is the toaster oven or a regular oven set to about 375°F (190°C). Lay the cold katsu slices out on a wire rack set on top of a baking sheet. This lets air circulate all around the chicken, which is crucial for drying out that coating again. Give it about 6 to 8 minutes. You just want it hot all the way through. Once the chicken is warmed up and starting to feel crispy again, reheat your rice quickly in the microwave (a quick 60-second burst is usually plenty) and then assemble your bowl!
Serving Suggestions for Japanese Meals
The Classic Chicken Katsu Rice Bowl is beautiful because it’s already a complete plate—rice and protein! But to truly round out these simple Asian Cuisine Recipes and make it feel like a genuine, full Japanese meal, you need just a little something fresh to cut through the richness of that fried chicken. It really balances everything out on your plate, keeping things from feeling too heavy.
You don’t need a dozen side dishes either. When I’m making this for dinner, I just aim for one or two small accompaniments to keep things breezy, especially since the prep for the katsu itself takes up the most time. These ideas keep things firmly in the realm of my favorite Japanese Food Recipes territory without adding too much complexity.
Simple Vegetable Sides
The best sides are those that offer a little coolness or acidity. They give your mouth a break from the savory fried coating and cleanse your palate perfectly between bites of that crispy chicken!
My absolute favorite thing to serve alongside is a heap of finely shredded raw cabbage. That’s it! No dressing needed sometimes, but if you want one, a tiny drizzle of rice vinegar and salt is perfect. The cabbage just adds such necessary bulk and crunch that contrasts nicely with the softer katsu texture.
If you want to get a little fancier but still keep it super fast—and I mean fast!—try quick-pickled vegetables. You don’t need a fancy fermentation setup. Just thinly slice some carrots and cucumbers, toss them in a jar with equal parts rice vinegar and water, a teaspoon of sugar, and a pinch of salt. Let that sit on the counter while you cook the chicken, and by the time the katsu is done, you have bright, tangy bites! If you want something green packed with flavor, try my healthy cucumber salad recipe—it’s less traditional Japanese, but the freshness works wonders!
Another easy win is just a small bowl of edamame sprinkled with sea salt. It’s protein, it’s green, and you just boil it for five minutes. Perfect!
Frequently Asked Questions About the Classic Chicken Katsu Rice Bowl
I always get tons of questions when people try this recipe for the first time! It’s so satisfying to see people jump into making their own authentic Asian Recipes Authentic at home. Here are the top three things I hear most often about making the best Classic Chicken Katsu Rice Bowl ever!
Can I make the chicken katsu ahead of time for these Japanese Meals?
Yes, you absolutely can, but listen closely because it’s important: You MUST store the cooked katsu separate from the rice. If you plan to eat it cold, it’s fine straight from the fridge, but for the best texture, you need to reheat it properly, which I covered in the storage section above! Don’t try to warm up the already assembled bowl, or you’ll end up with that dreaded soggy Katsu. For these Easy Asian Dishes, storing components separately preserves that lovely crunch for later enjoyment.
What is the best oil to use for frying the katsu?
I’m a big believer in using an oil with a high smoke point. That way, you can get the oil nice and hot—which is what gives you that quick crisp—without the oil breaking down and smoking everywhere. Neutral oils like canola, vegetable, or peanut oil are my top picks for frying anything crispy, whether it’s this Katsu or any other Chinese Cooking Recipes you might try. They don’t impart any weird flavors, which lets the chicken and breadcrumbs really shine!
Is this recipe considered one of the Easy Asian Food options?
One hundred percent yes! That’s why I love it so much. When you look at the times, we have 10 minutes of prep and only 15 minutes of cooking. That keeps this well under the 30-minute mark for a full meal! If you love the idea of coming home and making something delicious and authentic without spending hours in the kitchen, this Classic Chicken Katsu Rice Bowl is exactly what you need. It’s my go-to when I need super Easy Asian Food!
Sharing Your Classic Chicken Katsu Rice Bowl Experience
That’s it! You’ve successfully tackled one of my favorite Japanese Meals. Seriously, I hope your kitchen smells amazing right now and that you have a piping hot bowl of crispy goodness in front of you. Seeing you all bring these comfort food recipes to life is genuinely the best part of my job!
I would absolutely love to hear how your Classic Chicken Katsu Rice Bowl turned out. Did you stick to the traditional tonkatsu sauce, or did you try one of those spicier mayo variations we talked about?
If you made this recipe, please take a second to leave a star rating right below this! It really helps other people find these simple but delicious Asian Cuisine Recipes. And if you snapped a picture of that beautiful crispy chicken over rice, tag me on social media so I can swoon over your plating!
If you have any questions at all—maybe about substituting the chicken or how to make a bigger batch for meal prep—please don’t hesitate to send a note through my contact page. I check in there often!
Author Bio
By Grace Williams, Contributor at Recipes by Betty.
Classic Chicken Katsu Rice Bowl
Equipment
- Skillet or deep fryer
- Shallow dishes for dredging
Ingredients
- 2 chicken breasts, flattened
- Salt and pepper To taste
- 1/2 cup flour
- 1 egg, beaten
- 1 cup breadcrumbs
- Oil for frying
- Cooked rice For serving
Instructions
- Season the flattened chicken breasts with salt and pepper.
- Set up a dredging station with three shallow dishes: one with flour, one with the beaten egg, and one with breadcrumbs.
- Dredge each piece of chicken first in the flour, shaking off excess. Dip it into the egg, letting excess drip off. Finally, press it firmly into the breadcrumbs to coat completely.
- Heat enough oil in a skillet for shallow frying. Fry the breaded chicken until it is golden brown on both sides and cooked through, about 4 to 6 minutes per side.
- Remove the chicken from the oil and place it on a wire rack or paper towels to drain excess oil.
- Slice the cooked chicken katsu into strips.
- Serve the sliced chicken over bowls of cooked rice. Add your preferred sauce on top.