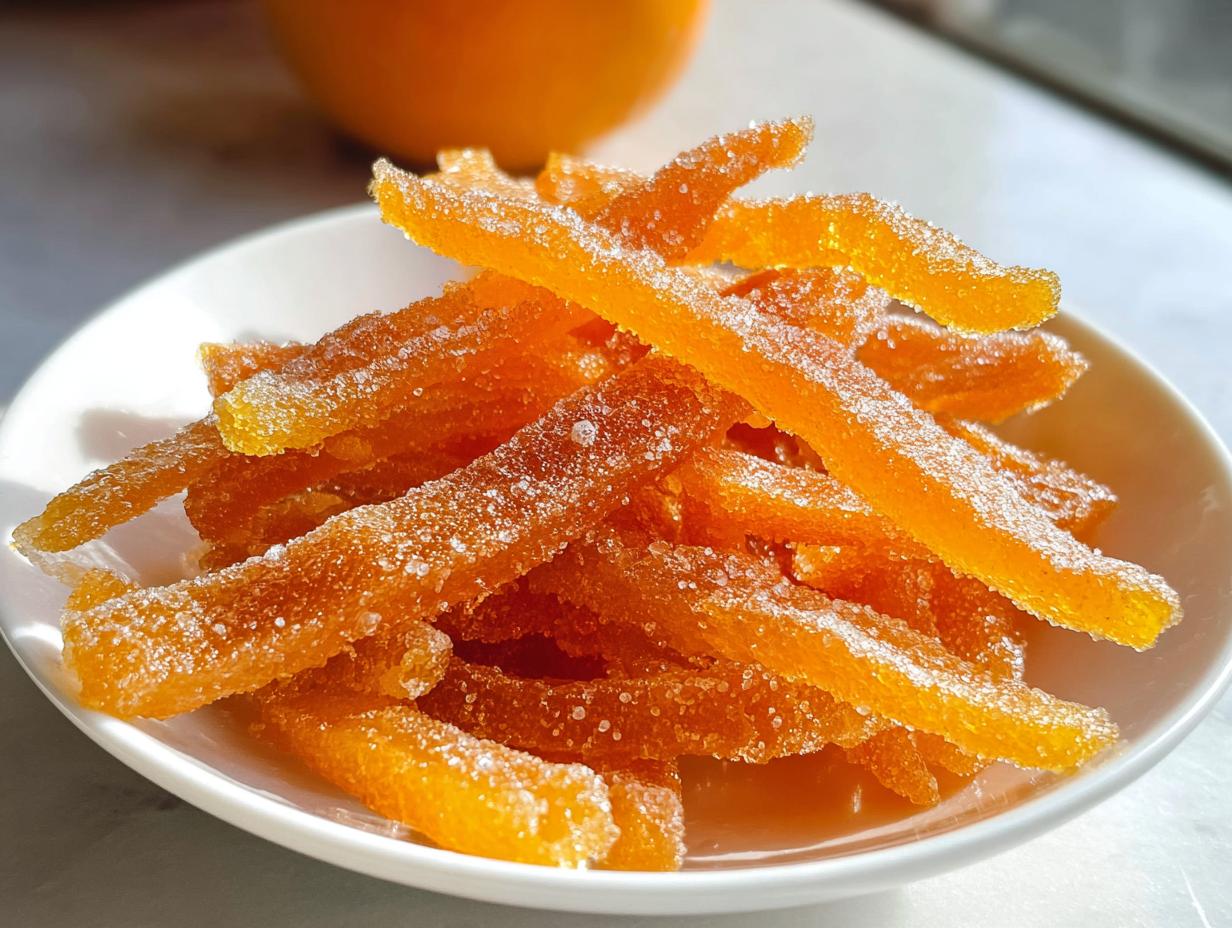
There’s something deeply satisfying about turning a humble piece of citrus rind into shimmering, sweet candy that lasts for months. Forget those stiff, overly bitter peels you grab on a whim! Today, we’re nailing the technique for making the absolute best Classic Candied Orange Peel. This guide guarantees you remove every trace of that harsh bitterness, leaving behind only bright orange flavor encased in sweet, translucent sugar.
My approach is all about patience—I truly enjoy the slow process of making peel; it is calming and incredibly rewarding. When you follow these steps, you’ll see why this method is a keeper for any home cook looking for quality confections. If you happen to have leftover citrus fruits after trying this, you might want to check out my notes on cranberry orange muffins! This rich, slightly chewy treat is one of the best things you can do with orange peels, trust me! I’m Clara Bennett, and as the Lead Plate Designer here at Recipes by Betty, I focus on making traditional techniques accessible.
Why This Recipe for Classic Candied Orange Peel Works So Well
Holiday bakers and traditionalists, listen up! This recipe isn’t just tossed together; it’s built on science that guarantees success. We aren’t trying to make a quick candy here; we are crafting a classic that holds up beautifully when stored or used in other preparations. It’s about technique that pays off beautifully.
- This method respects the ingredient, turning what we often discard into something magical. You might even realize you enjoy this more than baking those perfect scones!
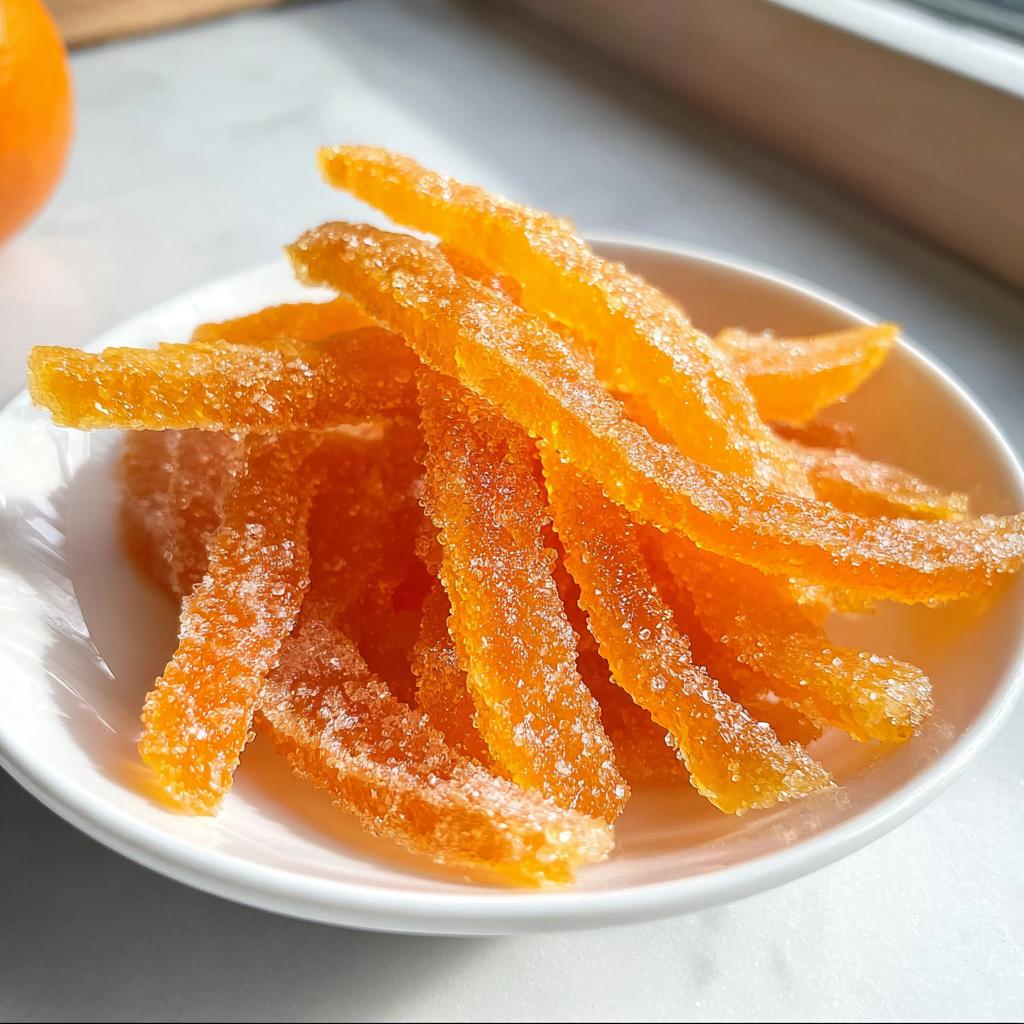
- The texture is chewy and jewel-like, never gummy or rock-hard.
Perfectly Balanced Sweetness in Classic Candied Orange Peel
The core of this recipe uses equal parts sugar and water for the syrup. That 1:1 ratio is crucial! It creates a syrup that’s sweet enough to preserve the peel but thin enough to fully penetrate all those little white pith walls. If the syrup is too thick, you end up with a sticky, uneven coating instead of that perfect, crystalline exterior on your Classic Candied Orange Peel.
Eliminating Bitterness: The Essential Pre-Boil Steps
This is the secret step everyone skips! The white pith under the colorful zest holds all that bitter flavor. Boiling the strips twice—and dumping that water out—is non-negotiable. It coaxes out the harsh oils, ensuring your final product tastes intensely of sweet orange, not medicinal rind. That double boil makes all the difference for truly excellent Classic Candied Orange Peel.
Equipment Needed for Classic Candied Orange Peel
You don’t need fancy gadgets for this, thankfully! Traditional candy making is often best done with straightforward kitchen tools. Having the right gear on hand makes the 70 minutes of simmering much smoother, especially since you have that long drying time ahead later on. Don’t go hunting for specialized equipment; just pull out your standard pots and pans!
Here’s what you’ll want ready before you even start trimming those oranges. Trust me, setting this up first means you won’t be scrambling around sticky-fingered later!
- A large pot: This is vital for the initial blanching steps. You need enough water to completely cover all those peels during the aggressive boiling process.
- A sturdy saucepan: This will be used later for making your sugar syrup and simmering the peels until they turn translucent. Make sure it has a nice wide bottom so the peels can lie flat.
- Parchment paper: You absolutely need this for the cooling and drying stage. It prevents the finished candy from bonding permanently to your counter or cooling rack. Speaking of related kitchen organization, I once wrote a little piece on the best types of salt for baking, but parchment paper is our star here!
Gathering Ingredients for Your Classic Candied Orange Peel
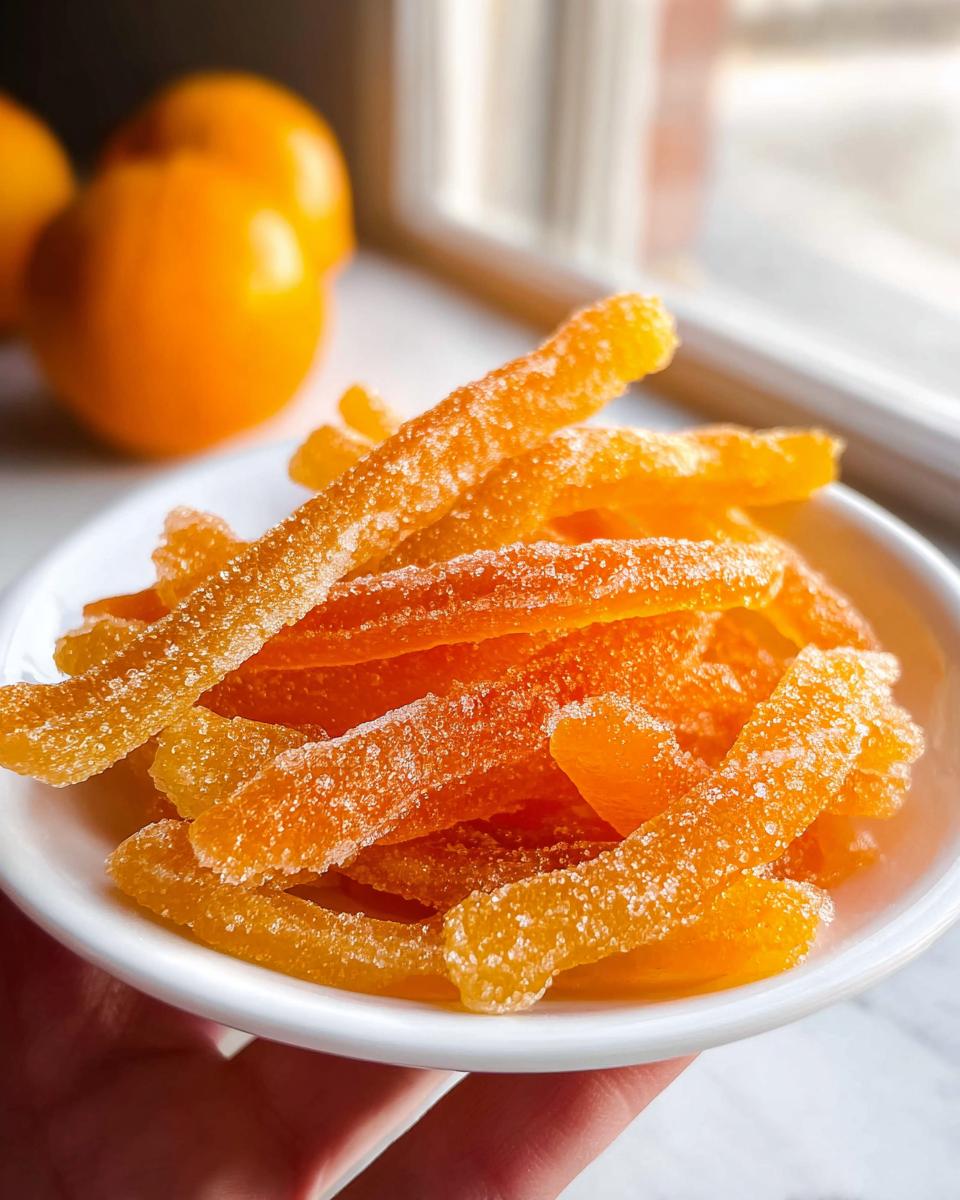
Okay, the ingredient list for this magic turning session is refreshingly simple. That’s the beauty of old-school candy making—it doesn’t obscure the main event! We are focusing entirely on maximizing the flavor of the orange itself. For this batch, you’ll want four firm oranges, which will yield enough peel for one good batch. You’ll need simple pantry staples as well, so no last-minute grocery runs, hopefully!
- Oranges (4): You need the whole peel here! Make sure they are washed really well since we are boiling them right away.
- Sugar (2 cups): Yep, that’s right—two full cups of good, white granulated sugar.
- Water (2 cups): This creates our initial boiling liquid and then our final preserving syrup.
Ingredient Notes and Substitutions
When choosing your fruit, I always look for oranges that have thicker skin—Navel or Valencia varieties are usually fantastic openers for this recipe. The thicker the white pith area, the more syrup it can actually absorb! If you were trying to rush things along for some reason—which I don’t recommend for this Classic Candied Orange Peel—you *could* try replacing about a quarter cup of the sugar with light corn syrup to achieve a slightly faster set, but honestly, sticking to the pure granulated sugar yields the best structural integrity. Don’t try to substitute the oranges with anything else; for this recipe, it has to be oranges!
Step-by-Step Instructions for Classic Candied Orange Peel
This is where the magic happens, but you can’t rush it! Remember, the total time involved is about 70 minutes of active cooking, followed by a loooong nap time—about 6 hours—for drying. Don’t try to speed up the drying part, or they’ll stick together! Follow these steps exactly, and you’ll have the most beautiful Classic Candied Orange Peel.
Preparing the Orange Peels: Cutting and Initial Blanching
First, take those whole, clean oranges and slice the peels away from the fruit. I aim for thin strips, about a quarter-inch wide—if they are too thick, they take forever to candy! Once you have your strips, drop them into the large pot filled with fresh water. Bring this to a rolling boil and let them go for a full 10 minutes. Don’t worry if they look a little frantic in the water; that’s normal. When time is up, drain them completely through a colander. Get as much water out as you can!
Second Boil to Ensure Perfect Classic Candied Orange Peel
We have to do it again! Seriously, do not skip this second dip. Return those drained peels to the large pot, cover them with fresh water, and bring it back to a boil for another 10 minutes. This is the essential step that zaps that residual bitterness lurking in the white pith. Drain them just as thoroughly as you did the first time. At this point, they should look a little duller, but they are ready to soak up that sweet syrup!
Creating the Sugar Syrup and Simmering the Peels
Now, switch over to your saucepan. Combine the two cups of sugar and two cups of water. Heat this gently, stirring frequently, until every single crystal has dissolved. I mean it—you shouldn’t feel any graininess when you run a spoon against the bottom of the pan. Once the sugar is dissolved, add your twice-blanched peels. Turn the heat down to a gentle simmer. We’re looking for a happy, low bubble. Let these simmer away for 45 to 60 minutes. You know they’re done when they stop looking opaque and start looking gorgeous and translucent, like stained glass! If you ever make homemade fruit roll-ups, you know that visual cue of ‘done’ is super important—it’s the same idea here.
Drying Your Finished Classic Candied Orange Peel
This is the trickiest part where patience really pays off! Use tongs or a fork to carefully lift the peels out of the syrup, letting excess drip back into the pan for a moment. Lay them out gently onto your sheet of parchment paper. Make sure they aren’t touching each other—if they overlap, they will fuse together later! Let them sit out at room temperature for at least 6 hours or, ideally, overnight. This slow drying process is what gives you that perfect, slightly crystallized exterior on your Classic Candied Orange Peel.

Tips for Success When Making Classic Candied Orange Peel
Even with a solid recipe, little things can derail your candied orange peel project! I’ve learned these tricks the hard way over the years, especially when I was rushing the drying phase. Trust me, if you pay attention to the details here, you won’t end up with a sticky, unusable mess.
The biggest concern people have is either bitterness lingering or the final product weeping sugary tears. Here are the few spots where you need to focus your attention to get that perfect batch that looks like real jewels.
- Don’t Skimp on Syrup Time: When you think the peels look translucent enough, give them five more minutes submerged in the hot syrup. The longer they simmer, the deeper the sugar penetrates, making them less likely to start weeping syrup later on. This dense sugar saturation is key to long-term storage.
- Syrup Temperature Matters When Drying: When you pull the peels out, make sure the syrup has cooled slightly before you lay them down. If the syrup is screaming hot, the peels will melt the parchment paper or stick instantly, making separation impossible.
- The Thickness Trick: If your peels are too thick, the blanching process might not eliminate all the bitter white part. Next time, use a sharp paring knife to gently shave off any excessively thick white sections after the first boil. This ensures uniform texture.
- Airflow is Your Friend: While you should keep them out of direct sunlight, make sure they are drying somewhere with good air circulation. I sometimes use a cooling rack covered loosely with screen mesh if I worry about house dust settling on them, but plain parchment on the counter works fine! If you’ve ever worried about moisture control in other baking projects, like learning how to prevent pumpkin bread from drying out, think of this drying stage as the opposite—we are purposefully removing moisture from the surface!
- Handling the Syrup: Don’t stir the peels while they are simmering in the sugar. You want them to stay separate. If they start clustering, gently nudge them apart with a wooden spoon, but avoid vigorous stirring, which can break the delicate peels.
Creative Ways to Use Your Candied Orange Peels
Once you’ve got these jewel-toned beauties drying, you might wonder what on earth to do with this big batch! Honestly, you can just snack on them plain—they are fantastic with a cup of strong coffee. But if you’re feeling ambitious, these peels open up a world of delicious possibilities. They elevate simple desserts into something truly special.
My absolute favorite thing to do is dip them halfway into melted dark chocolate. Oh my goodness, the combination of that bitter-sweet, chewy orange and rich, dark chocolate is just divine! Making chocolate fudge cookies is great, but coating these peels turns them into the ultimate homemade gift.
Beyond that, they are perfect chopped up and folded into scones, sprinkled over yogurt, or even added to bread dough for a truly festive lift. Don’t let your finished batch just sit on the counter! These peels answer the question of orange desserts easy because they do most of the heavy lifting flavor-wise. Think of all the wonderful Orange Peels Uses you haven’t discovered yet!
Storing Leftover Classic Candied Orange Peel
So, you managed to resist eating all your beautiful, jewel-like peels in one sitting? Good for you! Proper storage is key because we don’t want all that hard work dissolving into sticky mush or hardening up over time. Since we drained them thoroughly and let them dry out for so long, they are fairly well preserved, but they still need the right environment.
My rule of thumb is to keep them away from humidity. That’s the enemy of good candied fruit. You absolutely must ensure they are completely dry (that 6-hour or overnight drying time is not optional!) before you put them anywhere near a lid.
- Airtight Containers are a Must: Find a clean, dry glass jar or a food-safe plastic container with a tight-sealing lid. Pop the peels inside.
- Room Temperature is Best: Store the sealed container in a cool, dark pantry. Room temperature is perfect. Refrigeration can actually introduce too much moisture over time, which might make them stick together or feel damp.
- How Long Do They Last? Honestly, if you sealed them right and they are completely dry, they should last wonderfully for several months—maybe even six months if your kitchen stays relatively stable in temperature. Give them a little shake every few weeks just to make sure nothing is clumping at the bottom. If you notice any stickiness developing, pull them out immediately and let them dry uncovered for an hour or two!
Frequently Asked Questions About Candied Peels
Whenever I share how to make something like this, people always have the best questions! It makes sense; dealing with citrus peels and sugar syrup can feel tricky if you’ve never done it before. I’ve gathered a few common queries here to make sure your batch of Classic Candied Orange Peel turns out perfectly chewy and sweet.
Can I use peels from lemons or limes instead of oranges?
Oh, absolutely! While this recipe is designed for the sweetness profile of oranges, you can definitely use lemons or limes. Just remember that lemons and limes tend to have a much thinner white pith than oranges, which means they can absorb syrup faster but they can also be slightly more delicate. You might find they require a little less simmering time! You could even combine them for a truly vibrant mix of citrus flavors. If you’re looking for more ways to use up citrus in a simpler way, check out my notes on Orange Desserts Easy!
How do I know when my peels are fully dry for Classic Candied Orange Peel?
This is crucial for storage! When you first lay them out, they will look wet and very glossy. After about 6 hours on the counter, they will start to feel tacky, not wet. The real test is tactile: gently pick one up. If it feels sticky and leaves a slight residue on your clean finger, it needs more time. If you can handle it without much residue sticking, and it feels firm when you gently squeeze it—more like a chew toy than Jell-O—it’s ready to be stored. They shouldn’t be cracking, but they should definitely feel dry on the outside.
What can I do with the leftover orange syrup?
Don’t you dare throw that syrup away! That is pure, delicious, orange-infused simple syrup, and it’s far too good to waste. My favorite thing to do is use it to sweeten iced tea or pour it over a simple homemade pound cake. You can also use it as a base for cocktails! If you chill it down, it’s wonderful mixed with sparkling water for a refreshing homemade soda. It carries that bright flavor wonderfully.
Nutritional Estimates for This Recipe
Now, let’s talk fuel! We all know that traditional candied treats are more about joy and celebration than daily dieting, but it’s only fair to give you an idea of what you’re indulging in. Since this recipe is primarily just peels, sugar, and water, the carbs are definitely the star of the show here. Remember, this is just an estimate based on the three core ingredients provided for one full batch, so please take these numbers with a grain of salt—or maybe a bit of that leftover sugar syrup!
It’s worth noting that the nutritional information is based on the entire batch before it’s sectioned out for eating. If you happen to divide your candied peel into, say, 10 equal servings, these numbers will drop significantly per piece!
- Estimated Calories Per Batch: Around 2,000 – 2,200 kcal (This is high because of the two full cups of sugar!)
- Total Fat Per Batch: Very low, typically less than 2 grams (Since we don’t add any butter or oil!)
- Protein Per Batch: Negligible, maybe 1 gram.
- Carbohydrates Per Batch: Approximately 500 – 550 grams (Mostly from the syrup).
This information is just here for reference, my friends. When you sit down with a cup of tea and a few pieces of this beautiful, homemade Classic Candied Orange Peel, you’re tasting tradition, not counting macros. Enjoy every sweet, chewy bite!
Share Your Classic Candied Orange Peel Creations
Well, that’s it! We’ve gone from prickly peel to sparkling, beautiful candy. I truly hope you loved this process as much as I do. It’s one of those satisfying baking projects where the final outcome looks way fancier than the actual steps required. It does require time, but the hands-on work is minimal, making it perfect for a quiet afternoon!
Now that you have your gorgeous batch of Classic Candied Orange Peel drying perfectly on the counter, I would absolutely love to see what you do with them! Are you tossing them into a chocolate dip? Are they destined for the top of a holiday fruitcake? Drop a rating below so others know how you found the process, and feel free to send me a picture of your finished jewels!
If you have any burning questions that popped up while you were simmering away, or if you want to show off your beautiful sugar-coated treats, head over to the contact page. I try my best to read every message and offer advice when I can. You can reach out right here: Let us know how your baking went!
About the Author: Clara Bennett
By Clara Bennett, Lead Plate Designer at Recipes by Betty.
Classic Candied Orange Peel
Equipment
- large pot
- Saucepan
- Parchment paper
Ingredients
- 4 Oranges (for peels)
- 2 cups Sugar
- 2 cups Water
Instructions
- Cut the orange peels into thin strips.
- Boil the peels in water for 10 minutes. Drain the water.
- Repeat the boiling process one more time to reduce any remaining bitterness.
- In a saucepan, combine the sugar and water. Simmer this mixture until the sugar is completely dissolved.
- Add the prepared peels to the sugar syrup. Simmer for 45 to 60 minutes, or until the peels look translucent.
- Remove the peels from the syrup and place them on parchment paper to dry.