Nothing says holiday cheer quite like a festive baking project that doubles as a showstopping centerpiece. That’s exactly what my Christmas Tree Cupcake Platter delivers – equal parts delicious dessert and edible holiday magic. I still remember the first time I created this whimsical treat during a holiday photo shoot years ago. The moment those green-frosted cupcakes came together in that perfect tree shape, dotted with sprinkles like ornaments, I knew I’d stumbled onto something special. Now, assembling this platter has become one of my favorite December traditions – the kids love decorating it almost as much as eating it!
What makes this Christmas Tree Cupcake Platter so magical is how simple it really is. You don’t need fancy baking skills, just some basic cupcakes, buttercream frosting, and holiday sprinkles. The real trick is in the arrangement – those humble cupcakes transform into something extraordinary when placed just right. I’ve served this at everything from cookie exchanges to Christmas morning brunches, and it never fails to make people smile. The best part? Guests can just grab a cupcake when they’re ready – no slicing required!
Over the years, I’ve learned all the little secrets to making this platter shine. Like using gel food coloring for that perfect evergreen hue, or chilling the cupcakes before frosting so everything stays neat. But honestly, even if your tree ends up a little lopsided (mine often does!), that just adds to its homemade charm. After all, isn’t that what holiday memories are made of?
Why You’ll Love This Christmas Tree Cupcake Platter
This isn’t just any holiday dessert—it’s pure holiday joy you can eat! Here’s why this Christmas Tree Cupcake Platter has become my go-to for every festive gathering:
- Instantly festive: One minute it’s just cupcakes, the next – bam! – you’ve got a Christmas tree centerpiece that’ll have everyone reaching for their phones to take pictures.
- Perfect for sharing: No slicing, no muss – guests can just grab a cupcake when they’re ready (though good luck stopping at just one!).
- Easy enough for kids to help: My little ones go wild decorating with sprinkles – their “ornaments” might not be symmetrical, but that’s part of the charm.
- Foolproof but fancy: Looks like you spent hours, but the secret? It’s just simple cupcakes transformed by clever arrangement.
- Double duty: Dessert and decor? Yes please! It clears space on my holiday table while still wowing guests.
Trust me, once you see those faces light up when you bring out your edible tree, you’ll be making this every December too.
Ingredients for Your Christmas Tree Cupcake Platter
Gathering your ingredients is the first step to creating this festive masterpiece! I’ve learned through trial and error that using quality ingredients makes all the difference in how your Christmas Tree Cupcake Platter turns out. Here’s everything you’ll need, grouped by cupcakes and frosting:
For the Cupcakes
- 24 vanilla cupcakes – You can use your favorite homemade recipe (I swear by my pistachio cupcakes base with the nuts omitted) or even good-quality store-bought ones in a pinch
- Assorted Christmas sprinkles – Go for the mix with red, green, and silver for maximum holiday cheer!
For the Frosting
- 3/4 cup solid vegetable shortening – This helps the frosting hold its shape beautifully
- 3/4 cup softened butter – Unsalted is best, and make sure it’s truly softened (leave it out for 30 minutes) for perfect creaming
- 2 tsp clear vanilla extract – The clear kind keeps your green frosting vibrant (regular works too, just might tint it slightly)
- 6 cups sifted confectioners’ sugar – Sifting is non-negotiable here – lumpy frosting is no fun to pipe!
- 2 tbsp milk – Whole milk gives the creamiest texture
- Green gel food coloring – Gel gives that perfect Christmas tree green without thinning your frosting
- 2-3 tsp cocoa powder – For the tree trunk (I sometimes use my chocolate glaze recipe if I want extra richness)
Pro tip: Measure everything before you start – there’s nothing worse than realizing you’re short on powdered sugar mid-frosting! And don’t stress if you need to make substitutions – baking should be fun, not rigid.
Equipment Needed for Your Christmas Tree Cupcake Platter
Now let’s talk tools! You don’t need a fancy bakery’s worth of equipment to make this Christmas Tree Cupcake Platter shine, but a few key items will make your life so much easier. Here’s what I always reach for:
- Stand mixer with paddle attachment – My trusty KitchenAid makes whipping that frosting to perfect fluffiness a breeze. No stand mixer? A hand mixer works great too – just be prepared for a little arm workout!
- Piping bag with large star tip – This creates those gorgeous tree-like swirls. In a pinch? A gallon zip-top bag with the corner snipped off works surprisingly well.
- Angled spatula – Perfect for smoothing that base layer of frosting. No fancy spatula? The back of a spoon can do the job in a pinch.
That’s really it! The beauty of this project is how simple the tools are. I’ve even made it using just a bowl, whisk, and butter knife when traveling – the holiday spirit finds a way!
Step-by-Step Guide to Making Your Christmas Tree Cupcake Platter
Okay, let’s make some holiday magic! I promise this Christmas Tree Cupcake Platter is easier than it looks – I’ll walk you through every step. Just follow along, and before you know it, you’ll have a showstopping centerpiece that’ll have everyone ooh-ing and aah-ing.
Preparing the Frosting
First things first – that fluffy, dreamy frosting! Here’s how I get it just right every time:
- Cream the fats: In your stand mixer (or large bowl if using a hand mixer), beat the shortening and softened butter together for a good 5-7 minutes. Scrape down the sides occasionally. You want it super light and fluffy – this is the secret to that perfect texture!
- Add sugar gradually: Mix in 3 cups of powdered sugar on low speed until incorporated. Then add the vanilla and beat for about a minute. Pro tip: cover your mixer with a towel to avoid a sugar cloud!
- Whip it good: Add the remaining sugar and milk, then crank up the speed to medium-high. Beat for 3-5 minutes until it’s light as air. If it’s too stiff, add milk a teaspoon at a time.
- Color time: Remove about ¼ cup of frosting and mix in cocoa powder for the trunk. Then tint the rest green with gel food coloring – start with a little, you can always add more!
Troubleshooting tip: If your frosting gets too soft, pop it in the fridge for 15 minutes. Too stiff? A tiny splash of milk will loosen it up. Want more expert tips? Check out my baking secrets guide!
Assembling the Christmas Tree
Now for the fun part – bringing your edible tree to life!
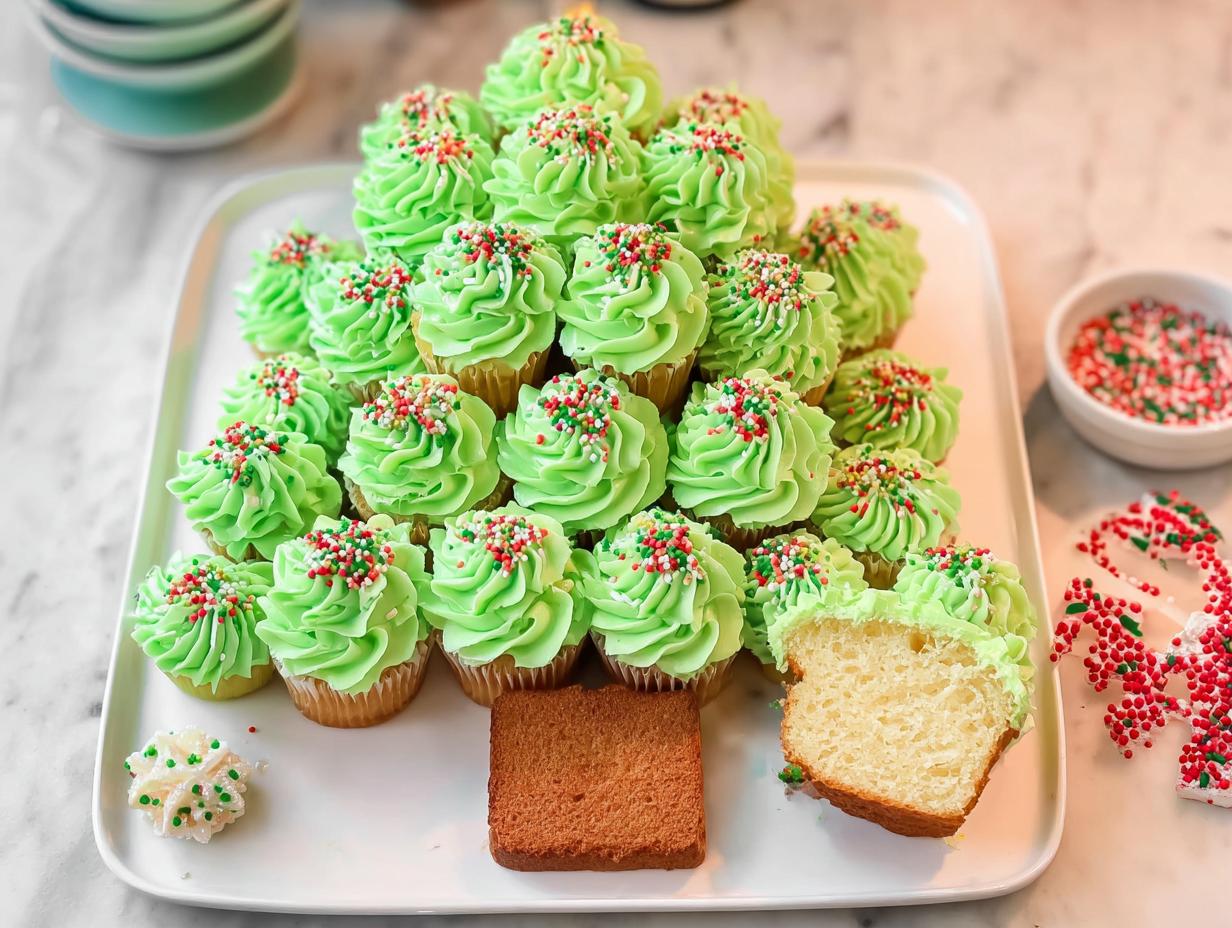
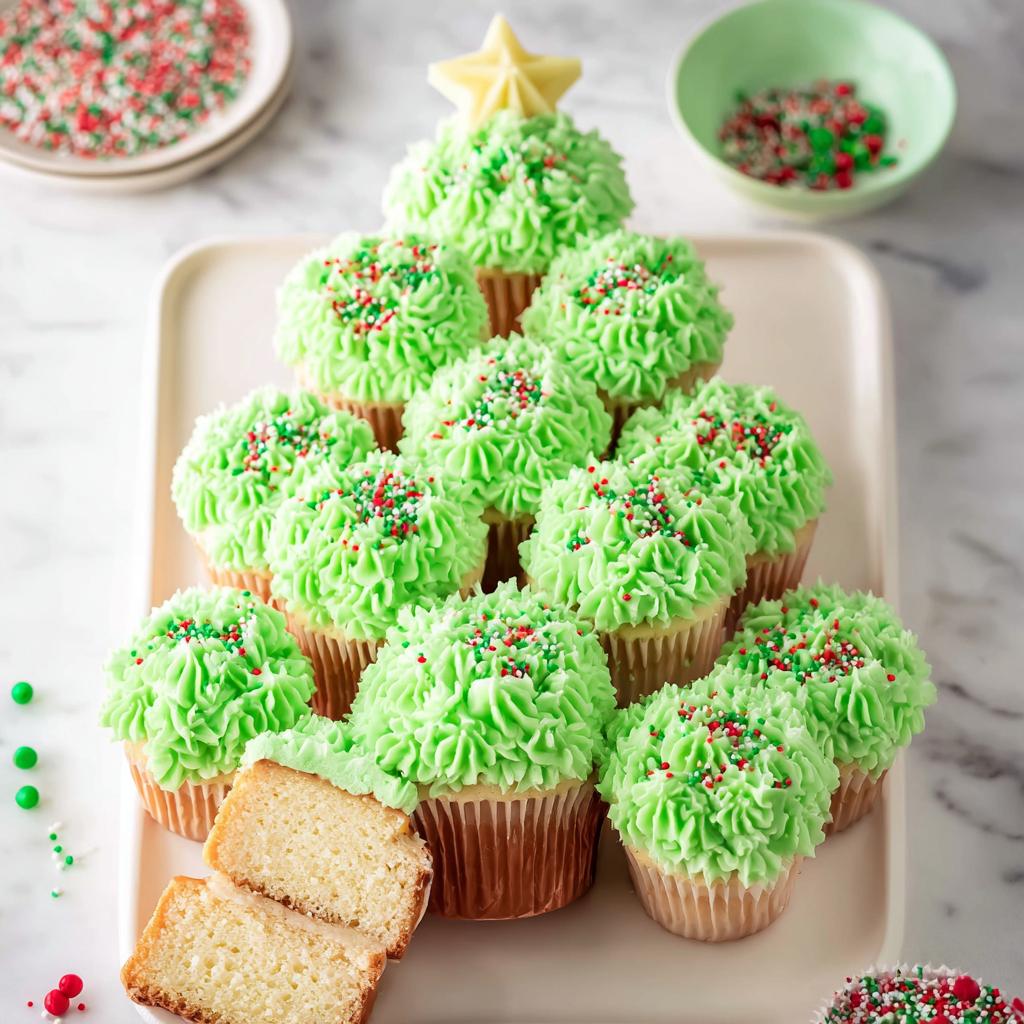
- Arrange your base: On a large platter or board, place 2 cupcakes at the bottom for the trunk. Then build upward in rows: 3 cupcakes, then 4, then 5, then 6, and finally 4 at the very top to form the tree point.
- Frost the base: Spread a thin layer of green frosting over all cupcakes except the trunk ones. Use an angled spatula to smooth it, making them look like one continuous surface. Don’t worry about perfection here!
- Create bark: Spread the cocoa frosting on the trunk cupcakes. Then take a fork and drag it downward to create that rough tree bark texture. So easy but so effective!
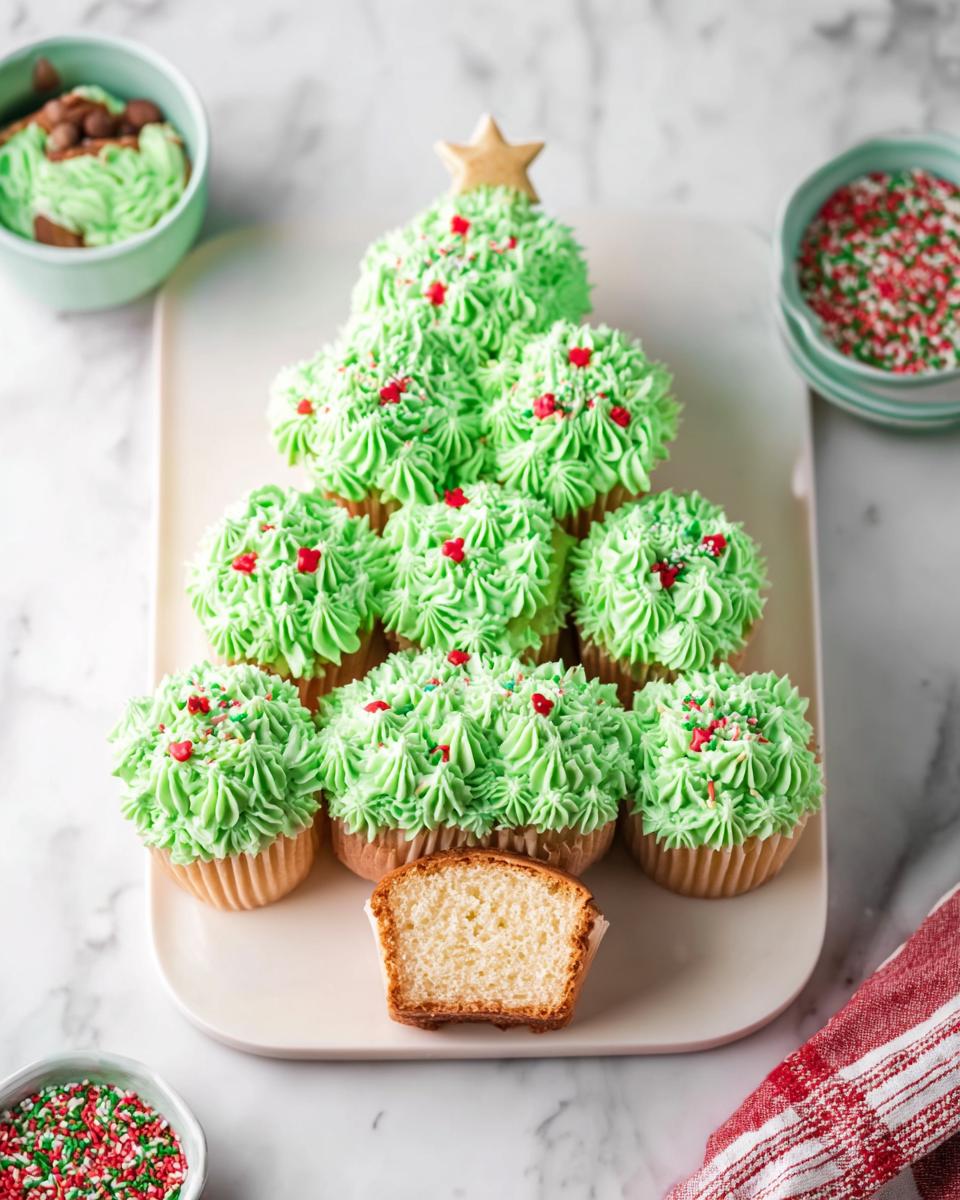
- Pipe the magic: Fill your piping bag with remaining green frosting. Starting at the top, pipe large stars all over, covering completely. Overlap slightly for that lush tree look. For extra sparkle, check out these holiday baking ideas!
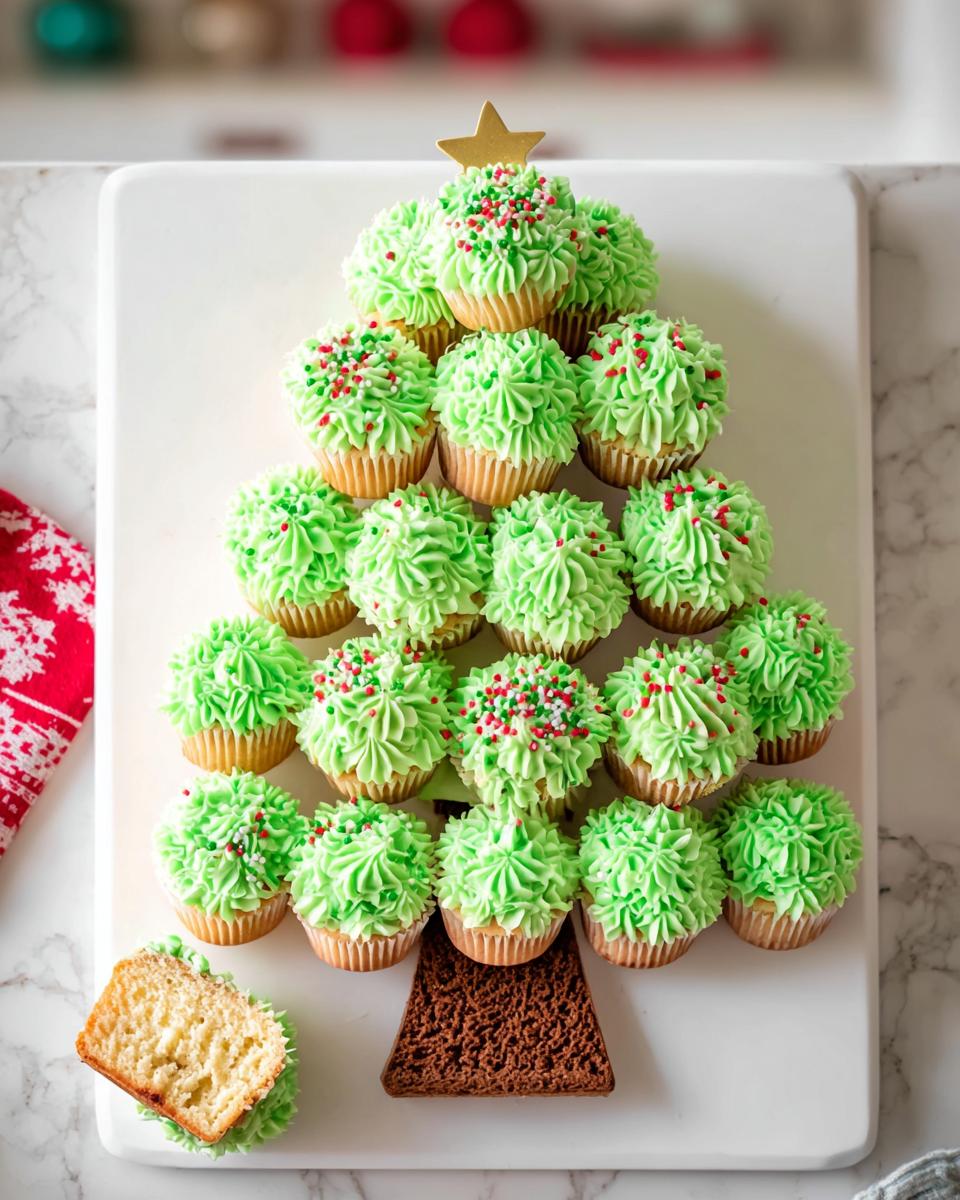
- Final touches: Now the best part – sprinkles! Scatter them like ornaments. I like to do a few gold ones at the top like a star.
And voila! You’ve just created the most festive dessert on the block. Pop it in the fridge for 30 minutes to set, then watch the smiles appear when you bring it out!
Tips for Perfecting Your Christmas Tree Cupcake Platter
After making this Christmas Tree Cupcake Platter more times than I can count (and yes, with plenty of “learning experiences” along the way!), I’ve gathered some foolproof tricks to make yours absolutely perfect. These are the little secrets that take your platter from cute to absolutely showstopping:
- Chill before decorating: Pop those baked cupcakes in the fridge for 20 minutes before frosting – it prevents crumbs from mixing into your beautiful green icing. Cold cupcakes = smooth canvas!
- Gel food coloring is your BFF: Trust me, the liquid stuff just waters down your frosting. Gel gives you that vibrant Christmas tree green without changing the texture. Start with a toothpick dab and add more as needed.
- Sprinkle strategically: Hold your sprinkles up high and let them rain down gently – this gives that natural “ornaments” look. For the trunk, I like to press some brown sprinkles into the frosting with my fingers to mimic bark texture.
- Pipe with confidence: When doing your star piping, don’t overthink it! Start at the top with firm pressure, then release as you pull away. Imperfections just make it look more like a real tree.
- The toothpick trick: If your frosting starts to get too soft while piping, stick the whole piping bag in the freezer for 5 minutes. Works like a charm!
Remember – even if your tree leans a little or your stars aren’t perfectly uniform, that’s part of the charm! Some of my favorite platters have been the slightly wonky ones that clearly had little helpers involved. The most important ingredient is always the holiday spirit you bake into it.
Variations for Your Christmas Tree Cupcake Platter
Oh, the possibilities are endless with this Christmas Tree Cupcake Platter! Once you’ve mastered the basic version, it’s so fun to play around with different flavors and decorations. Here are some of my favorite twists that always get rave reviews:
- Peppermint perfection: Swap the vanilla extract in the frosting for peppermint and add crushed candy canes on top – it’s like Christmas in every bite!
- Chocolate lover’s dream: Use chocolate cupcakes instead of vanilla, and mix cocoa powder into all the frosting for an “evergreen” that’s rich and decadent.
- Sparkle and shine: Mix edible glitter into your green frosting or dust it lightly over the finished tree – instant holiday magic!
- Fruitcake fans: Add chopped candied fruit and nuts to the cupcake batter for a traditional holiday flavor with a fun new look.
- Snowy wonderland: Pipe white frosting “snow” along the edges of your platter and dust the whole tree with powdered sugar “snowfall.”
The best part? You can mix and match these ideas to create your own signature version. Last year I did half peppermint and half chocolate – let’s just say there weren’t any leftovers!
Serving and Storing Your Christmas Tree Cupcake Platter
Okay, let’s talk about showing off (and saving!) your gorgeous Christmas Tree Cupcake Platter! I always put mine right in the center of the dessert table – it’s practically a decoration that happens to be edible. If you’ve got one of those fancy cake stands, even better! Just make sure it’s sturdy enough to hold all those cupcakes without tipping (learned that one the hard way at my sister’s holiday party…oops!).
Now, here’s my golden rule: refrigerate it until about 30 minutes before serving. The frosting stays picture-perfect, but the cupcakes won’t be rock-hard when your guests bite in. As for leftovers? They’ll keep happily in the fridge for 3-4 days in an airtight container. Though between you and me – in my house, they never last that long!
Nutritional Information
Just a quick note about the numbers – these nutrition facts are estimates based on standard ingredients. Your actual counts might vary depending on the specific brands you use or if you make any substitutions (like that extra handful of sprinkles we all sneak in!). One cupcake from this Christmas Tree Cupcake Platter typically contains about 400 calories, with the full breakdown shown below. But let’s be real – during the holidays, we’re counting smiles, not calories!
Frequently Asked Questions
Over the years, I’ve gotten so many questions about my Christmas Tree Cupcake Platter – and I love sharing all my little tricks! Here are the ones that come up most often:
Can I use store-bought cupcakes for this platter?
Absolutely! While I adore homemade (my homemade treats obsession is no secret), good-quality store-bought cupcakes work beautifully in a pinch. Just make sure they’re completely cooled before frosting. Pro tip: give them a quick trim if the domes are too rounded – it helps the tree shape stay neat.
How far in advance can I assemble this Christmas dessert?
You can frost and assemble your Christmas Tree Cupcake Platter up to 24 hours ahead – just keep it refrigerated. The sprinkles are best added within a few hours of serving though, so they stay nice and crisp. If you need to prep further ahead, bake and freeze the cupcakes, then frost the day-of.
What’s the best way to transport this holiday treat?
I always use a sturdy baking sheet or cake carrier with a non-slip mat underneath. Chill it thoroughly first so the frosting firms up, then cover loosely with plastic wrap or a cake dome. For extra security, you can place toothpicks around the edges to keep the wrap from touching the frosting.
Can I make this with gluten-free or vegan cupcakes?
You bet! The beauty of this Christmas Tree Cupcake Platter is how adaptable it is. Just use your favorite GF or vegan cupcake recipe (make sure they’re sturdy enough to hold frosting), and swap the butter in the frosting for vegan butter or extra shortening. The decorating process stays exactly the same!
Christmas Tree Cupcake Platter
Equipment
- Stand mixer with paddle attachment
- Piping bag with large star tip
- Angled spatula
Ingredients
For the Cupcakes
- 24 vanilla cupcakes (cooked)
- Sprinkles
For the Frosting
- 3/4 cup solid vegetable shortening
- 3/4 cup butter or margarine, softened
- 2 tsp clear vanilla extract
- 6 cups confectioners’ sugar, sifted
- 2 tbsp milk
- Green gel food coloring
- 2-3 tsp cocoa powder
Instructions
- Prepare a batch of at least 24 cupcakes and cool completely.
- Using the paddle attachment, whip the butter and vegetable shortening for 5-7 minutes, scraping down the bowl occasionally, beating until the butter is very fluffy.
- Add 3 cups of powdered sugar and mix on low speed until incorporated into the butter then add the vanilla extract and mix to combine. Beat for about 60 seconds.
- Add an additional 2 cups of powdered sugar and beat on low speed until sugar is incorporated. Increase speed to medium-high and beat for 3 minutes.
- Add the last 1 cup powdered sugar along with milk. Beat on low until the ingredients start to mix together.
- Increase speed to medium-high and beat for another 3-5 minutes to whip additional air into the frosting.
- Separate out ¼ cup of the finished frosting. Mix in 2-3 teaspoons cocoa powder until well combined. You may need to add 1 teaspoon milk to help incorporate the cocoa powder.
- Dye the rest of your remaining frosting green.
- Set up your cupcakes in the shape of a tree with 2 cupcakes for the trunk. For the cupcakes you’ll be frosting with green frosting, place a small dollop of frosting on each cupcake and spread evenly with an angled spatula spreading the icing across all the cupcakes to make them look like one cake.
- For the bottom two cupcakes, spread the brown frosting evenly across. Then use a fork to create downward strokes to create a rough texture to give the look of tree trunks.
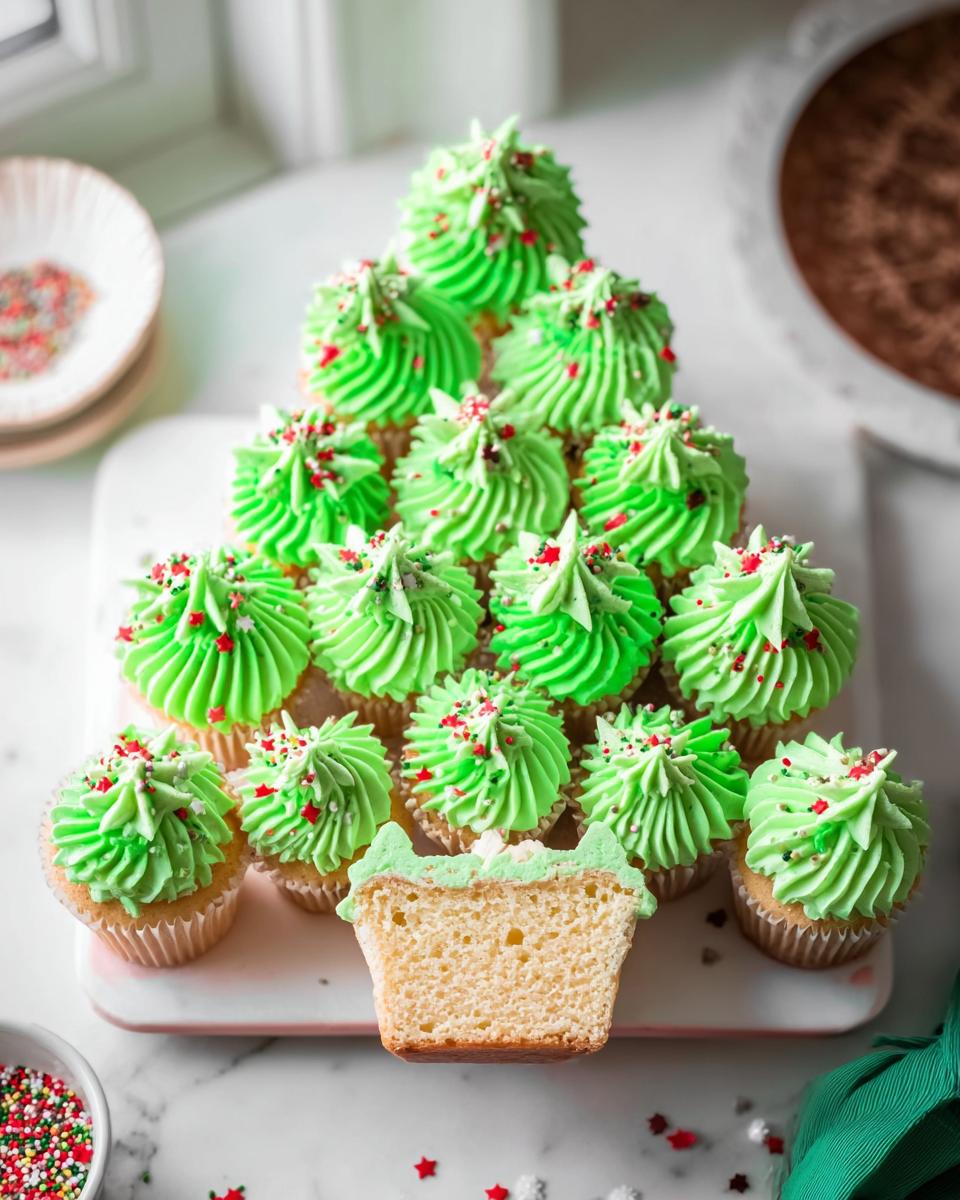
- Place the remaining green frosting into a piping bag. Using a large star tip, pipe large stars over all of the cupcakes making sure to fill in all the holes.
- Top with Christmas Sprinkles to look like ornaments.
- Refrigerate until ready to serve. Allow your guests to pull apart the cupcakes to enjoy.