I’ll never forget the first time I made Christmas Tree Brownies with my niece. She was five, covered in flour, and absolutely convinced that sprinkles were edible fairy dust. That messy, magical afternoon turned into our yearly tradition—because what’s more festive than rich, fudgy brownies shaped like Christmas trees, dripping with green buttercream and twinkling with sprinkles? These aren’t just desserts; they’re tiny edible celebrations. The chocolate base is dense and indulgent (I sneak extra chocolate chips in, shhh), but the real joy comes from decorating. Kids love pressing candy canes into the bases as trunks, and adults? Well, let’s just say piping buttercream “garlands” becomes weirdly competitive in my family. Every December, our kitchen smells like melted chocolate and peppermint, and these brownies—with their powdered sugar “snow”—always disappear faster than Santa’s cookies.
Why You’ll Love These Christmas Tree Brownies
Trust me, these aren’t just brownies—they’re little edible Christmas miracles! Here’s why they’ve become my go-to holiday treat:
- So easy even Santa could make them: The batter comes together in one bowl (less cleanup!), and decorating is as simple as piping zigzags and tossing on sprinkles. No fancy skills needed!
- Instant holiday cheer: Arrive at a party with these, and you’ll be the MVP. The festive shapes and colors scream “Christmas” louder than Mariah Carey.
- Kid (and adult!) magnet: My nieces fight over who gets to add the “star” (a yellow M&M) to the treetops. Pro tip: Let guests decorate their own—it’s half the fun!
- Chocolate overload: Fudgy centers, melty chips, and that crackly top? Yeah, these disappear faster than ghost brownies on Halloween.
Bonus: They freeze beautifully! I always stash a few undecorated ones for last-minute cookie-exchange emergencies. 🎄
Ingredients for Christmas Tree Brownies
Gathering the right ingredients is half the magic! Here’s what you’ll need for both the fudgy brownie base and those whimsical decorations that’ll have everyone saying, “Oh Christmas tree, oh Christmas tree!” Trust me, springing for good-quality chocolate makes all the difference—Grandma Bennett always swore by it.
For the Brownies
- 200g unsalted butter, diced – Cold butter? No thanks! Let it soften slightly so it melts smoothly with the chocolate.
- 200g dark chocolate, chopped – Use 70% cocoa for that rich depth, or go sweeter if you prefer (but don’t tell my brownie-purist friends).
- 4 medium eggs (or 3 large eggs) – Room temp eggs whip up fluffier! If you forget, just dunk them in warm water for 5 minutes.
- 275g caster sugar – That fine texture dissolves like snowflakes!
- 100g plain flour – Spoon and level it—don’t scoop straight from the bag or you’ll get dense brownies.
- 50g cocoa powder – Dutch-processed gives the deepest color.
- 100g milk chocolate chips + 100g white chocolate chips – Because more chocolate is always merrier.
For the Decorations
- 10 candy canes – Snapped in half to make adorable tree trunks!
- 100g unsalted butter, softened – Seriously soft—poke it and your finger should sink right in.
- 200g icing sugar – Sift it unless you enjoy lumpy frosting surprises.
- Green food coloring – Gel works best for vibrant frosting that won’t go weepy.
- Sprinkles & sweets – I raid the holiday aisle for mini stars and snowflakes. Yellow M&Ms make perfect tree toppers!
Pro tip: If you’re out of candy canes, pretzel sticks work in a pinch—just dab them with melted chocolate so they stick!
Equipment You’ll Need for Christmas Tree Brownies
Don’t worry—you don’t need fancy gadgets for these festive treats! Just grab these trusty tools from your kitchen (or borrow from your baking-obsessed neighbor like I sometimes do). Here’s your holiday baking toolkit:
- 9-inch square baking tray – The perfect size for thick, fudgy brownies you can slice into generous tree shapes.
- Electric whisk or stand mixer – For whipping those eggs and sugar into fluffy clouds. Hand whisk works too if you’ve got strong arms!
- Piping bag with 2D closed star tip – Creates those perfect zigzag “branches.” No piping bag? A ziplock with the corner snipped does the trick!
See? Nothing too crazy—just simple tools for edible Christmas magic!
How to Make Christmas Tree Brownies
Ready to turn your kitchen into Santa’s bakery? Making these Christmas Tree Brownies is like wrapping presents—it starts with something delicious inside (hello, fudgy brownies!) and ends with festive flair that makes everyone smile. Follow these steps to holiday dessert glory!
Step 1: Prepare the Brownie Batter
First, let’s make that dreamy brownie base. Melt your butter and dark chocolate together—I do this in a microwave-safe bowl in 30-second bursts, stirring between each until it’s velvety smooth. Critical step! Let it cool to room temperature (about 15 minutes) or you’ll scramble your eggs later—yikes!
While that cools, grab your electric mixer and whip the eggs and sugar until they’re pale, thick, and leave a ribbon trail when you lift the beaters—think fluffy cloud meets mousse. Now gently fold in that cooled chocolate mixture like you’re tucking a baby reindeer into bed (translation: gently!). Sift in your flour and cocoa powder, add those chocolate chips, and—boom—you’ve got batter worthy of Mrs. Claus’s praise.
Step 2: Bake and Cut into Trees
Pour that gorgeous batter into your lined pan and bake at 180°C (160°C Fan) for 25-30 minutes. You’ll know they’re done when the edges pull away slightly and the center has that perfect slight wobble—think brownie yoga pose. Let them cool completely (torture, I know!).
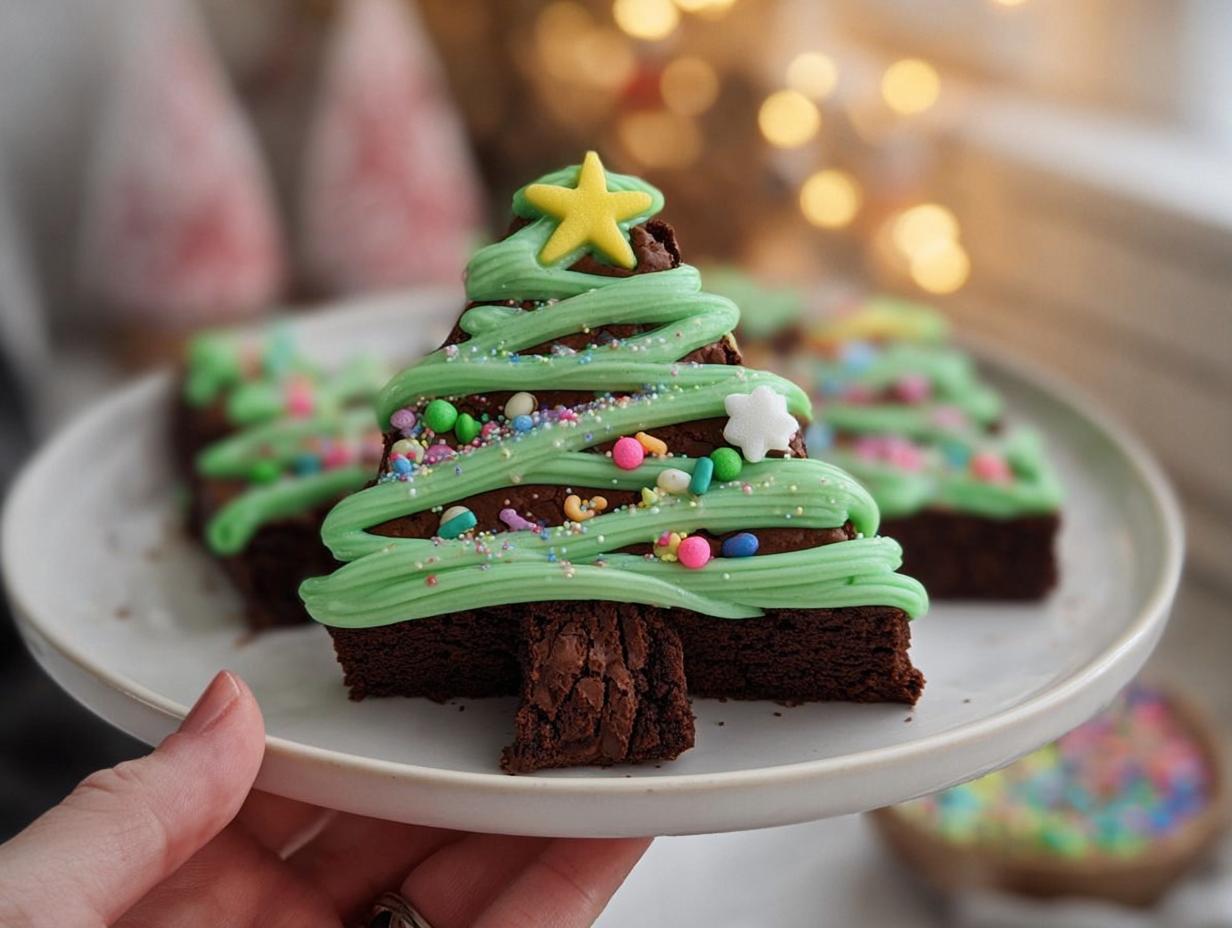
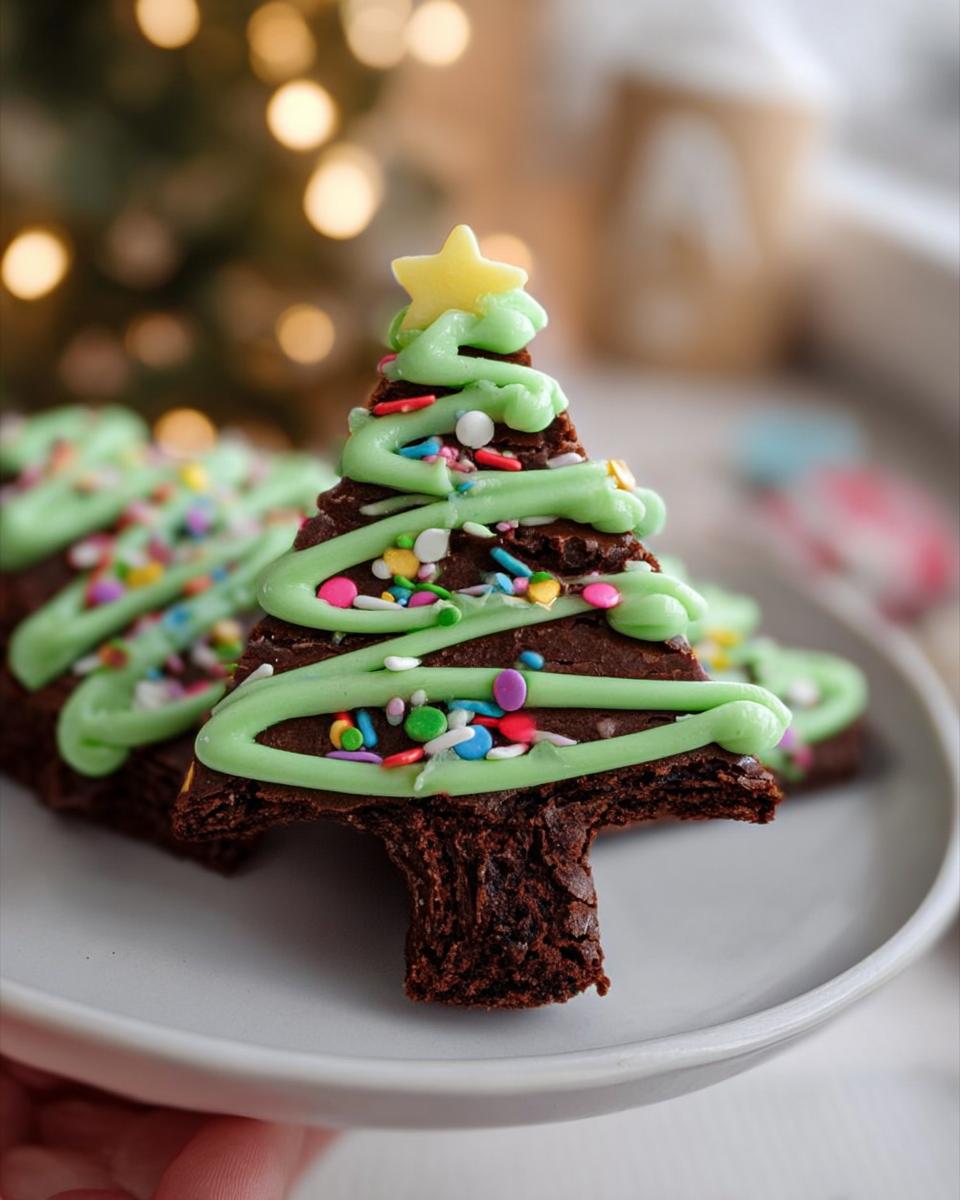
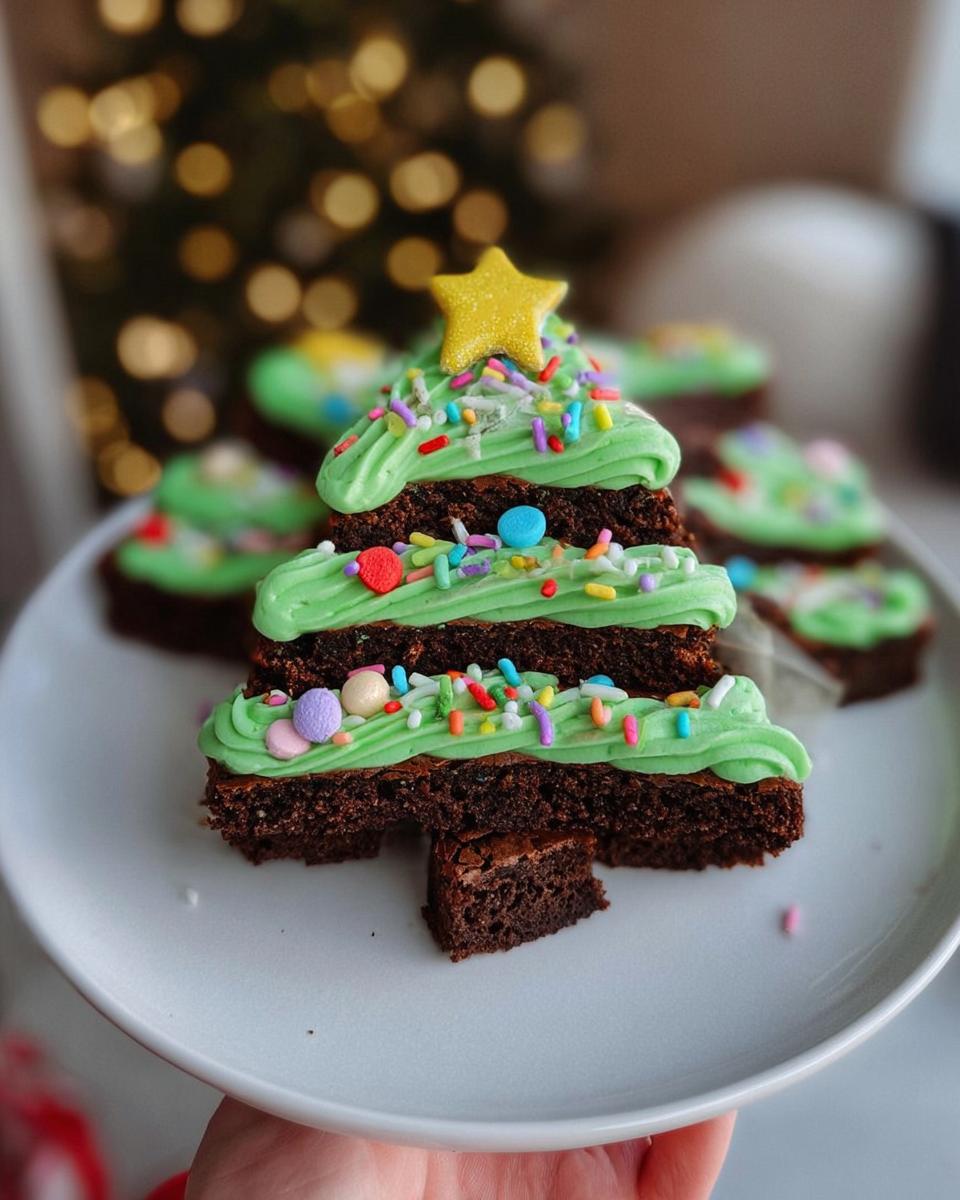
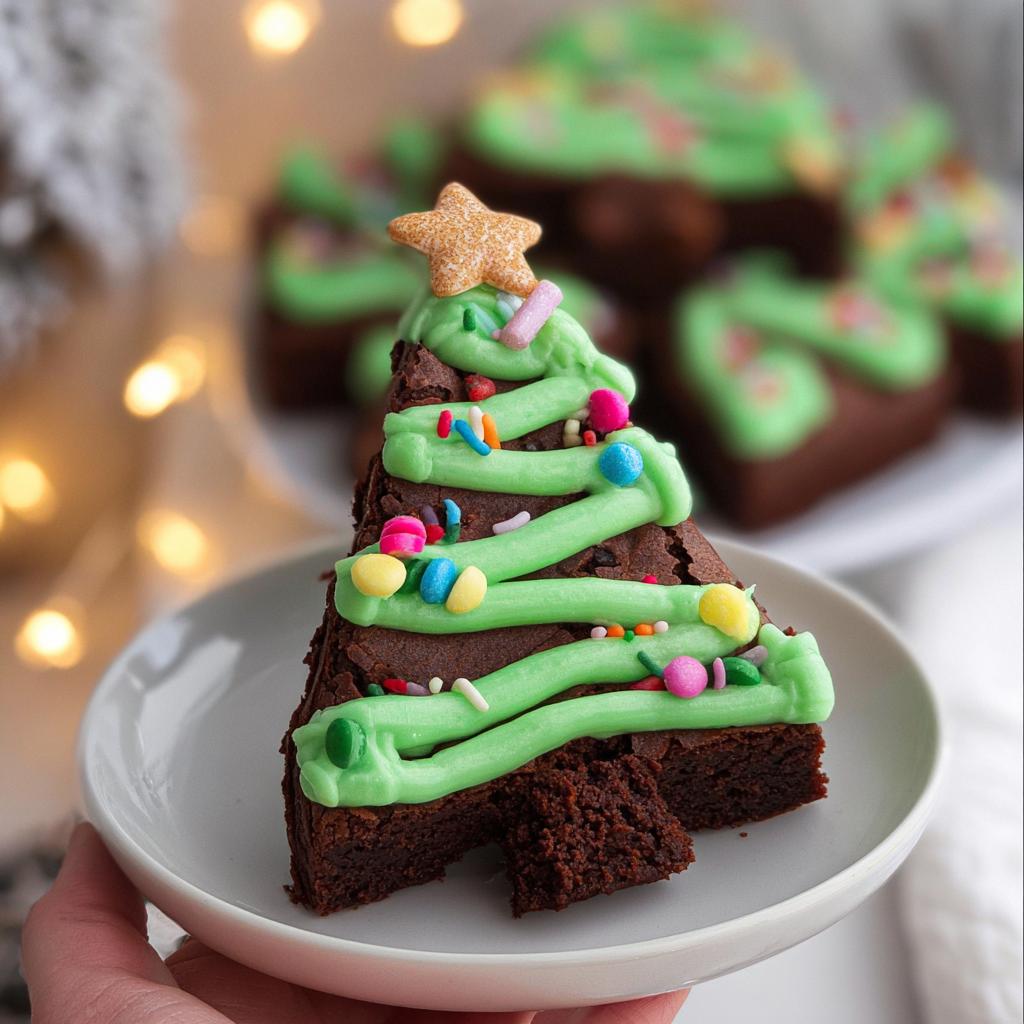
Time for the fun part! Cut the brownies diagonally from corner to corner to create big triangles. I cheat by using a cookie cutter, but a sharp knife works too. Want identical twins? Trace a triangle stencil first!
Step 3: Decorate Your Christmas Tree Brownies
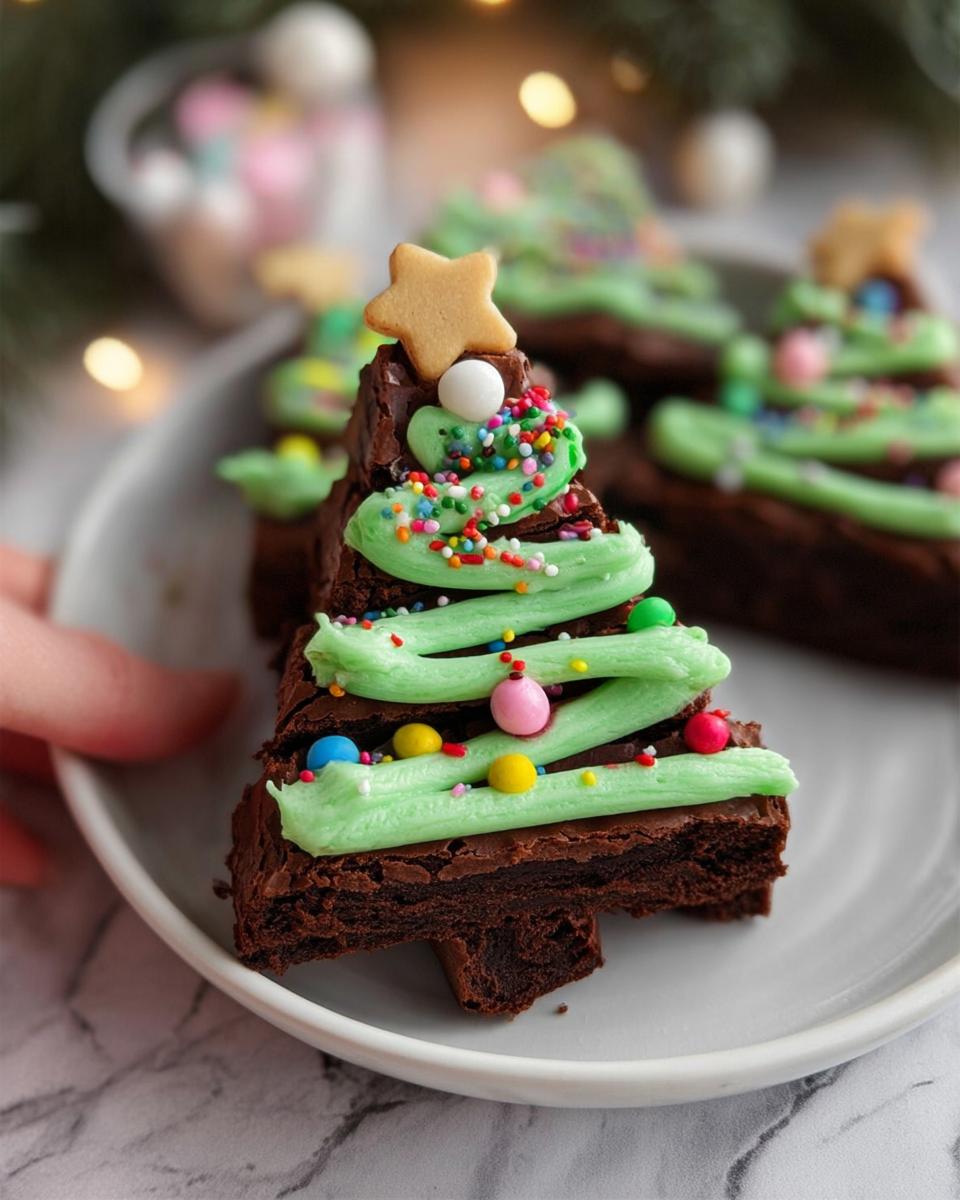
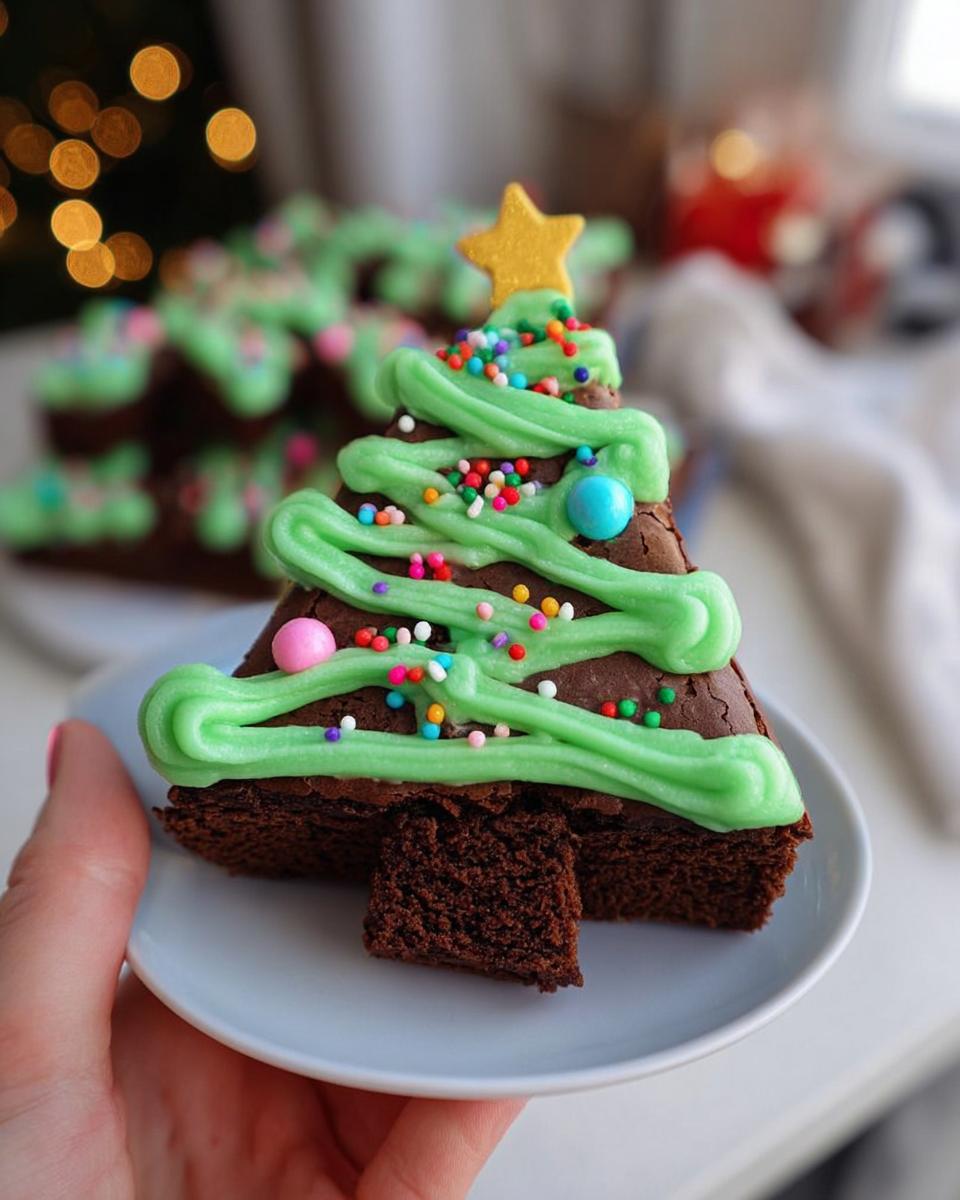
Now unleash your inner elf! First, stick half a candy cane into each brownie’s wide end—instant tree trunk. For the buttercream, beat softened butter and icing sugar until fluffy, then add green gel food coloring (pro tip: gel won’t water down your frosting). Pipe zigzag branches with your star tip—go top to bottom like tinsel!
Here’s where kids go wild: toss on sprinkles like ornaments, press a yellow M&M “star” at the top, and dust with powdered sugar “snow.” Want extra pizazz like my turtle brownies? Drizzle melted white chocolate garlands!
Pro tip: Decorating’s easier if brownies are chilled—pop ‘em in the fridge for 10 minutes first. Now stand back and admire your edible winter wonderland!
Tips for Perfect Christmas Tree Brownies
After years of making these holiday treats (and yes, a few frosting disasters), I’ve learned a few secrets to Christmas Tree Brownie success. Here are my must-know tips:
- Chill before cutting: Pop baked brownies in the freezer for 15 minutes—cold brownies won’t crumble when you slice them into perfect trees.
- Go gel! Liquid food coloring makes frosting runny. Gel coloring gives that vibrant Grinch-green without turning your buttercream into soup.
- Snow day magic: A light dusting of powdered sugar right before serving looks just like fresh snowfall on your edible evergreens.
- Candy cane hack: If candy canes crack when inserting, dip the broken end in melted chocolate first—it acts like edible glue!
These tiny tweaks make BIG differences. Now go forth and spread edible holiday cheer!
FAQs About Christmas Tree Brownies
Got questions? I’ve got answers! Here are the most common things readers ask me about these festive treats—plus all my sneaky tricks for stress-free holiday baking. (Pro tip: The best bakers always read the FAQ section first!)
Can I use boxed brownie mix instead of homemade?
Sure, in a pinch! We’ve all been there during the holiday rush. But—and this is a big but—homemade brownies taste richer and hold their shape better when cut into trees. If you go the boxed route, pick a “fudge-style” mix and underbake it slightly so your trees stay soft. Just don’t tell Grandma Bennett I suggested this shortcut!
How should I store leftover Christmas Tree Brownies?
Pop them in an airtight container with parchment between layers (so the frosting doesn’t smush) for up to 3 days at room temp. The candy canes might soften a tad, but they’ll still taste delicious. For decorated ones with fresh buttercream, I tuck them in the fridge—just let them sit out 10 minutes before serving so the frosting relaxes.
Can I freeze these ahead of time?
Absolutely! Freeze undecorated brownies (wrapped tightly in plastic + foil) for up to a month. Thaw overnight in the fridge, then decorate as usual. I always stash a batch in December—that way, when surprise guests arrive, I can whip up “fresh” trees in minutes. Genius, right?
Nutritional Information
Heads up, bakers! Nutritional values for these Christmas Tree Brownies are estimates (because who stops at just one?). Exact counts vary based on your ingredients—especially those extra handfuls of chocolate chips you swore you wouldn’t add. 😉
More Holiday Dessert Ideas
If you loved making these Christmas Tree Brownies, wait until you try these other festive treats that always steal the show at my holiday parties!
- Patriotic Crinkle Cookies – These chewy, powdered sugar-dusted cookies are perfect for Fourth of July, but I make them year-round with seasonal colors (red and green for Christmas, pastels for Easter!).
- Pumpkin Patch Dirt Cups – Kids go nuts for these adorable chocolate pudding cups topped with crushed Oreo “dirt” and pumpkin-shaped candies—so easy even tiny hands can help assemble them.
Pro tip: All three recipes use similar piping and decorating techniques, so once you’ve mastered Christmas trees, you’re ready to tackle any holiday!
Christmas Tree Brownies
Equipment
- 9-inch square baking tray
- Electric whisk or stand mixer
- Piping bag with 2D closed star tip
Ingredients
For the Brownies
- 200 g unsalted butter
- 200 g dark chocolate
- 4 medium eggs or 3 large eggs
- 275 g caster sugar
- 100 g plain flour
- 50 g cocoa powder
- 100 g milk chocolate chips
- 100 g white chocolate chips
For the Decorations
- 10 candy canes
- 100 g unsalted butter
- 200 g icing sugar
- green food colouring
- sprinkles
- sweets such as M&Ms for decoration
Instructions
- Preheat your oven to 180°C (160°C Fan) and line a 9-inch square baking tray with parchment paper.
- Melt the butter and dark chocolate in a heatproof bowl over a pan of boiling water or in the microwave for 1-2 minutes. Let it cool to room temperature.
- Whisk the eggs and caster sugar with an electric mixer until pale, mousse-like, and doubled in volume. The mixture should leave a trail when the whisk is lifted.
- Fold the cooled chocolate mixture into the egg mixture carefully to avoid losing air.
- Sift the cocoa powder and plain flour over the mixture and fold gently until combined. Stir in the chocolate chips.
- Pour the batter into the prepared tin and bake for 25-30 minutes. Let it cool completely in the tin.
- Cut the brownies into tree shapes by halving the tray and cutting triangles. Insert candy canes into the base of each brownie.
- Cream the butter and icing sugar to make buttercream. Add green food colouring until the desired shade is reached.
- Pipe zigzag lines of buttercream onto the brownies using a piping bag. Decorate with sprinkles and sweets, adding a yellow star (like an M&M) at the top.