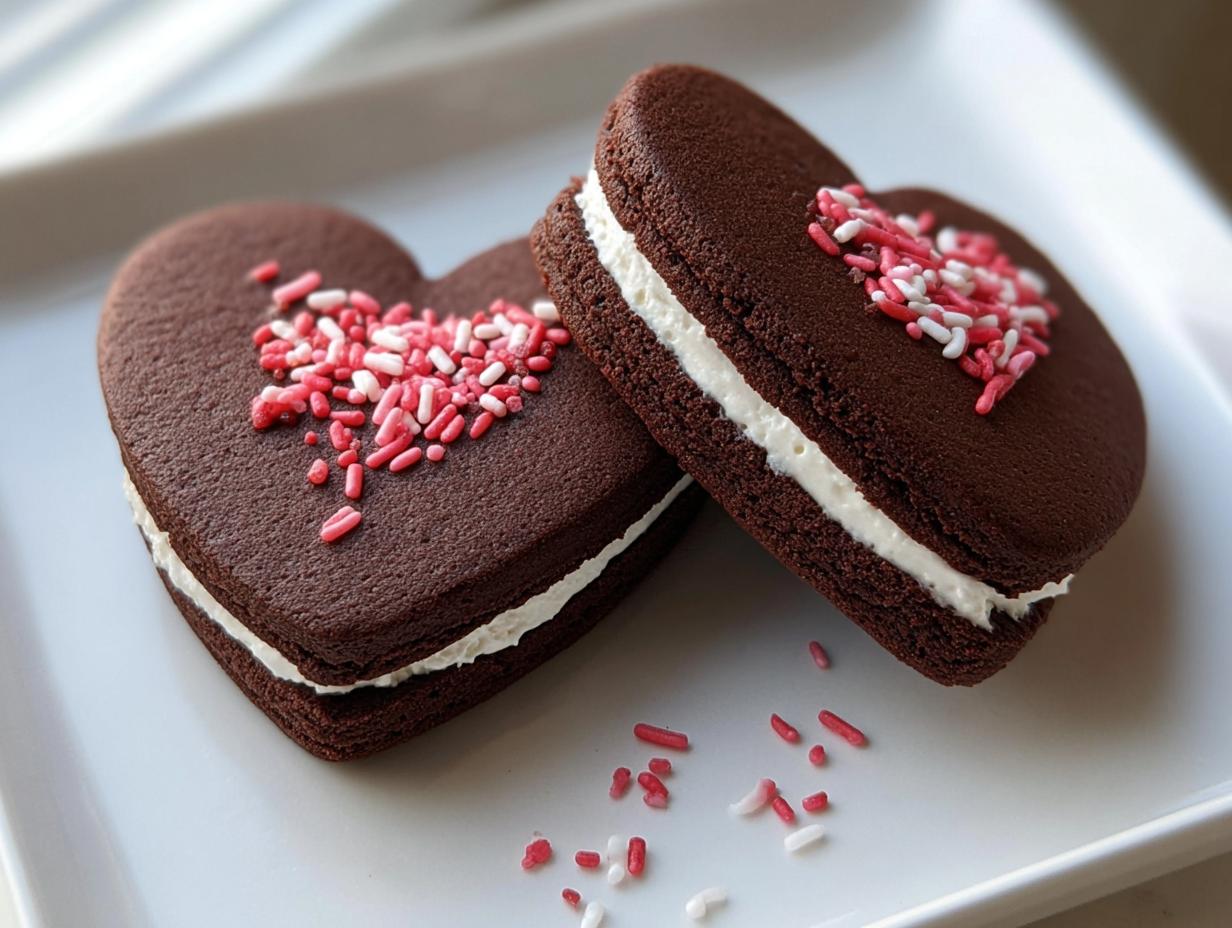
Oh, Valentine’s Day baking! It just feels like it needs a little extra magic, right? Forget those overly fussy, crumbling decorations that look better on Pinterest than on your plate. We’re making something truly decadent this year. These Chocolate Valentine Sandwich Cookies are exactly what you need—a deep, rich chocolate wafer holding back a cloud of sweet vanilla cream.
When I was testing these out for the first time, I was obsessed with getting those clean, sharp heart shapes. You know, the ones that look like they came straight from a fancy bakery? Trust me, achieving those beautiful shapes relies on one small, simple step that I’m going to share with you. If you’re looking for rich flavor that echoes our chocolate fudge cookies but in a sandwich form, this is it! They are melt-in-your-mouth wonderful and look absolutely stunning stacked up. If you love deep chocolate flavor, you’re going to want to save this recipe immediately!
Why You Will Love These Chocolate Valentine Sandwich Cookies
I know we all have loads of holiday baking projects, but you absolutely have to save room for these. They just hit different, especially when you want something really indulgent for your sweetheart or just need a major chocolate fix. Here’s why these have become my go-to for all things February.
- Intense Chocolate Flavor: We use real cocoa powder here, so these aren’t wimpy chocolate cookies; they are decadent and dark. They provide the perfect contrast to the creamy center.
- Bakery-Perfect Presentation: When you nail the chilling time, you get those gorgeous shapes! They look so professional stacked up on a platter, perfect for your Valentine’s Day Sugar Cookies platter.
- That Perfect Texture Contrast: You get the slight snap of the rich chocolate wafer followed by the soft, pillowy vanilla buttercream filling. Seriously, the texture contrast is everything.
- Surprisingly Simple Filling: The vanilla cream filling whips up in minutes, and it tastes so much better than anything you’d get out of a can. It’s pure, fluffy butter and vanilla goodness.
- Great for Gifting: These make amazing Valentines Day Cookie Sets. They travel well (as long as they aren’t too hot!) and everyone loves a sandwich cookie.
- They Taste Better the Next Day: I love that these Chocolate Valentine Sandwich Cookies aren’t best eaten right away. The moisture from the filling starts to soak into the wafer perfectly overnight—bonus for Valentine’s Day Treats prep!
Essential Ingredients for Perfect Chocolate Valentine Sandwich Cookies
Okay, let’s talk about what goes into these beauties. Because we are aiming for that bakery quality, using good ingredients and making sure they are at the right temperature is super important. Seriously, don’t try to pull cold butter out of the fridge and think you’re going to cream it well—it just won’t work! Get your butter softened nicely for both the wafers and the filling.
When I lay out the ingredients, I always check my pantry first, of course. For the absolute best deep color and flavor in our wafers, make sure your cocoa powder is fresh! A stale cocoa powder is just sad. I always look to brands like King Arthur Baking when I need high-quality staples.
For the Chocolate Cookie Dough
Measuring flour is crucial here, so use the spoon-and-level method if you can! This recipe makes about 24 individual cookie wafers, which gets us exactly 12 sweet sandwich cookies.
- 2.5 cups all-purpose flour
- 0.5 cup unsweetened cocoa powder (make sure this is sifted!)
- 1 tsp baking powder
- 0.5 tsp salt
- 1 cup unsalted butter, softened (very soft, but not melty!)
- 1 cup granulated sugar
- 1 large egg
- 1 tsp vanilla extract
For the Vanilla Cream Filling
This filling is what brings the sandwich together, literally! We want it fluffy, so give the butter a good ten minutes of creaming before you start adding the sugar.
- 0.5 cup unsalted butter, softened
- 1.5 cups powdered sugar (you might need a tiny bit more or less for the right consistency)
- 1 tsp vanilla extract
- 1 to 2 tablespoons milk (start with one!)
Step-by-Step Instructions for Chocolate Valentine Sandwich Cookies
The process is super straightforward, but the secret to making these look gourmet—not homemade and messy—is all in the timing. If you follow these steps, especially getting that dough chilled properly, you’ll be amazed at how easy it is to nail these stunning Chocolate Valentine Sandwich Cookies. Preheating your oven to 350°F (175°C) while you mix is always step one in my book!
Preparing the Chocolate Cookie Dough
First up, we handle the dry stuff. In a medium bowl, just whisk together your flour, that beautiful cocoa powder, baking powder, and salt. Whisking them ensures everything is distributed evenly, so you don’t end up with little pockets of baking powder later on. It’s good practice for almost all our baking!
Now for the wet ingredients! In your stand mixer or with a hand mixer, cream that softened butter and the granulated sugar until it gets light and fluffy. I like to stop every minute or so just to scrape down the sides—don’t skip this! Once it looks pale, you add your egg and vanilla and mix until it’s totally combined.
Finally, we bring the two bowls together. I mix the dry ingredients into the wet mixture gradually. What I mean by gradually is: add about a third of the dry, mix just until it disappears, then repeat. If you dump it all in at once, you risk overmixing, which makes for tough, chewy wafers instead of crisp ones. Stop mixing the moment you see the last streaks of flour disappear. You’ll notice the dough looks a little crumbly but comes together when squeezed!
Chilling and Cutting the Chocolate Valentine Sandwich Cookies
This is the non-negotiable part, my friends! The dough needs a good rest. Wrap that chocolate dough up tightly in plastic wrap and let it chill in the fridge for 30 minutes. This 30-minute window is vital because it firms up the butter, which stops the cookies from spreading into puddles when they bake! We want those perfect, sharp edges for our final Valentine’s Day Treats.
Once chilled, dust your counter lightly with flour or, even better, use parchment paper. Roll the dough out evenly to about 1/4 inch thickness. Then, grab those heart-shaped cutters and press firmly. I suggest using smaller cutters because once assembled, the filling makes them look much more substantial. Gather up the scraps, give the dough a quick re-chill if it gets too soft, and cut the rest.
Baking and Cooling the Cookie Bases
Place your cut hearts onto baking sheets lined with parchment paper—this helps prevent sticking, too! Pop them into the preheated 350°F (175°C) oven. They only need about 10 to 12 minutes. You’ll know they are ready when you can gently touch the edge and they feel set. Seriously, don’t overbake them; they should still look deep brown, not burnt!
Let them cool on the pan for just about five minutes before transferring them carefully to a wire rack to cool completely. And I mean completely. If you try to fill even slightly warm wafers, that lovely vanilla cream filling will melt into a sticky mess, and trust me, you don’t want that heartbreak!
Making the Vanilla Cream Filling
While those chocolate cookies are cooling down, let’s make the star contrast: the vanilla cream! Again, you need softened butter—this is the base for everything good here. Beat that butter until it’s really soft and creamy. Then, slowly stream in your powdered sugar one cup at a time, mixing on low until it’s incorporated, then cranking up the speed.
Add your vanilla extract. Now, for the milk: start with just one tablespoon. You want this filling stiff enough to hold its shape when sandwiched. If it looks too thick and won’t whip up light and fluffy, add that second tablespoon, but be careful not to thin it out too much! You’re aiming for a stiff buttercream that tastes straight out of a bakery.
Assembling Your Chocolate Valentine Sandwich Cookies
This is the fun part! Lay out half of your cooled chocolate wafers, flat side up. Take a small amount of vanilla filling—about a teaspoon is usually perfect—and spread it evenly over the flat side of the cookie. You can use a small offset spatula or even the back of a teaspoon if you don’t want to dirty extra dishes!
Once filled, gently take a second chocolate cookie wafer and place it on top, pressing just lightly until you see a tiny, even ring of the white filling peaking out around the edge. That slight filling visibility is how you know you’ve made perfect Chocolate Valentine Sandwich Cookies! If you want a few tips on leveling those cookies before assembly, check out my guide on perfect scone leveling; the theory is similar!
Tips for Perfect Chocolate Valentine Sandwich Cookies Edges
Listen, if you take away only one thing from this whole recipe, I hope it’s this: the secret to those picture-perfect, clean edges you see in bakeries isn’t magic; it’s physics, mostly involving cold temperatures! We need those cookie tops to hold their shape when we cut them, and definitely when they bake. If your cookies spread out, that beautiful heart shape turns into a blob, and you lose that sandwich cookie elegance.
The 30-minute chill time I mentioned earlier is your best friend, but here are a few other tricks I learned through trial and error until I finally nailed these for the first time. These tips make the difference between just-okay and absolutely show-stopping Valentine’s Day Sugar Cookies for your platter.
My first few batches looked like melted puddles until I started thinking like a pastry chef and channeling people like Martha Stewart! Here are the three things I focused on:
- Don’t Overwork the Dough: Once you combine the wet and dry ingredients, stop mixing as soon as it comes together. Overmixing develops gluten way too much, which makes the dough soft and causes spread. You want to mix until *just* combined—a few dry spots are totally fine at this stage.
- Flour Your Surface (But Not Too Much): You do need a little bit of flour when rolling out the dough so it doesn’t stick to your counter or the rolling pin, but add it sparingly. Too much excess flour on the outside of the dough gets incorporated when you cut, resulting in white, dry-looking edges. A light dusting works wonders, or just use parchment paper for rolling, which is my preferred method!
- The “Pre-Chill” Trick: If your kitchen is warm—and let’s be honest, standing by the oven heats things up fast—the dough can soften while you’re cutting. If you feel the dough getting sticky while cutting, quickly pop the whole sheet of cutouts (still on the parchment) into the freezer for five minutes. Seriously, five minutes! This locks those beautiful heart shapes in place just before they hit the heat.
A firm, chilled dough equals sharp, beautiful edges every single time. These little details turn any homemade batch of Chocolate Valentine Sandwich Cookies into a masterpiece suitable for any fancy V-Day dessert spread!
Creative Ways to Decorate Your Chocolate Valentine Sandwich Cookies
Now, you could totally stop once you’ve assembled these Chocolate Valentine Sandwich Cookies, because honestly, the dark chocolate wafer paired with that bright vanilla cream is already gorgeous! But since we are already deep into our Valentines Day Baking Ideas mode, why not add a little extra sparkle? Since the outsides are so dark, it makes any light decoration truly pop.
The key here is elegance, not overwhelming the rich chocolate flavor. For any decoration that involves royal icing or a thin glaze, I highly recommend waiting until the cookies have been sitting assembled for at least four hours. This lets the vanilla filling set up firmly so you aren’t pushing it out the sides when you try to decorate the tops!
Here are a few simple ideas inspired by Food Network that are perfect for these dark beauties:
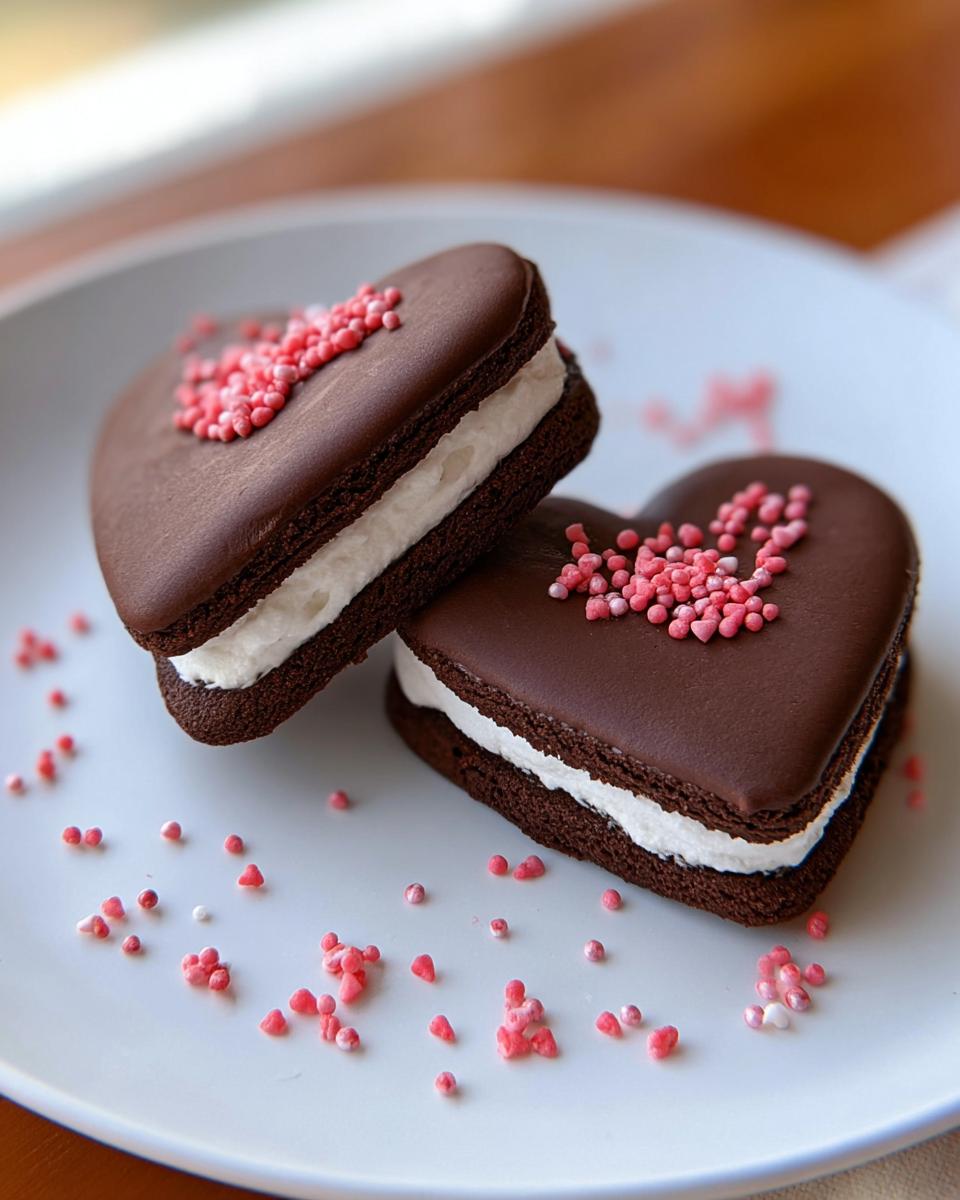
- A Simple Drizzle: Forget spending hours flooding cookies with royal icing. Melt some white chocolate chips—maybe even add a drop of pink coloring if you’re feeling festive—and drizzle it in thin, chaotic lines across the top cookie of the sandwich. It looks so modern and pretty against the deep brown.
- Sprinkles Before Assembly: This is my favorite trick for making simple cookies look professional. Take the top cookie wafer *before* you fill it. Dip the outside edge only (the curved side) into melted white chocolate or pink candy melts, and then immediately roll that edge in Valentine’s Day sprinkles. Once it sets, then you fill and sandwich it. It gives that gorgeous pop of color without messing with icing the flat surface.
- Dusting Magic: If your edges are clean from our previous tips, you don’t need much! Once the cookies are assembled, use a small fine-mesh sieve and dust the tops lightly with powdered sugar. For a romantic flourish, cut out a tiny paper heart, place it gently on top, dust the whole cookie, and then lift the heart away. Hello, instant Valentines Day Cookies Decorated Ideas!
- Edible Glitter: If you want that real shimmer, grab some edible gold or rose gold glitter dust. Use a clean, dry pastry brush and very lightly dust the edges of the top cookie wafer. It catches the light beautifully and makes them look truly special for your Valentines Dessert Ideas.
Don’t stress about making the filling look perfect on the inside; the visual drama is all happening on the outside where that dark chocolate meets the creamy white center. These decorating flourishes really elevate this recipe into true Valentine’s Day Treats!
Storage and Make-Ahead Tips for Chocolate Valentine Sandwich Cookies
The best part about this recipe is that it’s fantastic for making ahead! Seriously, the more you plan for your Valentines Day Baking, the less stressed you are on the actual day. I always bake the wafers a day or two early, and honestly, they taste even better when they’ve had a little time to relax.
But you have to store the components separately until you’re ready to assemble. If you fill the cookies too soon, the moisture from that beautiful vanilla cream will start to seep into the rich wafer, making them too soft and causing them to lose that lovely snap. We want them crisp until the last possible moment!
Storing the Unfilled Chocolate Wafers
The chocolate cookie bases are sturdy! Once they are completely cooled down from the wire rack—and I mean stone cold—store them in an airtight container at room temperature. Seriously, room temperature is best for cookies like this. If you put them in the fridge, they can sometimes absorb moisture from the air in there, which makes them chewy rather than crisp.
If sealed well, these wafers will stay perfect for a good week. This is great if you’re planning a massive spread of Valentines Day Treats. If you’re making the dough ahead of time—which you totally should—keep it wrapped tightly in plastic wrap in the fridge for up to three days before rolling and cutting.
Storing the Vanilla Cream Filling
The filling is buttercream, so you’ll need to treat it like butter. If you’re making this a day early, you can store the piped or spread filling in an airtight container in the refrigerator for up to five days. However, you *must* let it soften slightly at room temperature for about 15 to 20 minutes before you try to assemble your Chocolate Valentine Sandwich Cookies.
Trying to spread cold, stiff buttercream on a cookie is a disaster waiting to happen; you’ll end up squishing the cookie halves apart! Planning ahead sometimes means letting things warm up a touch before the final magic happens.
Storing the Assembled Chocolate Valentine Sandwich Cookies
Once you’ve put these lovely layers together, they can safely sit out on the counter for about 24 hours if you plan on eating them the next day. For longer storage, definitely pop the finished sandwiches into an airtight container in the refrigerator. They store really nicely this way for up to four days.
If you refrigerate them, just remember my earlier tip: give them about half an hour on the counter before serving. That slight warming makes the vanilla filling soft and creamy again, providing the best eating experience for these rich Chocolate Valentine Sandwich Cookies. Serving them slightly chilled is fine, but serving them ice-cold just mutes the vanilla flavor, and we certainly don’t want that!
Serving Suggestions for Valentine’s Day Treats
Once you have these amazing sandwich cookies ready, you have to think about the whole V-Day spread, right? These things are rich—deep chocolate with sweet, buttery vanilla—so they pair beautifully with things that cut through that richness or lean into the chocolate theme.
If you are having these as part of a bigger dessert bar, think about balancing them out. For instance, having something tart nearby really makes the chocolate flavor shine brighter. And since we’re already in the mood for Valentines Day Baking Ideas, I have a few go-to partners for these cookies!
Here are my favorite ways to serve these up:
- A Glass of Milk (The Classic): I know, I know, it sounds basic, but a tall, cold glass of whole milk is simply the best foil for a rich chocolate cookie. It washes down the sweetness perfectly.
- Hot Coffee or Espresso: If you are serving these after dinner, a strong cup of coffee cuts through the fat and sugar beautifully. The bitterness of the espresso really enhances the dark cocoa notes in the wafer. It’s so sophisticated!
- Raspberry Coulis: This is my top suggestion for something tart! Whip up a quick raspberry sauce—it’s just blended raspberries, a tiny bit of sugar, and maybe a squeeze of lemon. Drizzling just a little bit of that bright, tart sauce next to the cookie on the plate makes it feel like you’re eating at a fancy restaurant. Plus, red and chocolate? Hello, Valentine’s theme!
- Fruit Forward Dipping: Since we are talking pairing, think about dipping! These sandwiches are wonderful dunked quickly into my family’s Dark Chocolate Fondue Recipe. The cookie wafer holds up really well, and the vanilla filling slightly warms up in the fondue, making it gooey in the best way possible. Just don’t leave it in too long or you’ll lose the whole sandwich to the pot, oops!
- A Tangy Sorbet: If you want something lighter than full-on ice cream for your Valentines Dessert Ideas, a small scoop of lemon or cherry sorbet next to the plated cookie acts like a built-in palate cleanser between bites.
Honestly, you can serve these cookies on their own, perhaps tied up with a cute little red ribbon if you’re packaging them for gifting, but pairing them with a strong, dark drink or something sharply acidic really takes them to the next level. Enjoy your indulgence!
Frequently Asked Questions about Chocolate Valentine Sandwich Cookies
I think every good recipe deserves a quick Q&A session because I always have random questions pop up when I’m baking something new, especially when I’m trying to make a perfect batch of Valentines Day Baking Ideas!
These cookies are pretty straightforward, but sometimes readers want to tweak variables. I’ve gathered the most common things folks ask me about achieving that perfect sandwich every time.
Can I use a different cookie cutter shape for these Chocolate Valentine Sandwich Cookies?
Oh, absolutely! While the heart shape just screams romance for our Valentines Day Sugar Cookies platter, these wafers cut like a dream. You can use circles, squares, or even little ghosts if you want to stretch this into a year-round cookie! Because we chill the dough so well, retaining the shape is super easy, no matter what cutter you use. Just try to keep the two matching cookies close in size so they sandwich up nicely!
What is the best way to store these for Valentine’s Day Treats?
This depends on when you plan to eat them! For the absolute best texture—that crisp wafer and creamy filling—I recommend storing the finished Chocolate Valentine Sandwich Cookies in an airtight container at room temperature for up to a day. If you need them to last longer than 24 hours, definitely put them in the fridge so the filling stays firm. Just remember to let them sit out for 20 minutes before serving so the vanilla cream softens back up. If you store them separately (wafers vs. filling), they last even longer!
How can I make the filling look like Valentines Day Cookies Decorated?
That’s such a fun idea for adding an extra pop of color to your Valentines Day Cookies Decorated theme! You can easily color the vanilla cream filling. Before you add the liquid (milk), divide the buttercream into a few small bowls if you want different colors. Add just a tiny drop of gel food coloring—pink, red, or even a vibrant purple—to the batch you want to color. Gel colors are way better than liquid because they won’t thin out the frosting. Then, when you sandwich them, that colorful center peeks out beautifully!
Nutritional Estimate for Chocolate Valentine Sandwich Cookies
You know I always feel a little guilty looking at the numbers after making something this delicious, but it’s important to know roughly what you’re getting into when you bake up a batch of these rich sandwich cookies. I always say, baking is about joy, not restriction, but a little knowledge never hurt anyone, right?
Please remember that these numbers are just an estimate, okay? They are based purely on the ingredients listed in the recipe, assuming you get about 12 finished sandwiches out of the batch. If you use different brands of butter or add extra spoonfuls of filling (which I totally don’t blame you for!), your numbers will change a bit. It’s all approximations based on our standard pantry staples.
For those who track macros or just like seeing the breakdown for these amazing Valentine’s Day Baking projects, here is the approximate breakdown per finished cookie sandwich:
- Calories: About 350 per cookie
- Fat: Roughly 17 grams (Remember, that’s a good amount of butter making them taste so rich!)
- Saturated Fat: Around 10 grams
- Carbohydrates: Coming in at about 45 grams
- Sugar: Approximately 30 grams (Hello, holiday treat!)
- Protein: About 4 grams
- Sodium: Roughly 150 mg
- Fiber: About 2 grams
These are definitely a holiday splurge, but they are totally worth every single rich, creamy bite. Enjoy them responsibly—or don’t! Nobody’s counting calories when there’s chocolate involved!
Share Your Chocolate Valentine Sandwich Cookies Creations
Alright, that’s the whole journey for making these incredible Chocolate Valentine Sandwich Cookies! We went from mixing cocoa powder to assembling that perfect creamy center. Now comes my favorite part: seeing what you all create in your own kitchens! Baking is meant to be shared, and I absolutely love seeing how you incorporate these into your own special Valentine’s Day spreads.
Did you try the sprinkle-dipped edge? Or maybe you colored the filling pink? Head down to the comments section below and let me know how they turned out! A rating lets me know how much you enjoyed this recipe, and trust me, every rating helps me find more truly great Valentines Day Baking successes to share with you. Don’t forget to snap a picture and tag me if you share them online!

Author Bio: Emily Mitchell
By Emily Mitchell, Efficiency & Testing Coordinator at Recipes by Betty.

Chocolate Valentine Sandwich Cookies
Equipment
- Mixing Bowls
- Electric mixer
- Cookie cutters (heart shape)
- Baking sheets
Ingredients
Chocolate Cookie Dough
- 2.5 cups all-purpose flour
- 0.5 cup unsweetened cocoa powder
- 1 tsp baking powder
- 0.5 tsp salt
- 1 cup unsalted butter, softened
- 1 cup granulated sugar
- 1 large egg
- 1 tsp vanilla extract
Vanilla Cream Filling
- 0.5 cup unsalted butter, softened
- 1.5 cups powdered sugar
- 1 tsp vanilla extract
- 1 to 2 milk tablespoons
Instructions
- Whisk the flour, cocoa powder, baking powder, and salt together in a bowl.
- In a separate bowl, cream the butter and granulated sugar until the mixture is light and fluffy.
- Add the egg and vanilla extract to the creamed mixture and mix well.
- Gradually mix in the dry ingredients until a dough forms.
- Wrap the dough and chill it in the refrigerator for 30 minutes.
- Roll out the chilled dough and cut heart shapes.
- Bake the cookies at 350°F (175°C) for 10 to 12 minutes. Let them cool completely.
- To make the filling, beat the butter, powdered sugar, vanilla extract, and milk until the mixture is fluffy.
- Spread the vanilla filling on the flat side of one cookie and sandwich it with another cookie.