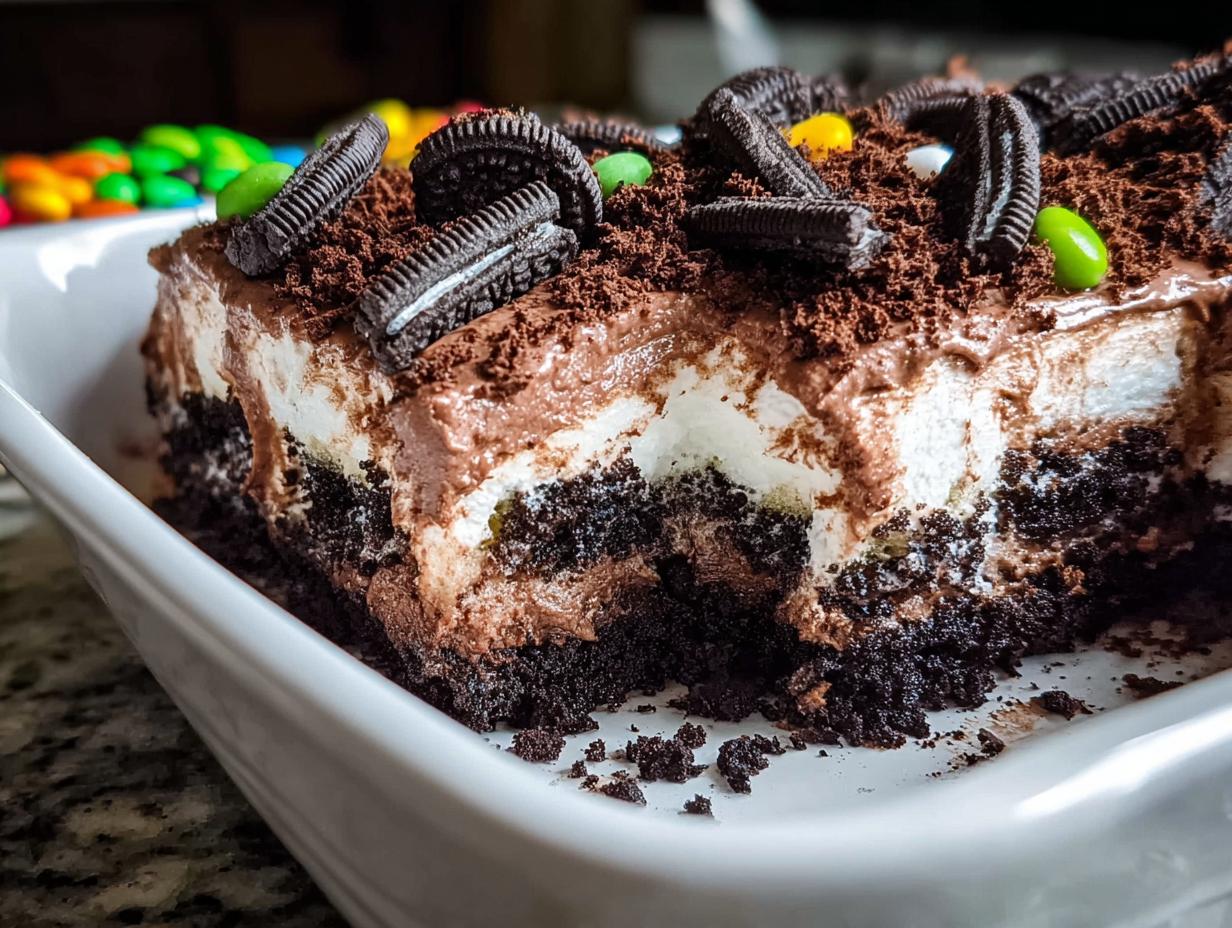
If you are anything like me, there’s a special magic reserved for those super nostalgic desserts—the ones that hit that sweet spot between childhood memories and adult craving. Well, get ready because we are leveling up simple nostalgia into something truly special with this ultra-creamy, no-bake Chocolate Pudding Dirt Cake. Trust me, after coordinating hundreds of recipe tests, I recognize a winner when I taste one, and this dessert delivers pure satisfaction.
Every spoonful of this Chocolate Pudding Dirt Cake is smooth, cool, and deeply decadent. It requires zero oven time, which is a huge win on a busy day! Testing out this combination of creamy filling and crunchy cookies reminded me exactly why these kinds of layered desserts are so beloved. It’s honestly perfect for when you need an indulgent treat without any fuss.

Why This Chocolate Pudding Dirt Cake is One of the Best Easy Treats
Let’s be real: sometimes you just need a crowd-pleasing dessert that doesn’t involve turning on the oven, right? That’s where this Chocolate Pudding Dirt Cake shines! It slots perfectly into the category of Simple Desserts because it’s practically foolproof. You just mix, layer, and chill. It’s such a fantastic, fuss-free option.
The texture is what truly sets it apart. It’s rich and unbelievably cool, which makes it one of my favorite Easy Treats to whip up when company is coming over unexpectedly. If you are looking for no-bake versions of your favorites, you absolutely must check out the delicious lineup of no-bake delights we have here.
Perfect for Easy Desserts For A Crowd
Because this is built in a large 9×13 dish, it handles volume like a champion. You don’t have to worry about perfect swirls or delicate cakes. Just make sure you have enough spoons because everyone will want a scoop of this!
Gathering Ingredients for Your Chocolate Pudding Dirt Cake
Okay, the beauty of this Chocolate Pudding Dirt Cake is that it uses pantry staples, meaning you probably have half of this stuff already! We’re keeping this super simple, exactly what you want in an Easy Dessert Idea that tastes gourmet but takes minutes of actual work. I’ve listed everything you need below, broken down by what goes into the amazing pudding layer and what builds the essential ‘dirt’ layers.
Remember, the quality of your pudding mix matters since there aren’t a ton of ingredients hiding anything! I always look for the classic flavors. It’s all about layering these few components perfectly to get that satisfying crunch against the smooth filling. Don’t skimp on the cold milk, though; that’s key for getting the pudding to set just right.
Here is exactly what you need to grab before you start:
For the Pudding Layer
- 2 boxes chocolate pudding mix
- 1 L cold milk
- 500 ml whipped topping
For the Layers
- 350 g crushed Oreos (Please set aside a handful for the very top!)
- Chocolate shavings (Only if you’re feeling fancy, totally optional, but who am I kidding? Always worth it!)
Essential Equipment for Making Chocolate Pudding Dirt Cake
You don’t need a stand mixer or fancy pastry gear for this one, thankfully. As an Efficiency & Testing Coordinator, I love recipes that keep the cleanup minimal, and this Chocolate Pudding Dirt Cake is a prime example of that!
We are working with cold ingredients and liquids, so having the right vessels keeps things from getting messy too fast. You really only need three core items, but I have one specific tip that I always swear by when mixing up the creamy layers.
Here is the short list of tools you’ll need:
- Mixing Bowl (Big one!)
- Whisk
- A 9×13 inch baking dish
Now, for my little secret touch regarding your mixing bowl. When you whisk the pudding mix with the cold milk, it tends to splatter like crazy when it starts thickening up. I always grab the absolute deepest mixing bowl I own—even if the recipe doesn’t look like it needs it. It saves you from having that white splatter all over your counter when you’re trying to incorporate that whipped topping. Trust me, using a deep bowl is a game-changer for keeping this mess manageable!
Step-by-Step Instructions for the Chocolate Pudding Dirt Cake
Alright, this is the fun part, and honestly, it moves so quickly! Because this is a no-bake recipe, we are building flavors and textures layer by layer. It is so satisfying watching it come together, knowing you have zero scrubbing to do later. The only real work is waiting for the final chill to set everything perfectly. We need about 15 minutes of hands-on time, and then we let magic—and the refrigerator—do the rest of the heavy lifting.
When you are done, make sure you cover that dish tightly. You want that cold air to work its magic for at least three glorious hours. Waiting that time is crucial so your layers don’t just slide around when you cut into them. You can find more tips on whipping up pudding perfection over at Joy of Baking if you ever want to compare notes on texture!
Mixing the Creamy Chocolate Pudding Dirt Cake Filling
First up, let’s get that filling looking smooth and luscious. Grab your big mixing bowl and whisk together the two boxes of chocolate pudding mix with the entire 1 liter of cold milk. You need to whisk this continuously for about five full minutes. Seriously, don’t cheat this step! You are building structure here, and you’ll notice it getting visibly thick while you work. Once it’s thick, grab your 500 ml of whipped topping. You have to gently fold that topping in, okay? We want it just combined. If you beat it aggressively, you’ll knock all the air out of the topping, and we want that fluffiness in our Chocolate Pudding Dirt Cake!
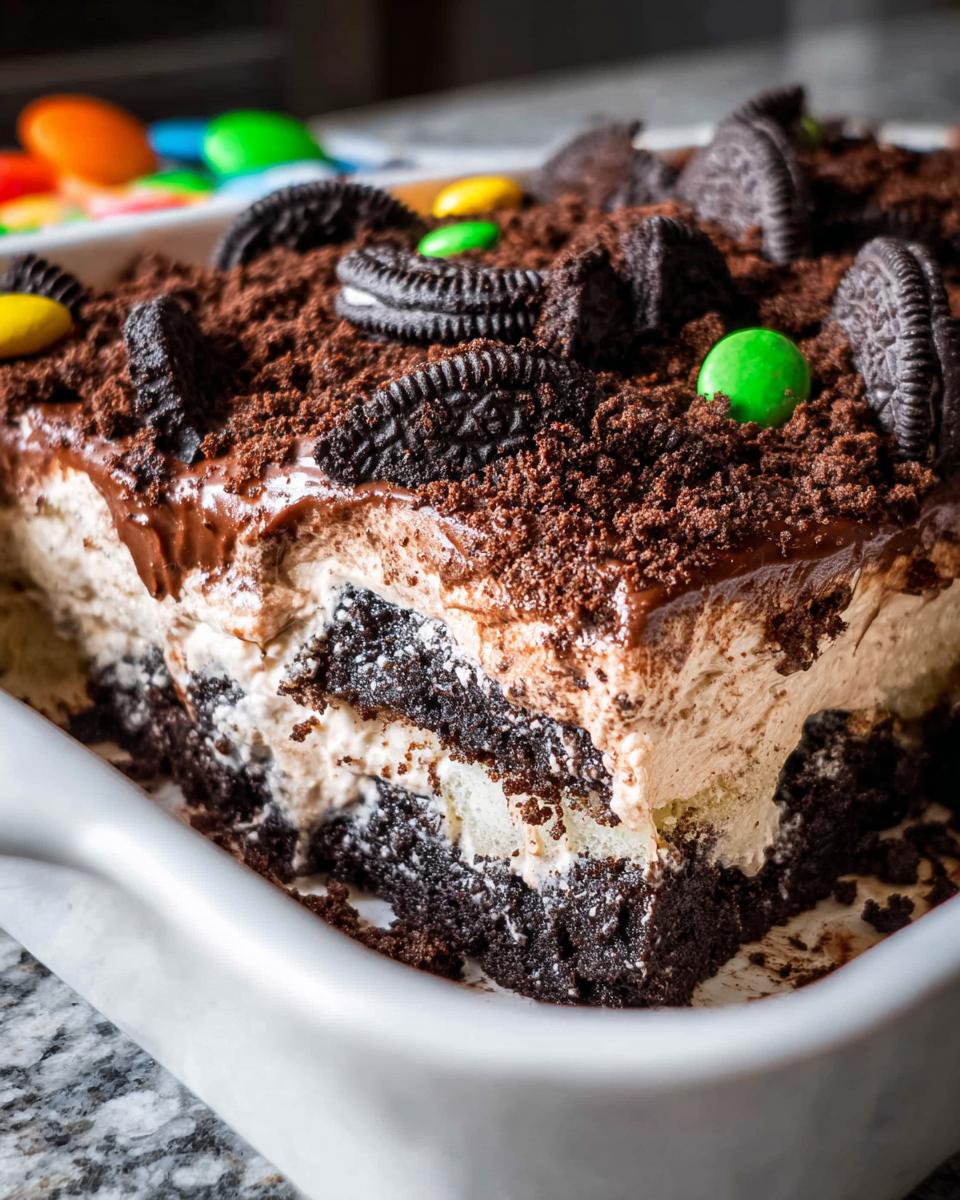
Layering Your Chocolate Pudding Dirt Cake
Now we start building the layers in your 9×13 dish, giving us those signature stripes! Take about half of your 350 grams of crushed Oreos and press them gently across the bottom of your dish. You don’t want to pack them down like a crust—just a soft, even layer works best. Then, spoon half of your gorgeous, creamy pudding mixture right over those crumbs and spread it carefully so you don’t disturb the cookie layer too much.
Next, we repeat! Add the remaining crushed Oreos on top of the first pudding layer. Make absolutely positive you save a small handful of those beautiful crumbs for the very top garnish later if you want that authentic ‘dirt’ look. Finally, spoon the rest of the pudding mixture over the top. See? So easy! Cover that up and get it chilling for a minimum of three hours so it sets up firm.
Tips for Success with Your Homemade Desserts Chocolate Pudding Dirt Cake
Even though this Chocolate Pudding Dirt Cake is labeled as one of the easiest Homemade Desserts you’ll ever make, a few little tricks can take it from great to absolutely unforgettable. Since we’re relying on simple ingredients, the quality and temperature control really shout louder here than in more complex bakes. I learned a few things during testing that I want to pass right along to make sure yours sets up perfectly creamy every single time.
My biggest tip involves that milk. You absolutely must use milk that is ice cold when you whisk it into the pudding mix. If the milk is even slightly warm, the pudding won’t set up to that thick, scoopable consistency we need to support those cookie layers. If you want to see how to elevate store-bought things, check out my guide on making the perfect cookie crumble topping—it’s the same mindset!
Another thing? Those Oreos. Don’t just throw them in a Ziploc bag and roll over them with a rolling pin—you’ll get giant chunks mixed with dust! I prefer to pulse mine in the food processor until they are mostly fine crumbs but still have a few small bits for texture. If you don’t have a processor, put them in a sturdy bag and use a can or a meat tenderizer, but pulse gently!
Ingredient Notes and Substitutions for Chocolate Pudding Dirt Cake
When it comes to making adjustments, this recipe is pretty flexible, but you have to respect the pudding-to-whipped topping ratio we established. For instance, if you wanted to try this out dairy-free, you could use an Oreo-style cookie (most are accidentally vegan!) and swap the milk for a very rich, cold oat milk or soy milk. You might find the texture is slightly softer, though.
If you’re out of Oreos, any dark chocolate sandwich cookie will work wonderfully. Also, if you can’t find the 1 L size of milk, just substitute with cold heavy cream and a bit of water until you hit that 1 L total liquid volume. If you want to dive deeper into making rich, homemade chocolate filling, you can always follow along with this amazing traditional homemade recipe reference, but for this dirt cake, the box mix is totally the way to go for speed!
Fun Party Ideas Using Chocolate Pudding Dirt Cake
Since this Chocolate Pudding Dirt Cake is already such a fun, visually interesting dessert, it’s perfect for any party setup! Forget plain slices; we can make this work for birthdays, casual get-togethers, or even a fun themed movie night. It’s one of those Easy Dessert Ideas that looks way more effort than it actually is, and you know I am all about that!
The beauty here is that you can go completely rustic, or you can dress it up to look incredibly polished. If you’re planning a big bash, you can even check out some of my favorite holiday and party recipes for other simple setups, but honestly, this dirt cake is a crowd-pleaser all on its own.
Here are a few ways I like to change up the presentation when serving this at gatherings:
- Individual Flower Pots: This is the classic! For themed parties, skip the 9×13 dish entirely. Buy small, clean terracotta pots (make sure they aren’t actually used for plants!) or clear plastic cups. Layer the pudding and crumbs right inside each one. Pop a small gummy worm sticking out of the top layer—instant hit!
- Mason Jar Magic: If you’re aiming for a slightly more polished look at a shower or adult gathering, layer everything neatly into individual wide-mouth mason jars. These are great because they are already portioned, and guests can easily carry them around without needing a plate.
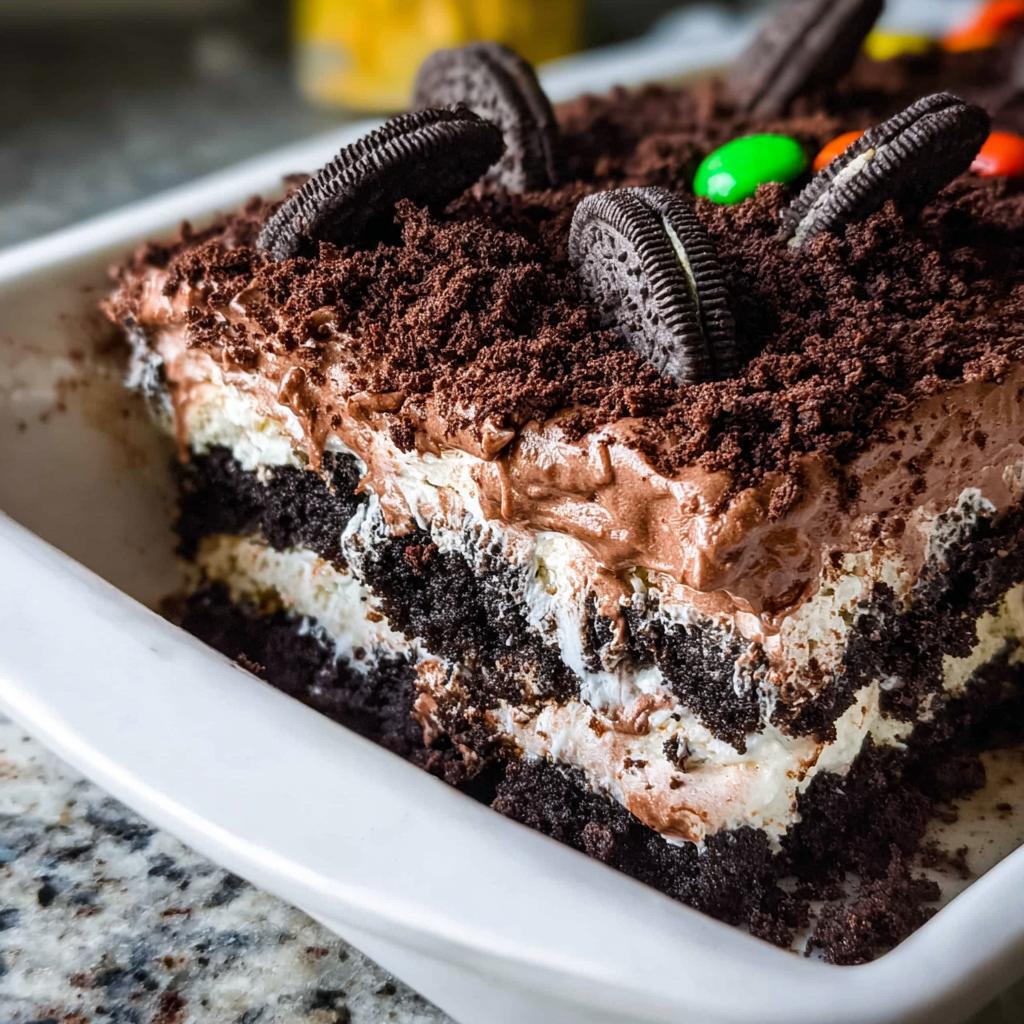
- Themed Decorations: Since the top looks like dirt anyway, lean into it! For a gardening theme, scatter edible flowers or small candy ladybugs on top of the reserved cookie crumbs. For a Halloween party? A few spider rings on top are spooky and fun, and you don’t even have to clean up the serving platter!
No matter how you serve it—in one big dish or a dozen little cups—this Chocolate Pudding Dirt Cake is always the star because it’s rich, cool, and perfectly chocolatey.
Frequently Asked Questions About Chocolate Pudding Dirt Cake
It’s totally normal to have questions when you’re making a new favorite! This Chocolate Pudding Dirt Cake is straightforward, but sometimes tweaks help it fit your life (or use up what you have on hand). As someone who tests recipes constantly, I find that even the simplest Easy Desserts With Few Ingredients benefit from a little clarification!
I’ve gathered the questions I get most often down below. If you end up trying this, I hope you’ll pop back and leave a rating over on my main dessert recipe page!
Can I use instant pudding instead of regular pudding mix in this Chocolate Pudding Dirt Cake?
That is a great, time-saving question! Yes, you absolutely can swap in instant pudding mix instead of the cook-and-serve kind. However, you must adjust your liquid. Instant pudding usually requires less milk than the cook-and-serve type to set up properly. Since our method relies on 1 L of cold milk, if you use instant mix, you’ll need to cut that milk back quite a bit—maybe start with 750 ml and add more if the package directions suggest it. Also, instant pudding sets much faster, so be ready to fold in that whipped topping quickly!
What are the best cookies to use for this recipe besides Oreos?
I love that you are thinking about making this your own! While Oreos are the classic star—they are sturdy enough to hold up to the pudding—you can totally experiment. If you’re looking for Unique Cookie Recipes that bring a slightly different flavor, try using chocolate graham crackers, or even dark chocolate wafers. If you use something that isn’t chocolate-filled, you might miss that extra bit of fat and sweetness that helps the layer stay firm. If you try alternatives, it definitely leans more toward being like a traditional dump cake recipe, so just be ready for a slightly different crumble texture!
Why must I chill this dessert for 3 hours? Can I serve it sooner?
Oh, I know waiting is the hardest part! You technically *can* serve it sooner—maybe give it an hour and a half—but honestly, if you cut into it that early, you’ll end up with soupy pudding sliding everywhere because those layers haven’t married yet. The chilling time is non-negotiable for quality because the pudding needs time in the cold to fully firm up and hold that beautiful structure. If you need it fast, make sure the milk you use is already ice cold; that gives the pudding a head start!
Can I make this recipe ahead of time?
Absolutely, and I highly recommend it! This is one of the best parts about having Easy Desserts For A Crowd ready to go. The Chocolate Pudding Dirt Cake actually tastes better the next day! It gives the moisture from the pudding time to mellow out the crumbs just enough so they aren’t rock hard, but they still maintain structure. I usually make mine the night before I plan to serve it. Just cover it tightly with plastic wrap so it doesn’t absorb any fridge odors.
Storage and Reheating Instructions for Chocolate Pudding Dirt Cake
When a dessert this good is left over—which rarely happens in my house, by the way—you want to know how to keep it fresh! Since this Chocolate Pudding Dirt Cake is completely no-bake, we only have to worry about refrigeration, not reheating. And honestly, it tastes fantastic straight from the cold!
If you manage to have leftovers after your party (maybe you made it extra large, like I always do!), you just need to cover that baking dish tightly. I always use plastic wrap, making sure it’s pressed down close to the surface if possible, or use a secure lid if you have one that fits your 9×13 dish. Keeping the air out is key to stopping the exposed cookie crumbs on top from getting stale or developing that weird fridge smell.
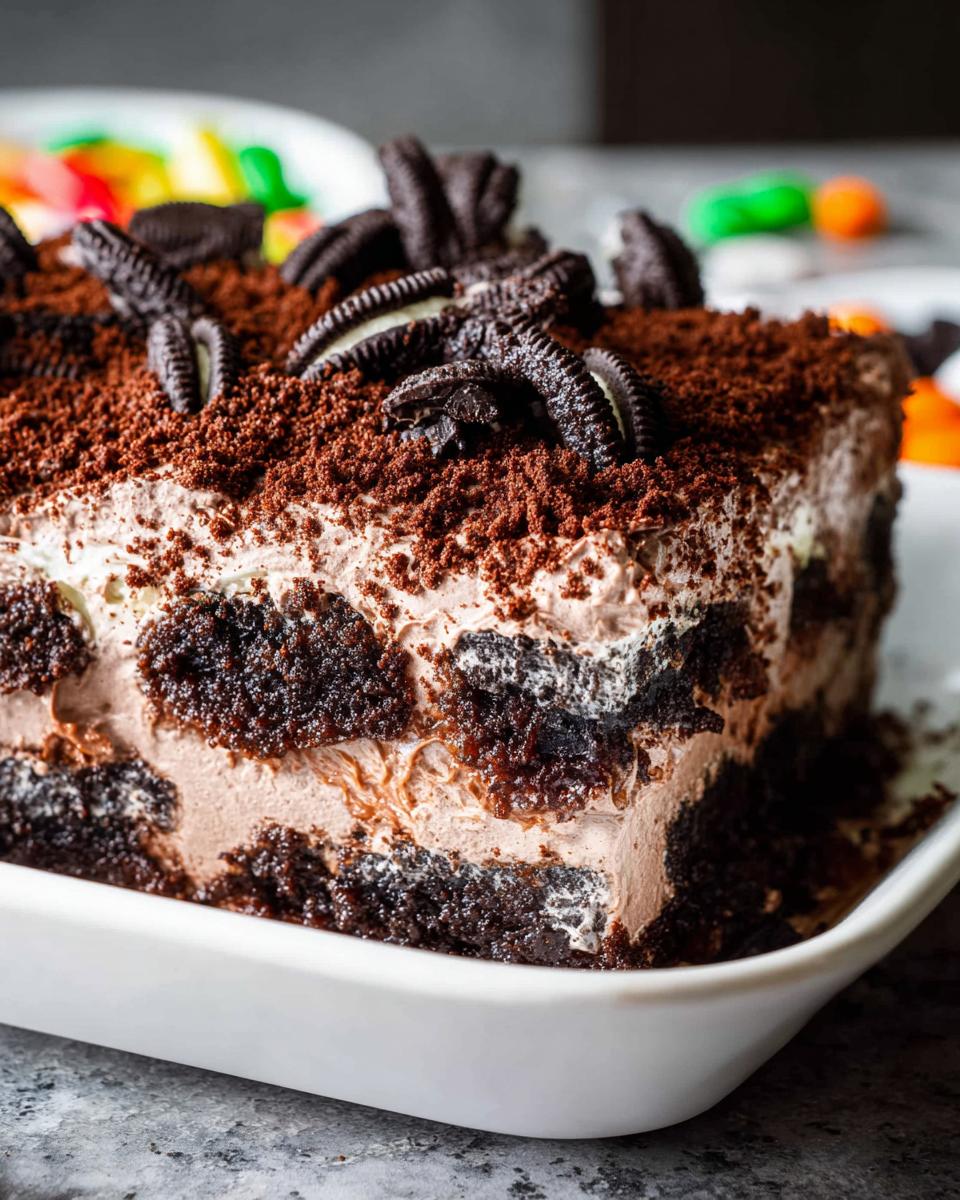
Why this dessert keeps so well
Because the filling is stabilized pudding and whipped topping, it holds up beautifully in the cold. I generally find that the Chocolate Pudding Dirt Cake is at its peak texture on Day 2. The filling has completely firmed up, and the cookie crumbs have softened up just enough. You end up with a dessert that’s almost like a rich, layered chocolate lasagna!
It’s good in the refrigerator for up to four full days. After that, the texture starts to get a little sad, and the crushed Oreos can get overly soggy. So aim to finish it off by Day 4 at the latest.
Can you freeze Chocolate Pudding Dirt Cake?
This is where we have to be honest: freezing isn’t my first choice for this specific treat. While it won’t hurt you, unfreezing pudding-based desserts can sometimes turn the whipped topping grainy or watery once it thaws out. That beautiful, smooth texture gets compromised.
If you absolutely must freeze some for later, here’s the trick: only freeze it if you cut it into individual servings first. Place each serving in an airtight container. When you thaw it overnight in the fridge, it generally comes back better than trying to thaw the whole pan at once. But seriously, I recommend just making a smaller batch if you know you won’t finish the whole 9×13 dish!
Regarding reheating
Put the thought right out of your head! We want this dessert ice cold. If you try to reheat it, you’re just going to end up with melted, runny chocolate pudding soup, and nobody wants that mess. Keep everything chilled, enjoy the cool contrast between the creamy filling and the crunchy cookies!
Share Your Chocolate Pudding Dirt Cake Experience
Now that you’ve whipped up this ultra-creamy, no-fuss Chocolate Pudding Dirt Cake, I truly want to know what you thought! Did you use gummy worms? Did the kids go crazy for the cookie layers? This is one of those Baking Ideas that really shines when people put their own spin on it.
My goal, as someone who tests efficiency in recipes, is to give you the best results possible, but your feedback helps me refine things even more for next time. Whether you stuck exactly to the creamy filling recipe or made a few tweaks to the cookie base, please don’t be shy!
Head down below and leave me a star rating. If you have a moment, share a quick sentence about what you loved most, or maybe even suggest a theme you used it for! Seeing your creations makes all the recipe testing worth it.
If you loved how surprisingly easy this was, make sure you browse our other fast and fun Baking Ideas to keep that simplicity going throughout the week!
Chocolate Pudding Dirt Cake
Equipment
- Mixing Bowl
- Whisk
- 9×13-inch baking dish
Ingredients
For the Pudding Layer
- 2 boxes chocolate pudding mix
- 1 L cold milk
- 500 ml whipped topping
For the Layers
- 350 g crushed Oreos Reserve some for the top layer
- 1 Chocolate shavings Optional
Instructions
- Whisk the chocolate pudding mix and cold milk together in a large bowl until the mixture becomes thick. This usually takes about 5 minutes.
- Gently fold the whipped topping into the thickened pudding mixture until just combined. Do not overmix.
- Spread half of the crushed Oreo crumbs evenly across the bottom of your serving dish.
- Spoon half of the pudding mixture over the cookie layer and spread it out evenly.
- Repeat the layers: add the remaining crushed Oreos, followed by the remaining pudding mixture.
- If using, sprinkle the top with chocolate shavings. Cover the dish and chill in the refrigerator for at least 3 hours before serving to allow it to set properly.